We’ve been working on our homes and sharing them on this blog for more than ten years, so we’ve definitely done a ton of home projects. We first wrote a post like this in 2016, but I am updating it and resharing it today with newer projects, ones that we’ve done over the last few years, along with a few tried and true favorites.
These projects are not too big {as in take weeks and cost major money} but still these are real projects that add value to your home. They may involve the use of tools, but not ones that require special skills. If you have a free day coming up, all of these can be completed {with some advance planning to have supplies on hand} in approximately one day.
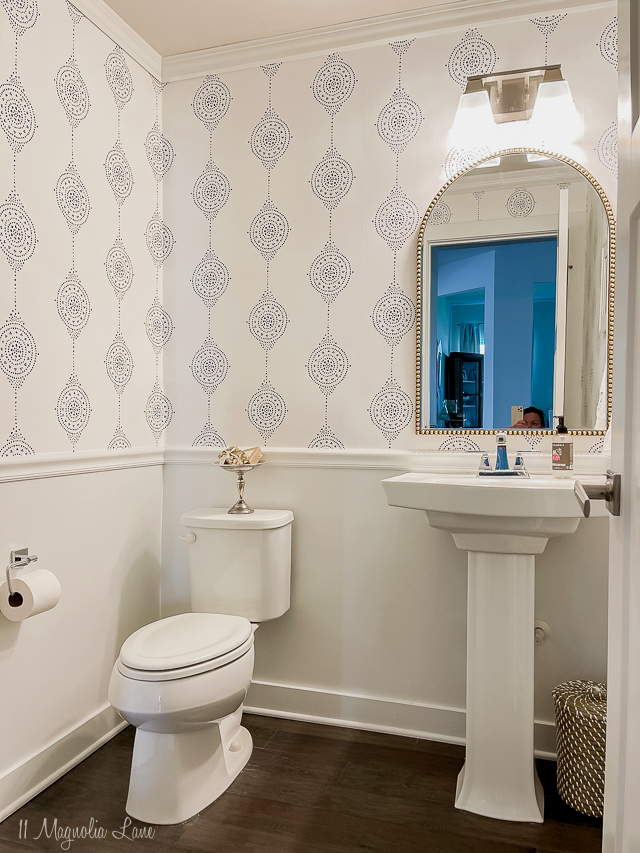
One of the projects I am the most proud of is the makeover I gave our small powder room in our last home. Not only did I add wallpaper but I added chair rail and molding to finish off the space. It was a great learning project, especially about how to hang wallpaper (which isn’t that hard really) and the end result was a big improvement. You can read the post here; the pretty wallpaper came from HERE.
DIY OPEN SHELVING {using stair treads}
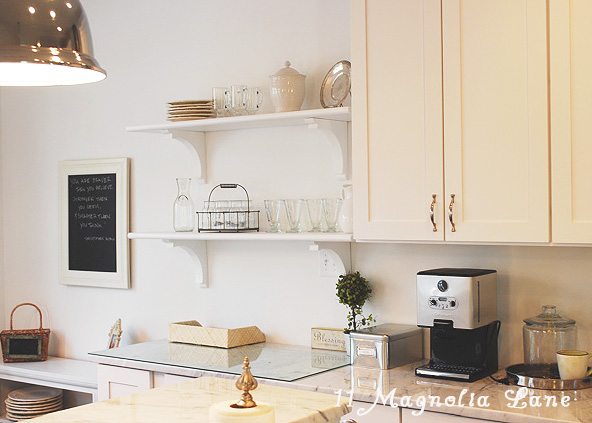
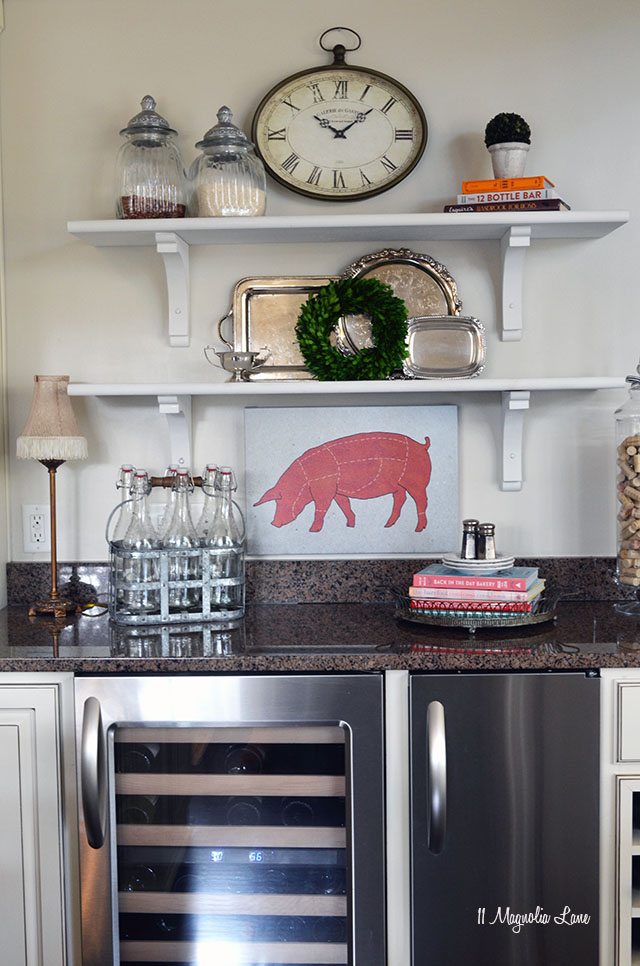
Open shelves are an easy way to fill an empty wall, we’ve added them to many of our homes over the years starting with the kitchen (circa 2013) above. Christy has also used open shelving several times in her homes, below is the entertaining area she created in her North Carolina home using this same simple concept.
There is no sawing necessary, just pick up several corbels and stair treads at the home improvement store, paint them and hang on the wall using anchors. You will find the stair treads are a great size for shelves. You can see more of this project HERE.
DIY BOTANICAL GALLERY WALL
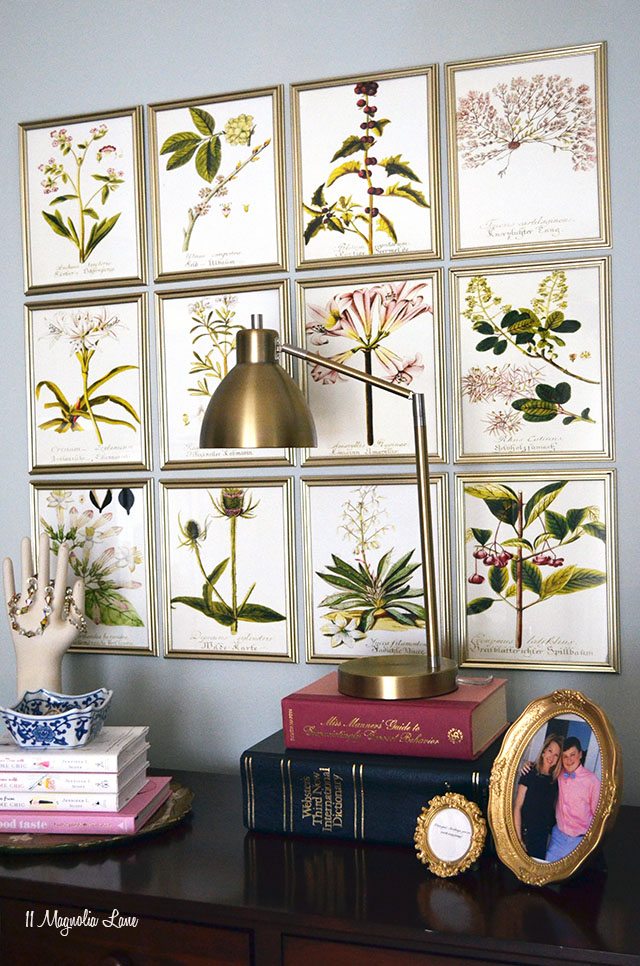
This easy gallery wall was part of Christy’s bedroom makeover, it is an easy and low-cost way to fill an empty wall. See the full tutorial in this post HERE.
DIY HUGE / GIANT / CHALKBOARD WALL
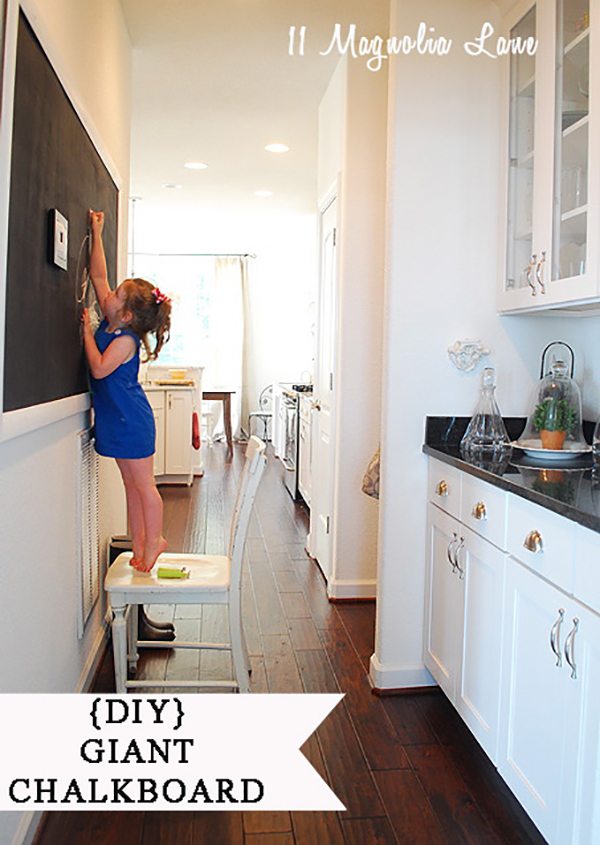
This one is from way back when, in fact that small child is now a full blown teenager! She also did survive standing on her toes on the chair despite all the comments over the years about how dangerous this photo was but I digress! This is a fun way to cover a large wall, especially in a playroom or basement, in this case we used it in a hallway by our back door. Adding a large chalkboard is a simple DIY project, just paint a large board using special chalkboard paint, then add molding and trim and hang. See all about this project HERE.
DIY CUSTOM PLATE RACK FOR LESS THAN $40
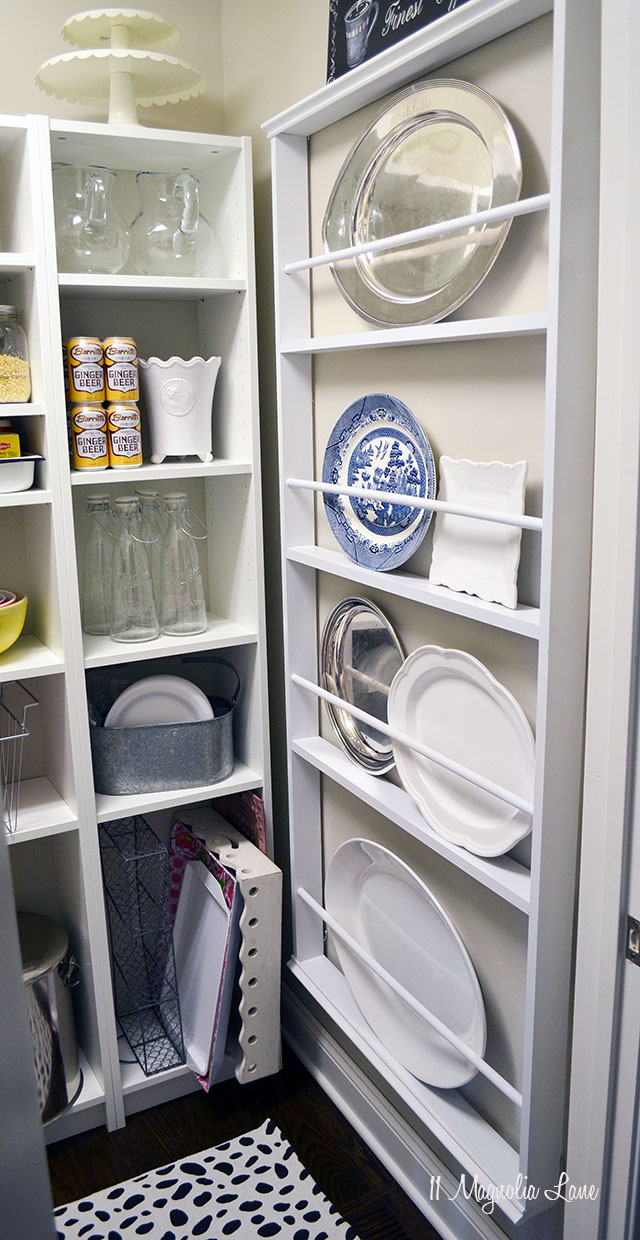
I love this idea and hope to do something similar in our new kitchen. A great way to fill an empty wall and create storage for bulky platters is to create a DIY Plate Rack, you can see all the details of how Christy built it HERE.
DIY OUTDOOR FIREPIT
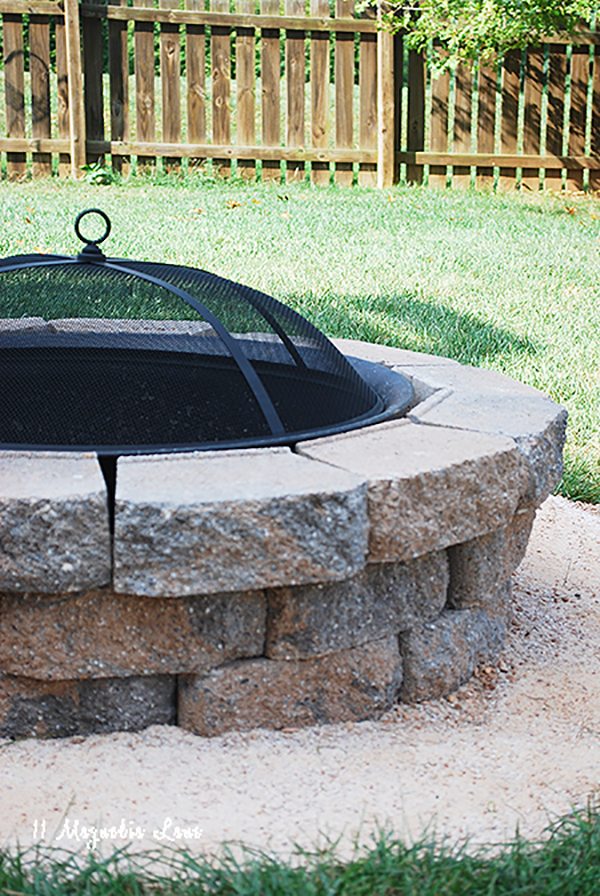
Moving outdoors, building a backyard fire pit is an easy weekend project. We built ours in just a few hours and it was a favorite outdoor hang-out spot. All the details are in this post HERE.
BUILT-IN BOOKCASES
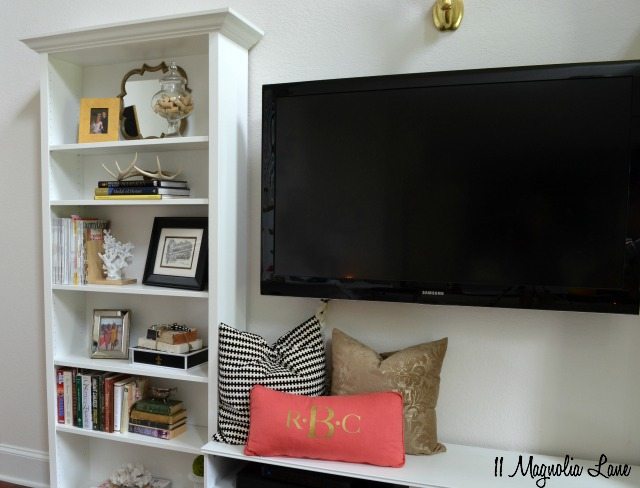
We have several built-in bookcase tutorials but as far as one-day projects {minus the drive to and from IKEA!} this one fits the bill. Christy framed her TV with bookcases and added some molding for a finished look, see the tutorial HERE. These easily break down and came with her to her next home, so consider them rental decor as well. If you are interested in a more elaborate project, the most viewed post on our blog ever is this one about built-ins using IKEA cabinets here.
BOARD & BATTEN TRIM
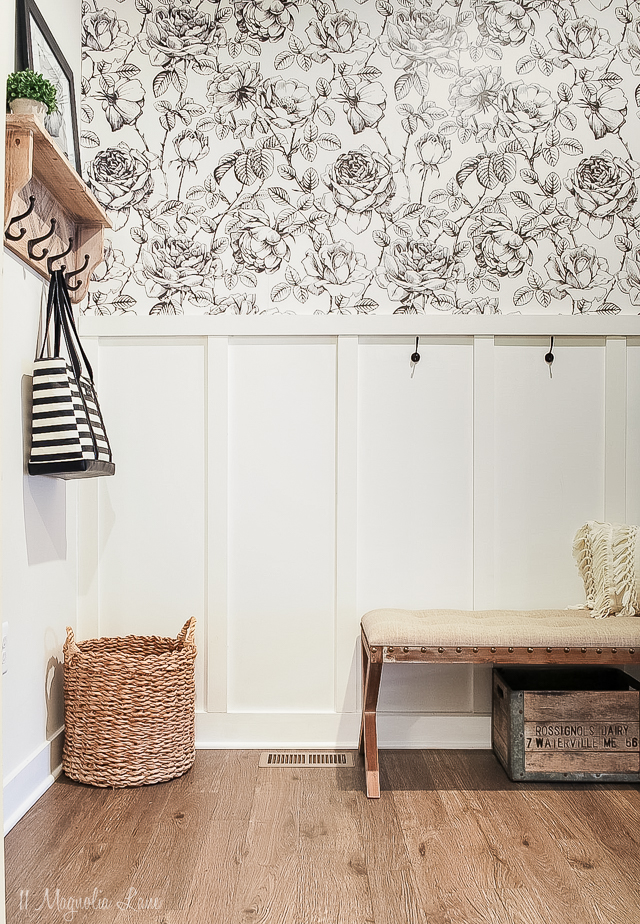
An easy fix for a blah space is to add board and batten trim just by tacking a few lattice strips on the wall, then adding molding and painting and caulking it. This is a great beginner DIY project and it will change the entire look of a room with just a few hours time. You can see my whole mudroom update here.
ADD PEEL + STICK FLOORING
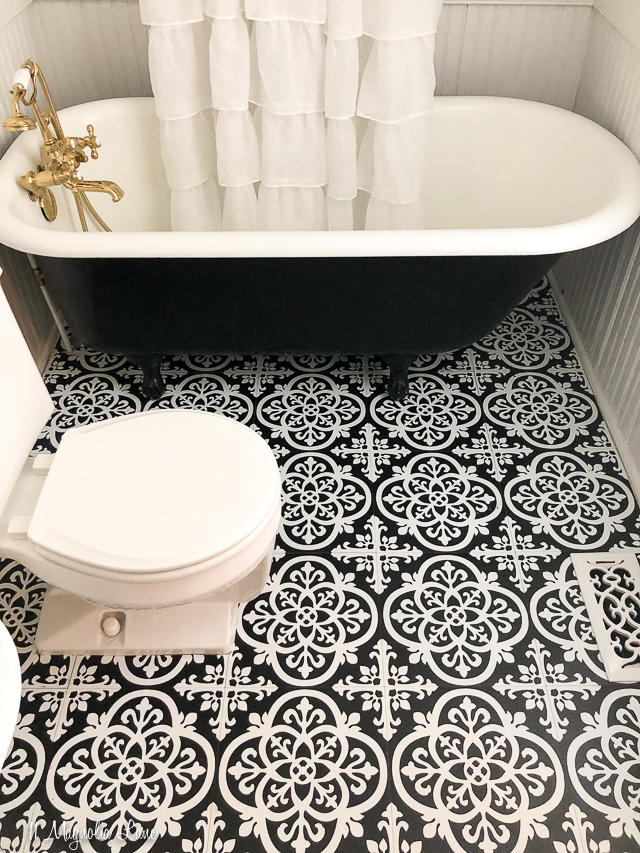
Christy updated the small bath in this older home using vintage touches, and the floor got an easy update with peel and stick tiles. You can find the boxes of the tiles here and the how-to post here. I also used the same peel and stick tiles for a temporary backsplash in our kitchen in our last home.
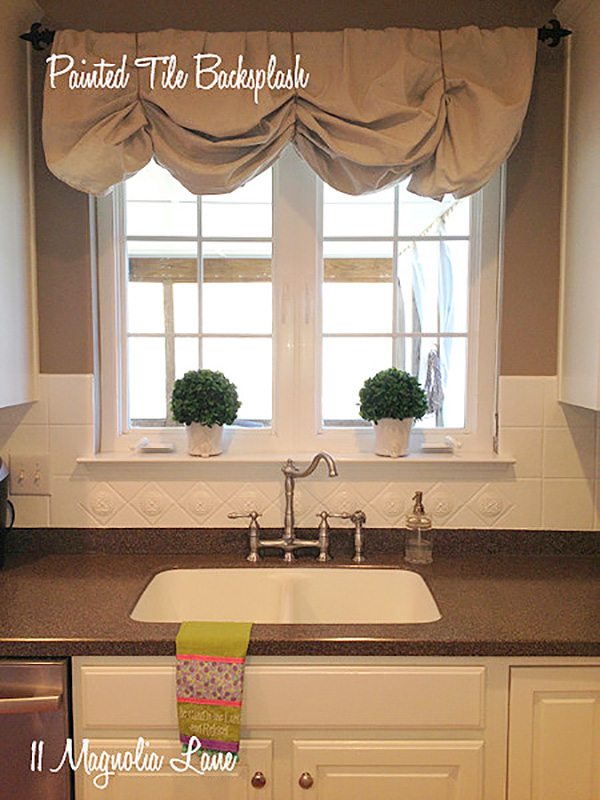
PAINT YOUR TILE BACKSPLASH
Speaking of backsplash, did you know you can actually change a tile backsplash with paint? This might save you the trouble of demo’ing tile and then having to re-tile. You can see the entire tutorial on how Christy completed this project in this post HERE.
STAINED OPEN SHELVING
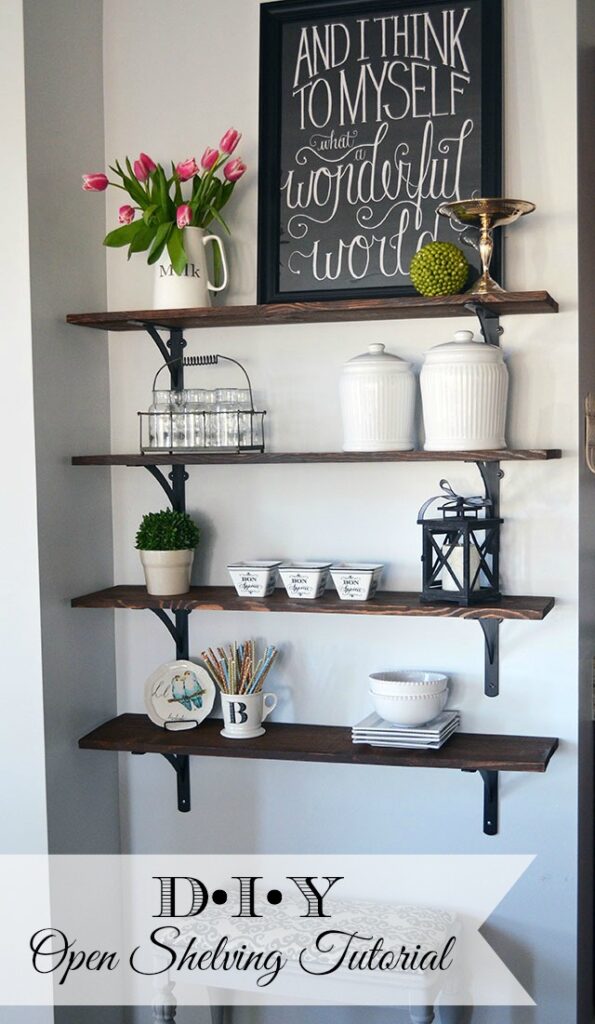
This project is very similar to the post about adding open shelving at the beginning, but these shelves use stained boards and iron brackets for a more rustic look. They are just as easy to build and offer lovely display space in a kitchen, though they would work in many different rooms. You can see the full tutorial for this project HERE.
REMOVE STAIR CARPET + ADD A RUNNER
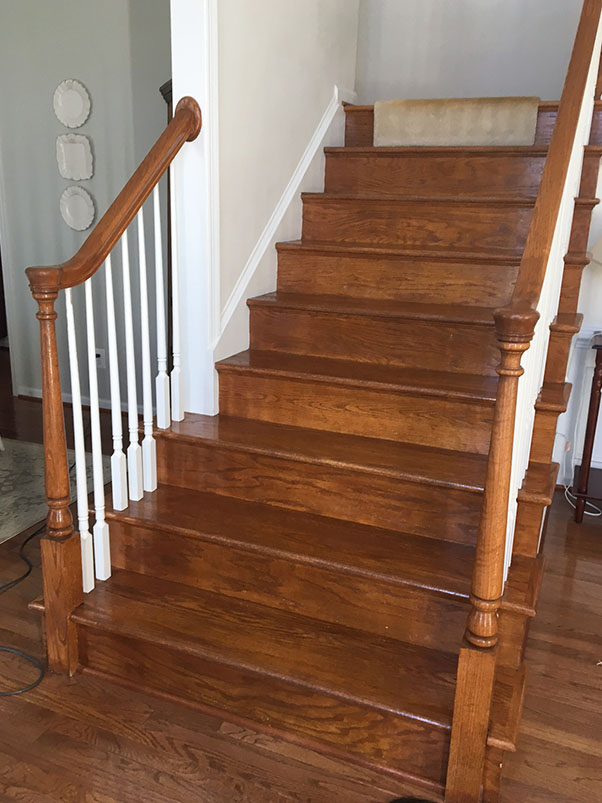
Despite being told I shouldn’t do it, I pulled up the dingy stair runner in favor of the hardwood floor in our previous home, and I think it was a great improvement. All in all, this wasn’t a hard project and the end result looked so much better. You can read the how-to post here.
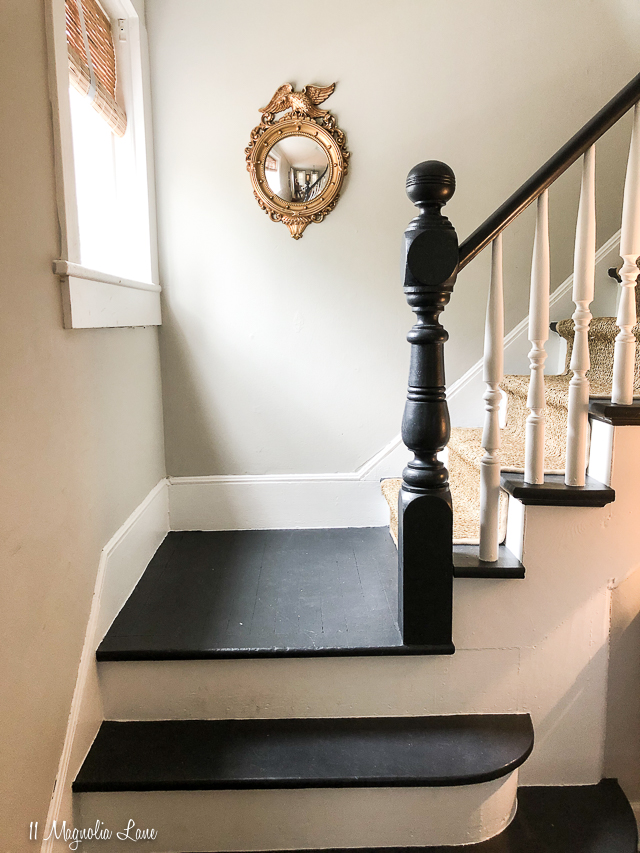
Christy redid her staircase (this project will probably take longer than a day, but still worth a mention) and it looked beautiful. You can read the post on how she redid the stairwell and then added a seagrass runner here.
ADD A LAUNDRY SHELF
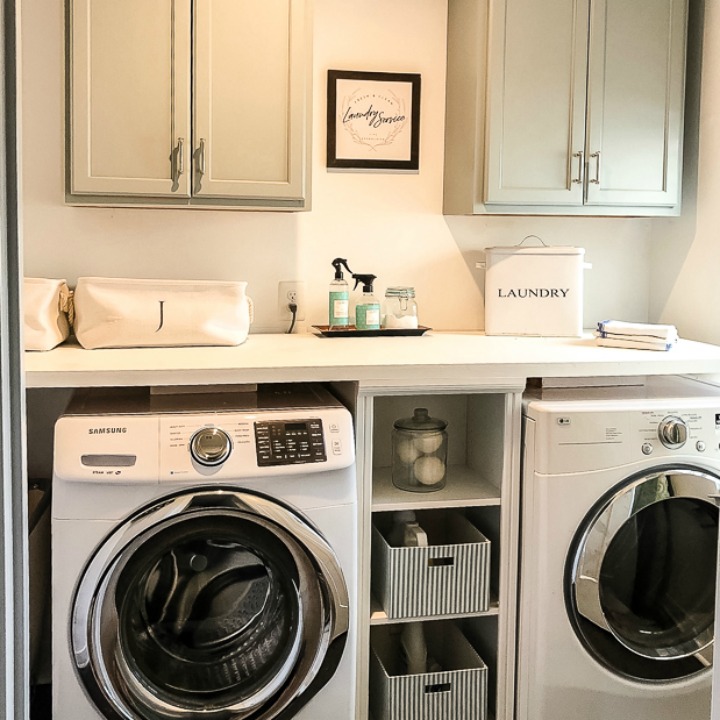
I already miss the functionality of this laundry room, our new house needs some help! Building this shelf over the front loaders gave us a great place to put clean laundry until it could be put away. It wasn’t a hard project you can read about it here.
Hopefully the next time you have a free Saturday and the urge to add something new to update your home, maybe one of our projects will inspire you.
Thanks for stopping by!![]()
XO,

We promise to never sell your email information. Our posts contain affiliate links. If you make a purchase after clicking on these links, we will earn a small commission, which helps to keep our content free. You don’t pay a cent more than you would otherwise, since that would be tacky! Please see our full disclosure policy here.


Leave a Reply