Today I am sharing a project that I am SO excited about, it’s by far my favorite DIY project to date.
These bookshelves!
I know we aren’t the first to take IKEA bookcases and build them into custom-esque bookcases but I look at these and can’t believe they are in my house.
These are way more special than average hacked bookcases for another reason, because my Dad built them for me. So I love them so much more 🙂
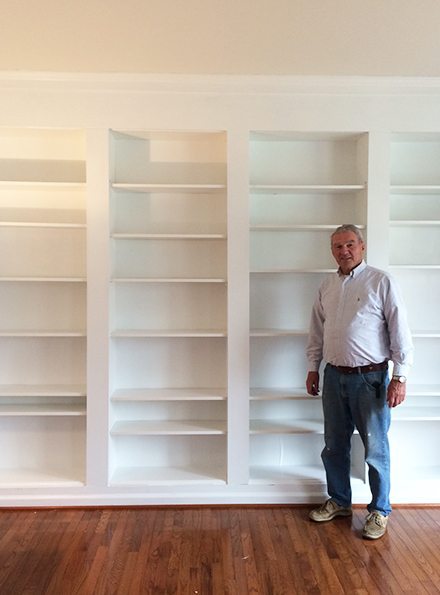
I made him pose with the shelves for his photo op, and yes I am having a plaque for them made in his honor.
A few months ago I showed him a picture of Kate’s bookcases and said innocently, “hey Dad, I am thinking about building some of these and I might need some help”. My husband had already taken one look at the project, muttered something about ‘teeth’ and ‘pulled’, and moved on so I knew I was going to need to call in my back-up team.
I’d love to say my Dad and I toiled away on this project, working on it together, him guiding and me helping out but truth be told, he did it ALL. Over the last few months, not deterred by a surgery, a snowbird stint in Florida, ice, snowstorms and everything else he came out to my house regularly and built them totally on his own. He did call in a bit of minor assistance from my thirteen year-old son who I am sure would have preferred to do anything but hold boards and paint bookcases, but he pitched in too. Being clear, I get no credit at all for this one!
And, seriously, I know how lucky I am {it’s not like this is the first great thing he is ever done for me, I can promise that} to have such an amazing Dad. His Dad, my Grandfather, was a talented carpenter–even building several of his own homes–so my Dad comes by it naturally. However, I know him well enough to tell you that he would much rather be outside playing baseball then inside building something. I am pretty thrilled to have bookcases {and didn’t they turn out great?} but it goes without saying they are even more special because he made them.
So all that being said, there is no way I am going to just stick a few pictures up of empty shelves and write only one blog post for a project of this caliber! I’ll be back with a step-by-step of how he built them and what we learned from it {by we, I mean him} and I can’t wait to decorate them and finally show-off the room. I still have to get a couch for the room, so there will be a bit of delay in being 100% finished, but it’s coming together.

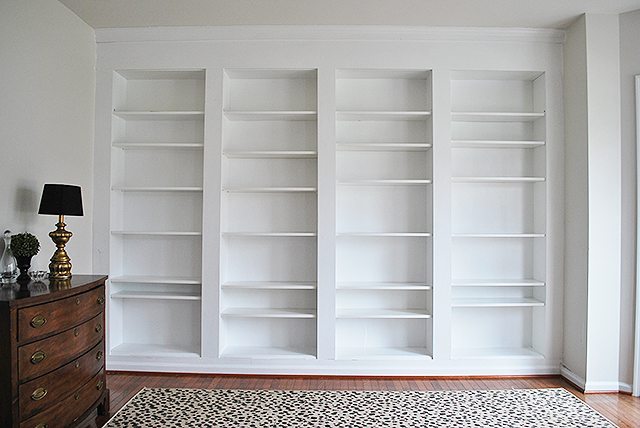
To fully appreciate them, this (above) was the starting point. This is the view of the room if you have just entered our house. To the right in the room is a bay window, and there is a sort of odd column to your left where the room goes at an angle. The above picture was taken before we moved in, just before we had the room painted to BM Classic Gray–which for some reason looks exactly the same in the light in our house as all the other builder cream walls? No idea why. Anyway, the room is no longer pale blue, but it does have this niche along the back wall that was calling out for bookcases, don’t you agree?
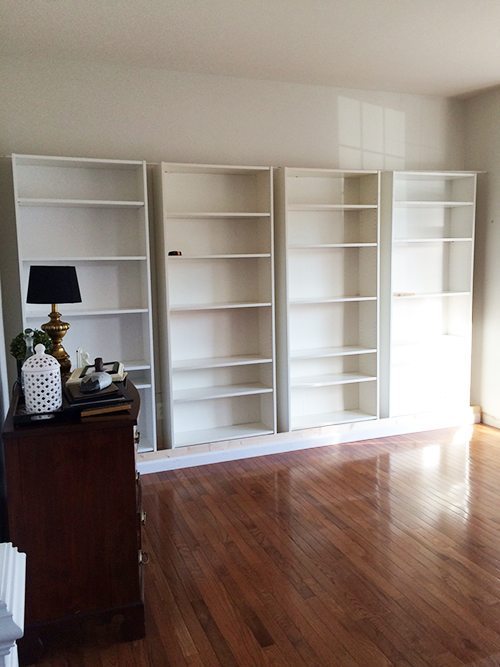
Above was Part 1–I already had two bookcases in my previous home office so I got two more. We assembled them and then my Dad framed in the bottom part. Then he left for Florida for six weeks so for the majority of winter my house looked like this–but that is OK, it was worth it. We have so many projects going on here it was just another one in the mix, by now, most people who visit aren’t very surprised to walk-in and find construction going on.
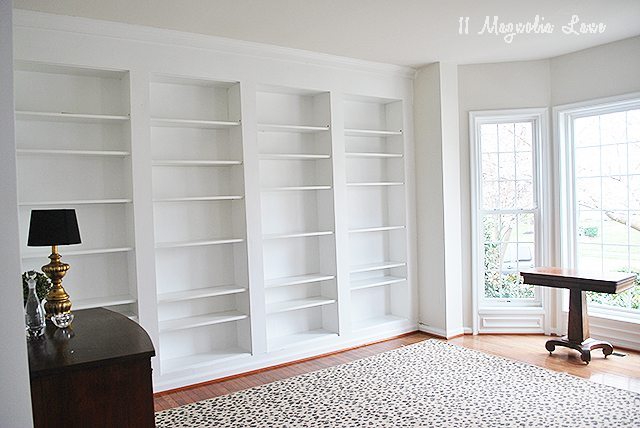
Skipping {for the time being} right to the completed “After” shot, here they are now all finished up, just waiting for books.
This room is such a nice, light-filled space and I have been excited to finally pull it together so we could actually start using it. We’re a family of bookworms so I am happy to see it turn into a place where we can keep our books and other treasures, and have a nice quiet reading spot. We finished just in time for the cherry tree outside the window to burst into bloom, the icing on the cake!

You can view the tutorial on how he built these HERE.
You can see them finished and styled HERE.
XO,