• Skip to primary navigation
  • Skip to main content
  • Skip to primary sidebar
  • Skip to footer
  • MEET CHRISTY & AMY
    • IF YOU’RE NEW HERE…
    • WORK WITH US
    • 11 MAGNOLIA LANE 101
    • DISCLOSURE + PRIVACY (the fine print)
    • BEST OF 11 MAGNOLIA LANE
  • TOUR OUR HOMES
    • TOUR OUR HOMES
    • CHRISTY’S MAGNOLIA COTTAGE
    • CHRISTY’S MCC HOUSE
    • Christy’s Stuttgart Flat
    • Amy’s Virginia Craftsman Home Tour
    • AMY’S VIRGINIA CRAFTSMAN Building Process
    • HOLIDAY HOME TOUR SERIES
  • CELEBRATIONS
    • EVENTS + ENTERTAINING
    • GIFTS
    • HOLIDAYS
    • RECIPES
  • HOME
    • CLEANING
    • DECORATING
    • ORGANIZING
    • ROOM BY ROOM
      • BATHROOMS
      • BEDROOMS
      • CLOSETS
      • CRAFT ROOMS + OFFICES
      • DINING ROOMS
      • KIDS’ ROOMS
      • KITCHENS
      • LAUNDRY ROOMS
      • LIVING + GREAT ROOMS
      • OTHER SPACES
      • PANTRIES
      • PLAYROOMS + BONUS ROOMS
      • PORCHES + OUTDOOR SPACES
    • TIPS
  • SHOP
    • SHOP OUR INSTAGRAM
    • SHOP OUR AMAZON STORE
    • FRIDAY FAVORITE FINDS
  • PROJECTS
    • CRAFTS
    • DIY PROJECTS + TUTORIALS
    • FURNITURE
    • PRINTABLES
    • WINDOWS, DOORS, + WALLS
  • LIFE
    • FRIDAY FREE FOR ALL
    • HEALTH
    • SIMPLY ON SUNDAY
  • TRAVEL
  • CONTACT
    • Email
    • Facebook
    • Instagram
    • Pinterest

11 Magnolia Lane

Sharing our easy DIYs, decorating, entertaining and more!

How We Installed Our Press and Stick Vinyl Floor Tiles

February 7, 2020 By Christy 22 Comments

This Post Contains Affiliate Links

91 shares

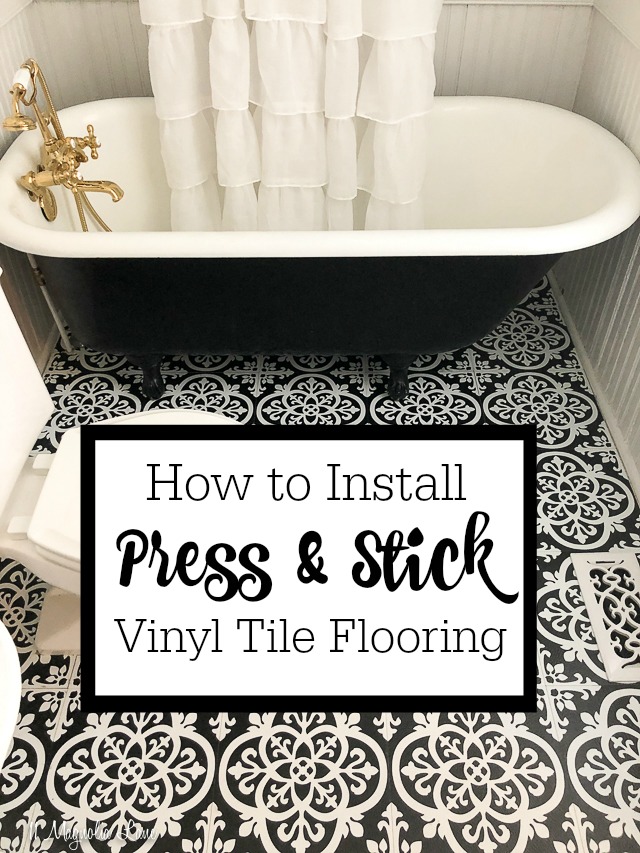
Today I wanted to answer some of the questions you’ve asked about the projects we’ve completed in our downstairs bathroom update. Many of the questions were about how I installed the press and stick vinyl tiles, so I’ll go into more detail about that process.

Vintage bathroom redo with black and white clawfoot tub and brass fixtures | 11 Magnolia Lane

If you missed the original post, you can see all the photos and details here, or on the Home Depot blog here.

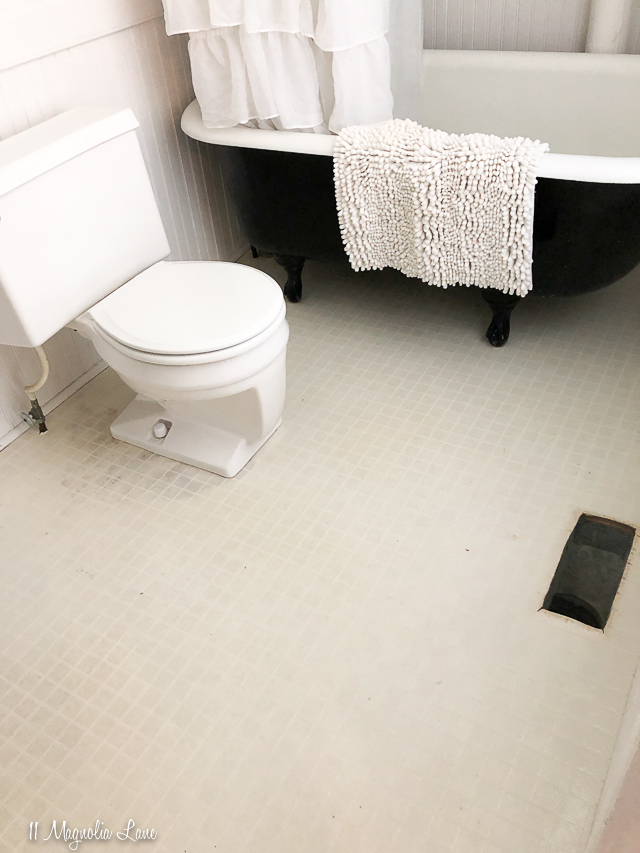
I think we’re all in agreement that updating the flooring was one of the projects that made the biggest impact in this small space. Here’s what the existing flooring looked like when we moved in:

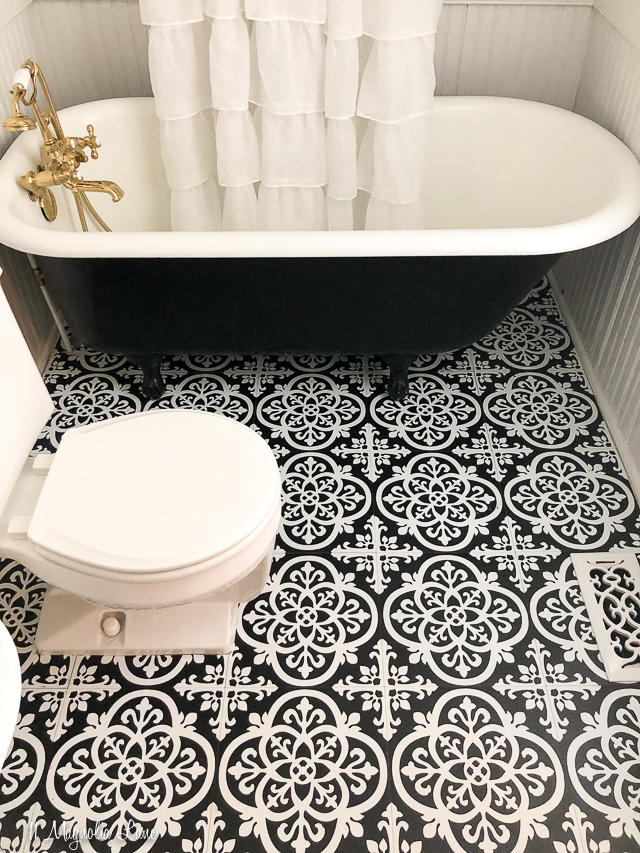
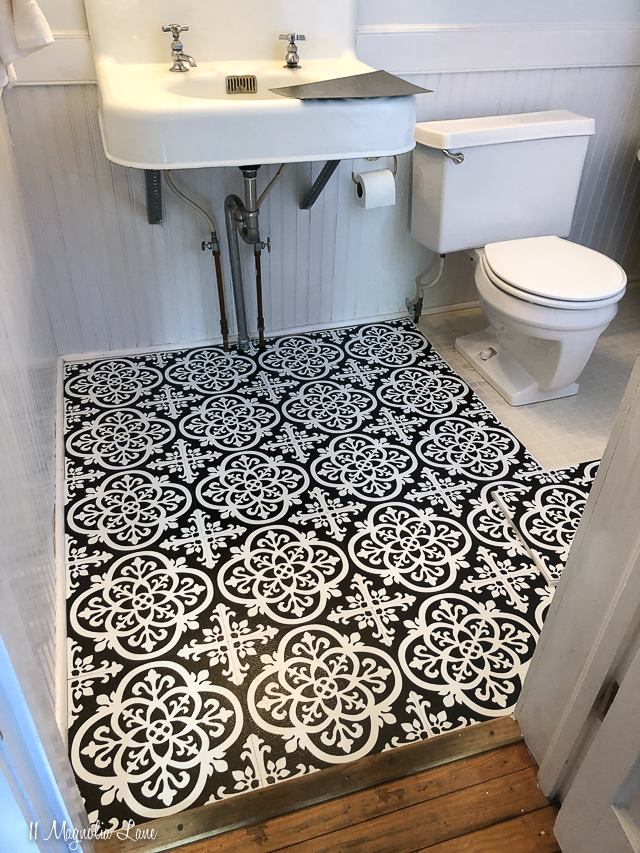
And here’s what it looked like after:

There are several companies that make peel and stick flooring and they’re carried by most of the big box store. That’s helpful since you can compare prices and delivery methods. The exact tiles I purchased are usually priced best at Walmart and HomeDepot.

The process was super-easy and would be a simple DIY for a beginner. Here are my tips:

Measure Your Space

The first step in the process is to measure your space. My bathroom is about 50 sf and so I ordered 7 boxes of tiles. Yes, that equals 70 sf of coverage, but I’d rather return an unopened box or two at the end of a project than run out in the middle! I highly recommend that you purchase an extra box or two because some of your tiles might be damaged, or discolored. I made a few mistakes when cutting around the toilet and the pipes, so I was happy to have extras to work with. I wound up returning one box and keeping a partially used box downstairs in case repairs or replacements are needed in the future.

Prepare for Installation

I let the tiles sit inside for several days since they were shipped in November…you want to give them time to come to room temperature no matter what time of year it is. While they were acclimating, I vacuumed and cleaned the existing vinyl since a clean surface is essential for the glue to adhere.

Start in the Center of the Room

Visually, your finished floor will look best if you start the installation in the center of the room. Since my bathroom is about 5′ deep and each tile is 12″ x 12″, that made the process much easier. I wound up only needing to cut the edges on two walls.

Rotate each tile before you remove the paper backing to be sure that the patterns line up. On my particular tiles, there’s one exact way that they line up, so that part was pretty easy.

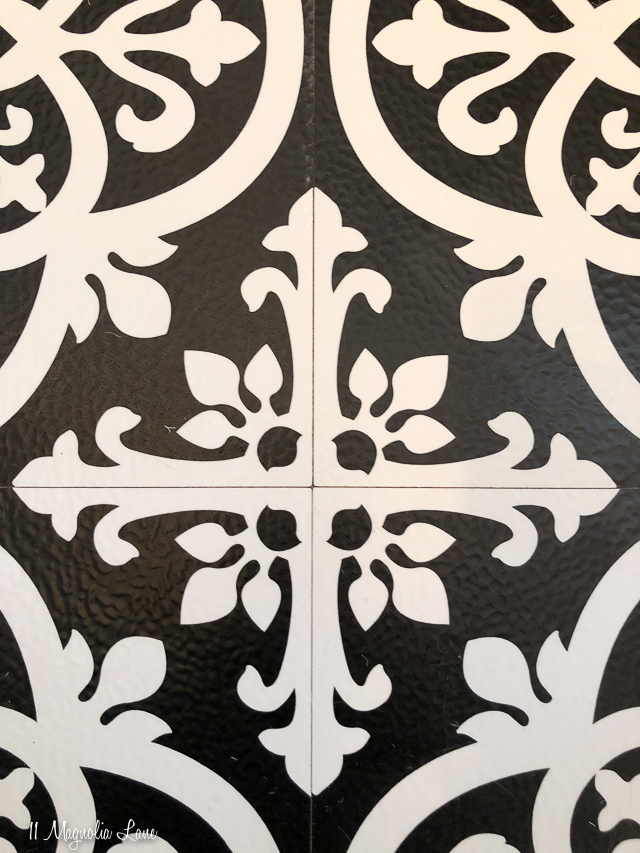
Remove the backing paper to expose the adhesive, adjust the positioning, and press to adhere the tile. (I found that they can be repositioned if you use a light touch)

Cut to Fit Edges and Around Obstacles

Several people asked how I installed the tiles around the toilet and pipes, an under the cast iron tub. I was a little nervous about that before I started, since the room isn’t perfectly square (old houses never are!), plus there are water supply lines running to the tub. I also figured I’d have to practically stand on my head to get the tile under the tub (OK, that part was actually true!).

The tiles were SO much easier to cut than I thought they’d be. I purchase a brand new utility knife to use, but turns out I could cut the tiles easily with my kitchen shears. That made a huge difference during the detail work when I cut around the toilet and water lines. This is also where it’s helpful to have a few extra tiles in case you mess up a cut line.

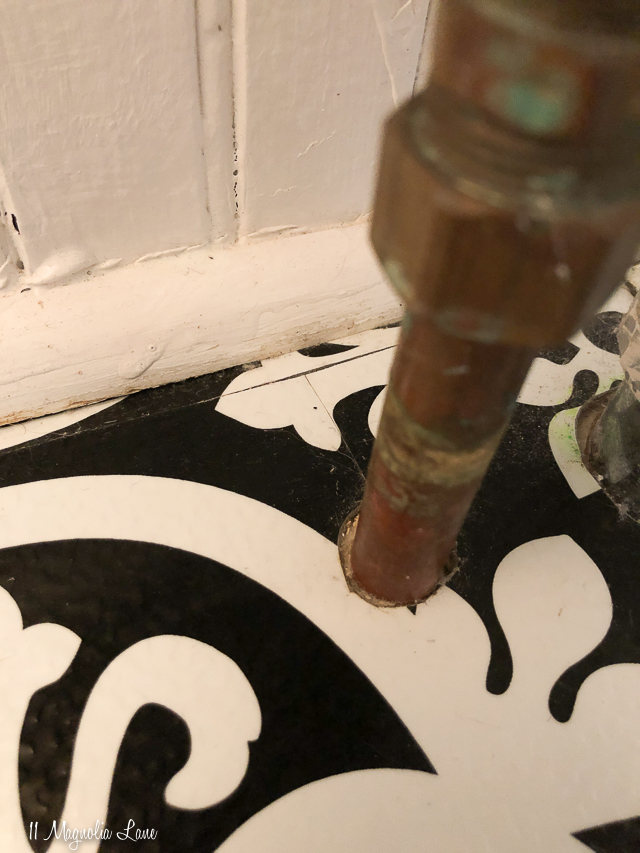
Here’s a close up of how I installed around the water lines for the sink. This area is hidden by the sink skirt and up close it certainly isn’t a perfect fit, but from a standing position it looks like it is!

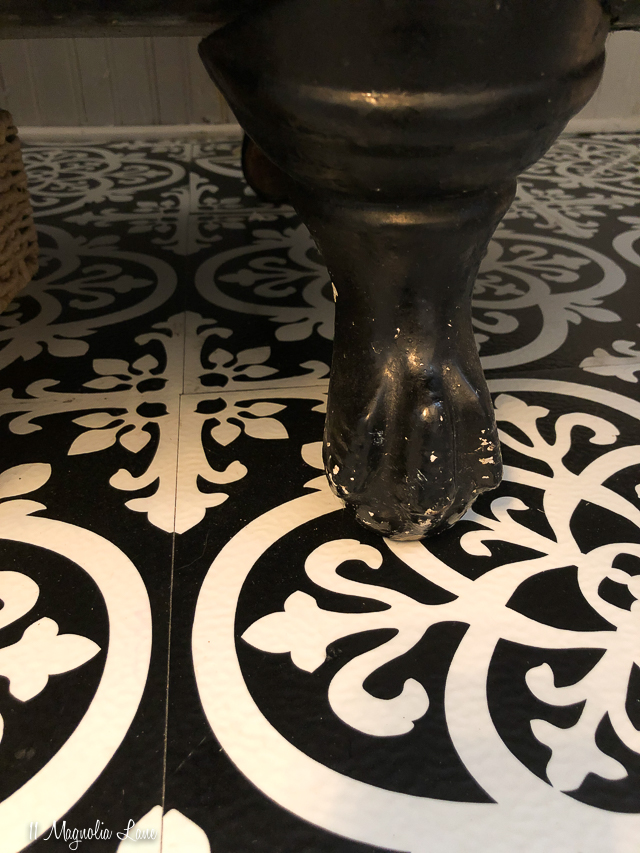
The cast iron tub wasn’t as much of a problem as I thought it would be. Turns out that since the tiles are so thin, it was easy to slide them right under the feet of the tub while my husband lifted it up just a few millimeters. He said it wasn’t even that heavy, but possibly he is exaggerating for effect so we will be extra-impressed with him. 😉

Your Questions and My Answers

I had several questions about working with the claw foot tub and the plumbing, which I hopefully answered above to everyone’s satisfaction. Here are a few others:

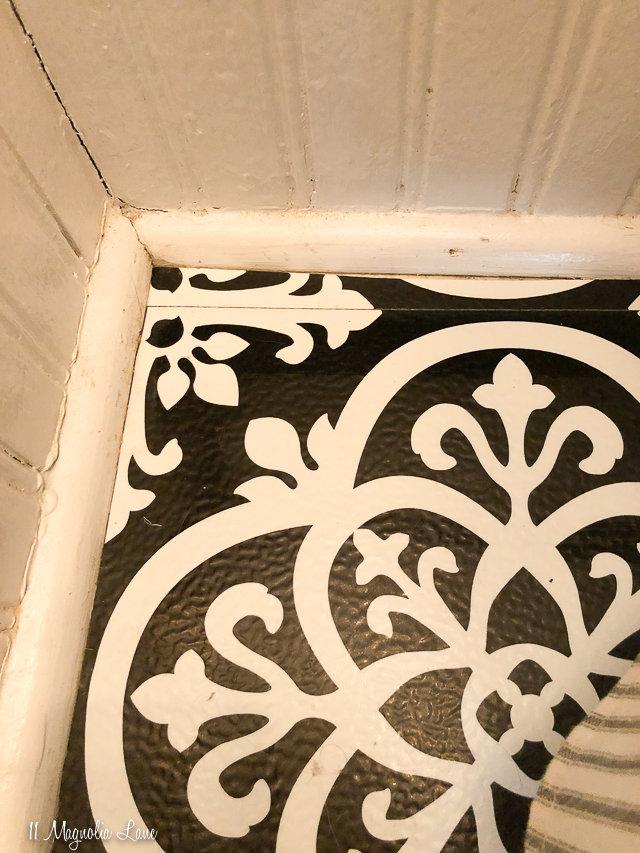
Q: Did you remove the baseboards? A: No. I was able to install the tile right up against the baseboards. Where it wasn’t a perfect match, I just cut a small piece of tile to make it fit:

Q: Are the tiles removable? A: Yes and no. While they’re meant to be permanent, you could remove them (unless you use additional adhesive when you’re installing them). I think you’d have a significant amount of adhesive left behind, though, so you’d have to be planning to recover the floor with something else. Also, the manufacturer’s instructions recommend rolling the floor with a tile roller. I skipped that part since very little of the floor space could be rolled with the tub, toilet, and plumbing in the way, so it didn’t make a lot of sense to me. I walked all over the floor and that is almost as good as a roller!

Q: How are they holding up? A: Great! This is definitely a project I’d do again and it’s a great one for renters. I’d definitely recommend that you ask your landlord to reimburse you for the cost of the tiles, but a room like this would only be about $50-$60, so lot of bang for the buck.

Vintage bathroom redo with black and white clawfoot tub and brass fixtures | 11 Magnolia Lane

So there you have it! Please let me know if you have questions that I missed, and thanks for stopping by.

Final New Christy headshot 2015
icon-facebook-1icon-instagram-1icon-pinterest-1icon-twitter-1

YOU MIGHT ALSO LIKE THESE POSTS... :

How We Added Cabinets in our Breakfast Room
Friday Free for All {Thoughts, Life Lately an...
The Best of 2020-Our Year in Review
Shopping for Flooring Online

Filed Under: Bathrooms, DIY/Projects/Tutorials, Room Makeovers Tagged With: flooring, projects

Reader Interactions

Comments

  1. Julie says

    February 7, 2020 at 2:25 pm

    Love looking at this room…………. =)

    Reply
    • Maria Blomgren says

      February 7, 2020 at 4:14 pm

      It’s amazing to see that you did it yourself!

      Reply
      • Christy says

        February 14, 2020 at 11:50 am

        Thanks so much, Maria!

        Reply
    • Christy says

      February 14, 2020 at 11:50 am

      Thank you! 🙂

      Reply
  2. Bets says

    February 7, 2020 at 5:07 pm

    I would love to use these in my foyer to cover a really old, super ugly piece of vinyl flooring. The flooring has been damaged in one small area where the wood subfloor now shows. Do you think the peel and stick tiles would stick on the part of the floor where it’s damaged — some tiles would cover half-vinyl / half-wood — without leaving a weird bump?

    Reply
    • Christy says

      February 14, 2020 at 11:50 am

      I’m not sure; they’re pretty thin. Maybe add something to the damaged spot to build it up a bit before putting the new tile over it? You could even cut a piece of tile to fit in that spot, or maybe spackle? Good luck!Christy

      Reply
  3. Heidi says

    February 8, 2020 at 10:52 am

    That does look easy! Thank you for the tutorial. Those tiles look amazing!

    Reply
    • Christy says

      February 14, 2020 at 11:48 am

      Thanks, Heidi!

      Reply
  4. june says

    February 8, 2020 at 1:23 pm

    love the floor! I’ve never been crazy about the skirt on your sink and I see all these beautiful restoration hardware freestanding sinks! I think if you painted the pipes under your sink shiny silver an added the shiney silver towel bar on one side of the sink it would resemble a beautiful rh sink????

    I love the rest of your remodel! you really worked hard on your house!

    Reply
    • Christy says

      February 14, 2020 at 11:48 am

      Thanks, June! I think we prefer having the extra storage under the sink skirt but I’ll definitely keep that in mind for the future.
      Christy

      Reply
  5. aajilon says

    February 9, 2020 at 6:56 am

    there is a fitting that goes around the pipe at the floor to cover the less than perfect cut and gives that area a great finished look. available at Home Depot

    Reply
    • Christy says

      February 14, 2020 at 11:47 am

      Yes, I’m familiar with those flanges. They’re a great option if we ever ditch the sink skirt. Thank you!

      Reply
  6. cberi says

    February 9, 2020 at 7:15 am

    dont like your trying to ride the shirtales of chip and joanna. better to develop your own idenitity. you are so not chip and joanna

    Reply
    • Christy says

      February 14, 2020 at 11:46 am

      Instead of deleting, I’m just going to leave this comment as a great example of “if you don’t have anything nice to say, don’t say anything.”

      Reply
  7. Janet Cole says

    February 16, 2020 at 7:10 pm

    I absolutely LOVE this reno…so much so that am looking at doing this in my kitchen. Just curious to confirm that it was not necessary to fill in the grout lines between the existing tile to “level out” the floor. My existing tiles are 12×12 and it would be so wonderful to just go right over them without a ton of prep. Thanks for the beautiful pics!

    Reply
    • Christy says

      February 18, 2020 at 10:18 am

      That’s a great question, Janet, and I’m not sure of the answer. I applied my tiles over vinyl flooring so there were no grout lines to cover. These tiles are also 12″ x 12″ so you’d maybe want to buy a package and try a few before you commit to the entire room (unless you can find someone who applied them over tile). Good luck! Christy

      Reply
  8. Marlyn Bisher says

    May 8, 2020 at 3:39 pm

    I love the bathroom! The cute skirt on the sink is genius! The floor tiles make the room. Great job!

    Reply
    • Christy says

      May 10, 2020 at 10:34 am

      Thanks so much, Marlyn! I agree that hiding those sink pipes made a big difference in the space. I have our extra T.P. stashed there now.
      Take care,Christy

      Reply
  9. Maria says

    May 9, 2020 at 10:23 am

    Wow!! Such a huge impact the tile made on this cute bathroom. So nice to see a simple DIY project that really is simple:)

    Reply
    • Christy says

      May 10, 2020 at 10:35 am

      Good point–this is one that even a beginner DIY’er can do.Thanks for your comment!

      Reply
  10. Scotty says

    April 16, 2021 at 11:47 pm

    Hi there, I have an almost identical size and set up as you (it’s kinda surreal!). Curious how you painted the tub black? Did you have to move it out of the bathroom or is only one side painted ha????

    Reply
    • Christy says

      April 20, 2021 at 9:34 am

      Hey, Scotty–The tub was already painted when we moved in (the house was a rental). I never looked on the other side to see if it was painted but if I had to guess, I’d say they only painted the visible parts. I do remember seeing brush strokes and it was a matte/satin finish. I know that doesn’t help much but it’s all I’ve got!
      Take care,Christy

      Reply

Leave a Reply Cancel reply

Your email address will not be published. Required fields are marked *

Recipe Rating


This site uses Akismet to reduce spam. Learn how your comment data is processed.

Primary Sidebar

Lowest prices. Straight Teeth,

•Don’t Miss A Thing!!•

•Do You Know Jesus?•

•Featured In•

Footer

  • Email
  • Facebook
  • Instagram
  • Pinterest

Copyright © 2023 · 11 Magnolia Lane· Blog Design by Little Blue Deer
Privacy Policy

11 MAGNOLIA LANE IS A PARTICIPANT IN THE AMAZON SERVICES LLC ASSOCIATES PROGRAM, AN AFFILIATE ADVERTISING PROGRAM DESIGNED TO PROVIDE A MEANS FOR US TO EARN ADVERTISING FEES BY ADVERTISING AND LINKING TO AMAZON.COM AND AFFILIATED SITES. AS AN AMAZON ASSOCIATE, WE EARN FROM QUALIFYING PURCHASES. WE ALSO PARTICIPATE IN SEVERAL OTHER AFFILIATE PROGRAMS; THIS INCOME ALLOWS US TO MAINTAIN THE QUALITY OF YOUR USER EXPERIENCE AND KEEPS OUR CONTENT FREE. WHEN YOU PURCHASE THROUGH ANY OF OUR AFFILIATE LINKS, WE EARN A SMALL COMMISSION AND YOU DON’T PAY A CENT MORE THAN YOU WOULD OTHERWISE; THAT WOULD BE TACKY!   READ OUR FULL PRIVACY AND DISCLOSURE POLICY {HERE}.
  ©11 Magnolia Lane 2019. Unauthorized use and/or duplication of this material without express and written permission from this blog’s authors and/or owners is strictly prohibited. Please email us at admin@11magnolialane.com for more information.

  • MEET CHRISTY & AMY
    • IF YOU’RE NEW HERE…
    • WORK WITH US
    • 11 MAGNOLIA LANE 101
    • DISCLOSURE + PRIVACY (the fine print)
    • BEST OF 11 MAGNOLIA LANE
    • Back
  • TOUR OUR HOMES
    • TOUR OUR HOMES
    • CHRISTY’S MAGNOLIA COTTAGE
    • CHRISTY’S MCC HOUSE
    • AMY’S NEW HOME BUILD
    • HOLIDAY HOME TOUR SERIES
    • SPRING HOME TOUR SERIES
    • Back
  • CELEBRATIONS
    • EVENTS + ENTERTAINING
    • GIFTS
    • HOLIDAYS
    • RECIPES
    • Back
  • HOME
    • CLEANING
    • DECORATING
    • ORGANIZING
    • ROOM BY ROOM
      • BATHROOMS
      • BEDROOMS
      • CLOSETS
      • CRAFT ROOMS + OFFICES
      • DINING ROOMS
      • KIDS’ ROOMS
      • KITCHENS
      • LAUNDRY ROOMS
      • LIVING + GREAT ROOMS
      • OTHER SPACES
      • PANTRIES
      • PLAYROOMS + BONUS ROOMS
      • PORCHES + OUTDOOR SPACES
      • Back
    • TIPS
    • Back
  • SHOP
    • SHOP OUR INSTAGRAM
    • SHOP OUR AMAZON STORE
    • FRIDAY FAVORITE FINDS
    • 11 ML ETSY SHOP
    • 11ML ORGANIZING SHOP
    • Back
  • PROJECTS
    • CRAFTS
    • DIY PROJECTS + TUTORIALS
    • FURNITURE
    • PRINTABLES
    • WINDOWS, DOORS, + WALLS
    • Back
  • LIFE
    • FRIDAY FREE FOR ALL
    • HEALTH
    • SIMPLY ON SUNDAY
    • TRAVEL
    • Back
  • CONTACT
    • Email
    • Facebook
    • Instagram
    • Pinterest
91 shares