• Skip to primary navigation
  • Skip to main content
  • Skip to primary sidebar
  • Skip to footer
  • MEET CHRISTY & AMY
    • IF YOU’RE NEW HERE…
    • WORK WITH US
    • 11 MAGNOLIA LANE 101
    • DISCLOSURE + PRIVACY (the fine print)
    • BEST OF 11 MAGNOLIA LANE
  • TOUR OUR HOMES
    • TOUR OUR HOMES
    • CHRISTY’S MAGNOLIA COTTAGE
    • CHRISTY’S MCC HOUSE
    • Christy’s Stuttgart Flat
    • Amy’s Virginia Craftsman Home Tour
    • AMY’S VIRGINIA CRAFTSMAN Building Process
    • HOLIDAY HOME TOUR SERIES
  • CELEBRATIONS
    • EVENTS + ENTERTAINING
    • GIFTS
    • HOLIDAYS
    • RECIPES
  • HOME
    • CLEANING
    • DECORATING
    • ORGANIZING
    • ROOM BY ROOM
      • BATHROOMS
      • BEDROOMS
      • CLOSETS
      • CRAFT ROOMS + OFFICES
      • DINING ROOMS
      • KIDS’ ROOMS
      • KITCHENS
      • LAUNDRY ROOMS
      • LIVING + GREAT ROOMS
      • OTHER SPACES
      • PANTRIES
      • PLAYROOMS + BONUS ROOMS
      • PORCHES + OUTDOOR SPACES
    • TIPS
  • SHOP
    • SHOP OUR INSTAGRAM
    • SHOP OUR AMAZON STORE
    • FRIDAY FAVORITE FINDS
  • PROJECTS
    • CRAFTS
    • DIY PROJECTS + TUTORIALS
    • FURNITURE
    • PRINTABLES
    • WINDOWS, DOORS, + WALLS
  • LIFE
    • FRIDAY FREE FOR ALL
    • HEALTH
    • SIMPLY ON SUNDAY
  • TRAVEL
  • CONTACT
    • Email
    • Facebook
    • Instagram
    • Pinterest

11 Magnolia Lane

Sharing our easy DIYs, decorating, entertaining and more!

How To {Safely} Remove That Large, Builder Bathroom Mirror

March 16, 2016 By Amy 22 Comments

This Post Contains Affiliate Links

10079 shares
  • 104

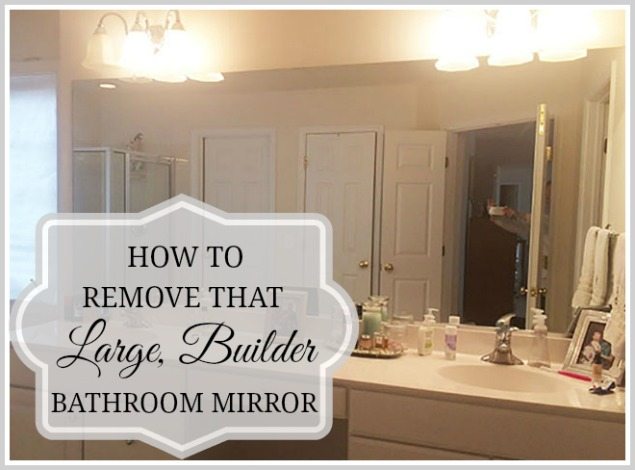
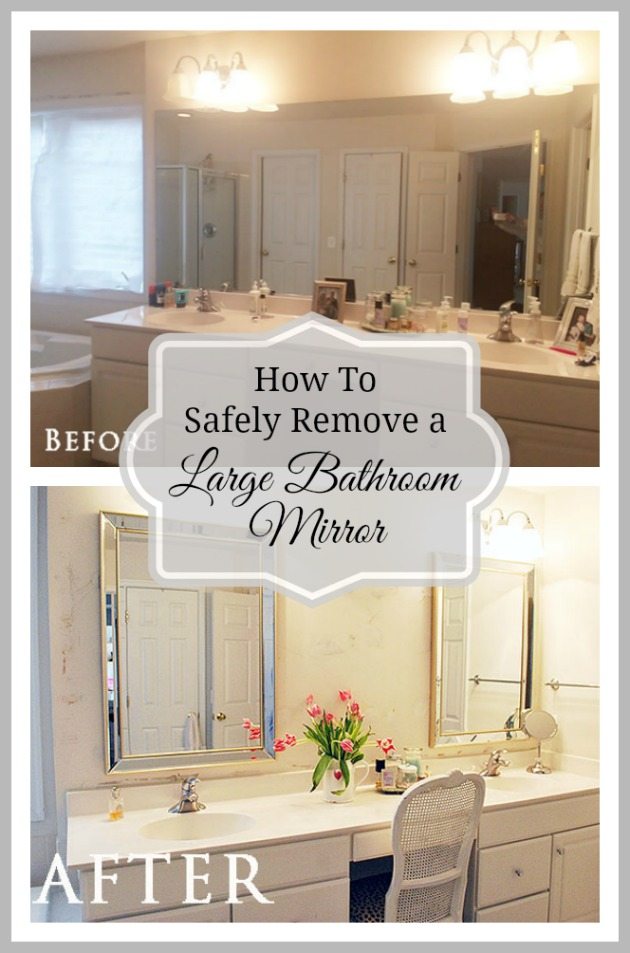
Today I am going to show you how we removed the large builder mirror in our master bathroom. Our large bathroom mirror was attached (with glue) to the wall, so it was extra challenging to remove. Here is the technique we found to safely detach it from the wall so we could replace it with more decorative smaller mirrors.

I shared in this post HERE about how my husband and I jumped into a ‘weekend’ warrior project a few Saturdays ago {OK, I jumped and he got dragged}, but it was one that didn’t go off as easily as we’d hoped and planned.

how-to-remove-that-large-bathroom-mirror-revised-header

I am mid-makeover for our master bathroom. The state of it has been pretty bad ever since we moved into our new home. We’ve slowly been overhauling each room in our builder-basic home and major projects like our kitchen and our more public rooms like our library and dining room have gotten the immediate attention. While our master bedroom is still in need of its refresh, our bathroom has been sorely neglected down to the paper blinds on the window and blah, white tile, stainless fixtures and plain jane paint.

bathroom-before

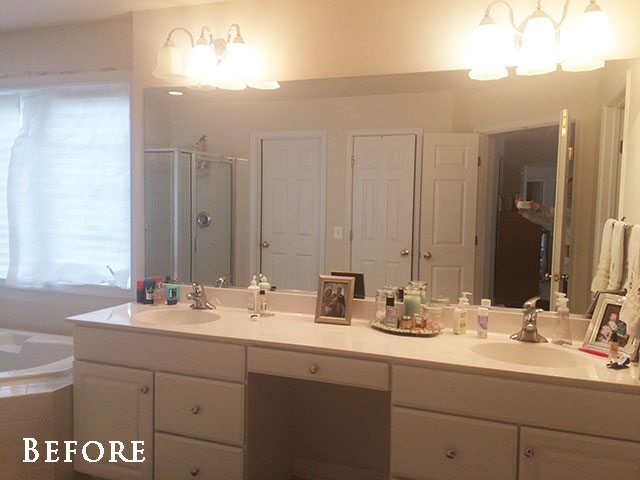
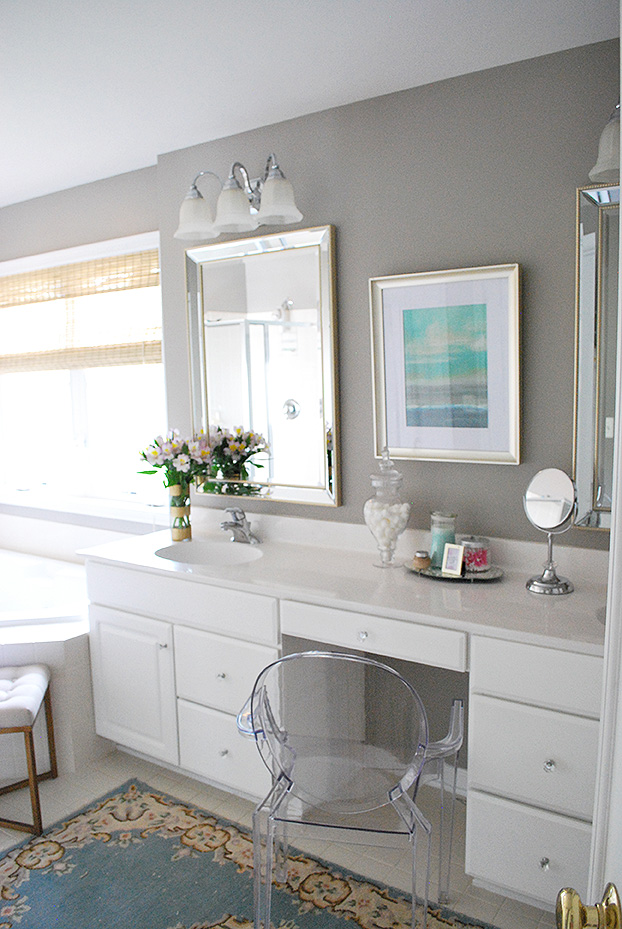
So while we like to do full “ta-da!” type reveals, this post is still mid-project {edit: see the finished space HERE}. Since I had to do some research as to the safest and easiest way to take down the huge, eight-foot mirror you see above, I thought it was worth sharing how I did it. I had found two pretty, smaller mirrors at HomeGoods and couldn’t wait to get them put up in place of this monstrosity. {If for some reason you can’t remove your mirror, we also have a great renter-friendly way to update a large mirror HERE.}

How to Remove a Large Bathroom Mirror

mirror-taped-before

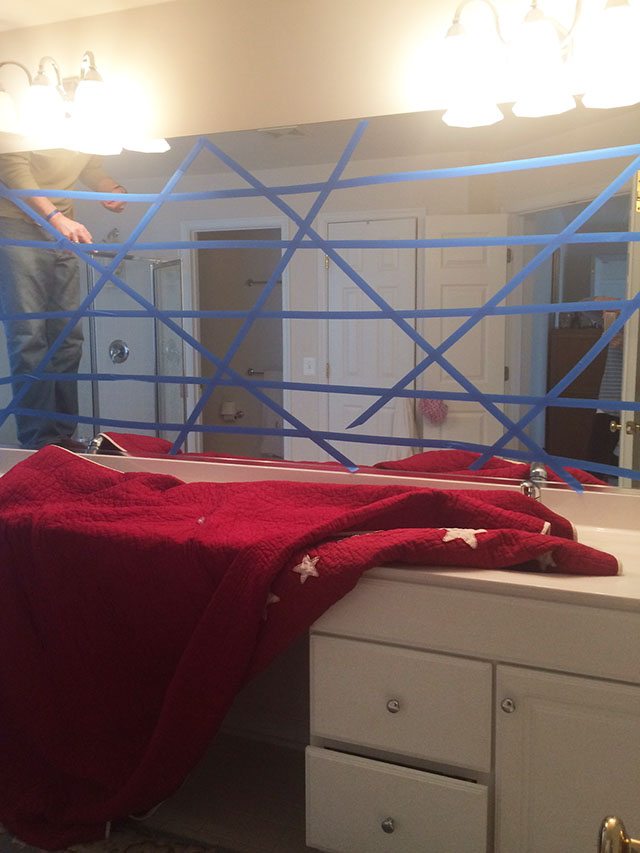
I started by taping up the mirror and protecting our counter with a bedspread, I figured if the mirror did fall it would help contain the glass. To jump ahead briefly, we successful removed the entire mirror with no cracking or breaking and we’ll be able to repurpose it in our basement for a work-out area, but it’s better to be safe than sorry with this much glass. I also don’t think this is a one person job, the mirror was exceptionally heavy, so be sure you have help close by if you attempt this project.

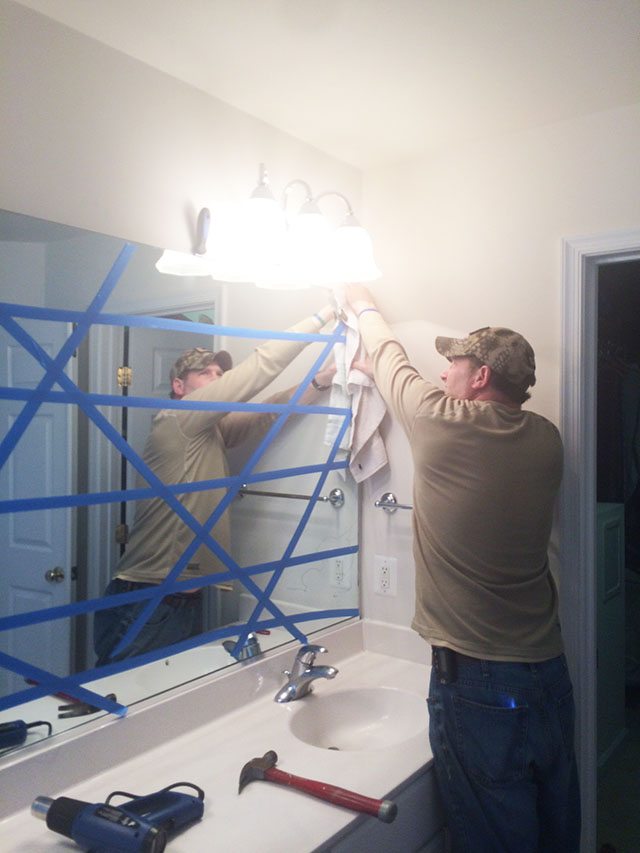
Once I removed the few plastic clips that held it to the wall, my hopes of it coming off easily were crushed, it was clearly glued to the wall in multiple places. I went to the internet to see if I could find any tricks to remove it and read about using a hair dryer to soften the glue, then using a large wire to saw downward to separate the glue from the back of the mirror.

As a HomeRight Ambassador, I knew I’d be able to one-up using a hair dryer, and broke out my HomeRight Heat Gun {this is not a sponsored post, their tools are just handy to have around when you are tackling home projects}, which was a great solution but in the end with such a huge expanse of wall I had no way of knowing exactly where the glue was.  This method would work really well on a smaller mirror.

We then ran a long piece of strong picture wire behind the mirror, both of us holding an end and pulling downward with all our might, sometimes using a sawing motion in an attempt to make better progress. We got about halfway down and could feel the mirror start to separate from the wall but unfortunately, that was as far as we got. My husband then began to gently pry the mirror from the wall using screwdrivers and other flat objects, every once and awhile we’d feel another pop as another piece of glue separated from the wall.

Once we were able to pull the top part forward, I used another HomeRight tool, my Steam Machine, and using the smallest nozzle blasted the hot steam between the wall and the mirror. Since we knew that we were going to have major drywall to repair, I didn’t think the small amount of moisture would create too much of a problem, and I knew it would soften the glue or the drywall enough to let the mirror separate. Shortly after a little bit of steam, we heard almost a “pop” when the mirror gave way, and yes there may have been a few cheers after all that work!

pulling-down-large-bathroom-mirror

After it was removed, we assessed the damage. I had several places that needed drywall patches and quite a bit of sparkling/repair work ahead. {Note: I used these mesh patches over the largest holes and they worked well.}

wall-damage-after-removing-large-bathroom-mirror

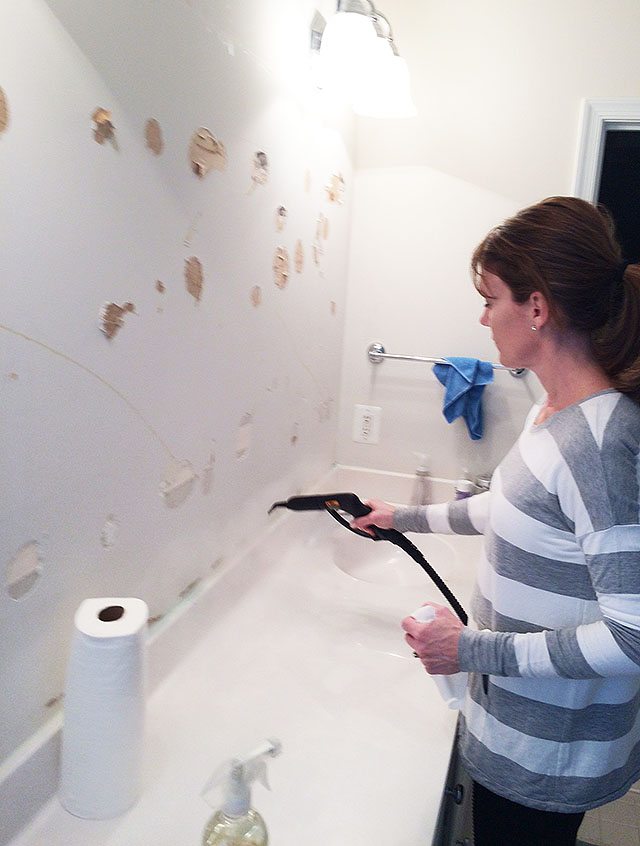
Once we popped off the bottom metal track that the mirror had set in {which was also glued on-argh!} still having my SteamMachine on hand, I used it to blast away all the grime, glue and gunk that had accumulated under the mirror.

Sources

cleaning-bathroom-post-mirror

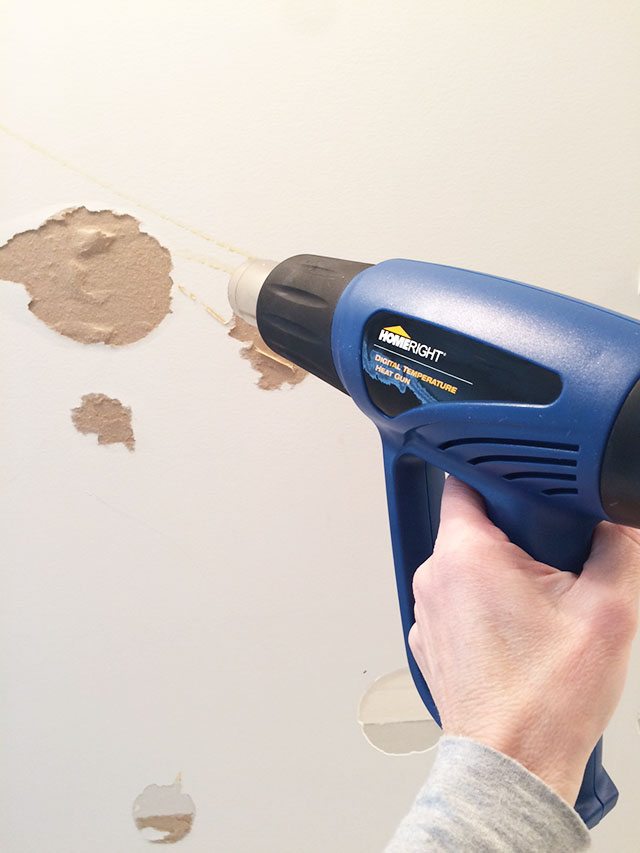
I also used the Heat Gun to melt all the remaining glue on the wall, then sanded it off before I started patching it up.

removing-glue-from-wall-mirror

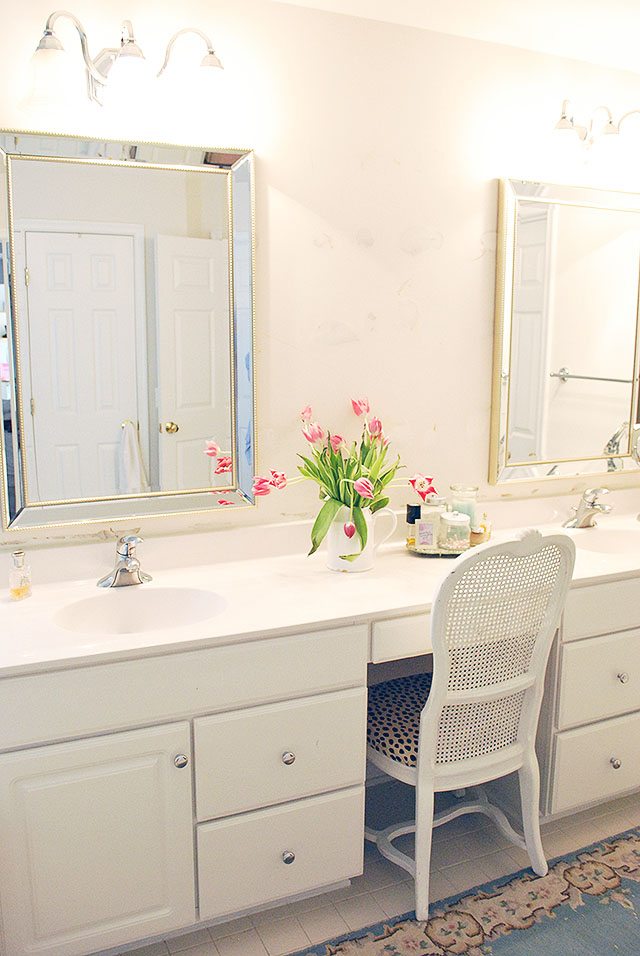
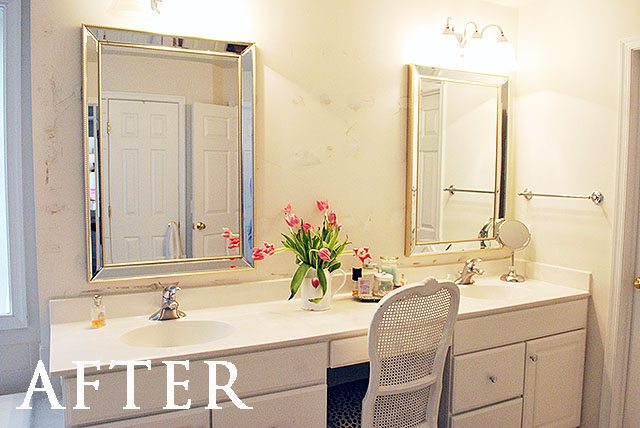
After all the patching and sanding was done, I went ahead and rehung the mirrors for instant gratification {and so I could see to put my make-up on the next day!}.

bathroom-mirror-after1

You can still see the damage under the mirror, and on the wall, but ignore that and look at the pretty mirrors I found at HomeGoods 🙂

bathroom-mirrors-homegoods-after

Similar mirror HERE or HERE

bathroom-mirrors-after2-wide-marked

Here is an easy-to-pin image so you can save these tips when you need to remove your huge glued-on bathroom mirror!

How-to-safely-remove-large-bathroom-mirror-pinterest

And here is the space after it’s finished! We had the room painted, added woven blinds and some accessories. What a difference…You can see it all HERE.

I did another small update in the room a few months later, you can see more of that HERE.

Thank you to those of you who have let comments with other ways to accomplish this task, this is helpful! Please check below for some other ways to help remove a stuck on wall mirror!

If you are looking for more bathroom inspiration, here are a few other spaces we have designed.

elegant master bathroom makeover

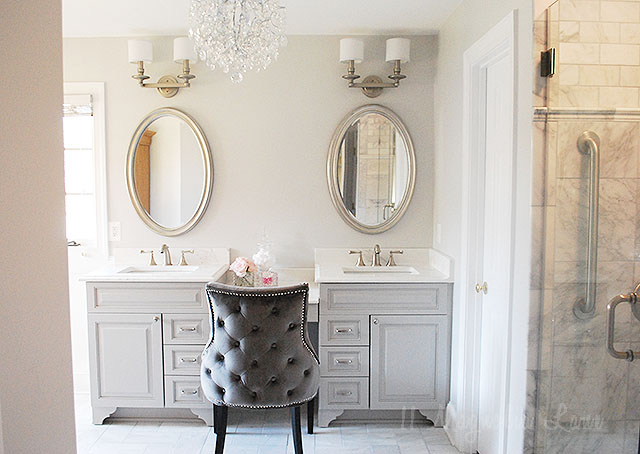
Elegant Master Bathroom Renovation

Vintage bathroom redo with black and white clawfoot tub and brass fixtures | 11 Magnolia Lane

Vintage Powder Room Renovation

Small Powder Room With Blue and White Wallpaper

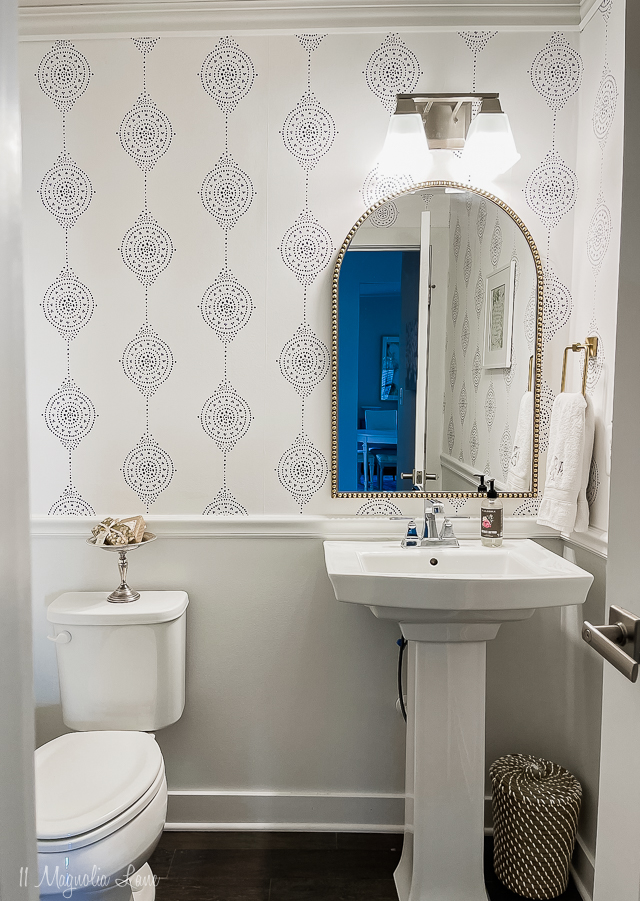
Small Guest Bathroom with Wallpaper

Take our full home tour HERE.

Tour the new home we built HERE.

XO,


XO,

small-amy-new-headshot-summer-2016-2 copy
icon-facebook-1icon-instagram-1icon-pinterest-1icon-twitter-1
We promise to never sell your email information. Our posts contain affiliate links.  If you make a purchase after clicking on these links, we will earn a small commission, which helps to keep our content free.  You don’t pay a cent more than you would otherwise, since that would be tacky! Please see our full disclosure policy here.

SaveSave

YOU MIGHT ALSO LIKE THESE POSTS... :

Tutorial: Quick and Easy Way to Hang Silver ...
DIY Custom Plate Rack (For $40!)
Our Master Bathroom with Painted Cabinets and...
Our Powder Room Makeover with Serena + Lily W...

Filed Under: DIY/Projects/Tutorials, HomeRight Projects, PROJECTS, Wall & Door Decor Tagged With: Bathroom, bathroom mirror, diy

Reader Interactions

Comments

  1. Sara says

    March 16, 2016 at 2:17 pm

    Oh my gosh that’s a lot of work, and it looks incredible with those mirrors!! There is a product called DeBond that is AMAZING… It has one of those little straw things, and if you spray behind the mirror where you think the glue is, it dissolves it in a few minutes. It’s actually made for removing glue on boats. I can’t remember where my husband bought it, but I’m sure google does. 😉

    Reply
    • Amy says

      March 17, 2016 at 11:14 am

      This is such a great tip (wish I’d known a week ago, LOL!) I edited the post mentioning it so hopefully that will help others tackling the same job—thank you so much for sharing, I love this community 🙂 XO, Amy

      Reply
      • Kate says

        September 23, 2021 at 12:05 pm

        5 stars
        Debond is a chemical product labelled as hazardous and should be returned for refund! It could lead to serious reactions or even death! Canadian Consumer Product Safety recall!

        Reply
  2. Shirley@Housepitality Designs says

    March 16, 2016 at 2:57 pm

    Beautiful…so love the mirrors and what an amazing transformation!

    Reply
    • Amy says

      March 17, 2016 at 11:14 am

      Thanks Shirley, have a great day! XO

      Reply
  3. Julie says

    March 16, 2016 at 3:45 pm

    I don’t deny I love the new look/mirrors
    , and yet when my home was built 20 years ago I requested a full mirror, like you have, with built in medicine cabinets. I think the mirror makes the room look bigger, yet find the look you’re pursuing all the rage right now. Nevertheless, do enjoy!

    Reply
    • Amy says

      March 17, 2016 at 11:13 am

      I think you are right Julie, that big mirror did make the room look bigger and it did bounce the light around, but I was ready for a change. I may miss it in the end? We’ll see! Have a great day and thanks for the note… XO, Amy

      Reply
  4. Debbie says

    March 17, 2016 at 10:31 am

    Thank you so much for this post. This project is on my summer list for our master bathroom, too, and I had no idea how we were going to tackle it. I’ve pinned it to ‘DIY For the Home’ on my Pinterest Board so I’ll be able to come back and review it. You and your husband did a fabulous job, and I just love your new mirrors.

    Reply
    • Amy says

      March 17, 2016 at 11:11 am

      Thanks Debbie! Good luck with your project 🙂 Let us know how it goes! XO, Amy

      Reply
  5. Carol says

    March 31, 2017 at 11:02 am

    Love what you did and the great directions. We removed a similar mirror, but can’t find a place to donate it. It seems we’ll have a large mirror in our garage! Not what I want. Any suggestions?

    Reply
    • Amy says

      April 2, 2017 at 8:03 am

      Hi Carol–do you have a Habitat Restore? They take building supplies so they would be happy to take it off your hands. If you can’t find something like that you may just try listing it on Craig’s List. You never know what people will buy! Good luck, Amy

      Reply
    • Pam says

      July 20, 2019 at 8:48 am

      When we removed a large plate glass mirror (4×8), we tried selling it for $10, then posted it for free and someone who repurposes old wood for picture/mirror frames took it off our hands.

      Reply
  6. Susan Wilson says

    May 21, 2017 at 3:40 pm

    Hi Carol,
    Thanks for sharing how you removed the mirror As I am going to be tackling this project this summer as well. The transformation of your bathroom was amazing. What is the color of the paint you used? The grey paint is so classy with the mirrors you chose.
    Thank you again,
    Susan

    Reply
    • Just Julie says

      March 6, 2021 at 1:24 pm

      Sherwin Williams Agreeable Gray paint is the perfect gray to give a bathroom a calming, spa like feel. Use silver and white elements in the room to create the look and complete the experience. Especially great for a small bathroom.

      Reply
  7. angela says

    June 26, 2017 at 5:51 pm

    Do you have more pics showing the full layout of your bathroom? from what I can see, it looks quite similar to mine, and I find mine to be a bit unusual. Mine is kind of an L shape.

    Reply
    • Amy says

      June 27, 2017 at 8:29 am

      Hi Angela, the bathroom is more of a rectangle. There is another updated post on it HERE: https://www.11magnolialane.com/2017/06/05/outdoor-doormat-giveaway-and-our-updated-master-bathroom/
      Hope that is helpful! XO, Amy

      Reply
  8. Ruby M sutton says

    December 23, 2017 at 9:53 am

    I just removed a eight foot mirror from living room wall. removed clips and placed a quilt under it. After a week, down stairs and mirror had fell to floor onto quilt without breaking. Now to remove glue. Thanks for tips on removing glue.

    Reply
  9. trish says

    February 11, 2018 at 2:55 pm

    Just a question: You removed the full mirror and replaced it with two smaller mirrors over the sinks. Do you find that the area between the sinks are a useless space now that there is no mirror to use across from the chair? What is the purpose of the chair? Looks great by the way.

    Reply
    • Amy says

      February 26, 2018 at 2:04 pm

      Actually now it is so much more useful, I had a small stand up mirror (with a magnifying side), it came from HomeGoods and was about $15. It allowed me to actually sit and put on makeup. So much easier and you could get ‘closer’ to the mirror than you could with standing. I loved this setup! I don’t have the same thing in our new house, and I am going to miss it! —Amy

      Reply
  10. ALicia says

    December 9, 2018 at 12:34 pm

    Thank you so much for posting this! We are doing ours today and this is a huge help!

    Reply
  11. TP says

    January 19, 2019 at 11:47 am

    You certainly did a great job, but why remove such a large, functional mirror? Large mirrors are the best: they make the room look bigger, they just work with a large vanity, and they allow a better view of your outfit if you step back. If I wanted to pursue today’s trendy small-mirrors-over-sinks, I’d place the new /fancy mirrors over the larger mirror.

    Reply
  12. Sarah says

    February 19, 2023 at 3:48 pm

    What are the dimensions of the new mirrors?

    Reply

Leave a Reply Cancel reply

Your email address will not be published. Required fields are marked *

Recipe Rating


This site uses Akismet to reduce spam. Learn how your comment data is processed.

Primary Sidebar

Lowest prices. Straight Teeth,

•Don’t Miss A Thing!!•

•Do You Know Jesus?•

•Featured In•

Holiday Gift Ideas

Footer

  • Email
  • Facebook
  • Instagram
  • Pinterest

Copyright © 2023 · 11 Magnolia Lane· Blog Design by Little Blue Deer
Privacy Policy

11 MAGNOLIA LANE IS A PARTICIPANT IN THE AMAZON SERVICES LLC ASSOCIATES PROGRAM, AN AFFILIATE ADVERTISING PROGRAM DESIGNED TO PROVIDE A MEANS FOR US TO EARN ADVERTISING FEES BY ADVERTISING AND LINKING TO AMAZON.COM AND AFFILIATED SITES. AS AN AMAZON ASSOCIATE, WE EARN FROM QUALIFYING PURCHASES. WE ALSO PARTICIPATE IN SEVERAL OTHER AFFILIATE PROGRAMS; THIS INCOME ALLOWS US TO MAINTAIN THE QUALITY OF YOUR USER EXPERIENCE AND KEEPS OUR CONTENT FREE. WHEN YOU PURCHASE THROUGH ANY OF OUR AFFILIATE LINKS, WE EARN A SMALL COMMISSION AND YOU DON’T PAY A CENT MORE THAN YOU WOULD OTHERWISE; THAT WOULD BE TACKY!   READ OUR FULL PRIVACY AND DISCLOSURE POLICY {HERE}.
  ©11 Magnolia Lane 2019. Unauthorized use and/or duplication of this material without express and written permission from this blog’s authors and/or owners is strictly prohibited. Please email us at admin@11magnolialane.com for more information.

  • MEET CHRISTY & AMY
    • IF YOU’RE NEW HERE…
    • WORK WITH US
    • 11 MAGNOLIA LANE 101
    • DISCLOSURE + PRIVACY (the fine print)
    • BEST OF 11 MAGNOLIA LANE
    • Back
  • TOUR OUR HOMES
    • TOUR OUR HOMES
    • CHRISTY’S MAGNOLIA COTTAGE
    • CHRISTY’S MCC HOUSE
    • AMY’S NEW HOME BUILD
    • HOLIDAY HOME TOUR SERIES
    • SPRING HOME TOUR SERIES
    • Back
  • CELEBRATIONS
    • EVENTS + ENTERTAINING
    • GIFTS
    • HOLIDAYS
    • RECIPES
    • Back
  • HOME
    • CLEANING
    • DECORATING
    • ORGANIZING
    • ROOM BY ROOM
      • BATHROOMS
      • BEDROOMS
      • CLOSETS
      • CRAFT ROOMS + OFFICES
      • DINING ROOMS
      • KIDS’ ROOMS
      • KITCHENS
      • LAUNDRY ROOMS
      • LIVING + GREAT ROOMS
      • OTHER SPACES
      • PANTRIES
      • PLAYROOMS + BONUS ROOMS
      • PORCHES + OUTDOOR SPACES
      • Back
    • TIPS
    • Back
  • SHOP
    • SHOP OUR INSTAGRAM
    • SHOP OUR AMAZON STORE
    • FRIDAY FAVORITE FINDS
    • 11 ML ETSY SHOP
    • 11ML ORGANIZING SHOP
    • Back
  • PROJECTS
    • CRAFTS
    • DIY PROJECTS + TUTORIALS
    • FURNITURE
    • PRINTABLES
    • WINDOWS, DOORS, + WALLS
    • Back
  • LIFE
    • FRIDAY FREE FOR ALL
    • HEALTH
    • SIMPLY ON SUNDAY
    • TRAVEL
    • Back
  • CONTACT
    • Email
    • Facebook
    • Instagram
    • Pinterest
10079 shares
  • 104