Today I’m resharing a post from quite a few years ago–2015, if you can believe it–because I’m hoping to build a similar plate rack for our kitchen here in Germany. The nice part about this easy DIY is that you can customize the rack, and it’s definitely beginner-level carpentry. I used a few power tools but it can be done without them. Before I had a saw, I just had them cut my wood for me at the store. It’s a project that takes just a few hours but makes a big impact!
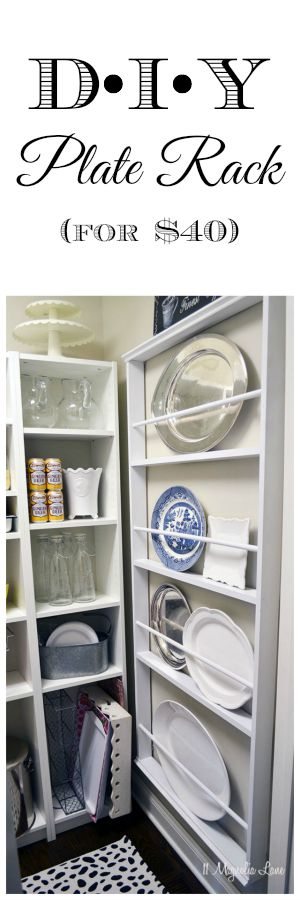
DIY Custom Plate Rack (For $40!)
If you follow us on Instagram, then you saw a sneak peek of this project when I finished it last Saturday night–I was a bit gleeful because I LOVE IT!
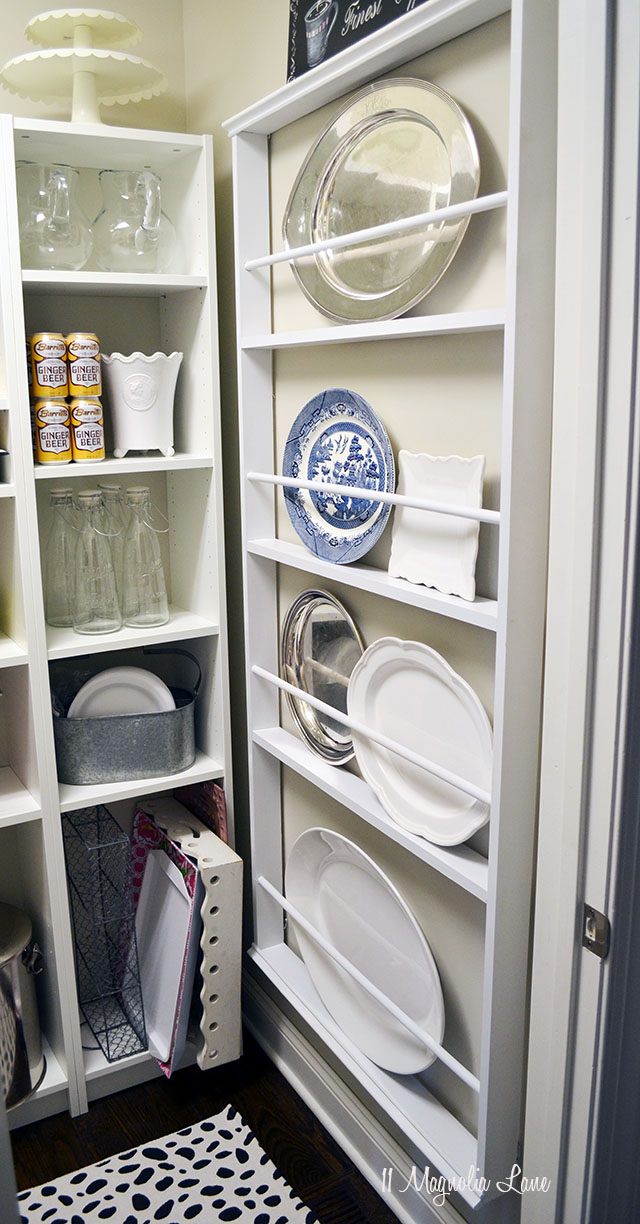
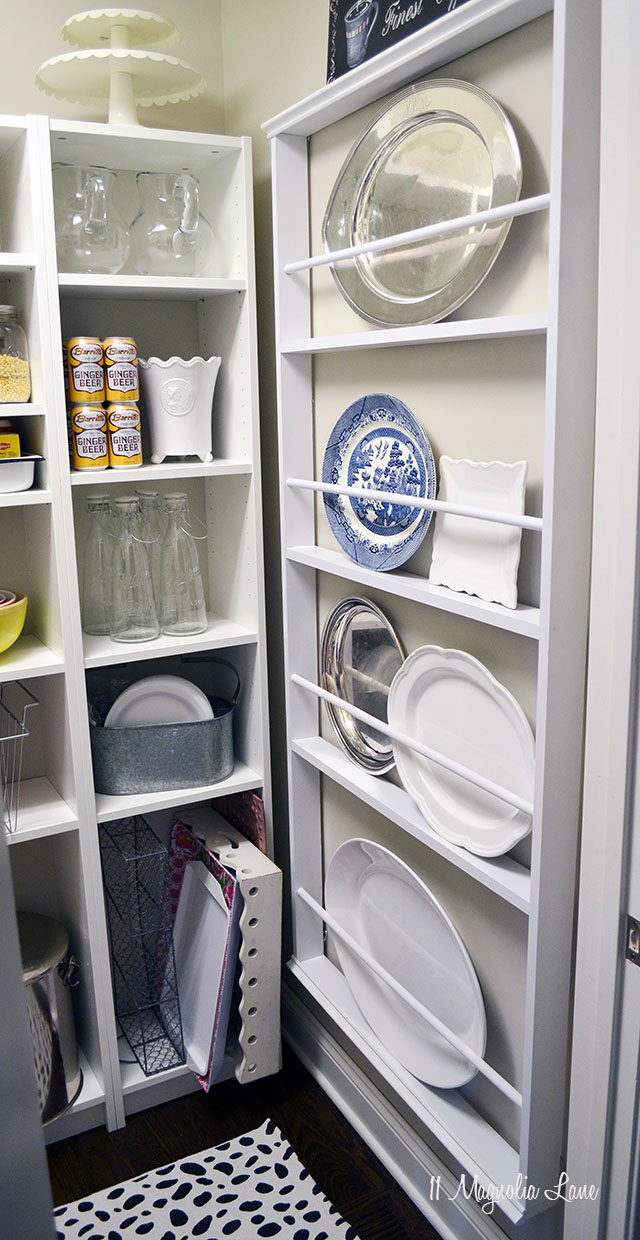
Seriously, I have always wanted a huge plate rack in my pantry. Well, this is about as huge as it gets–it takes up an entire wall in the pantry that I’ve created out of an empty closet in our new house. You can read all about my big plans for our garage entryway {here}; the pantry is part of that along with some built in bookshelves and a closet-turned-mudroom like Amy’s.
This would also work on a wall in the kitchen…the best part is that you can customize it to fit any size room or wall. And it’s inexpensive. My BIG old rack (5.5′ tall and 32″ wide) cost under $40. Here’s how I built it:
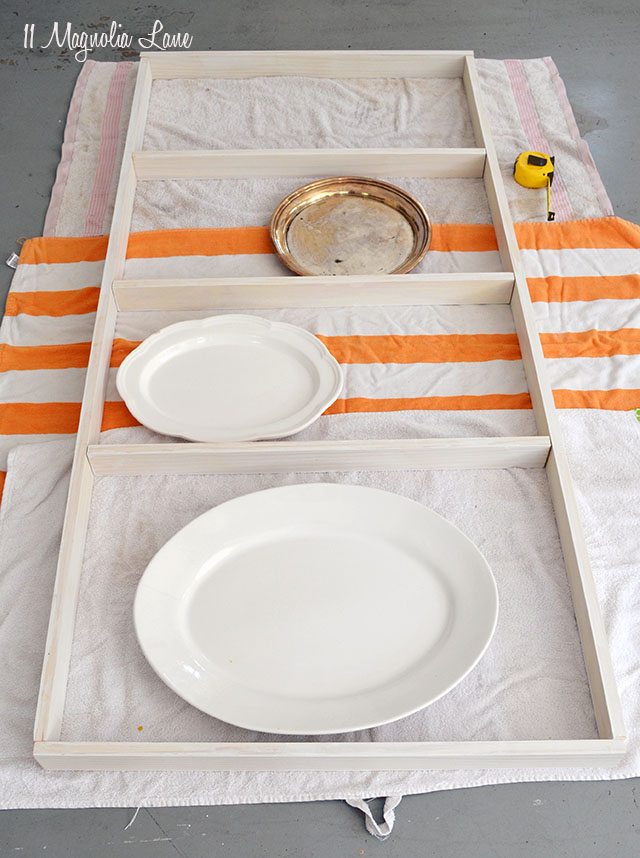
While you’re measuring, plan out how many shelves you want your rack to have. I have a HUGE platter that I wanted on the bottom shelf, so I figured that into my measurements.
2. Go to the store and spend hours wandering the trim and lumber aisles aimlessly. Seriously–tell me I’m not the only one!
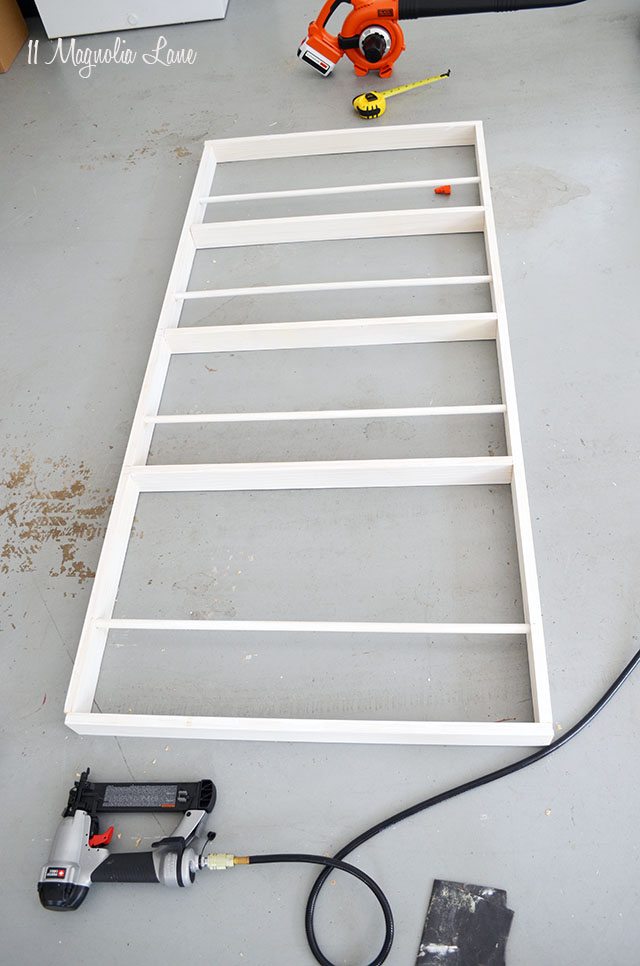
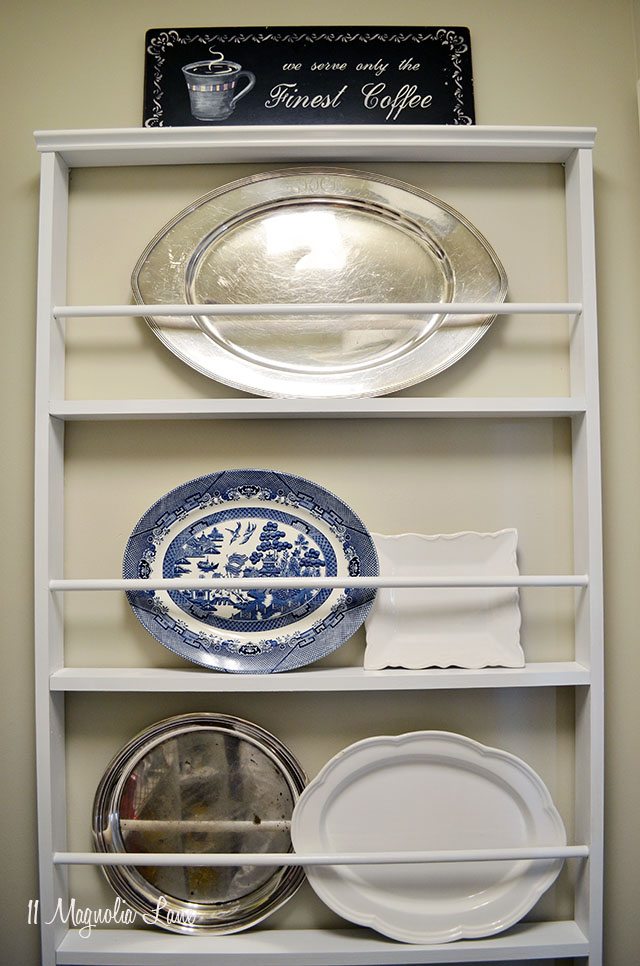
This is what you’re buying lumber to make: a box with shelves, and then dowels (or trim) in front of each shelf. I’ll jump ahead a step to show you:
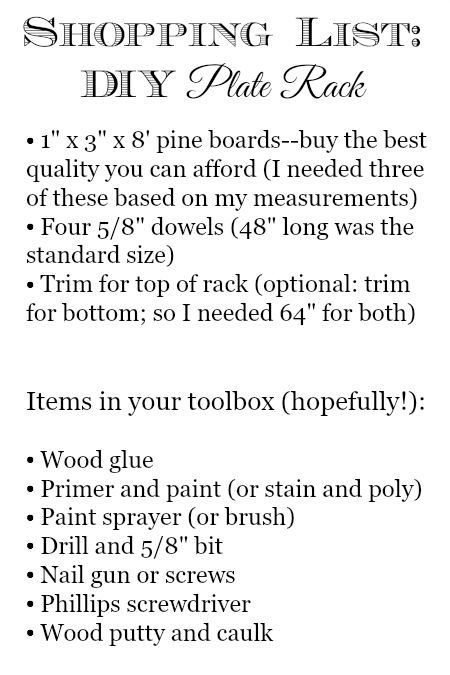
Here’s the shopping list for a rack of my size:
4. I primed all the pieces before I assembled the rack, using a brush (in hindsight I would assemble it first and then spray the primer as well as the paint because painting dowels with a brush is a pain!). Tip: dowels or pieces of trim, if they’re not too long, can be placed inside a tall jar or bottle while they dry.
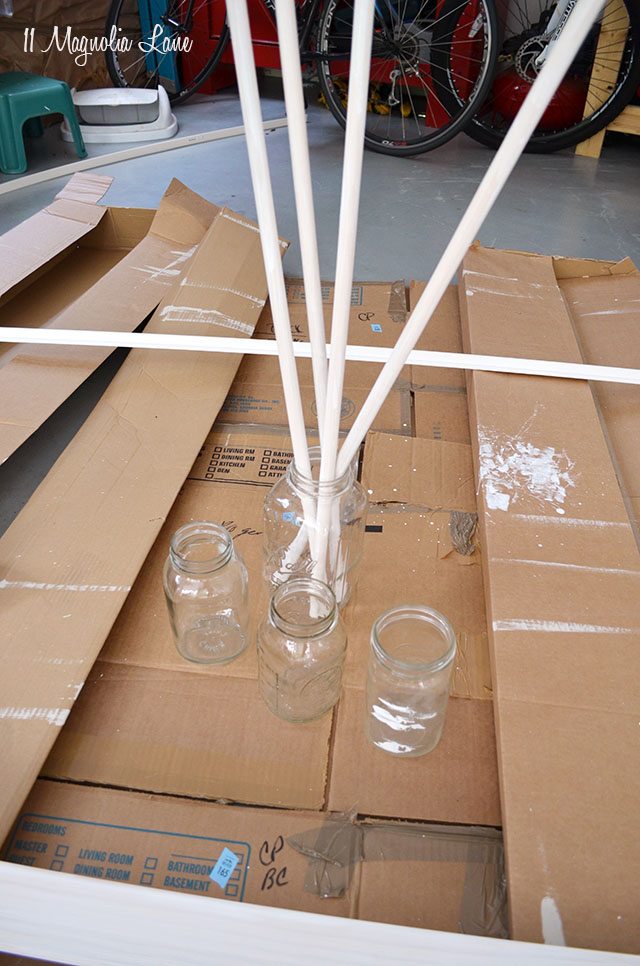
5. Assemble your rack, making sure that it’s square, but don’t nail or glue anything yet. Measure 1/3 of the way up each shelf to determine the right placement for the dowel (my top 3 shelves are about 15″ tall so the dowel is 5″ up from the bottom of the shelf) and drill a hole about 1/4″ deep for the dowels. This is a BIG drill bit, so go slowly!
6. Now, starting on one side, use wood glue(I used this one) and your nail gun to put the frame together. You can put everything together except for one of the long sides. It might help to have another set of hands to hold the dowels in place until that other side is in place! A nail gun makes this job so quick and easy (this is my exact one and I love it), but if you don’t have one you can certainly use nails or wood screws to hold everything together. I don’t recommend only glue for a rack of this size; you want it to be sturdy. (Tip: If you would rather nail or glue trim to the front of the shelves instead of using a dowel, check out this great tutorial from our friends from At the Picket Fence.)
7. Cut the trim and nail it to the top of the frame. I also trimmed the bottom; that’s optional.
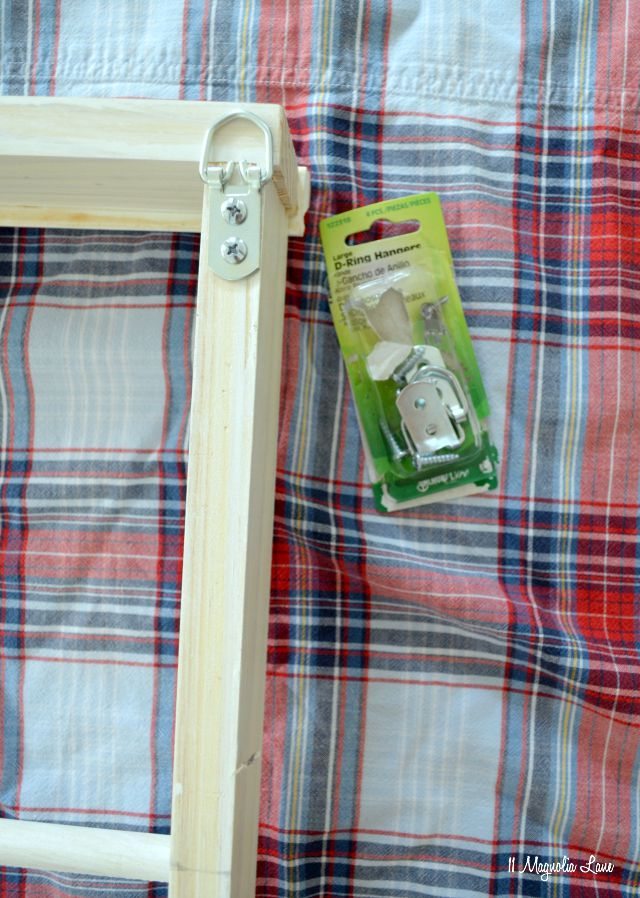
8. Screw the D-rings to the back at the top and the bottom of the rack (I used four total). You could also use sawtooth hangers.
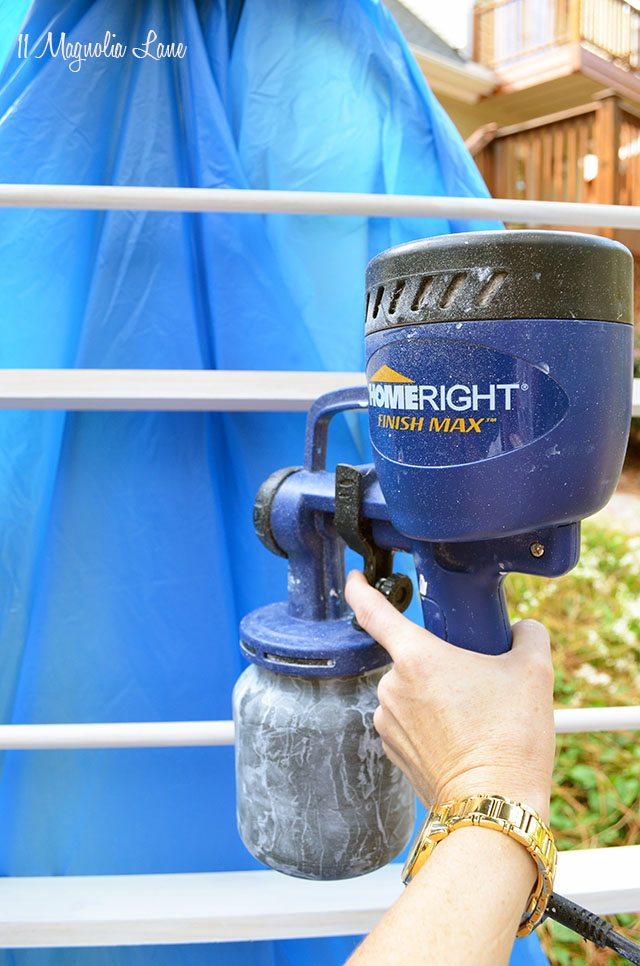
9. Now the fun stuff–painting it with the FinishMax Fine Finish Sprayer. You can also spray stain with it (I debated for quite a while over painting vs. staining). It gives you an absolutely flawless finish and is simple to use–and just as importantly, easy to clean. If you don’t have the budget for a paint sprayer, a couple of cans of spray paint work just fine, too.
10. Hang your rack on the wall and have fun styling it with platters–always the best part of any project!
Other posts in this series:
Plans for an Organized Entryway
Progress in My Garage Entryway: Paint and a Striped Wall
How to Paint Horizontal Stripes on a Wall
Tressa H says
I would love to spray our mudroom/playroom area. There is exposed brick, and I think a sprayer would give it the best finish!
Christa says
Looks great! I’m a little intimidated by paint sprayers and the clean up, but I’d love to give it a try!
Stephanie says
I’m pinning this as a project for the next long weekend. Looks great!
Debbie @ Refresh Restyle says
Oh I love this! I want one! Such a great project!
Debbie
Jill Nelson says
I would like to refinish my kitchen table…it has turned legs which are no fun to paint by hand!
Moye' says
I love it! I’ve been drooling over this sprayer for a while, but it’s not in the budget right now. I would love to win. Thanks for the opportunity!
Linda says
Love it, need it, want it.
Karen C says
I love the plate rack and your house. Great job!
Joyce says
So, there is no groove in the shelf to sort of stabilize the platters?
What would you think of using dowels as the shelf bottom (to create grooves to keep the platters stable)?
Mary ann says
Lots of Reno projects for new house!
Sandi Anderson says
Love it girl! Looks awesome!
Donna Marie says
This is a great project—but you should wear shoes in case of weary drills—hate to mess that beautiful mani !!!
mary ballerin says
bookcases, a wingback chair, deck, fence ….
Heidi says
I want to paint my kitchen cupboards and this would make the job easier!
kathy b says
Since my hubs calls me the spray paint queen, I would use this on EVERYTHING! Color choices would expand dramatically! Right now we are putting the house up for sale so every room could use some love!
Susan M. says
First on the list is an antique children’s secretary – painting the cubbies by hand is not an option! Thanks for the opportunity – my fingers are crossed!
Shirley@Housepitality Designs says
LOVE the plate rack Christy!!!…I have 4 porch rockers and tables in dire need of painting!!!..great giveaway!
Cassie says
i’d use this to paint our garage interior
Bette O says
Thank you for the opportunity.
Meaghan B. says
I would love to tackle lots of projects with this paint sprayer! I have a pair of Adirondack chairs that would be very grateful for an updated look!
gina says
Oh my goodness, what a great giveaway! There are so many, many projects crying out for paint in our home. It would simplify things to have a sprayer. Thanks for offering the giveaway:)
Karen A. says
Would love to put the spray painter to use on numerous projects! Thanks for the opportunity!
Tina W says
I have some new (to us) bathroom cabinets that I would just love to paint a bright orange!
SONJA HANSEN says
I will paint a 60 year old dresser and repurpose as a buffet.
Lauren R. says
Your plate rack looks great!
DJ says
I would love to stain my back deck.
Kathy Harris says
Can you tell me where you found the pretty white wooden tray with scalloped edge and holes? I am making 2 of these plate racks (my window will be between them) for my beach duplex. Thank you so much for your wonderful tutorial (the best I have found)! ~Kathy
Christy says
So glad the tutorial is helpful! The tray is an older one from Southern Living at Home. I’m not sure if they’re still in business, so maybe try eBay? I’ve found a bunch of their items on there in the past.
Good luck with the beach house–how fun!
Christy
Sami Swan Thompson says
WONDERFUL WEBSITE!
I have to thank you for creating tutorials that are fun, clear, and easy to understand.
Lately, I’ve watched a LOT of tutorials that left my brain in a muddle, so I was beginning to think that perhaps (since I’m disabled & older) it was time for me to hang it up and head for the nearest rocking chair. Thank you for changing my mind about this – and a special thank you for the inspiration that flows throughout your site.
Christy says
Hi, Sami–
What a lovely comment–thank you so very much! I have a hard time following directions via video and always have to keep things simple, so maybe that’s why mine seemed clearer than others you’ve watched. I’m so glad you’re finding inspiration on our blog–we’re thankful for you!
Beth Bird says
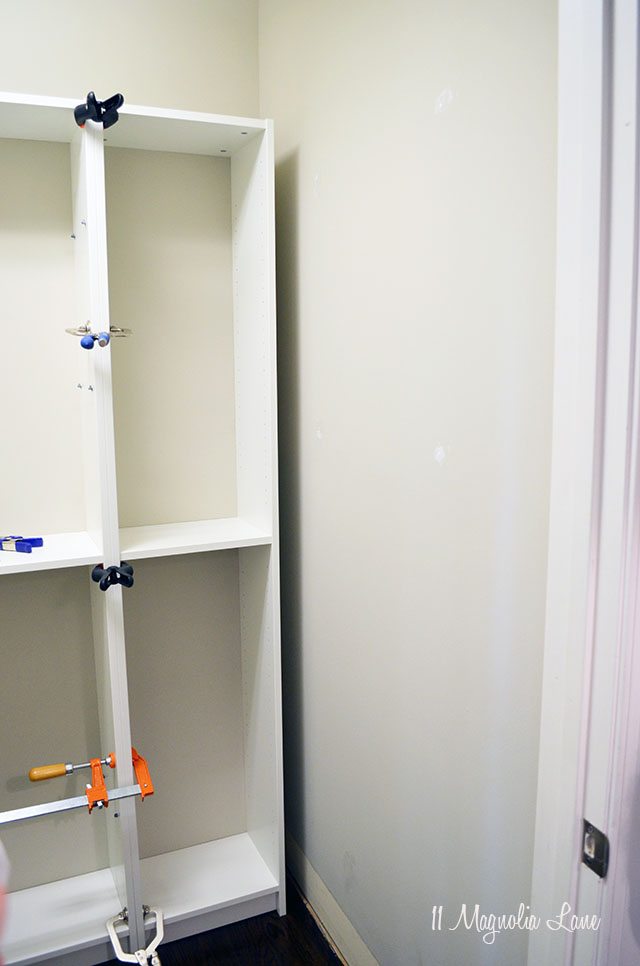
Hi! I just saw this and I’m wondering what the cabinets on the left are made from? I see your plate rack and it is quite pretty too. The cabinet on the left looks like the Ikea Lillangen that I have. If so how did you set it up for storage? I would love to do that with mine since I don’t need them for laundry anymore.
Christy says
Hey, Beth–
They’re the IKEA Billy bookshelves. You can see the rest of the pantry here {https://www.11magnolialane.com/2015/09/29/organized-pantry-with-built-in-shelving/} to see how I used them.
Hope that helps–thanks for writing!