• Skip to primary navigation
  • Skip to main content
  • Skip to primary sidebar
  • Skip to footer
  • MEET CHRISTY & AMY
    • IF YOU’RE NEW HERE…
    • WORK WITH US
    • 11 MAGNOLIA LANE 101
    • DISCLOSURE + PRIVACY (the fine print)
    • BEST OF 11 MAGNOLIA LANE
  • TOUR OUR HOMES
    • TOUR OUR HOMES
    • CHRISTY’S MAGNOLIA COTTAGE
    • CHRISTY’S MCC HOUSE
    • Christy’s Stuttgart Flat
    • Amy’s Virginia Craftsman Home Tour
    • AMY’S VIRGINIA CRAFTSMAN Building Process
    • HOLIDAY HOME TOUR SERIES
  • CELEBRATIONS
    • EVENTS + ENTERTAINING
    • GIFTS
    • HOLIDAYS
    • RECIPES
  • HOME
    • CLEANING
    • DECORATING
    • ORGANIZING
    • ROOM BY ROOM
      • BATHROOMS
      • BEDROOMS
      • CLOSETS
      • CRAFT ROOMS + OFFICES
      • DINING ROOMS
      • KIDS’ ROOMS
      • KITCHENS
      • LAUNDRY ROOMS
      • LIVING + GREAT ROOMS
      • OTHER SPACES
      • PANTRIES
      • PLAYROOMS + BONUS ROOMS
      • PORCHES + OUTDOOR SPACES
    • TIPS
  • SHOP
    • SHOP OUR INSTAGRAM
    • SHOP OUR AMAZON STORE
    • FRIDAY FAVORITE FINDS
  • PROJECTS
    • CRAFTS
    • DIY PROJECTS + TUTORIALS
    • FURNITURE
    • PRINTABLES
    • WINDOWS, DOORS, + WALLS
  • LIFE
    • FRIDAY FREE FOR ALL
    • HEALTH
    • SIMPLY ON SUNDAY
  • TRAVEL
  • CONTACT
    • Email
    • Facebook
    • Instagram
    • Pinterest

11 Magnolia Lane

Sharing our easy DIYs, decorating, entertaining and more!

How to Remove Vinyl from Walls and Doors

April 8, 2013 By Christy 9 Comments

This Post Contains Affiliate Links

8663 shares
  • 8

IMG_2515Remember for awhile there, when everyone was putting big, long sayings on their walls?  Bible verses and cute phrases like “Always Kiss Me Goodnight,” and “Happily Ever After?”  I had one on my kids’ bathroom wall reminding them to Brush, Rinse, Flush, Floss, and a few other things–now THAT was useful!  Anyway, I think there’s still a place for vinyl in the home, and trust me, I use lots of it still (there’s an enormous three-initial monogram on the wall above my bed, for example), but if you’re wanting to take your vinyl down in some areas to keep your decor cutting-edge :), then you may be wondering if it’s really as removable as we were promised that it is!

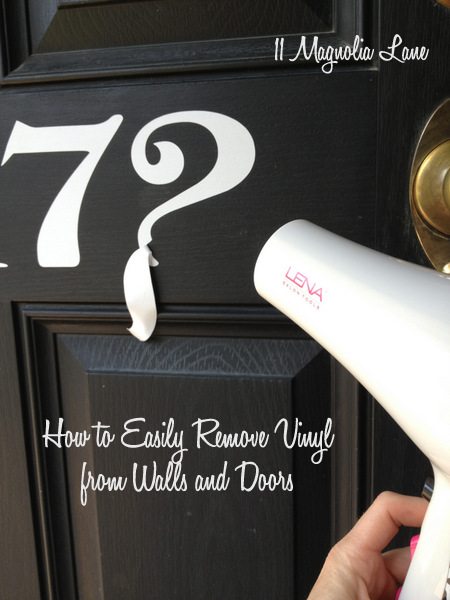
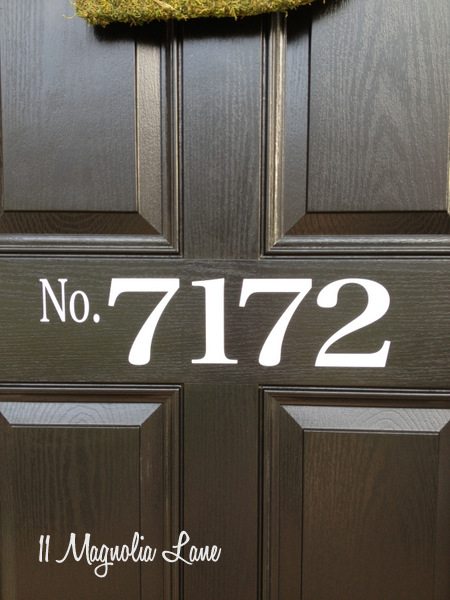
I’ve been waiting for warm enough weather to paint our front door.  Our house is on the rental market, as most of you guys know, and an immaculate front entry is key to curb appeal.  First step, though, was to remove my cute vinyl house numbers from the door:

Front door at 11 Magnolia Lane


Sadly, vinyl is removable, but not reusable, so don’t think you’re going to be able to move it somewhere else or put it back up later.

Using a hair dryer set to medium heat, warm the edge of the vinyl until a plastic spatula or putty knife can lift up the edge.  If you don’t have a putty knife, maybe a credit card, or even a razor blade?  Be careful that you don’t scratch the wall with the razor blade, though!

Use a hair dryer to warm the vinyl

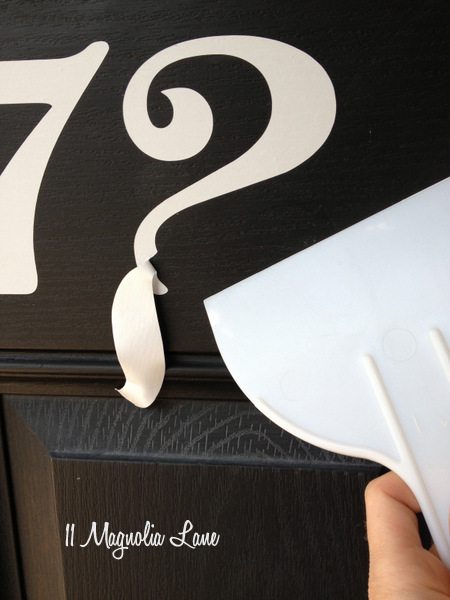
Working SLOWLY, peel the vinyl away.  If it starts to resist, just shoot it with the hair dryer!  Be patient and remember that it’s better to go slowly than to have to spackle a wall!


IMG_2516

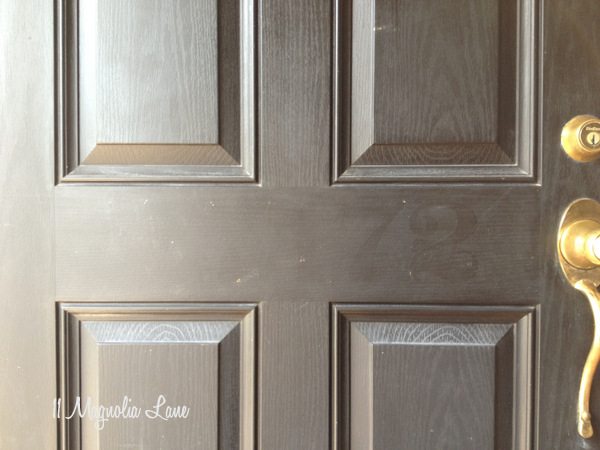
I was favorably impressed with how my door looked when the vinyl was off.  You can barely see the outline of the numbers on the right side of the door, but after I wiped it down, I realized that was dirt and/or pollen, and not adhesive residue.  I had planned to lightly sand any glue away before I painted, but it wasn’t necessary.

Door after vinyl is removed.

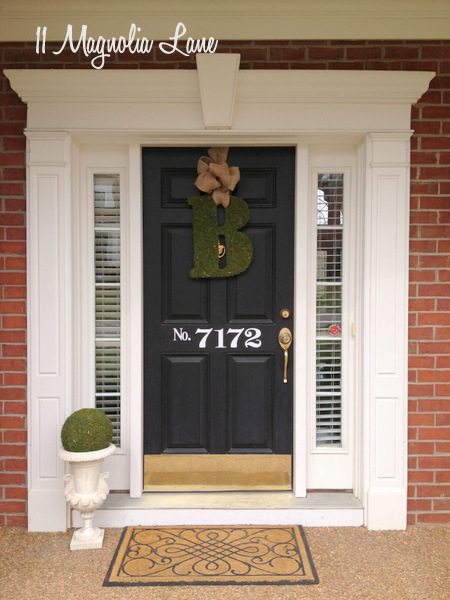
I forgot to snap a picture of the door after I painted and before I reapplied the vinyl, but it looked perfect.  I could easily have left the door vinyl-free, and no trace would have remained.  But, since I loved those door numbers, I cut a new set and reapplied them.  Just a side note; the font is different.  I bought the original set before I got my vinyl cutter and while I like the original font better, this one is just fine for now!

IMG_2524

The bottom line is that the vinyl held up perfectly for almost two years, and then was easily removed without leaving a trace behind.   And while removal was slow and steady, it was also easy.  Two thumbs up!

Thanks for stopping by.

icon-facebook-1icon-instagram-1icon-mail-1icon-pinterest-1icon-twitter-1

YOU MIGHT ALSO LIKE THESE POSTS... :

How to Build a Wall Mounted Plate Rack
Entryway Update: Built In Bookshelves
Back to Basics: How to Apply a Vinyl Decal
Tutorial: How to Paint Horizontal Stripes On...

Filed Under: DIY/Projects/Tutorials Tagged With: how to, remove, vinyl

Reader Interactions

Comments

  1. CatellyaRose says

    April 8, 2013 at 3:11 pm

    That’s good info. I never would have thought of that in a million years.

    Reply
  2. Debbie says

    April 8, 2013 at 6:22 pm

    Love your tip! I have been admiring your front door and wondered if you miss having a storm door. I also have a mostly white-trimmed front door so i would love the contrast of the darker wood door next to the white but my husband loves to open the main door and let the light in. Just curious about your opinion? Thanks.

    Reply
    • Christy says

      April 15, 2013 at 9:37 am

      Debbie, I have to admit that I have never had a storm door, so I guess I haven’t had an opportunity to miss what I don’t have! If I could choose any door at all, though, I’d pick one with glass panels (like in Amy’s house on the right sidebar). That way the light would still come through.

      Reply
  3. shirley@housepitality designs says

    April 9, 2013 at 9:47 pm

    Great tip and love, love your door..!! Have a wonderful week!

    Reply
  4. MARY CHANONA says

    October 6, 2017 at 6:25 pm

    Facepalm! Duh! I WAS WRACKING MY BRAIN ON HOW TO REMOVE MINE FROM MY RENTAL’S DOOR. didn’t EVEN THINK OF THAT! tHANKS!

    Reply
    • Christy says

      October 7, 2017 at 6:33 pm

      The reason I wrote the post was that it’s obvious but only once you think about it. I had a lightbulb moment the first time I thought of it, too. Glad it was helpful for you!
      Christy

      Reply
  5. Katrina Blake says

    February 20, 2018 at 10:05 am

    Vinyl is removable & REUSABLE. Using a blow dryer, remove one symbol at a time. While vinyl is still warm, place it where you want it and reheat with blow dryer while smoothing out. If the vinyl has cooled, reheat it with the blow dryer before placing it where you want.

    Reply
    • Christy says

      February 22, 2018 at 8:11 pm

      Well, technically you’re correct, if you’ve got a very simple design that doesn’t require the spacing that transfer tape can provide, you’ve got plenty of time on your hands, and you didn’t use permanent/outdoor vinyl. That being said, the only times I remove vinyl are 1. if it’s faded/peeling or 2. I’m sick of it, so in cases like that, I’m just going to peel it off and cut something new!
      Thanks for your comment–
      Christy

      Reply
  6. Elliscia says

    July 24, 2018 at 3:16 pm

    HI! Will this strategy work with permanent vinyl?

    Reply

Leave a Reply Cancel reply

Your email address will not be published. Required fields are marked *

Recipe Rating


This site uses Akismet to reduce spam. Learn how your comment data is processed.

Primary Sidebar

Lowest prices. Straight Teeth,

•Don’t Miss A Thing!!•

•Do You Know Jesus?•

•Featured In•

Holiday Gift Ideas

Footer

  • Email
  • Facebook
  • Instagram
  • Pinterest

Copyright © 2023 · 11 Magnolia Lane· Blog Design by Little Blue Deer
Privacy Policy

11 MAGNOLIA LANE IS A PARTICIPANT IN THE AMAZON SERVICES LLC ASSOCIATES PROGRAM, AN AFFILIATE ADVERTISING PROGRAM DESIGNED TO PROVIDE A MEANS FOR US TO EARN ADVERTISING FEES BY ADVERTISING AND LINKING TO AMAZON.COM AND AFFILIATED SITES. AS AN AMAZON ASSOCIATE, WE EARN FROM QUALIFYING PURCHASES. WE ALSO PARTICIPATE IN SEVERAL OTHER AFFILIATE PROGRAMS; THIS INCOME ALLOWS US TO MAINTAIN THE QUALITY OF YOUR USER EXPERIENCE AND KEEPS OUR CONTENT FREE. WHEN YOU PURCHASE THROUGH ANY OF OUR AFFILIATE LINKS, WE EARN A SMALL COMMISSION AND YOU DON’T PAY A CENT MORE THAN YOU WOULD OTHERWISE; THAT WOULD BE TACKY!   READ OUR FULL PRIVACY AND DISCLOSURE POLICY {HERE}.
  ©11 Magnolia Lane 2019. Unauthorized use and/or duplication of this material without express and written permission from this blog’s authors and/or owners is strictly prohibited. Please email us at admin@11magnolialane.com for more information.

  • MEET CHRISTY & AMY
    • IF YOU’RE NEW HERE…
    • WORK WITH US
    • 11 MAGNOLIA LANE 101
    • DISCLOSURE + PRIVACY (the fine print)
    • BEST OF 11 MAGNOLIA LANE
    • Back
  • TOUR OUR HOMES
    • TOUR OUR HOMES
    • CHRISTY’S MAGNOLIA COTTAGE
    • CHRISTY’S MCC HOUSE
    • AMY’S NEW HOME BUILD
    • HOLIDAY HOME TOUR SERIES
    • SPRING HOME TOUR SERIES
    • Back
  • CELEBRATIONS
    • EVENTS + ENTERTAINING
    • GIFTS
    • HOLIDAYS
    • RECIPES
    • Back
  • HOME
    • CLEANING
    • DECORATING
    • ORGANIZING
    • ROOM BY ROOM
      • BATHROOMS
      • BEDROOMS
      • CLOSETS
      • CRAFT ROOMS + OFFICES
      • DINING ROOMS
      • KIDS’ ROOMS
      • KITCHENS
      • LAUNDRY ROOMS
      • LIVING + GREAT ROOMS
      • OTHER SPACES
      • PANTRIES
      • PLAYROOMS + BONUS ROOMS
      • PORCHES + OUTDOOR SPACES
      • Back
    • TIPS
    • Back
  • SHOP
    • SHOP OUR INSTAGRAM
    • SHOP OUR AMAZON STORE
    • FRIDAY FAVORITE FINDS
    • 11 ML ETSY SHOP
    • 11ML ORGANIZING SHOP
    • Back
  • PROJECTS
    • CRAFTS
    • DIY PROJECTS + TUTORIALS
    • FURNITURE
    • PRINTABLES
    • WINDOWS, DOORS, + WALLS
    • Back
  • LIFE
    • FRIDAY FREE FOR ALL
    • HEALTH
    • SIMPLY ON SUNDAY
    • TRAVEL
    • Back
  • CONTACT
    • Email
    • Facebook
    • Instagram
    • Pinterest
8663 shares
  • 8