I showed a little bit of this faux shiplap wall in the first post about my teenage son’s room in our new house. If you follow us on Instagram then you saw that I encountered a bit of an issue with the wallpaper during this project. I’ll get to that little snafu in a minute but I wanted to follow up with a post about using this wallpaper since it is such an easy and affordable way to get the look of shiplap without tools or damage to the walls.
Shiplap is everywhere, thank you Joanna Gaines! I admit to liking how it looks, but even in a boy’s room I didn’t want to commit to that large of a project, or create something so permanent on the walls. I like to change my decor around (you might have noticed?! ?) and as “IN” as shiplap is now, so were avocado appliances once…am I right? So, a faux shiplap wall, namely in the form of one made of peel and stick wallpaper seemed like a great (but still temporary) option to me.
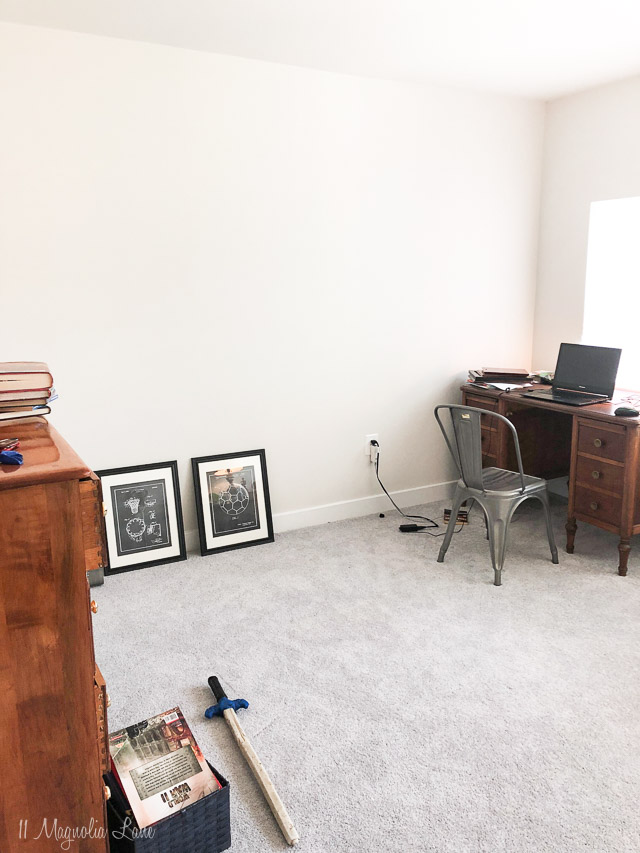
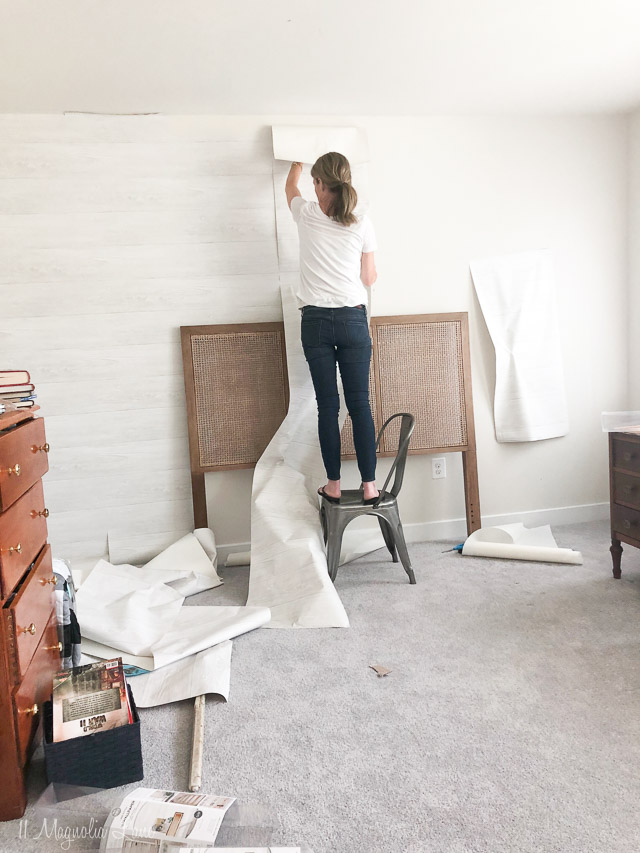
This is what his room looked like when I started. It was very plain jane, that is the wall that would be behind the bed that I wanted to do something interesting with, so I decided it couldn’t hurt to give the peel and stick paper a try.
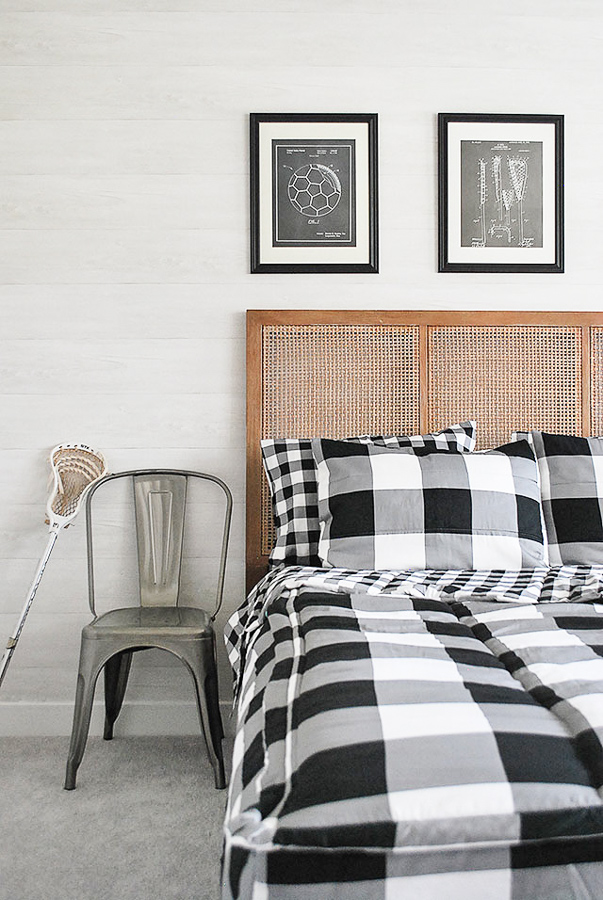
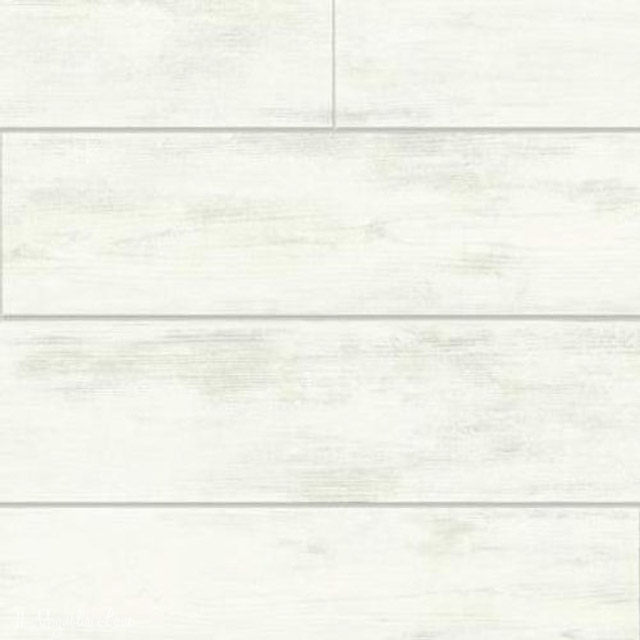
To start with, below is the wallpaper I used. There are many options for colors and patterns available, but I wanted to be sure what I used had a whitish/gray background. I am so happy with the textured cane headboard we are using in his room, and I didn’t want to detract from it by using too busy of a pattern on the wall behind it. In hindsight, I think I should have worked with the Magnolia Home brand of wallpaper, it might have saved me some trouble in the end, but instead I purchased the one below.
I promise this is a super easy project, you don’t even need wallpaper hanging skills. I didn’t even use one of those fancy scrapers to remove the air bubbles (though in hindsight that might have been a little helpful), I just used a sharp pair of scissors and smoothed with my hands. The hardest part about using this paper is figuring out the repeat. You can’t just stick it on the wall as it comes off the roll, you have to very carefully match up the lines of the “faux” boards. Eventually, I got the hang of a pattern which made it easier, but it took a bit of extra time to make sure I was lining the grain of the wood up correctly as I put up each sheet. Once matched up it is hard to tell where one sheet of paper ends and the next one begins.

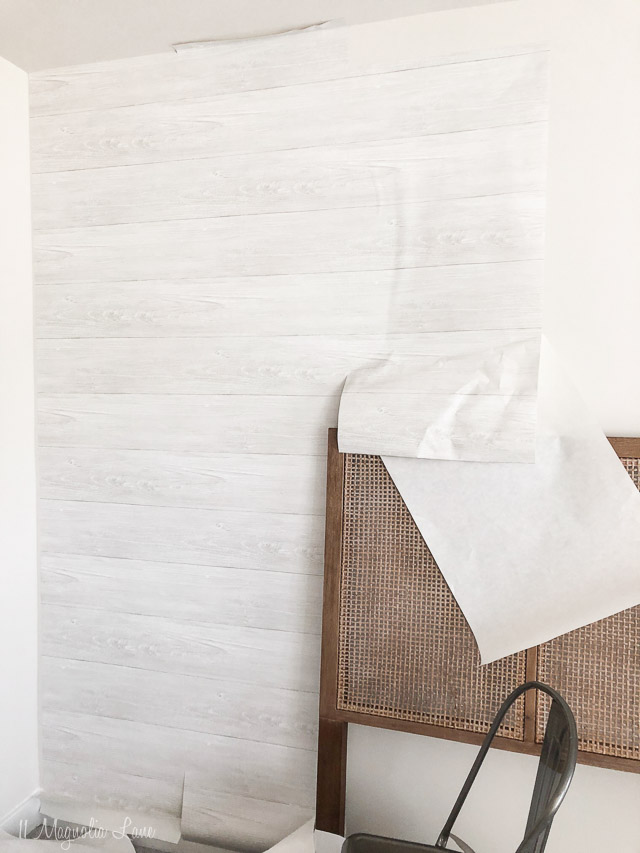
Once I got the majority of the paper hung and started seeing the pattern, I was pretty impressed with how good it looked. Most people who see it actually can’t believe that it is just wallpaper! Standing from the other side of the room, it really looks like the wall is made from shiplap style boards.
It took me just a few hours to get the wall done, it wasn’t until I went to open the third of the three rolls of paper I had purchased to complete the final section when I discovered I had a problem. I should note that I knew I was cutting it close on the amount of paper I ordered. I did not plan to put any paper behind the headboard or the bed to save money and time. We don’t plan to rearrange his furniture anytime soon, and if we ever do, by then I’ll probably want something totally different in his room anyway.

When I went to install the last piece, I kept looking at the paper, flipping it around trying to get it to match up. Finally, I had to admit that the third roll was similar but had a much whiter background than the rest I’d already put up. I examined the boxes and they were exactly the same style and brand. However, I found on the box where it mentioned lot numbers, I had two boxes from Lot 8 and one from Lot 6. Apparently, there is that much of a difference. I haven’t been able to find a way to contact the seller directly to see if I can order another box from Lot 8. This was a little frustrating, to say the least. So, if you tackle this project, be sure all your boxes are from the same “lot”, lesson learned.
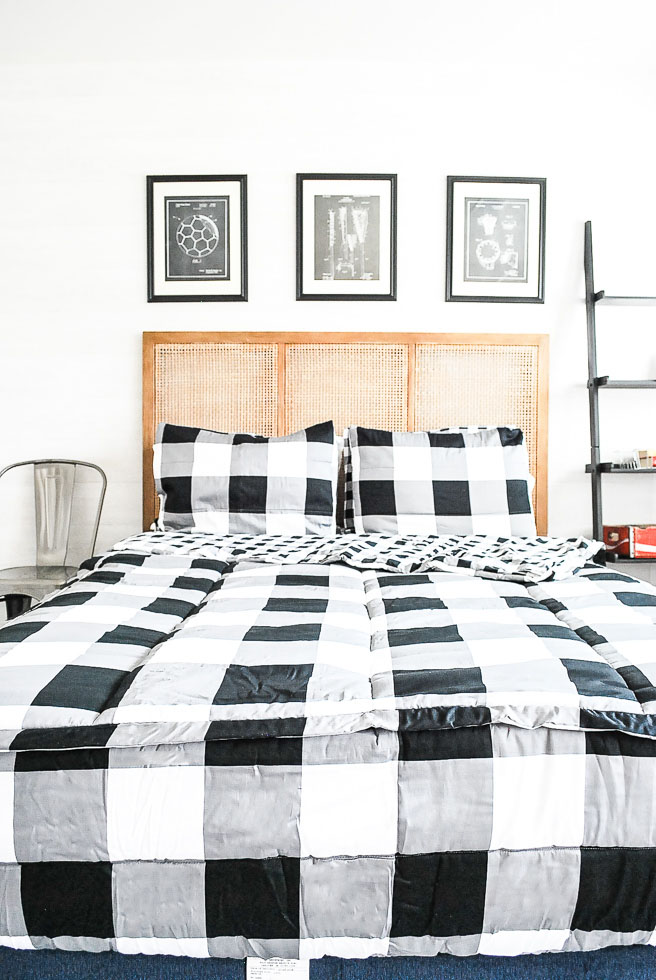
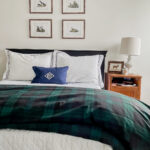
In the meantime, we have just let the wall be as it is, perfect or not. I admit if this was in a public space of my home, I’d probably have sourced more immediately but my 13-year-old son and his friends definitely do not care or even notice the lighter section. He’s just happy to have his room done and to have a big comfortable bed to sleep in. His bedding is from Beddy’s, if you missed the first post, I can’t tell you what a great solution this is for a BOY! I really love it, I think he does too.

Hopefully, once I get this last wallpaper detail figured out, I will do a final post with better pictures of his room including the rest of the space, like the window nook where the desk is. For now, if you are curious about any sources I have them listed below.

XO,

Our posts contain affiliate links. If you make a purchase after clicking on these links, we will earn a small commission, which helps to keep our content free. You don’t pay a cent more than you would otherwise, since that would be tacky! Please see our full disclosure policy here.