Today I wanted to share with you an easy holiday DIY project. We’ve definitely gotten away from blogging about projects in favor of just showing the final result, so I thought I’d take a step backward today and show off how I made this garland that I hung on the arch in our hallway this holiday season.
This also means you get sneak peek at our Christmas Tree, I’ll be back tomorrow with our full living room tour (update: see it all here) but in the meantime I wanted to go a bit more in depth on how I created the garland. It was so simple to make, and I think looks almost as nice as the one that inspired me.
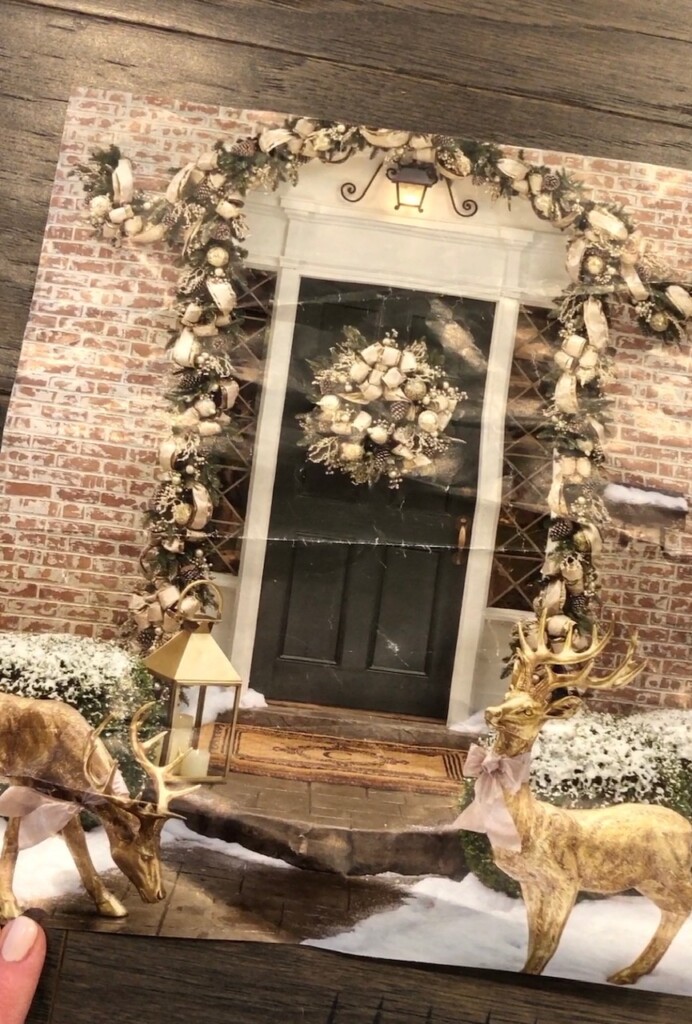
I saw this pretty outdoor decor (above) in the Frontgate catalog and I really loved how it looked. I thought twice about ordering it once I saw the price tag (the garland, while beautiful, was over $300) and so I decided it couldn’t be too hard to recreate this look for our home without spending nearly that much.
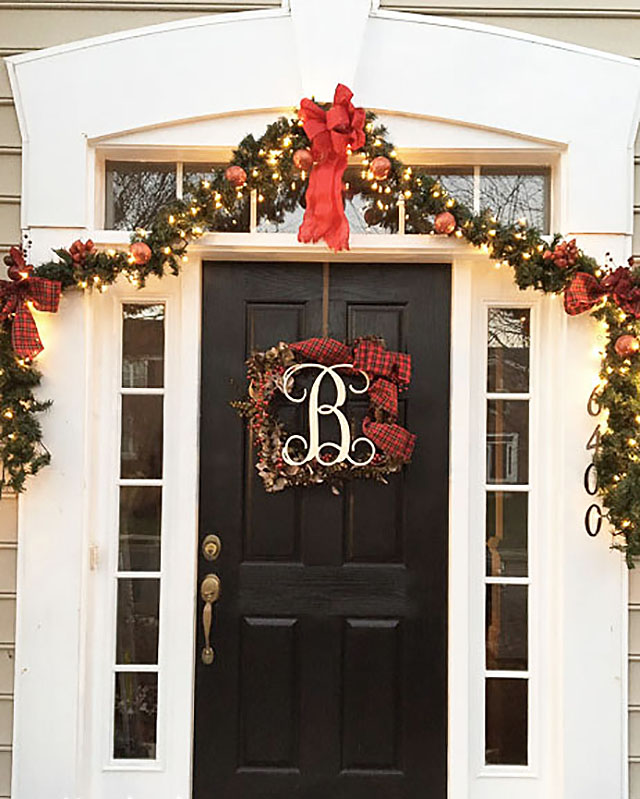
We have had this basic, very inexpensive garland for years, I jazzed it up a few years ago with some traditional red plaid and some red ornaments (like above) but then I stopped using it and it was stuck in a bin for a few years. I figured it would work well for this project so I dragged it out, re-wrapped the white lights, and removed what was left of the red decor and used it again as the base for this year’s look.
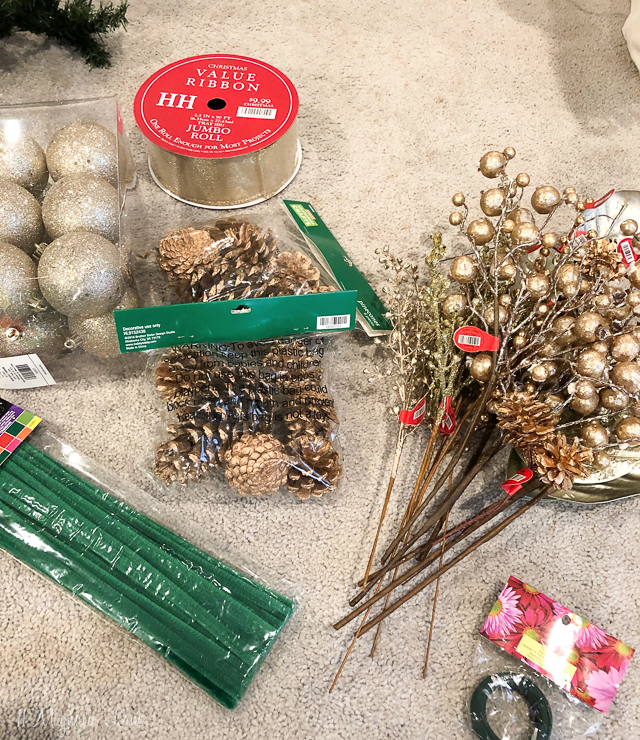
I picked up some supplies at Hobby Lobby, mostly gold accents like magnolia leaves, gold berries, gold pine cones etc. All in all, I probably spent about $40 on all the picks and the gold ribbon. Here are some sources for supplies: (keep in mind how much length you need for your entire garland, you might need to order two base garlands).
Another lighted Garland Option
Gold Leaf Garland (I didn’t use this, but it would be very pretty)

I spread the garland out on our floor and started wiring the picks to it at even intervals. Then I added the ribbon, using a sheer gold 3″ wired ribbon. I did a combination of wrapping it around the garland, using shorter (approximately 1′) pieces tucked into the branches and also wired some loops together for more depth.
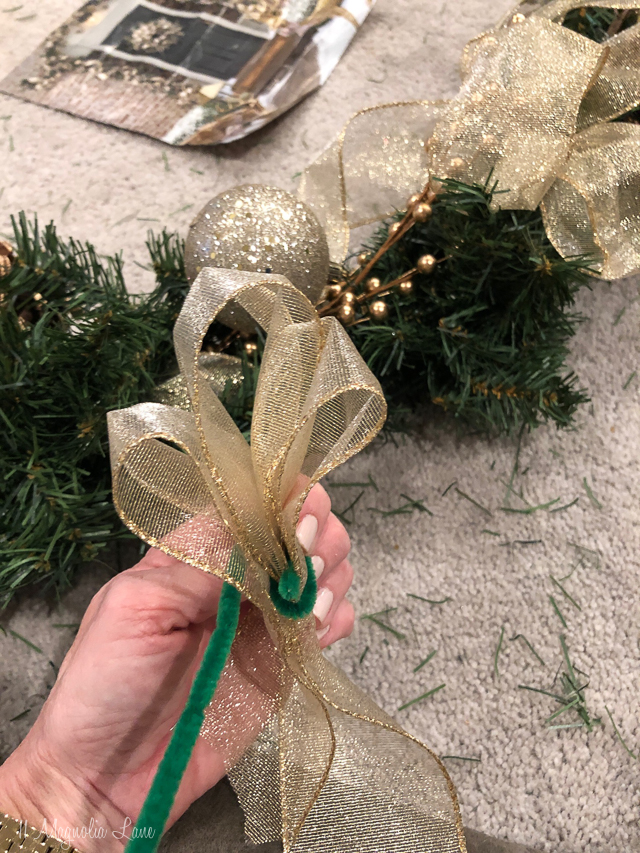
It is easy to do this, just use a floral wire (or I used green pipe cleaners though I don’t know that there was any advantage over the floral wire) to bind a few loops together, leaving the ribbon strands hanging on either side. When you tuck the ribbon in this style in the garland (hiding the wire/pipe cleaner in the tree), it gives it a fuller look. This is also a technique I have used with ribbon on a Christmas Tree–FYI, it is easy and looks really pretty nestled in the branches of a tree.
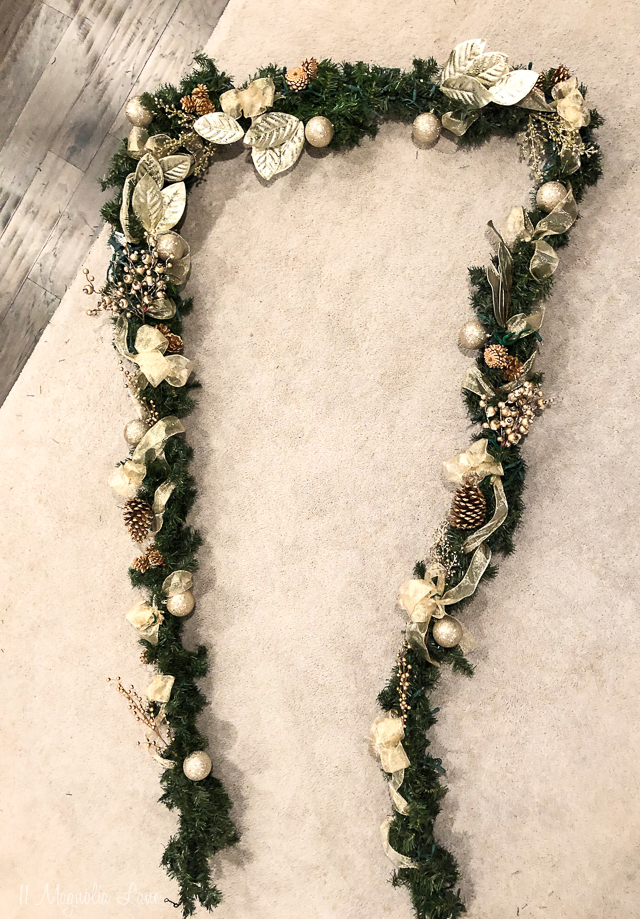
Here is how it looked when it was all done, it took about an hour and I did it while enjoying a Hallmark Christmas movie!
I will say that hanging it up was much more challenging, I did have to rework quite a bit of it once I finally got it up since it fell down multiple times while I was trying to hang it and some of the embellishments fell off. I tried command hooks, cup hooks, and finally had to get two larger, anchor hooks in the center of the arch to keep it hung up securely. The sides are attached to the wall with command hooks. There will be some spackling in our future but lets not worry about that now and just concentrate on how nicely it came out!
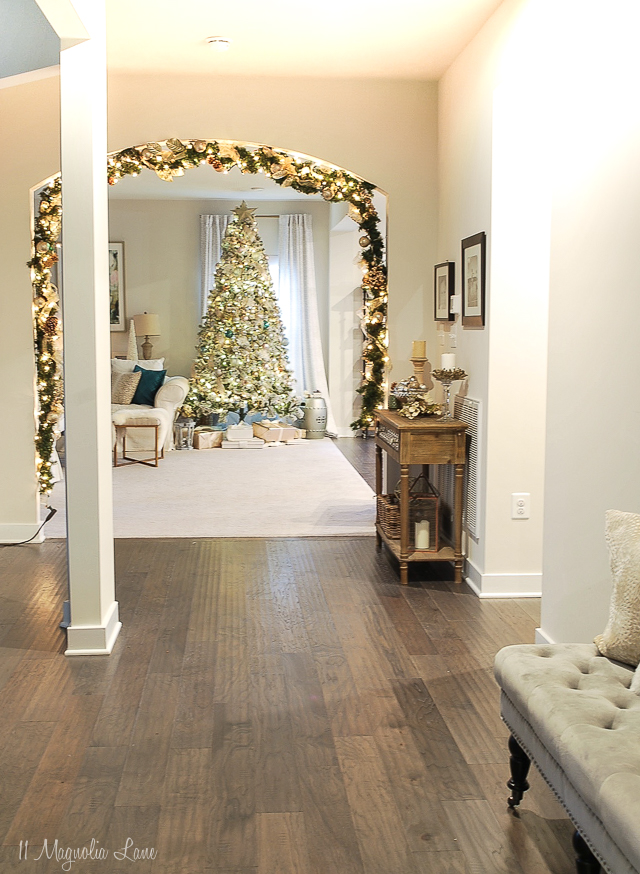
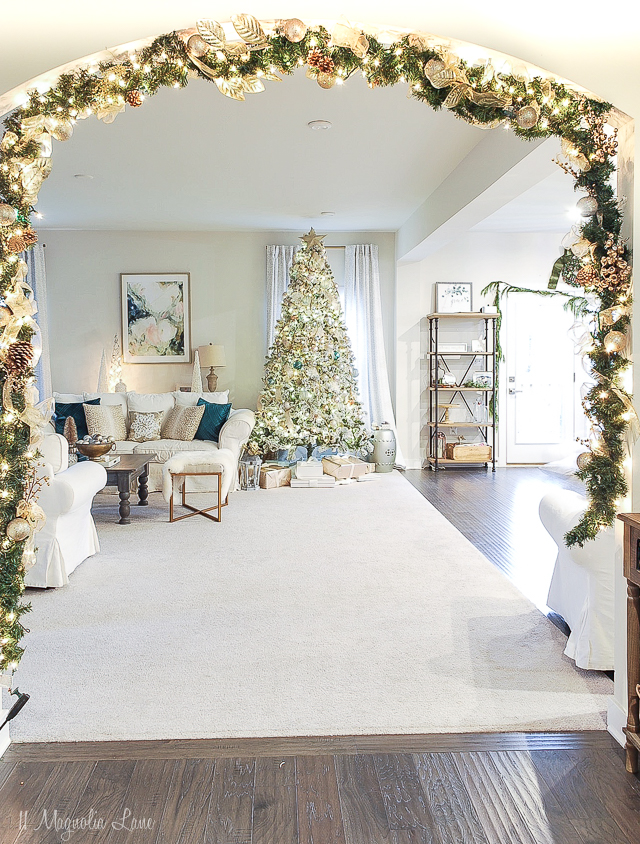
This is the view from near our front door, I like how it frames the tree as soon as you enter our home. I don’t know that we’ll always keep our tree in this same spot but I do really like the combination for this year.
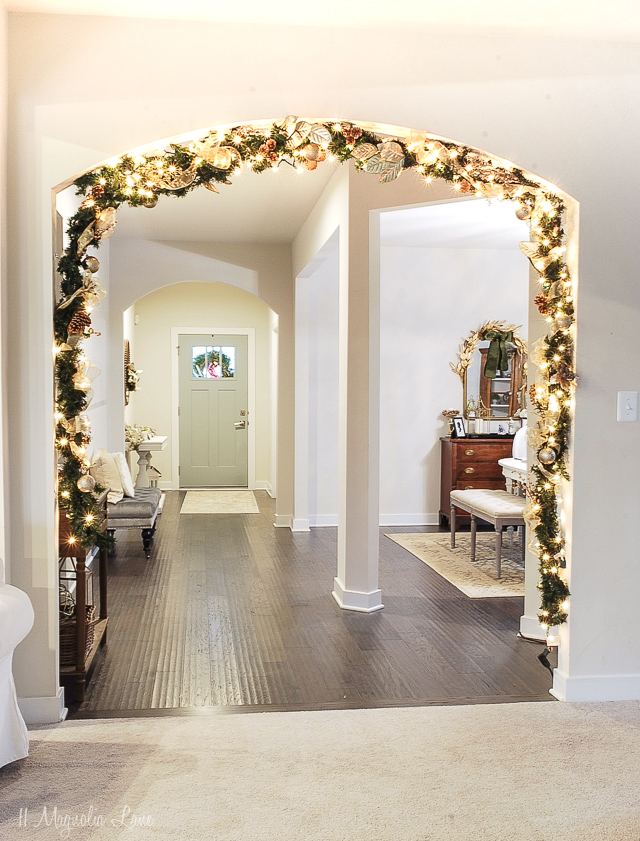
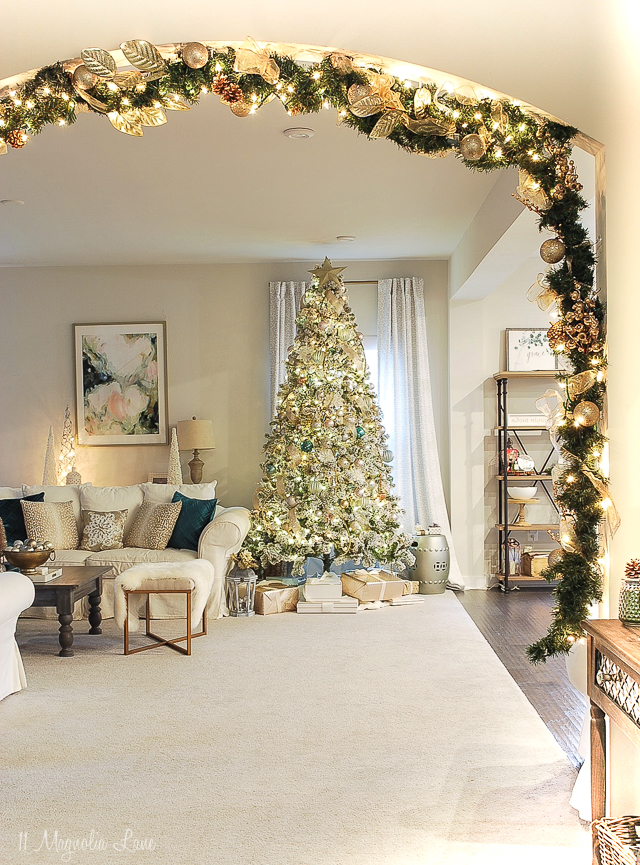
Here is looking back toward the door, and this is the view from our living room so I get to see this side all the time. I love it all lit up especially at night.
That was all it took, so stay tuned and I’ll see you tomorrow with tons more photos of this room!
See my Holiday Home Tour Here.
How is your holiday shopping going? Here are our Gift Guides full of ideas to make it easy to shop for everyone on your list!
Black Friday Gift Guide (and Cyber Monday)
XO,