Because I have my entire powder room ripped apart right now and it’s nowhere near ready to show you yet, today I’m sharing a project done by good friends who we met when we lived in Virginia Beach–Steve and Robyn. Despite several moves (all on our side 🙂 ) our families have remained close, and most recently Robyn visited us so that we could run the Country Music Half Marathon together. Or, more accurately, we both were running the same course on the same morning, but she managed to finish it in record time and I just managed to finish!
Here we are post-race, with the gorgeous Nashville skyline behind us:

And because she’ll probably be annoyed that I shared a photo of her looking less than her usual glamorous best, here we are the same night (after blissful showers and a big nap!) enjoying a post-run margarita:
But I digress, because we’re talking about stairs here, and not margaritas, right? That’s a shame…
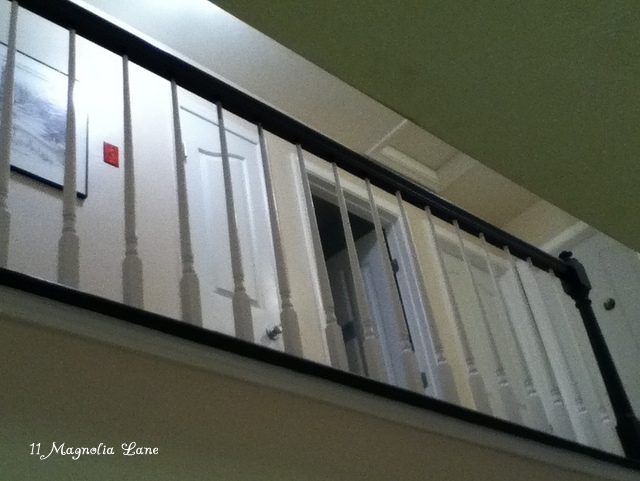
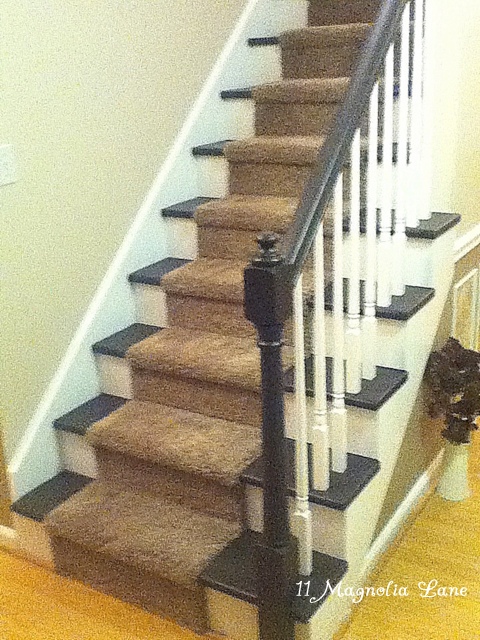
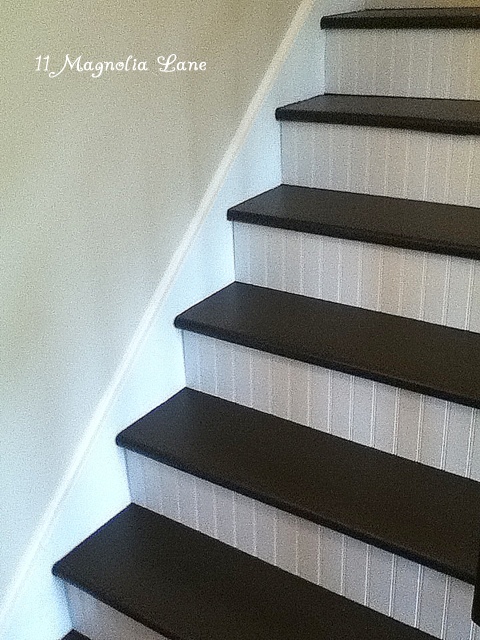
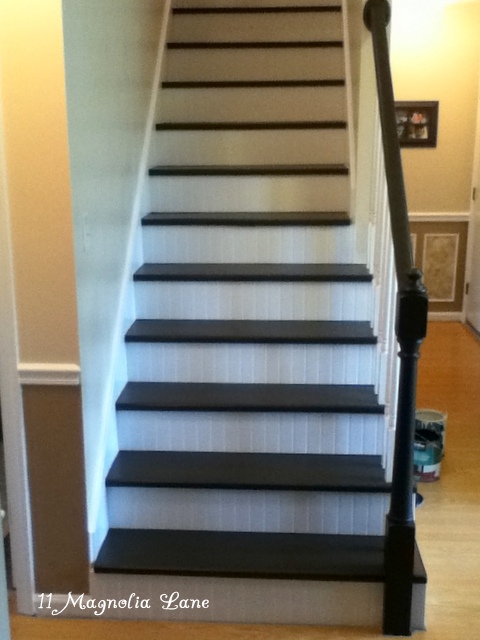
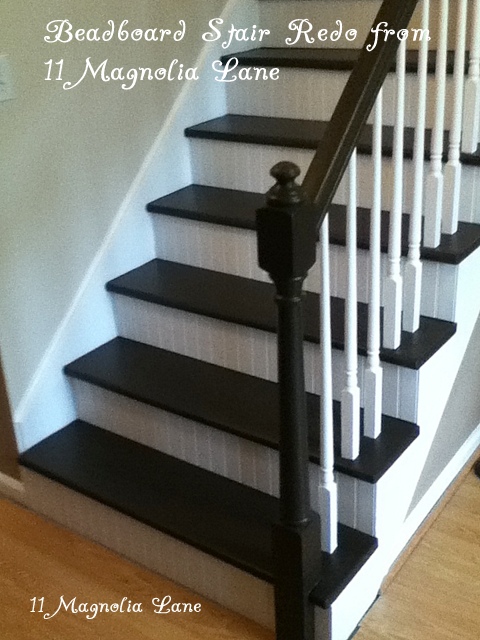
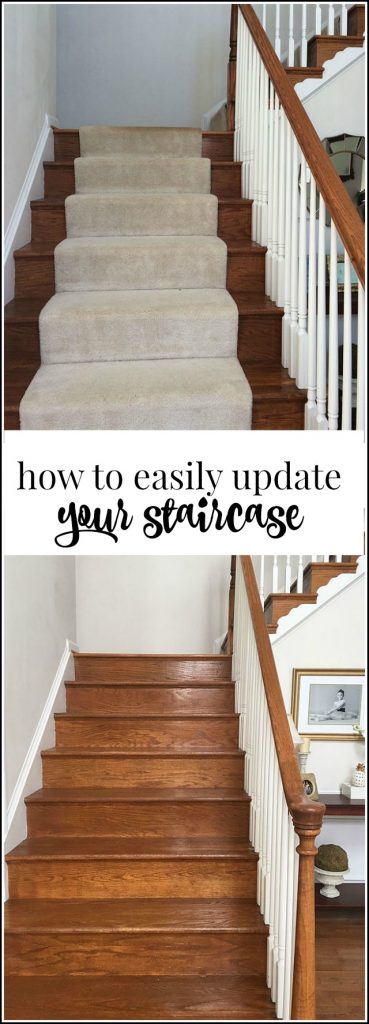
Steve and Robyn decided to get new carpet in their house, and as so often happens, one change led to several must-do projects. As they ripped the old carpet off their stairs (they were completely covered in carpet although I don’t have a before picture), they realized that they wanted to go with a different look. I had sent Robyn a blog post written by Miriam at Prudent Projects (read it HERE), and it gave them some inspiration to get to work on their stairs! They wound up with a dark espresso brown banister and treads, and crisp white spindles and beadboard risers–gorgeous! Here’s what they did to get these fabulous results:
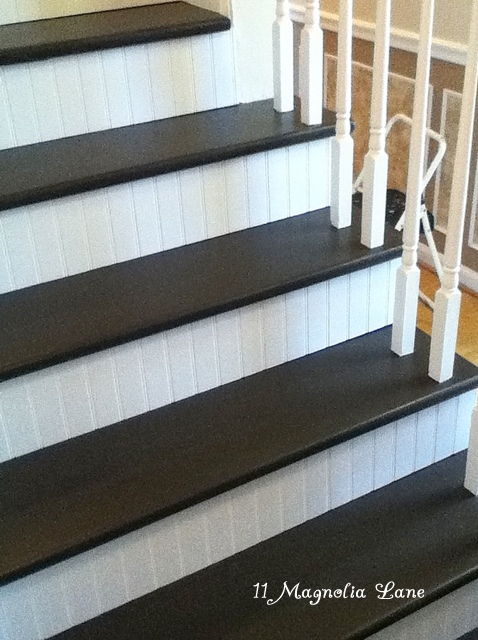
1. Yanked up the old carpet (underneath they found MDF stair treads, but they did have a nice bullnose, or round, edge on the front).
2. Hung sheets to protect the doors to as many rooms as possible from sanding dust (this was a smart step and one that I usually skip, I’ll admit).
3. Sanded, sanded, and sanded the treads, banister, and spindles.
4. Caulked the edges, where the stair treads meet the wall and the banister.
5. Primed the stair treads with gripper gray primer and also primed the banister and spindles with regular primer.
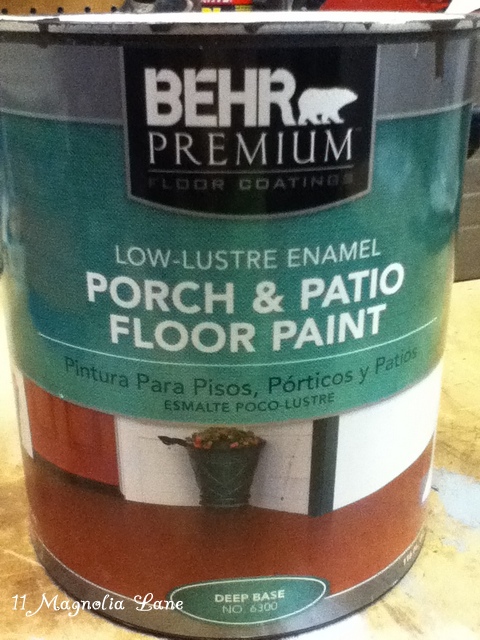
6. Painted the banister with this lovely dark brown paint from Home Depot:
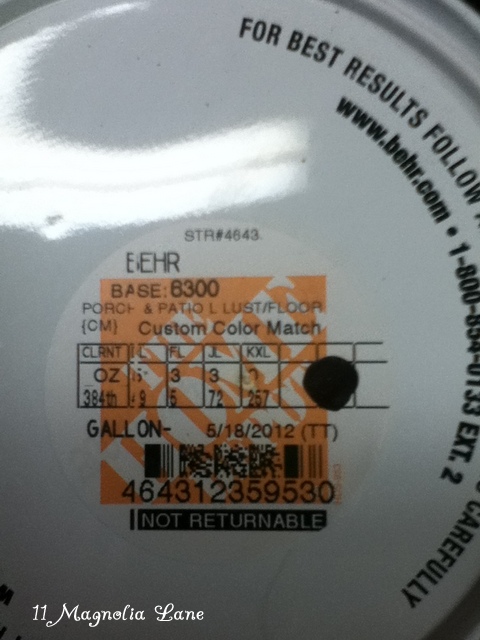
And below is the color match formula if you’re interested:
Here’s the banister before (hi, Steve):
And after:
7. The spindles got a couple of coats of white (just regular white latex off the shelves). Robyn said that everything got one coat of primer and two coats of paint (either dark brown or white). She also said there was a lot of painting and repainting around spindles to make sure that white areas were only white (with no brown smears) and vice versa. I don’t doubt it!
8. Next, the stair treads got two coats of espresso brown. Robyn reports that they sent the kids to sleep over at her mom and dad’s house that night, and she and Steve ate sushi and watched a movie downstairs while the treads were drying in between coats. You could also paint every other stair so that you could still climb the steps two at a time during a project like this, although that doesn’t sound quite as much fun as dinner and a movie!
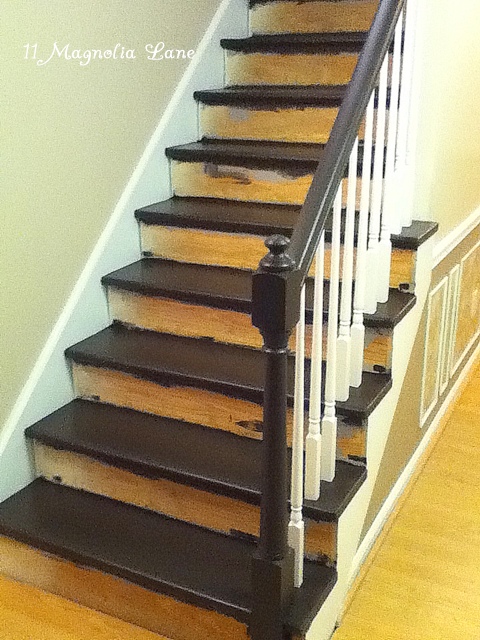
9. After the treads were painted, they added the beadboard to the risers. They bought one of the big sheets (I think they’re 4′ x 8′) and Steve cut them to fit on his table saw. They adhered them with glue, and while they did caulk around the edges, they didn’t paint the beadboard–it was already white and Robyn said they didn’t need to.
It took the two of them three full days to complete this project, due to the multiple coats of primer and paint and the detailed painting work required. However, they’re so pleased with the results. They did add a carpet runner to protect their hard work–plus, with two kids and a dog, the stairs are in heavy use all day long. Let me know if you have any questions for Robyn and I’ll have her answer them.
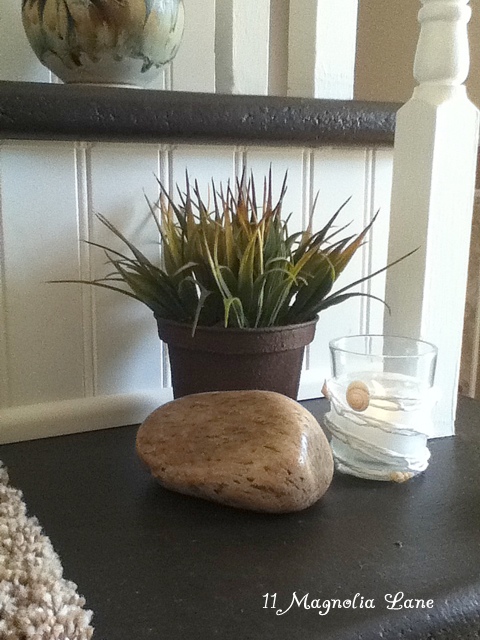
Here are a few more “after” shots–I love the way she styled her steps!
Great job, guys! I’m almost inspired to rip up the carpeting on my stairs and see what I find! Thanks for sharing your project with us, Robyn and Steve, and thanks for stopping by!
Here is another stair makeover post you might find helpful!
Our posts contain affiliate links. If you make a purchase after clicking on these links, we will earn a small commission, which helps to keep our content free. You don’t pay a cent more than you would otherwise, since that would be tacky!

Robyn says
Thank u so much for sharing our project! Its been a while since we have done anything around the house! I will say though, this one takes the cake as a DIY!! Thanks for sharing that one pic that I least liked of us post race, but u redeemed yourself with the dinner shot! Haha!! Thanks again & next will be the Pramm!! 😉 xo
Christy says
It was an amazing redo and the world needed to see it, too! Thanks for letting us share it with everyone!
Lindsay Manchua says
What kind of wood replaced the carpet? Do you need to buy extra for bull nose? I’ve looked at retrotread but I don’t want to spend too much, I have 16 steps. Thanks
Christy says
Hi, Lindsay–This was a friend’s project and you might have seen that it was done eight years ago (!), so I read back through the post and saw that when they removed their carpet they found MDF treads with a bullnose in place. So they didn’t need to replace their treads; they just sanded and painted them. Hopefully you’ll have good luck with what you find when you lift your carpet, too. Good luck with your project!Christy
Kathy Robinson says
TO 11 MAGNOLIA LANE – HOW FANTASTIC!
James says
Hi there,
Great job on the redo. My wife and I are doing the same in our home after seeing the great outcome that you had. I see that you used a runner to protect the treads but how has the color and finish on the banister held up? We do not want to use a runner and are just worried about scuffing and scratching the treads.
Christy says
Hi, James–I emailed Robyn and asked her to respond to your question. Here’s what she sent me:
Hi! Thanks for the compliment on my stairs. We are so glad we used the runner. While I still love the look of the stairs without it, the runner not only provides protection (having a dog, cat & 2 children we need it!), it also has a comfortable feel and makes my entryway feel more cozy! We love the multi texture look of it with installing the runner, paint of the treads & the bead board! Next project will be incorporating the bead board in my foyer!! As for the finish, aside from gummy fingerprints from the kids, the banister is great! We did notice before we had the runner installed, scuffs on the treads showed up quickly. That sealed the deal for the runner. I don’t think there is a paint out there that prevents scratches in high traffic areas! I hope I answered your question! Good luck with your project!!
Hope that helps. Thanks for stopping by!
James says
Thanks Christy & Robyn! It looks like my wife was right (shhh don’t tell her I said that) and we will look into runners as well. The treads scuffed pretty quickly with our hyper dog, 2 cats, and the two of us going up and down all day. Thanks for all your help. Your project inspired us and now we have beautiful stairs!
Christy says
I’m glad you love your stairs! James, you probably knew this already, but your wife is *always* right. That’s just one of the rules! 🙂
Kim says
Hi Robyn, My Daughter and I are about to do her stairs this exact same way. My questions is this: How do you lay the runner on the stairs? Did you get a professional or do it yourself. Please give me specifics if possible. Thank you very much.
Christy says
Kim, Robyn had the runner laid professionally by her installer. They updated the carpet throughout their house as part of this project. Good luck with your daughter’s stairs!
Francesca says
Really nice project! I love the final result and the pic you posted! It’s always nice being able to se the before and after comparison! I like the style you went for and I think it gives a personal touch to an already nice space! Great blog! thanks for sharing!
Christy says
Thanks so much, Francesca! Glad you stopped by!
Elise says
Words cannot express the love I have for this! We replaced our stairs 4 years ago because they were 60 years old and were falling down from old termite damaged from before we moved in. My husband did not want to pay extra to have the staircase finished before they installed it (insert mad face here) and nowthey sit unfinished and getting yucked up. With 3 kids, 3 dogs and 4 cats the idea of staining and all that sanding and poly was terrifying. I have visions of tufts of hair stuck to everything! But this….this is doable and so adorable witht he beadboard. I never would have thought of that. Bravo!
Christy says
Elise–you can do it, and you’ll be thrilled with the result. Since the stairs are normally a focal point of the home, it will make such a difference in the feeling of your home. Good luck!!
Kris Ullur says
Impressive. I have an exactly similar requirement for my home in Franklin Tennessee, some 20 miles south off Nashville. I don’t have the carpentry skills of any kind, hence looking for a good skilled person do it for me. Any help?
Thanks
krish
Ron says
Beautiful staitcase, love it. I was wondering if 1) The shoe molding in front of the beadboard goes all the way across or just to the edge of the runner? 2) Did you use padding under the runner? 3) Did you bind the edges of the runner. Thanks, and again, your staitcase is absoutely stunning.
Christy says
Hi, Ron–
I forwarded your questions to Steve and Robyn, and here’s what they said:
1.Shoe moulding is just at the edges, it was the finishing touch. The breadboard goes all the way across. When the runner was installed, the style, called “Hollywood” required the carpet to be tacked closely to the back of the tread against the riser, so we didn’t want the moulding to interfere with that. Besides, it was less expensive! 🙂
2. Yes, there was padding placed on each tread.
The edges were not bound, I was not a fan of how that looked, I wanted a softer edge, so the installers did what they called a “tuck and turn”. Basically folded the edge under and tacked it.
3.The installers didn’t like doing it that way due to it being more labor, but, it was what I wanted! We were very pleased with the turn out!
Thank you.
Lisa says
This is an amazing project I want it now and now my husband is going to do this for me!!!!
Thanks for sharing this with me.
Lisa x
Christy says
Good luck with your project, Lisa–or should I say, good luck to your husband! 🙂
Melissa says
Hi did they put a moulding where the riser meets the tread?
Christy says
Melissa–they did. You can see it in some of the closeups. It looks like either a piece of quarter round or screen trim to me. Hope that helps!
Mona says
Hi – I’m getting ready to replace our treads with MDF ones and then paint them (eggplant!). I’m planning on using Behr porch and floor paint too, but I have a couple of questions –
1. From what I’m reading, I need to sand them very well, right? What grit and how much should I sand?
2. I know I need to prime them, but I’ve never heard of Grey Gripper. Is this better than Zinnser? Since they’re MDF treads, do I need to use a oil-based primer?
3. Do I need to sand again after priming?
4. I will not be adding a runner (carpeted or otherwise) to the steps – should I mix in some kind of additive to the paint to keep them non-slippery, or is the porch paint alone sufficient for this?
5. I’m painting the risers too – I’ll be stenciling or painting a design on the risers, so I’m not sure if I should use the same paint as the treads or if I should go with a semi-gloss to make them pop? If I use semi-gloss, will the difference in sheen make the stairs and the risers look like they’re slightly different colors?
OK, so more than a couple of questions! But I really appreciate your help!
Christy says
Hey, Mona–I’m sure you saw that this is a friend’s project that I posted for her. It’s been just over two years, so let me email her and see if she remembers enough about what they did to answer your questions. I’ll comment again if she’s able to help. Thanks for stopping by!
Elissa says
Where was the runner from that was put on the stairs remodel??
Christy says
Elissa–they had the runner installed by the carpet company that replaced their upstairs carpet at the same time. I hope that helps!
kathy says
Hi Christy, I had some of the same questions that mona had. could you let me know what you found out.
its been 3 years, how are holding up?
thanks!
Liz Mar says
Hello! I love the finished product. I just a few questions about the process!? After you sanded the railings, what kind of primer was used? And after you painted them, did you use anything for A sealant or top coat??
nicole says
I LOVE this project. I’m having trouble reading the paint color match pic for the depot. would you pls tell me the mix?
Thank you!
Rhonda hoyseth says
Hi, I am having trouble seeing the one letter beside the L. Could you let me know the mix. Thank you kindly and the stairs look great.
Christy says
I asked Robyn if they still have the can but they don’t since they completed this project back in 2012. Looking at the photo, it looks like 6 oz. under the L column and then 49 under it. You can ask them to pull up the color combo on their computer and compare it to the photos: if it’s not dark brown, then you’ll know to try a different number. I hope that helps!
Kelly says
Hello! I did the beadboard trick for my risers due to this remodel! I love them and will be putting quarter round on the bottom of my risers. I was curious if they put anything on the top of the riser? When we cut the beadboard, it seemed to leave some rough edges and looks unfinished. Did they just caulk it?
Christy says
Hi, Kelly–
I’m so sorry for the delayed response. It took me awhile to get an answer as this post and project were done so many years ago. Yes, they just caulked the top of the risers. By now you’ve probably finished your own project, so I hope it went well and that you love how it turned out!
Take care,
Christy