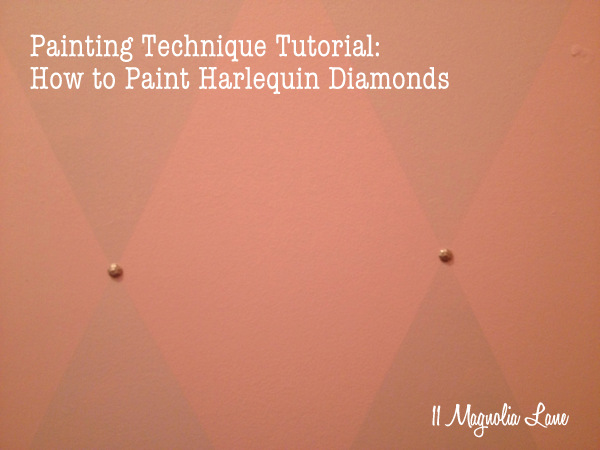
I posted last month on my closet redo, and then followed up with a post on how I organized my shoe boxes with plastic bins and chalkboard labels {here}. I promised a tutorial about how I painted the harlequin diamonds on my wall, and this is it. Sorry for the slight delay–Fall and Halloween posts bumped it off the calendar for awhile!

Harlequin diamonds are simple to paint, but time-consuming. Having done a few paint techniques in the past, like the painted wallpaper I did in my laundry room, it’s easy in terms of difficulty, and moderate in terms of time. Are you with me? Good.

The first step is to gather your supplies. Are you painting first? I did–I used an interior flat latex from Lowe’s (the color is “Princess”). I gave the entire closet a coat of pink, including the ceiling (I often paint the ceiling in a small space). Decide what color you want your diamonds to be. Do you want a BIG contrast, like black and white? If so, then you’ll paint the lighter color on your walls first, and then use the darker color when you paint the diamonds, so you’ll need twice as much of the lighter color. In my case, I chose to use a glaze technique, because I wanted a very subtle, silvery sheen, and my 5′ x 8′ closet needed two jars of Martha Stewart’s glaze in Mercury (available at Home Depot).
Supplies:
- Paint for walls (and ceiling if desired).
- Paint or glaze for diamonds (about half as much as the base color). Don’t forget that if you’re using glaze, you’ll need to mix it with your base coat color of paint, so be sure you buy enough to do that.
- Dropcloths, brushes, rollers, and all that jazz.
- Painter’s tape, and LOTS of it. I needed 3-1/2 rolls for my closet. Better to buy more and return it than run out in mid-project! Also, I would buy the painter’s tape that works on newly painted walls. You’ll be taping over paint that has only had a few hours to dry, and you don’t want to peel any of it off.
- Any embellishments you want to use to accent your diamonds. I used brushed silver/platinum upholstery tacks and just nailed them in when I was done. I’ve seen others use a gem or a pearl. Of course, you don’t need to use any of these.
- Chalk
- A level
OK, here are your steps:
1. First, prep and paint the room in your lighter color. Here’s my closet with its coat of pink:

2. Now, decide how big you want your diamonds to be. The rule of thumb is that they should be twice as tall as they are wide. I decided to make mine 20″ tall and 10″ wide. Obviously, the smaller they are, the more work they’ll be with all the taping you’ll be doing. I’ll be using 10″x 20″ for the purposes of this tutorial.
3. Using the level and a piece of chalk, draw rectangles on your wall that measure 10″ x 20″. The level will ensure that your lines remain straight. Start in the corner that’s opposite the door, or whichever corner will be most visible. In a closet, that’s none of them since they’re all full of clothes! 🙂 Also, I started my first horizontal line 10″ from the ceiling, not 20″, because I wanted the top row of diamonds to be a full PINK diamond, not a full SILVER diamond. Translation: if you want your top row to be diamonds of the lighter/first color, do it my way. If you want your top row to be diamonds of the darker/second color, then start your top line 20″ from the ceiling. When you’re finished, your entire room will look like it’s made of rectangle bricks!

Use a level and chalk to draw rectangles on your wall.
I like using chalk because all these lines will need to be erased eventually, but if you have a hard time seeing them on your paint, go ahead and use a pencil. Just write lightly!
4. Now, mark the midpoint on all four sides of the rectangle. For my rectangles, this meant that I made a mark with the chalk at 5″ on the top and bottom, and at 10″ on the sides. Using your painter’s tape, you’re going to use those four midpoint marks as the “points” of your diamond. You’ll only be able to tape every other diamond, and it will look like this:

Tape every other rectangle to form a diamond.
5. Paint inside each diamond with your second or darker color. Since I used glaze, I mixed one part glaze with two parts paint. This made the diamonds a subtle silver color, which I loved.
NOTE: If you’re using dark paint for a high-contrast look, I would experiment with one diamond in a discreet area first to see how much of a problem you’re going to have with the paint bleeding under the painter’s tape. That will depend on the texture of your walls, the consistency of the paint or glaze you’re using, and even how well you applied the tape. If bleeding is a big problem, you can “seal” the tape line by painting on the line with your first/lighter color, waiting until that dries, and then painting over it with the darker color. Fortunately, I didn’t have to do that!
6. After your diamonds have dried, remove the tape, and do the same thing for the unpainted diamonds. Make sure you line up the tape with your already-painted diamonds so that their points all line up! When it comes to corners, you can always make a diamond a little wider or a little thinner without it being obvious, so some of my corner diamonds are 9″ or 11″ wide. Just don’t make the diamond taller or shorter!!

Remove the tape from the first set of diamonds. Every other diamond will be painted.
7. Paint your second set of diamonds and let them dry. Remove the tape. I used a damp washcloth to wipe away all the chalk lines.

8. Embellish your diamonds with upholstery tacks or gems, if desired.

9. Wipe your brow–phew! that was a lot of work–and enjoy the gorgeous diamonds you’ve painted on your wall!


Leave me a comment if you have any questions and I’ll be happy to answer them.


Leave a Reply