Welcome to Operation: Organization {Back to School Edition}. Today, we’re thrilled to welcome Lauren from Bless’er House–she is so talented! Be sure to follow her so you can keep track of all of her neat projects:
Facebook | Pinterest | Instagram | Twitter | Google+ | Bloglovin | Hometalk
••••••••
Hi y’all! I’m Lauren from Bless’er House, and I’m so thrilled to be stopping by to share one of my organizing adventures for this handy series. If you’ve never visited my blog, I make budget home improvement my business. I’m talkin’ super budget. As in, “I’d rather buy shoes so let’s pull out every cheap trick in the book” kind of budget.
One thing I hate spending a ton of money on is organization. The problem was I really had to do something with our disaster area of a pantry, and it’s hard to find a pretty pantry that costs less than $500 for a storage system.
It was out of control. We’d just moved into our new builder grade house the year before, and this space had never really been dealt with. That wire shelving that makes boxes fall over wasn’t helping the situation.
So I pulled everything out and started sorting.
In the process, I figured out three cheaper options for storage. I found a way to make our space orderly, functional, and pretty all for around $50! That’s unheard of, y’all! But I did it!
After doing my homework and finding that even the cheapest pantry storage options in Walmart were at least $5 per container, I resolved to finding something more budget-friendly. (Yep, we’re cheaper than Walmart around here.)
So here ya go- 3 cheap pantry storage options:
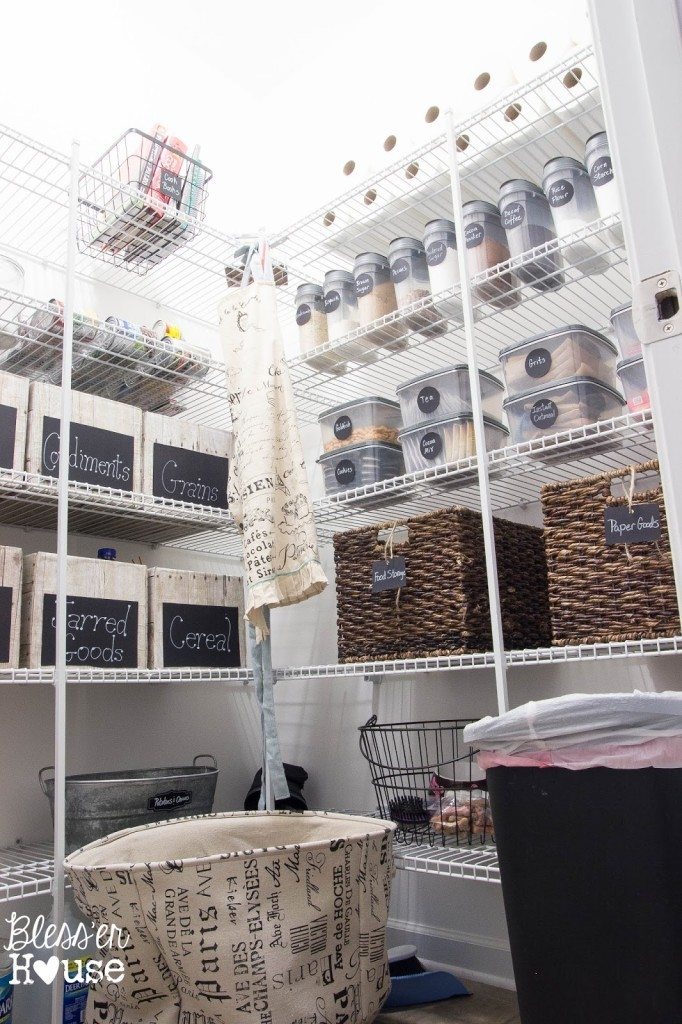
1. Wrap cardboard boxes in pretty paper or fabric with labels. I collected diaper boxes for a few months with this plan in mind, and they worked perfectly! The only cost was the $8 roll of paper I used. You can see my DIY pantry crates from this post. If you’re not in the diaper stage of life, you can ask most local daycares in your area or a neighbor/friend with little ones.
Mine have held up perfectly since making them 8 months ago.
2. Use Dollar Store Containers. Those handy clear containers below did not cost me $5-$10 a pop. I found them at the dollar store! (Dollar Tree to be exact if you live in the U.S.)
I bought 8 tubs and 10 containers with pourable spouts for $1 each. I cut out labels with black cardstock I had lying around, labeled them with a white chalk marker, and taped them on. I could have gotten fancy with printed labels, but I kept it simple.
The containers are mostly air tight too! I’ve had brown sugar sitting in one of them for months, and it hasn’t hardened at all.
I happened to already have the set of glass containers from Walmart earlier last year when I first attempted the pantry organization process and sort of lost my steam. They’re great in here too though.
•••••••••
See all of the previous posts in our Operation: Organization series {here} and follow the Pinterest board {here}.
Operation: Organization {Back to School Edition} 2015 Schedule:
8/17: 11 Magnolia Lane
8/18: Blesser House
8/19: Sunny Side Up
8/20: Monthly Pretty Preppy Party
8/21: The Heathered Nest
8/22: The Creativity Exchange
8/23: Just a Girl and Her Blog
8/24: This is Happiness
8/25: Dixie Delights
8/26: Organizing Made Fun
8/27: Pretty Preppy Party Features
8/28: Simply Organized
**********
While you’re here–click HERE to enter to win a HomeRight FinishMax Pro Spray Painter {these are the BEST ya’ll!} and check out our new line of organizational products HERE, perfect for back to school!


