• Skip to primary navigation
  • Skip to main content
  • Skip to primary sidebar
  • Skip to footer
  • MEET CHRISTY & AMY
    • IF YOU’RE NEW HERE…
    • WORK WITH US
    • 11 MAGNOLIA LANE 101
    • DISCLOSURE + PRIVACY (the fine print)
    • BEST OF 11 MAGNOLIA LANE
  • TOUR OUR HOMES
    • TOUR OUR HOMES
    • CHRISTY’S MAGNOLIA COTTAGE
    • CHRISTY’S MCC HOUSE
    • Christy’s Stuttgart Flat
    • Amy’s Virginia Craftsman Home Tour
    • AMY’S VIRGINIA CRAFTSMAN Building Process
    • HOLIDAY HOME TOUR SERIES
  • CELEBRATIONS
    • EVENTS + ENTERTAINING
    • GIFTS
    • HOLIDAYS
    • RECIPES
  • HOME
    • CLEANING
    • DECORATING
    • ORGANIZING
    • ROOM BY ROOM
      • BATHROOMS
      • BEDROOMS
      • CLOSETS
      • CRAFT ROOMS + OFFICES
      • DINING ROOMS
      • KIDS’ ROOMS
      • KITCHENS
      • LAUNDRY ROOMS
      • LIVING + GREAT ROOMS
      • OTHER SPACES
      • PANTRIES
      • PLAYROOMS + BONUS ROOMS
      • PORCHES + OUTDOOR SPACES
    • TIPS
  • SHOP
    • SHOP OUR INSTAGRAM
    • SHOP OUR AMAZON STORE
    • FRIDAY FAVORITE FINDS
  • PROJECTS
    • CRAFTS
    • DIY PROJECTS + TUTORIALS
    • FURNITURE
    • PRINTABLES
    • WINDOWS, DOORS, + WALLS
  • LIFE
    • FRIDAY FREE FOR ALL
    • HEALTH
    • SIMPLY ON SUNDAY
  • TRAVEL
  • CONTACT
    • Email
    • Facebook
    • Instagram
    • Pinterest

11 Magnolia Lane

Sharing our easy DIYs, decorating, entertaining and more!

Operation: Organization 2014 ~ Gift Wrapping Station Organization from Burlap & Denim

January 7, 2014 By Christy 5 Comments

This Post Contains Affiliate Links

2489 shares
  • 2

operation organization button

Welcome to Day #4 of Operation: Organization.  Today, Amanda from Burlap + Denim s going to share how she built a wrapping paper station in her laundry room.  It’s amazing!  Here’s Amanda:

Wrapping-Station

Have you ever been to a Paper Source store?  On our last trip to Carlsbad my husband and I happened upon one of their adorable stores.  One entire wall of their shop was lined with beautiful wrapping papers.  They are a mix between fabulous scrapbook paper and amazing hand made wallpaper I’m not gutsy enough to glue to the wall.  I knew right then and there that I wanted a place to display beautiful papers.  I wanted a wrapping paper station that was compact, affordable, and displayed beautiful paper.  A few months later inspiration struck.

I decided to make my own Wrapping Paper Storage Station.  We’ve been working on our basement and just finished up all of the trim.  I looked around and found a few scraps that would work perfect.  I cut them to be the same length making them 4.25″ x 52″.  I sanded the bottom of each board.

After a trip to Lowe’s I found these corner L braces in a 4 pack for $2.97.  Since they are 3″ deep so they would fit within the trim.  I marked where the screws would go and drilled a pilot hole for each of the 8 screws that would secure the trim to the braces (NOTE: when securing the braces to the trim, be sure that the screws aren’t too long, I used the ones that came with the package for the thicker parts of the trim, but used shorter screws for the thinner parts).

I took a trip to Walmart and bought 10  28″-48″ Mainstays sprint tension rods for $2.17 each (cheapest of anywhere I found).  Be sure to buy round rods so that the ribbon will slide on easily.

Here is a layout I did on my kitchen island.  I measured the width of the wrapping paper and used that to set my distance for the braces on the wall (30.75″).

 After a lot of measuring and leveling, I secured the four braces to the wall.  Then I screwed the trim to the braces.  The right trim is just off the wall because it turns out like most houses, it wasn’t quite straight.  Plus it gives me a little space to store stuff on the side unseen (note: while I haven’t yet, I plan to buy a magnet strip from IKEA to hang extra stuff on the side).

Then unscrew the trim and prep for paint.

In classic form, when I drilled my pilot  holes I accidentally drilled a little bit too deep in the center of the trim.  No worries, a little Fast ‘N Final patch it was all good.

A quick sand, prop up the boards on some soda cans and paint away.  I used a primer and paint in one spray can.

Re attach the dry painted trim and prepare to fill it up.

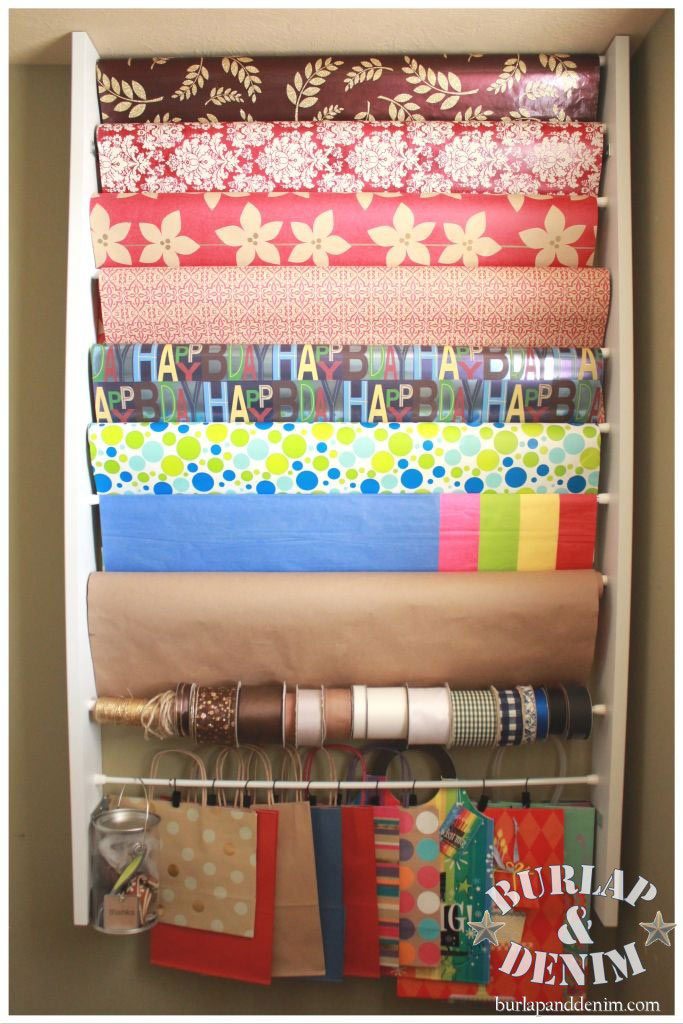
Then I slid a tension rod inside each roll of wrapping paper.  I expanded it about 1/2″ larger than the space between the pieces of trim and layered them.   Being the neat freak that I am, I measured the space between each rod and leveled them out.  The great thing about THIS system is that it is fully adjustable.  If you only have a few papers or a lot of ribbon you can change how close or far appart each of the rods are with no tools.  It looks great if the bags are with in the frame or hanging below it.  Figure out what works best for you and go with it.

 After the eight rolls of wrap and tissue paper it was time to add the ribbon.  I chose all smaller bolts so that they wouldn’t take up too much room or be crazy heavy.

I put up one last rod toward the bottom.  On the left side I slid a cute clear light weight can and put odds and ends of decorative toppers and my Scotch wrapping paper cutter. The rest of the rod holds gift bags.  To secure them I found some old clips that came with a set of curtains I bought a while back.  They hang with a clip secured in the center of each bag.  If you don’t have these laying around you could use clothes pins, shower curtain rings or just slide the handles through the rod (but then you have to take the rod out each time you want a bag).

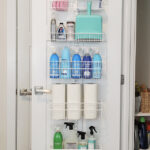
I love that even though I have a tiny laundry room (as seen below) I can still have the luxury of having a wrapping station easy at hand.

So, to “wrap” things up:

CHEAP-this cost me about $25 for the brackets and the rods, everything else I had already.  It could be done for even less if you didn’t want as many papers out.

SMALL-it takes up virtually NO space.  My door handle sticks out farther than the entire station.

EASY-this project is a one woman, one day beauty.

Now I just need to get to a Paper Source and buy some crazy beautiful papers to display!

You can follow the Operation: Organization Pinterest board {here}.

Here’s the rest of the all-star lineup for Operation: Organization:

Friday, 1/3:  Janis at All Things Beautiful
Saturday, 1/4: Amanda at Dixie Delights
Monday, 1/6: Samantha at Simply Organized
Tuesday, 1/7: Amanda at Burlap + Denim
Wednesday, 1/8: Julie at Less Than Perfect Life of Bliss
Thursday, 1/9: Debbie at reFresh reStyle
Friday, 1/10: Christy at 11 Magnolia Lane
Saturday, 1/11: Jenn at My Fabuless Life
Sunday, 1/12: Terry at 11 Magnolia Lane
Monday, 1/13:  Amy at 11 Magnolia Lane
Thanks for stopping by!

icon-facebook-1icon-instagram-1icon-mail-1icon-pinterest-1icon-twitter-1

Filed Under: DIY/Projects/Tutorials, Operation: Organization Series, Organization

Reader Interactions

Comments

  1. Shirley@housepitality designs says

    January 7, 2014 at 9:26 am

    What a great idea for a wrapping station!…I have a Martha Stewart wrapping station and Amanda has given me even more great ideas!…Great series!

    Reply
  2. Julie says

    January 7, 2014 at 9:26 am

    Love it! And I can’t resist the gorgeous papers at Paper Source either! Beautiful job.

    Reply
  3. Janis@All Things Beautiful says

    January 7, 2014 at 10:11 am

    I need to look for one of those stores! Love this wrapping station! Great job and you found the perfect spot for it!

    Reply
  4. JaneEllen says

    January 7, 2014 at 11:09 pm

    Was that Carlsbad, CA where you found the Paper source store? We used to live in San Diego area, east county out in Santee. There are a few things I miss about So. CA. We don’t have an IKEA or a Paper source or lots of other places. We got a TJMaxx over a year ago. Grand Junction, CO is growing but not fast enuf to have an IKEA among other stores. No Home goods either.
    Your post is terrific. At least you have an actual room for your laundry, we have closet where our washer/dryer reside behind closed doors in our mud room. Your wrapping station is genius.
    I’ll be very interested to see what next organizing post is about. Happy days

    Reply
  5. Amanda @ Burlap and Denim says

    January 10, 2014 at 12:26 pm

    JaneEllen, Yes, the one in Carlsbad! I used to live in El Cajon, small world. Now I am in Utah and while we don’t have Paper Source, we do have TJMaxx, Ikea and Home Goods. I’m hoping for great stores to come your way in CO 🙂

    Reply

Leave a Reply Cancel reply

Your email address will not be published. Required fields are marked *

Recipe Rating


This site uses Akismet to reduce spam. Learn how your comment data is processed.

Primary Sidebar

Lowest prices. Straight Teeth,

•Don’t Miss A Thing!!•

•Do You Know Jesus?•

•Featured In•

Footer

  • Email
  • Facebook
  • Instagram
  • Pinterest

Copyright © 2022 · 11 Magnolia Lane· Blog Design by Little Blue Deer
Privacy Policy

11 MAGNOLIA LANE IS A PARTICIPANT IN THE AMAZON SERVICES LLC ASSOCIATES PROGRAM, AN AFFILIATE ADVERTISING PROGRAM DESIGNED TO PROVIDE A MEANS FOR US TO EARN ADVERTISING FEES BY ADVERTISING AND LINKING TO AMAZON.COM AND AFFILIATED SITES. AS AN AMAZON ASSOCIATE, WE EARN FROM QUALIFYING PURCHASES. WE ALSO PARTICIPATE IN SEVERAL OTHER AFFILIATE PROGRAMS; THIS INCOME ALLOWS US TO MAINTAIN THE QUALITY OF YOUR USER EXPERIENCE AND KEEPS OUR CONTENT FREE. WHEN YOU PURCHASE THROUGH ANY OF OUR AFFILIATE LINKS, WE EARN A SMALL COMMISSION AND YOU DON’T PAY A CENT MORE THAN YOU WOULD OTHERWISE; THAT WOULD BE TACKY!   READ OUR FULL PRIVACY AND DISCLOSURE POLICY {HERE}.
  ©11 Magnolia Lane 2019. Unauthorized use and/or duplication of this material without express and written permission from this blog’s authors and/or owners is strictly prohibited. Please email us at admin@11magnolialane.com for more information.

  • MEET CHRISTY & AMY
    • IF YOU’RE NEW HERE…
    • WORK WITH US
    • 11 MAGNOLIA LANE 101
    • DISCLOSURE + PRIVACY (the fine print)
    • BEST OF 11 MAGNOLIA LANE
    • Back
  • TOUR OUR HOMES
    • TOUR OUR HOMES
    • CHRISTY’S MAGNOLIA COTTAGE
    • CHRISTY’S MCC HOUSE
    • AMY’S NEW HOME BUILD
    • HOLIDAY HOME TOUR SERIES
    • SPRING HOME TOUR SERIES
    • Back
  • CELEBRATIONS
    • EVENTS + ENTERTAINING
    • GIFTS
    • HOLIDAYS
    • RECIPES
    • Back
  • HOME
    • CLEANING
    • DECORATING
    • ORGANIZING
    • ROOM BY ROOM
      • BATHROOMS
      • BEDROOMS
      • CLOSETS
      • CRAFT ROOMS + OFFICES
      • DINING ROOMS
      • KIDS’ ROOMS
      • KITCHENS
      • LAUNDRY ROOMS
      • LIVING + GREAT ROOMS
      • OTHER SPACES
      • PANTRIES
      • PLAYROOMS + BONUS ROOMS
      • PORCHES + OUTDOOR SPACES
      • Back
    • TIPS
    • Back
  • SHOP
    • SHOP OUR INSTAGRAM
    • SHOP OUR AMAZON STORE
    • FRIDAY FAVORITE FINDS
    • 11 ML ETSY SHOP
    • 11ML ORGANIZING SHOP
    • Back
  • PROJECTS
    • CRAFTS
    • DIY PROJECTS + TUTORIALS
    • FURNITURE
    • PRINTABLES
    • WINDOWS, DOORS, + WALLS
    • Back
  • LIFE
    • FRIDAY FREE FOR ALL
    • HEALTH
    • SIMPLY ON SUNDAY
    • TRAVEL
    • Back
  • CONTACT
    • Email
    • Facebook
    • Instagram
    • Pinterest
2489 shares
  • 2