As a graphic designer, I love type and the simple messages words can convey. I began making these simple little signs as gifts and decorations and they are so easy.
All you need is:
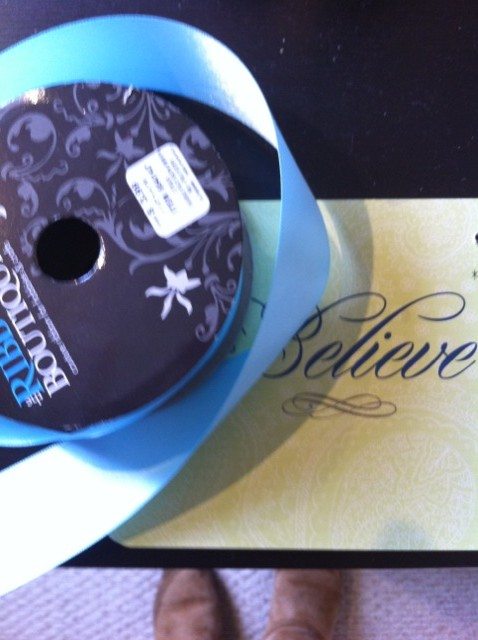
Scrapbook paper in light color (s) with a simple pattern. I chose a light green with a white paisley so the text won’t compete with the pattern.
A color printer
Several small wood rectangles (I have bought them at both Hobby Lobby and Michael’s)
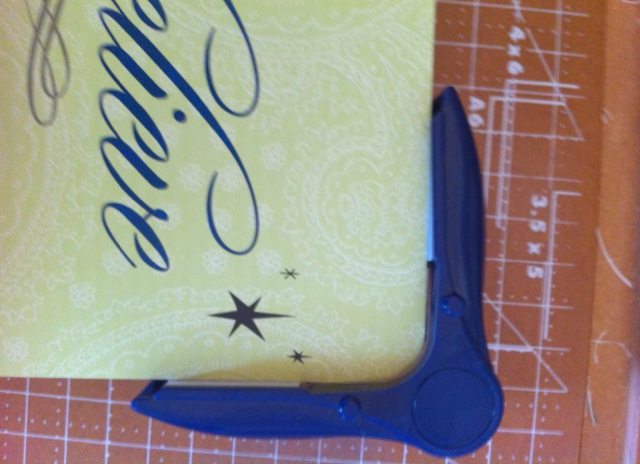
Corner rounder (mine is from Creative Memories years ago, this is only necessary if your wood has rounded corners)
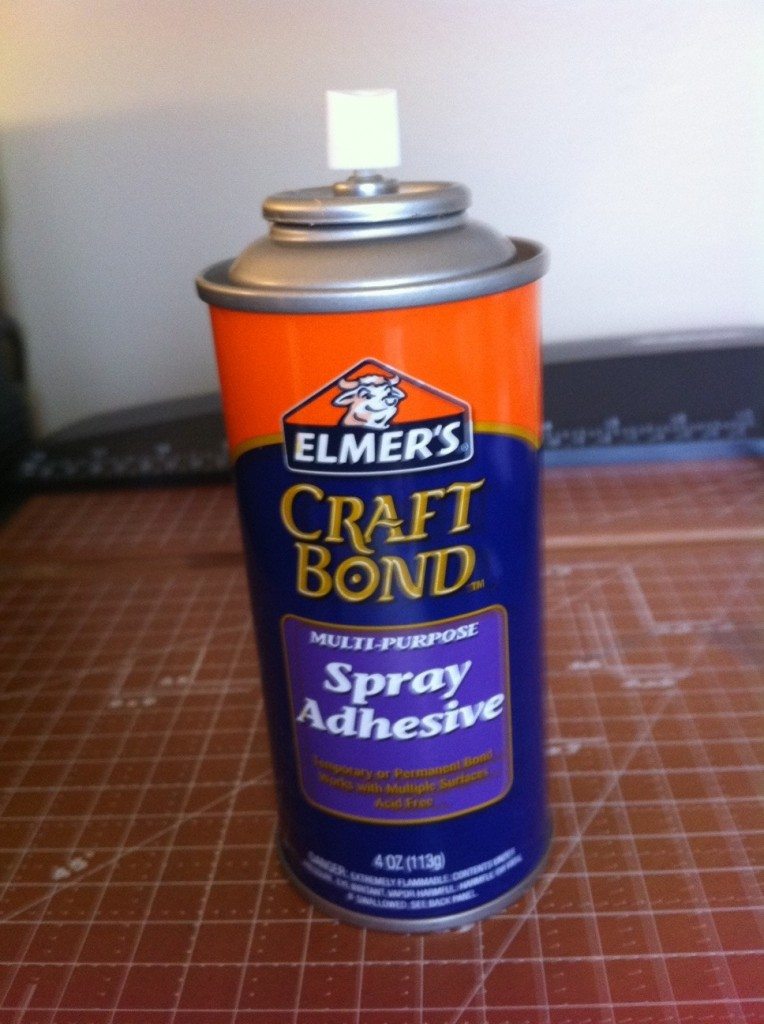
Spray Mount Craft Adhesive
Ribbon
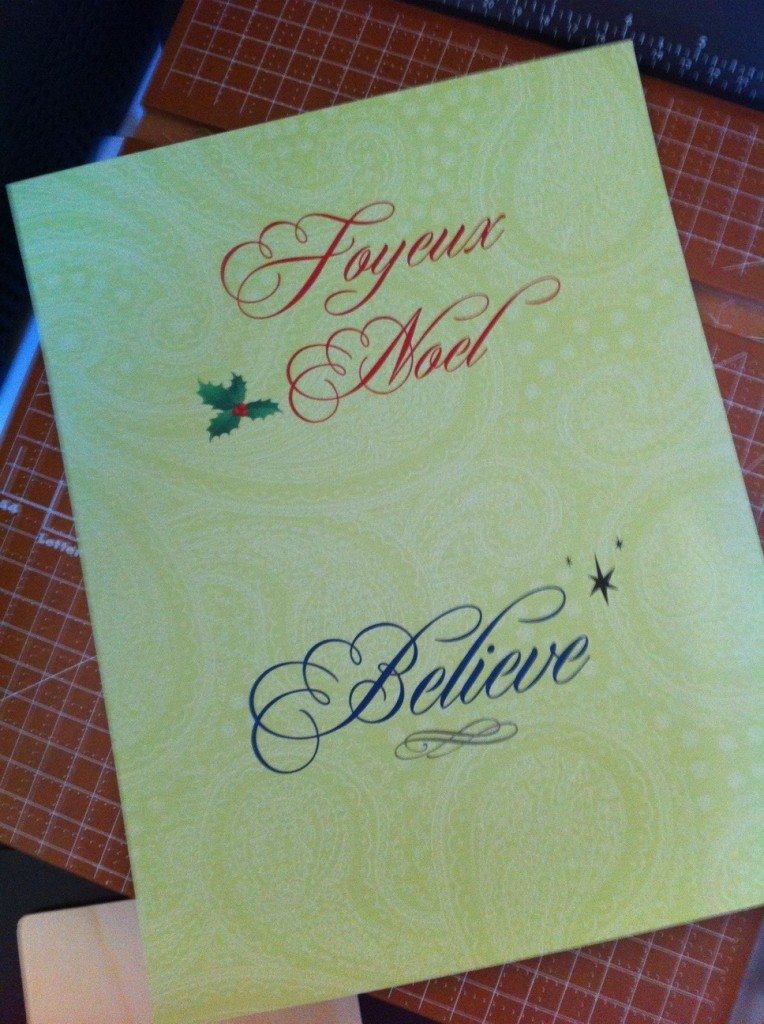
1) Print out the graphic on your scrapbook paper. (I cut down 12×12 scrapbook paper to fit my printer, BTW). Here is the file I used:

{click image to download and print}
2) Cut it down to size (I carefully line up the text in the center of the wood before I cut–which sometimes works, sometimes doesn’t, but perfection isn’t necessary in my world). I use a paper cutter, but scissors are fine, too. I also round the corners off with a little tool I got years ago from Creative Memories, but if your board has square corners, obviously this isn’t necessary.

3) Then spray the back of the paper with spray adhesive and press on the wood board. Don’t worry if it shows through, it will dry. I usually put a heavy book over it for a few minutes just to make sure it adheres.
4) Then I raid my husband’s tools (he finds this very stressful, so I do it when he isn’t around…he really loves his drill) and anyway–get out his drill. I usually use the 3/16 bit to make a hole large enough for the ribbon to go through easily. Just drill a hole on either side from the front of the sign to the back, but don’t get too close to the edge or the wood could crack.

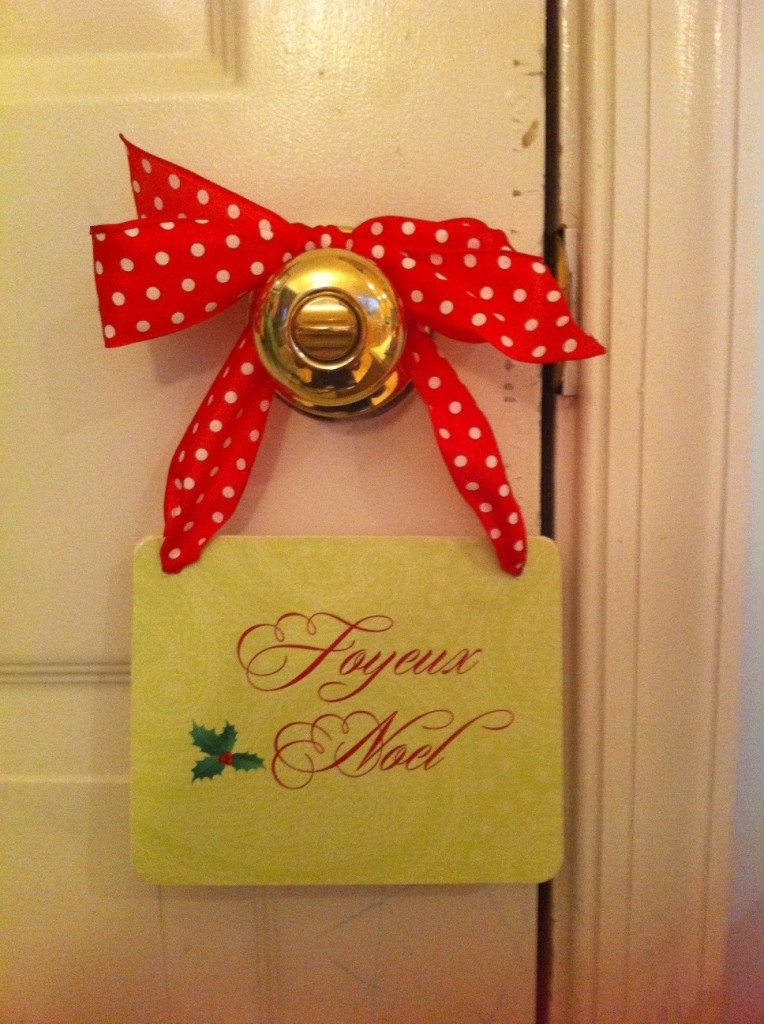
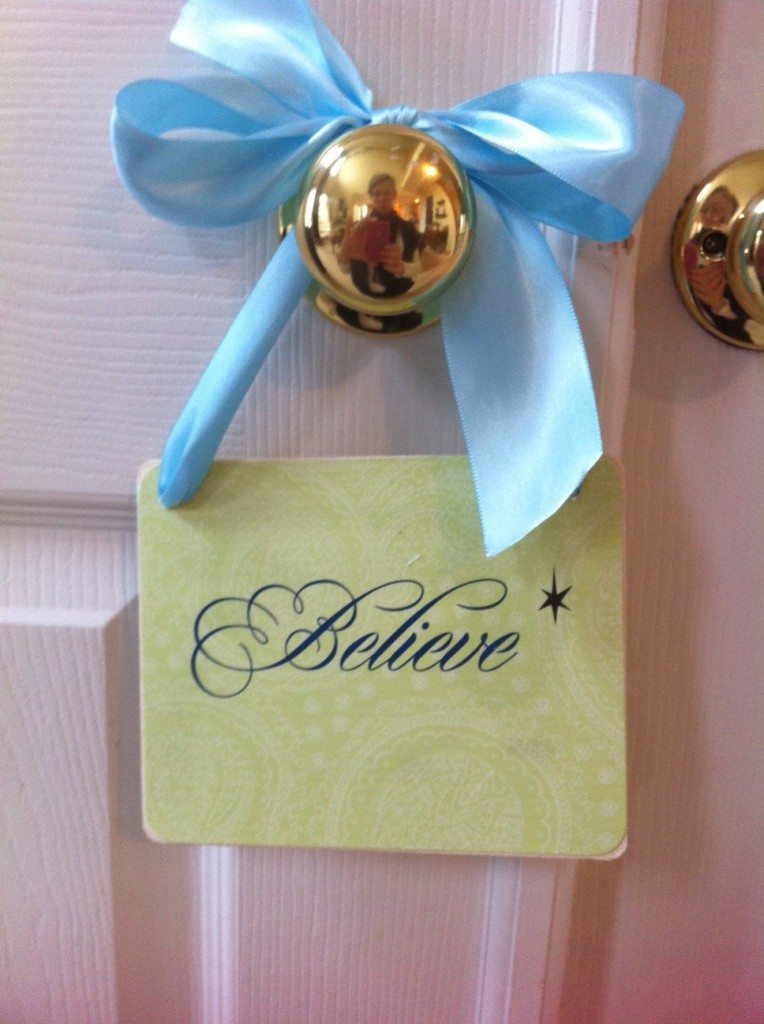
5) Now all I do is add some ribbon, I cut about 2 16″ pieces, knot one end then slide it through the hole, twisting it up makes it easier to get through the small hole. (If you are strugging to get it through the hole, use an opened paperclip to help).
6) Then tie a knot to hold the ribbon in place, then I tie a bow over top of it. (And, I am never able to create those magazine quality bows, so if anyone has any tips please post a comment and help!), but then I trim the ribbon ends neatly and hang. All done! I am going to make a few more signs, so check back for more printables.
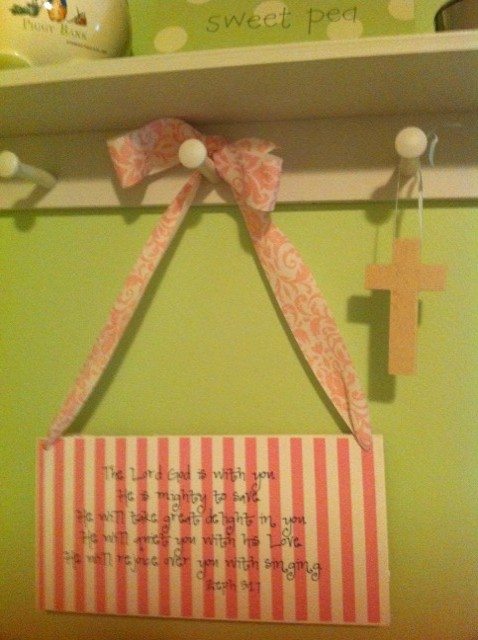
I also made this one for my daughter’s room, it’s similar to the holiday ones but larger, and I plan to do an entire post on it soon. I was inspired by Jones Design Co.’s post entitled TWIRL and I had to make this sign for my baby girl’s room. She embroidered hers, but I am all for a faster solution.
ENJOY!
Thanks for stopping by!


