This is another project that’s almost so easy that you don’t need a tutorial, but come to think of it, that’s my favorite kind! But it’s a fast, cheap, and easy way to add a bit of interest to your rooms.
This project was born out of necessity, because I needed to cover a flaw in my powder room beadboard (you can read about that installation HERE). Because I only measured twice and cut once, I made a mistake around my electrical outlet. Next time I will measure at least FIVE TIMES and cut once!!
This is the problem I had:
 I needed to cover the spot on the right where I cut the outlet in the wrong place. I know, I should have just run out to the store and bought more beadboard and re-cut it, but I didn’t. And by the time I was done and saw how glaring the flaw was, I didn’t want to pull it ALL out and redo it. So I tried to cover it like this:
 Obviously that was a temporary fix since there’s not a light switch on the right. I wish they made plate covers that are half outlet, half blank, but they don’t. So I thought about how I could cover up that unneeded light switch side, and I decided to decoupage the outlet cover with some scrapbook paper.
I actually started with this paper, but it was too thick–more like cardstock–and I thought it wouldn’t fold well around the corners. I cut it about 1/2″-3/4″ larger than the switch plate:
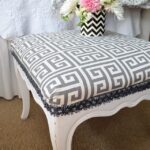
 When I realized it was too thick, I ditched it and grabbed a piece of black and white toile paper that matches the footstool by the sink (you can see that in my powder room post). All of this was in my stash, by the way, but it would have been 50 cents if I’d had to buy it. I cut the toile paper out the same way. Fabric would have worked well, too.
First, use a brush to spread decoupage paste (I used Mod Podge glossy) on the front of the outlet cover or switch plate. I did both my outlet cover and switch plate since they’re on the same wall and it would have looked odd to only do one of them, so you’ll see both in the pictures. Try snapping photos with your fingers covered with Mod Podge!!
 Then I brushed a coat of Mod Podge on the back of the toile paper, and placed the switch place face down on it.
 Spread the paste around the edges of the plate and fold them over. I wrapped them like a present, and I did trim a little from the corners so they’d fold without too much excess. As the paper gets more saturated with the decoupage paste, it folds more easily and you can work any wrinkles out with your fingers. Be careful, though, since you can tear the paper if you’re too vigorous. Next, brush the top of the switch plate or outlet cover with ModPodge. This will make it virtually waterproof when it dries.
 Next, you’ll want to use a utility knife to cut the paper gently in the middle of the socket holes (or switch holes). Use your fingers to smooth the paper around the edges of the holes. I used a toothpick to poke the screw holes, although a paper clip or straight pin would work, too. Don’t worry as much about those as the screws will cover any flaws on them.
 Then you just wait for them to dry. This is where I had a hard time…I had to do the outlet cover THREE TIMES because I kept ditzing out and poking holes in the switch side instead of the outlet side (I probably shouldn’t have admitted that). While the ModPodge is wet, you can easily run it under water and just wash it and the paper off. Sigh.
 Here’s how they looked when I hung them back up:
 And this is how my “problem area” looks now:
 I’m contemplating putting a small vinyl “B” or “RBC” monogram on it (to match the towel).
Since switch plates and outlet covers are about $1, you could conceivably make more than one set for a room, depending on your decor or the time of year (Christmas switch plates, anyone?). And if you’ve taken a look at the aisles of scrapbook paper at the craft store, you know that the options are literally endless. Why not?!
Here’s one more look:
 Thanks for stopping by!