
Drumroll, please, because this is my first room redo in a long time (since the kitchen photoshoot, I think)! Let me first inform y’all that this is only Part 1 since the room isn’t quite done (are they ever?) but it’s good enough to show it off a little bit.
Our downstairs powder room was always too dark for me. While the previous owners had done a pretty faux finish on the walls (gold tones over chocolate brown), the dark paint color combined with the limited light sucked all the light out of the room. I like white, and light colors, so I knew the bathroom would need a redo at some point.
Here’s what the room originally looked like:

The gold leaf mirror was heavy and obviously very expensive, so I wanted to save that. It was also my intention to leave the faucet, sink, and toilet intact, and maybe just change out the light fixture.

I HAD to use my flash in here even though that doesn’t give us a very pretty result, but the room was too dark to shoot otherwise.

Hubby headed out of town for six weeks for work, and as usually happens when he goes away, I decided this was the perfect time to start the project. The kids could happily eat cereal and frozen pizza for dinner for a few days, right?
I started by giving the ceiling and the top half of the walls a coat of flat white paint (I just used the Ultra Pure White by Behr at Home Depot). I was pleasantly surprised that it only took two coats to cover that brown, and I didn’t have to sand the walls as the texture of the faux finish was smooth.

I will tell you that even with just the top half of the walls painted, the transformation was immediate. The light was fantastic, even though there’s only one vanity light over the sink and no overhead light). I knew I’d made the right decision!
Our last house, in North Carolina, had white beadboard in the bathroom, and I loved the cottage-y feel of it. I also like the fact that it was taller than the standard 32″ and 36″ installations. I decided to cut my bead board to 48″ high. I bought the long packages (they’re 96″ tall) and cut them in half on my miter saw. I still don’t have a table saw…soon!

Installing the beadboard was actually pretty easy. I did use construction adhesive on the back of the panels and my brad nailer to secure the panels in place once I’d positioned them on the wall. I’ve always been a little scared of my nail gun (correction: scared of my air compressor and the LOUD noises it makes!) and this project forced me to learn to use it by myself since Chris wasn’t around to help me. The brad nailer made the job about a million times easier.

Because my house is neither trim NOR square, as I discovered when building shelves in my pantry (read about that HERE), the panels were a little wonky at the corners. I did the best I could, and figured caulk and paint would help as I finished the project. I had some screen trim left from my pantry shelves and put a piece of that in two of the corners to cover up some small gaps. I was right, when I was done caulking and painting it was impossible to tell.

I wasn’t sure how I’d manage to install the beadboard around the toilet and the sink. I lucked out with the toilet as my water pipes come up from the floor (in some of our houses they come through the wall) so I didn’t have to remove the toilet or the tank; however, I did have to remove the pedestal sink to put the beadboard behind it. THAT was fun–not! Plumbing work always involves standing on your head while screwing or unscrewing connections with the perilous possibility of dropping porcelain and having to buy a new one. But, I persevered and got that sucker off the wall. I didn’t realize it at the time, but getting it back into place was going to be more work than removing it! 🙂
Here we are with no sink!

“Measure twice, cut once” takes on new meaning when you’re measuring for pipe openings. This was also a chance to use that hole-cutter-attachment thingy for my drill that I’d always wondered about. How nice and easy it made the job! Oh, and you can see the two holes in the wall where the toggle bolts for the sink attach…I had to buy new ones as the old ones fell into the wall when I removed the sink. I wouldn’t have thought of that ahead of time!
Since the bead board was 48″ high, I also had to cut openings for the light switch and outlet. I think a jig saw would have been the appropriate tool here, but I don’t have one, so I used a utility knife to saw away at the back of the beadboard and make the openings. Don’t forget to use outlet spacers whenever you’re adding something like bead board or board and batten to a wall; that way your switches and outlets won’t look sunken into the wall.

Finally, I had to trim the top of the beadboard. I used pine finger joint board and cove molding to create the top trim and glued and nailed them into place. The finger joint pieces are sold in 1″ x 2″ x 8′ sections and then I cut them with my miter saw. The cove molding went underneath to create a smooth transition between the finger joint board and the bead board. The cove molding was the only thing that wasn’t pre-primed, but two coats of paint still covered everything. Oh, and I did not remove my baseboards. The bottom of the bead board sat right on top of my baseboards and I just piped in a line of caulk for a smooth transition.

The last step in the process (before decorating–yeah!) was to give all the beadboard and trim two coats of Ultra Pure White in semi-gloss finish. Bead board is a little tricky to paint, but I found that a 3″ wide brush worked best with a 1-1/2″ angled brush for corners.
I spray painted the big heavy mirror black and then realized that hanging it would be tricky with the finger joint board projecting out from the wall. I solved that problem by using a couple of wood scraps and drywall anchors to allow me to hang the mirror away from the wall. Here’s the picture from the side of the mirror–maybe it will make more sense than my description.

And here’s the now-black mirror, from the front:

I did take down the old 3-bulb light fixture and replaced it with a chrome fixture to keep things consistent. Since I bought the new one off Craigslist and sold the old one on Craigslist (both for $30), I was pretty pleased with myself.

As is true with all of my DIY projects, it took longer than I thought it would, but I’m so glad I did it! The last step is going to be to do something on the top half of the wall, but I’m not sure yet if I want to wallpaper (black and white toile, anyone?) or maybe paint a black and white awning stripe or harlequin diamond pattern. Let me know if you have any input!
Here are a few “after” shots, always my favorite part!
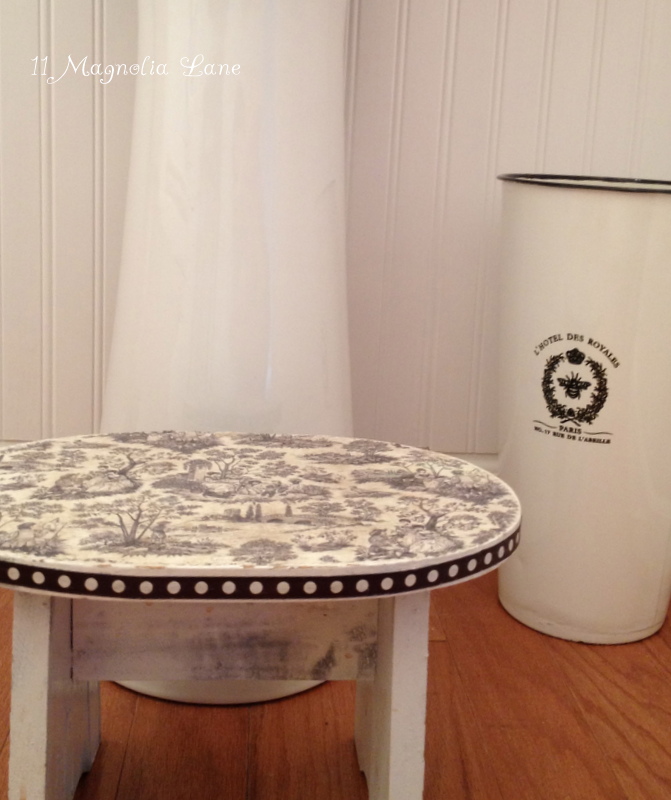
I bought the step stool at a garage sale years ago for $1 and decoupaged toile paper onto the top and trimmed it with ribbon.

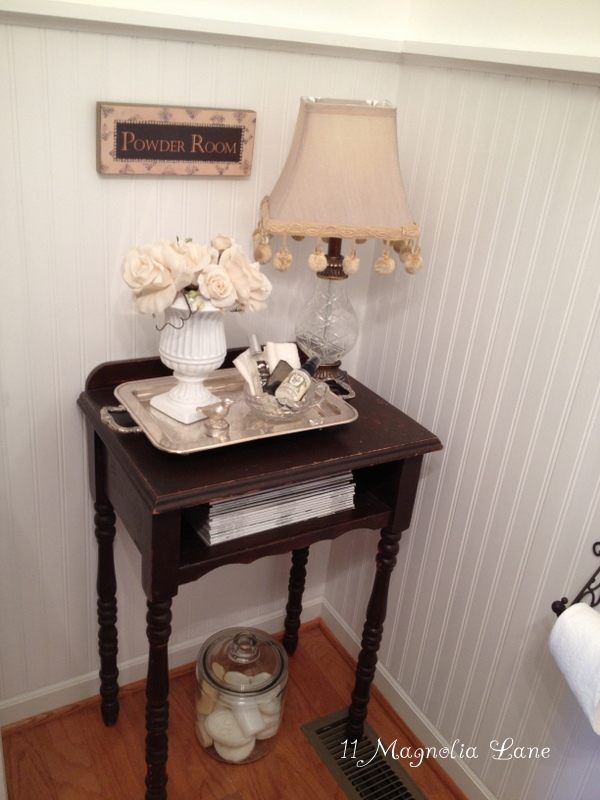
The brown telephone stand is also from a yard sale (recurring theme?) and holds my back issues of Romantic Homes magazine and a variety of powder room essentials.


Why not use a hotel ware ice bucket to store that extra roll of tp?!


I hope you like how it turned out. Now, stay tuned for Part 2!

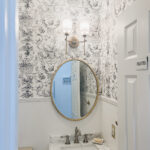


Though I loved the look of your old powder room I really love the new black and white look!! Amazing girl. I want to add beadboard to something now. 🙂
Just let me know when we’re going it and I’ll bring the miter saw and the nail gun!
This look is so, fresh and updated, yet elegant and friendly…just like you, Christy. And the ice bucket to hold the tp is such a, “duh, why didn’t I think of that!” thing! You are consistenly an inspiration to me. Keep it coming! (:
Thank you, Debbie. You are always SO encouraging and I really appreciate it (and you)!
Wow…I applaud you for taking on such a huge project on your own…The powder room looks fantastic!….Love all the creative touches…Great, great job!
Thanks, Shirley. I’ll admit that I didn’t know how big the job was when I started it!!
Oh I love the black and white theme and the accessories are all wonderful. The beadboard looks amazing. Hugs, marty
Thanks, Marty. 🙂
Wow! So pretty and so full of charm! What a change! Beautiful job!
Thanks for stopping by to take a look, Roeshel!