• Skip to primary navigation
  • Skip to main content
  • Skip to primary sidebar
  • Skip to footer
  • MEET CHRISTY & AMY
    • IF YOU’RE NEW HERE…
    • WORK WITH US
    • 11 MAGNOLIA LANE 101
    • DISCLOSURE + PRIVACY (the fine print)
    • BEST OF 11 MAGNOLIA LANE
  • TOUR OUR HOMES
    • TOUR OUR HOMES
    • CHRISTY’S MAGNOLIA COTTAGE
    • CHRISTY’S MCC HOUSE
    • Christy’s Stuttgart Flat
    • Amy’s Virginia Craftsman Home Tour
    • AMY’S VIRGINIA CRAFTSMAN Building Process
    • HOLIDAY HOME TOUR SERIES
  • CELEBRATIONS
    • EVENTS + ENTERTAINING
    • GIFTS
    • HOLIDAYS
    • RECIPES
  • HOME
    • CLEANING
    • DECORATING
    • ORGANIZING
    • ROOM BY ROOM
      • BATHROOMS
      • BEDROOMS
      • CLOSETS
      • CRAFT ROOMS + OFFICES
      • DINING ROOMS
      • KIDS’ ROOMS
      • KITCHENS
      • LAUNDRY ROOMS
      • LIVING + GREAT ROOMS
      • OTHER SPACES
      • PANTRIES
      • PLAYROOMS + BONUS ROOMS
      • PORCHES + OUTDOOR SPACES
    • TIPS
  • SHOP
    • SHOP OUR INSTAGRAM
    • SHOP OUR AMAZON STORE
    • FRIDAY FAVORITE FINDS
  • PROJECTS
    • CRAFTS
    • DIY PROJECTS + TUTORIALS
    • FURNITURE
    • PRINTABLES
    • WINDOWS, DOORS, + WALLS
  • LIFE
    • FRIDAY FREE FOR ALL
    • HEALTH
    • SIMPLY ON SUNDAY
  • TRAVEL
  • CONTACT
    • Email
    • Facebook
    • Instagram
    • Pinterest

11 Magnolia Lane

Sharing our easy DIYs, decorating, entertaining and more!

And Finally…A Headboard

February 8, 2011 By Amy 4 Comments

This Post Contains Affiliate Links

203 shares
  • 2

While you can certainly find upholstered headboards galore in “Blogland,” I am so pleased that a) I got around to making one and b) that it came out just how I wanted it to,  so I had to share!

DIY burlap monogrammed headboard


For YEARS my husband and I have needed a real grown-up bed, and we have been planning on upgrading to a king-sized “Sleep Number”–but life tends to get in the way and we have yet to do so. While that is still our plan, this will then become our guest bed (hopefully) in the near future. I expect it will get a lot of use as we are moving to the beach, and therefore hoping for lots of company!

A few things I wanted to mention now that I have completed this project. It’s SO easy! It took me just a few hours, and cost less than $100. The hardest part was getting it hung on the wall. It’s still not 100% straight, and that would be because our level has gone missing, it would have helped to have it. My husband and I each say the other used it last…hmmm….

First off, I procrastinated this project for months years because the idea of getting to Home Depot and getting a 70″ by 30″ board, cut and out the door with (screaming) child (ren) in tow was just too much for me. So, in my usual fashion, last weekend I sent my husband to handle it for me, which he kindly did. I purchased regular right-off-the-rack linen from Joann’s…I didn’t want to wait for special order fabric. I was nervous about this, but it worked perfectly. I did use a cotton lining layer over the batting just as a precaution, however.

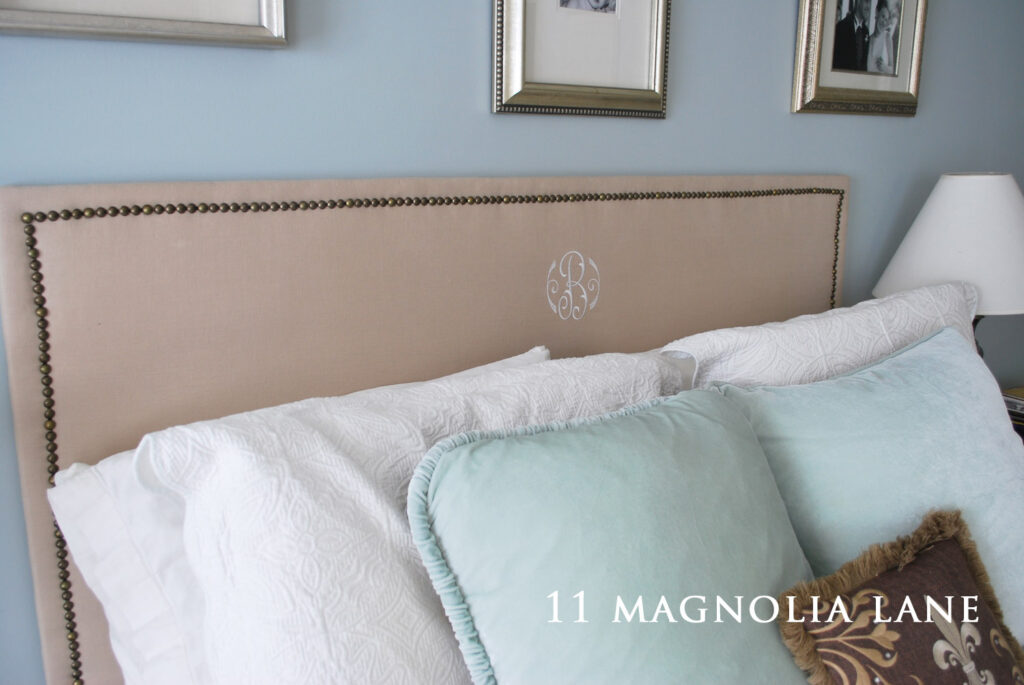
My favorite part is the monogram. Can I tell you how wonderful Diane is from Klein’s Embroidery? She was super-patient with my (graphic designer) self that just needed a particular style of “B” for our monogram. She let me find one on the internet (which I did from Embroidery Arts) and she downloaded it for me and created perfectly on my fabric. And, she now has it on file so I can use it on other projects from here on out, my perfectionistic side is just thrilled to pieces with it. (Any of you with a “B” name out there are welcome to use it, just give her a shout!)

I used the nailhead trim on a roll, which was really easy to use, but hard to find. I ordered it from Beacon Fabrics and I have tons leftover.

We hung it in the wall studs, with D ring hooks as I saw recommended by Centsational Girl (who has a great, inspiring tutorial on this project here) and since it’s coming down in a few months to move, we didn’t stress too much over it, but it seems very secure and at least not too likely to fall on our heads when we sleep.

I won’t bore you with all the steps. But here is a quick look at what I did…

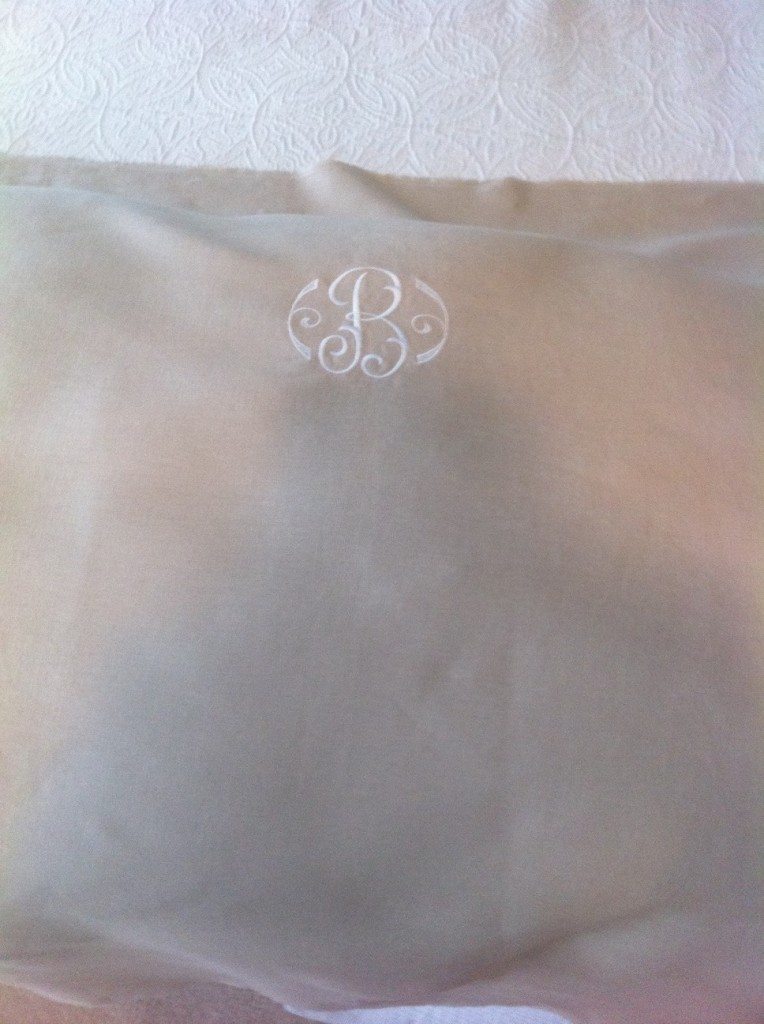
Here is the fabric, which I spent a great deal of time ironing first. Isn’t that monogram pretty?  I love monograms…sigh…


Back Camera

I covered the board first in white cotton batting (two layers), stapled it on, and then over that, stapled on plain white cotton lining fabric and pulled very tight.


Back Camera


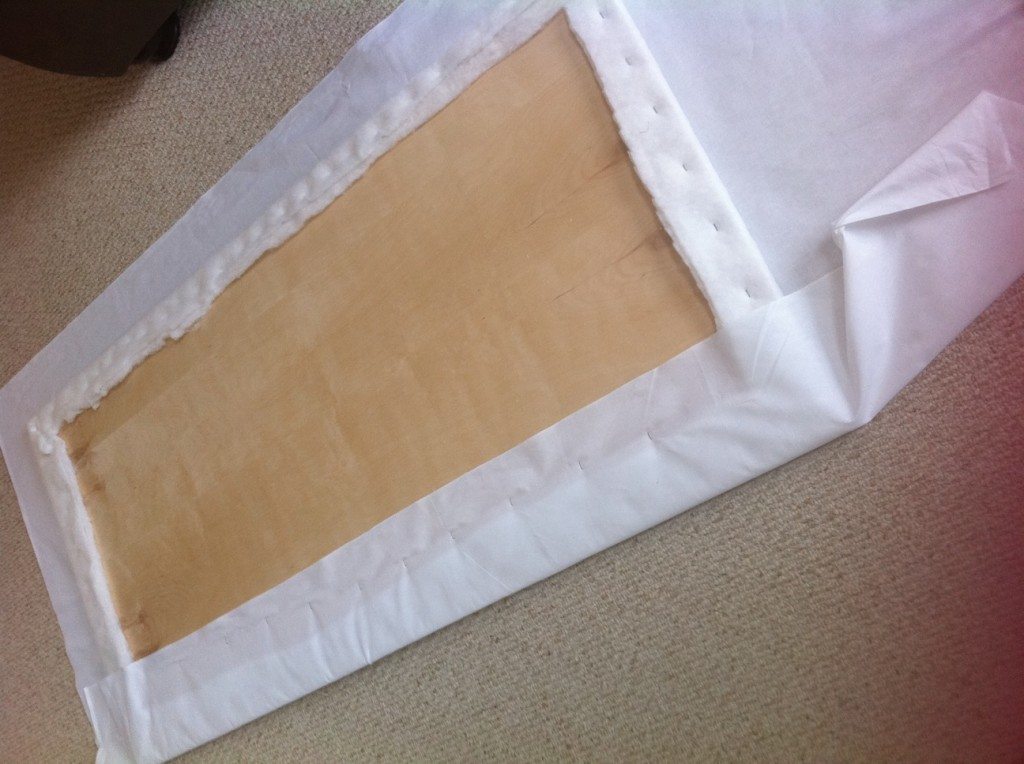
Here is the “underlayer” picture.


Back Camera

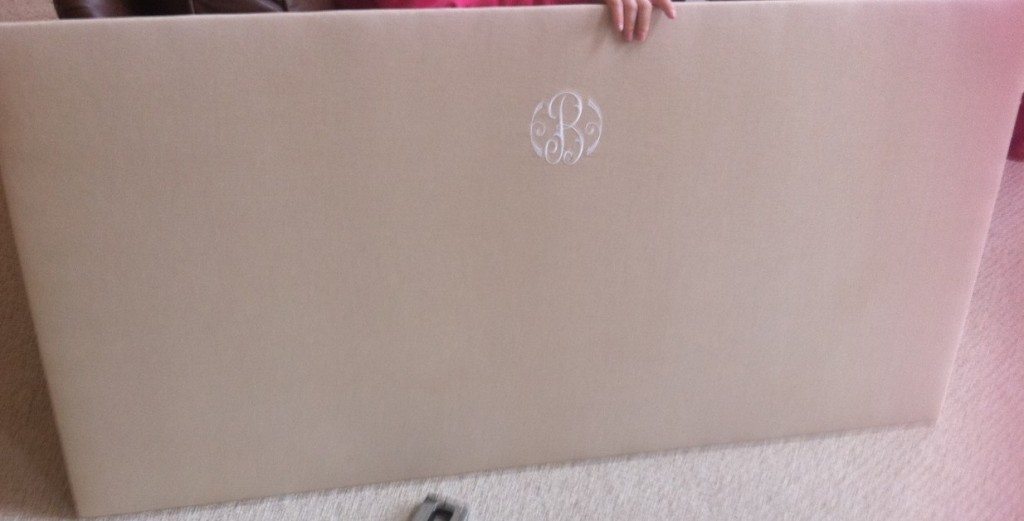
Here it is all covered:


Back Camera


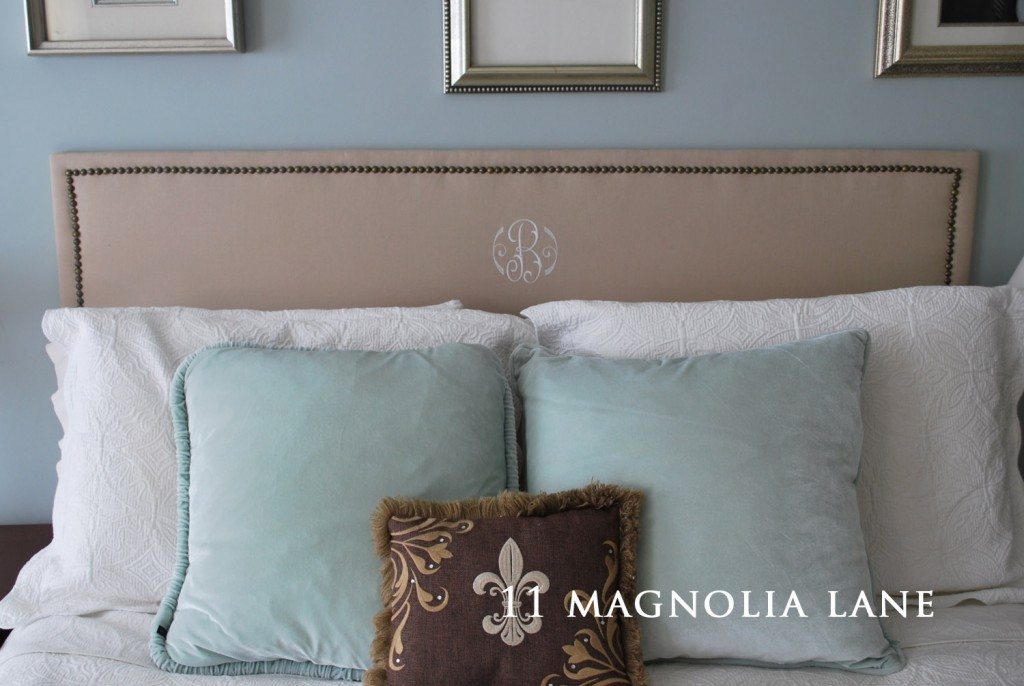
I added the nailhead trim (oops ,no picture) but its easy.  And here it is all, hung up and done. Like so many things, I wish I had done it years ago!

DIY burlap headboard

Headboard 2


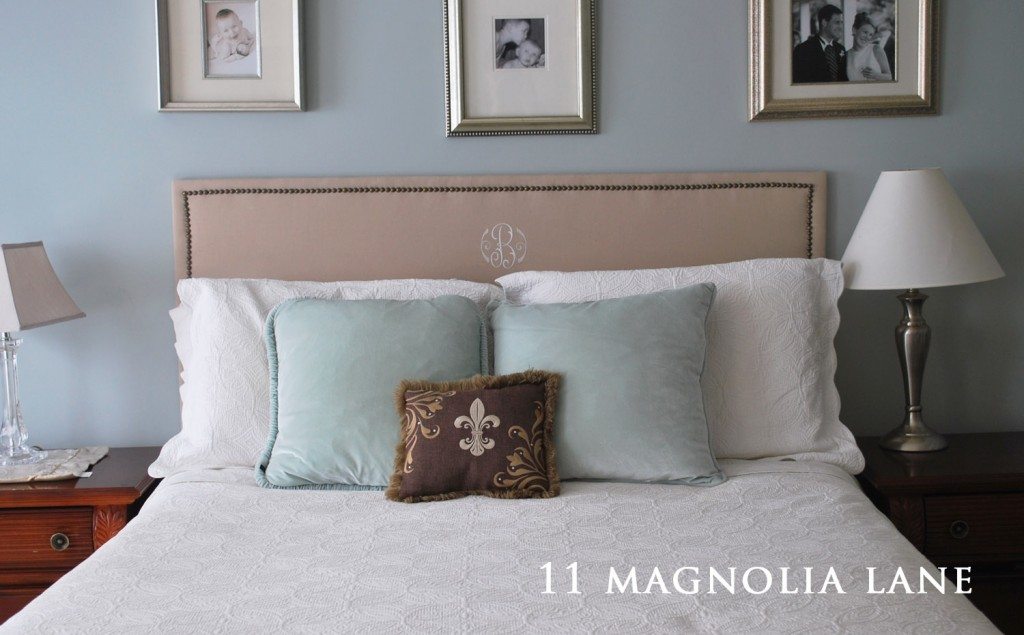
Note: I am now off in search of the perfect accent pillow…that cute fleur de lis is “borrowed” from my living room for the photo op. (I just couldn’t wait till I found a new one to post this) So, I am off to ETSY to search for the ideal grainsack or maybe burlap little pillow…hmmm….we’ll see what I find! Suggestions?

Thanks for stopping by!

icon-facebook-1icon-instagram-1icon-mail-1icon-pinterest-1icon-twitter-1

YOU MIGHT ALSO LIKE THESE POSTS... :

Kathie's Living Room Mini-Tour
DIY Custom Plate Rack (For $40!)
Our Powder Room Makeover with Serena + Lily W...
Easy DIY Peel & Stick Kitchen Backsplash

Filed Under: Burlap Projects, DIY/Projects/Tutorials, Furniture, Monograms Tagged With: Decorating, diy, headboard, make your own, Monogram, nailhead trim

Reader Interactions

Comments

  1. Bella Michelle says

    February 8, 2011 at 6:55 pm

    It looks gorgeous and the monogram just screams designer and expensive!!!! I love it. Now, I need to get off the stick and do one for my dear daughter’s room!

    BTW, where/what beach are you moving to? Just wondering since I am close to a beach! LOL

    Reply
    • Amy from Magnolia Lane says

      February 12, 2011 at 2:22 pm

      Virginia Beach! (we are already in Virginia)…Its still a change as we are much more in the city now. Its going to be an adventure no doubt.
      Thanks for your sweet comments…go for it, this was so easy I am kicking myself that I didn’t get to it a long time ago. It would be supercute in a girls room–I think that’s next on my list.
      Amy

      Reply
  2. My Beautiful Life says

    February 12, 2011 at 1:07 pm

    Oh Amy! That so pretty! I was just looking at Z Gallerie for a headboard/bed. I may just have to consider making one. I am not crafty though, but after seeing the fantastic job you did, I am inspired to at least try!

    Reply
    • Amy from Magnolia Lane says

      February 12, 2011 at 2:22 pm

      Really, its SO easy! You can do it. Drop me a line if you have trouble…all you need is a good staple gun, how easy is that?
      Good luck!
      Amy

      Reply

Leave a Reply Cancel reply

Your email address will not be published. Required fields are marked *

Recipe Rating


This site uses Akismet to reduce spam. Learn how your comment data is processed.

Primary Sidebar

Lowest prices. Straight Teeth,

•Don’t Miss A Thing!!•

•Do You Know Jesus?•

•Featured In•

Holiday Gift Ideas

Footer

  • Email
  • Facebook
  • Instagram
  • Pinterest

Copyright © 2023 · 11 Magnolia Lane· Blog Design by Little Blue Deer
Privacy Policy

11 MAGNOLIA LANE IS A PARTICIPANT IN THE AMAZON SERVICES LLC ASSOCIATES PROGRAM, AN AFFILIATE ADVERTISING PROGRAM DESIGNED TO PROVIDE A MEANS FOR US TO EARN ADVERTISING FEES BY ADVERTISING AND LINKING TO AMAZON.COM AND AFFILIATED SITES. AS AN AMAZON ASSOCIATE, WE EARN FROM QUALIFYING PURCHASES. WE ALSO PARTICIPATE IN SEVERAL OTHER AFFILIATE PROGRAMS; THIS INCOME ALLOWS US TO MAINTAIN THE QUALITY OF YOUR USER EXPERIENCE AND KEEPS OUR CONTENT FREE. WHEN YOU PURCHASE THROUGH ANY OF OUR AFFILIATE LINKS, WE EARN A SMALL COMMISSION AND YOU DON’T PAY A CENT MORE THAN YOU WOULD OTHERWISE; THAT WOULD BE TACKY!   READ OUR FULL PRIVACY AND DISCLOSURE POLICY {HERE}.
  ©11 Magnolia Lane 2019. Unauthorized use and/or duplication of this material without express and written permission from this blog’s authors and/or owners is strictly prohibited. Please email us at admin@11magnolialane.com for more information.

  • MEET CHRISTY & AMY
    • IF YOU’RE NEW HERE…
    • WORK WITH US
    • 11 MAGNOLIA LANE 101
    • DISCLOSURE + PRIVACY (the fine print)
    • BEST OF 11 MAGNOLIA LANE
    • Back
  • TOUR OUR HOMES
    • TOUR OUR HOMES
    • CHRISTY’S MAGNOLIA COTTAGE
    • CHRISTY’S MCC HOUSE
    • AMY’S NEW HOME BUILD
    • HOLIDAY HOME TOUR SERIES
    • SPRING HOME TOUR SERIES
    • Back
  • CELEBRATIONS
    • EVENTS + ENTERTAINING
    • GIFTS
    • HOLIDAYS
    • RECIPES
    • Back
  • HOME
    • CLEANING
    • DECORATING
    • ORGANIZING
    • ROOM BY ROOM
      • BATHROOMS
      • BEDROOMS
      • CLOSETS
      • CRAFT ROOMS + OFFICES
      • DINING ROOMS
      • KIDS’ ROOMS
      • KITCHENS
      • LAUNDRY ROOMS
      • LIVING + GREAT ROOMS
      • OTHER SPACES
      • PANTRIES
      • PLAYROOMS + BONUS ROOMS
      • PORCHES + OUTDOOR SPACES
      • Back
    • TIPS
    • Back
  • SHOP
    • SHOP OUR INSTAGRAM
    • SHOP OUR AMAZON STORE
    • FRIDAY FAVORITE FINDS
    • 11 ML ETSY SHOP
    • 11ML ORGANIZING SHOP
    • Back
  • PROJECTS
    • CRAFTS
    • DIY PROJECTS + TUTORIALS
    • FURNITURE
    • PRINTABLES
    • WINDOWS, DOORS, + WALLS
    • Back
  • LIFE
    • FRIDAY FREE FOR ALL
    • HEALTH
    • SIMPLY ON SUNDAY
    • TRAVEL
    • Back
  • CONTACT
    • Email
    • Facebook
    • Instagram
    • Pinterest
203 shares
  • 2