• Skip to primary navigation
  • Skip to main content
  • Skip to primary sidebar
  • Skip to footer
  • MEET CHRISTY & AMY
    • IF YOU’RE NEW HERE…
    • WORK WITH US
    • 11 MAGNOLIA LANE 101
    • DISCLOSURE + PRIVACY (the fine print)
    • BEST OF 11 MAGNOLIA LANE
  • TOUR OUR HOMES
    • TOUR OUR HOMES
    • CHRISTY’S MAGNOLIA COTTAGE
    • CHRISTY’S MCC HOUSE
    • Christy’s Stuttgart Flat
    • Amy’s Virginia Craftsman Home Tour
    • AMY’S VIRGINIA CRAFTSMAN Building Process
    • HOLIDAY HOME TOUR SERIES
  • CELEBRATIONS
    • EVENTS + ENTERTAINING
    • GIFTS
    • HOLIDAYS
    • RECIPES
  • HOME
    • CLEANING
    • DECORATING
    • ORGANIZING
    • ROOM BY ROOM
      • BATHROOMS
      • BEDROOMS
      • CLOSETS
      • CRAFT ROOMS + OFFICES
      • DINING ROOMS
      • KIDS’ ROOMS
      • KITCHENS
      • LAUNDRY ROOMS
      • LIVING + GREAT ROOMS
      • OTHER SPACES
      • PANTRIES
      • PLAYROOMS + BONUS ROOMS
      • PORCHES + OUTDOOR SPACES
    • TIPS
  • SHOP
    • SHOP OUR INSTAGRAM
    • SHOP OUR AMAZON STORE
    • FRIDAY FAVORITE FINDS
  • PROJECTS
    • CRAFTS
    • DIY PROJECTS + TUTORIALS
    • FURNITURE
    • PRINTABLES
    • WINDOWS, DOORS, + WALLS
  • LIFE
    • FRIDAY FREE FOR ALL
    • HEALTH
    • SIMPLY ON SUNDAY
  • TRAVEL
  • CONTACT
    • Email
    • Facebook
    • Instagram
    • Pinterest

11 Magnolia Lane

Sharing our easy DIYs, decorating, entertaining and more!

Our New Home: Tutorial on Our DIY Living Room Built-In Shelves + Giveaway

August 1, 2014 By Christy 12 Comments

This Post Contains Affiliate Links

1890 shares
  • 26

This post is sponsored by HomeRight. 

DIY Faux "Built In" Shelves--IKEA Hack
Phew!  They’re finally done–although to be honest, writing this post took longer than actually finishing the bookcases.  Be sure to read through to the end, because we’re giving away an awesome HomeRight FinishMax Pro paint sprayer, which was one of my must-have tools for this project.  Also, this room is FINALLY all finished; see it {here}.

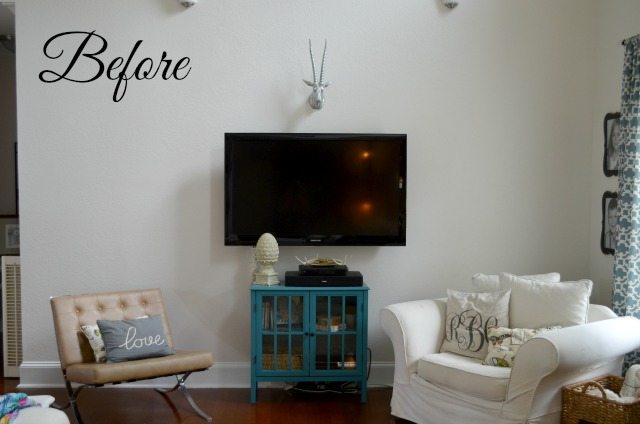
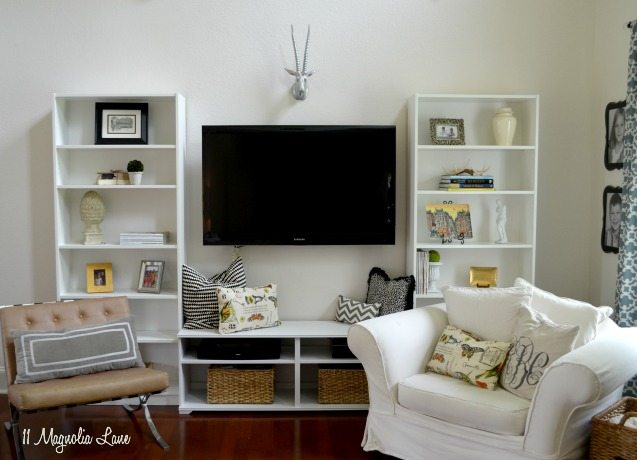
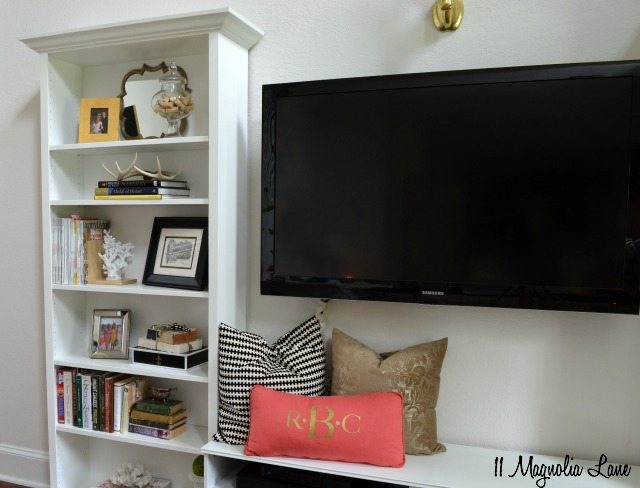
I’ve been working on my living room, and I’ve showed you the progress in several locations.  As a very quick recap, this is the same wall when I started:

Living Room Before
Just a little too bare for my taste, and nowhere to put all of our books.  After a quick trip to IKEA while I was in Atlanta for the Haven conference, the back of my car looked like this, as I lugged home two Billy bookcases and a Borgsjo TV unit.  And a few more throw pillows, because you can NEVER have enough of those!

haven-ikea
Here is the “wall unit” after my husband put everything together for me (my love language is acts of service, dontcha know?), but before I trimmed the shelves:

Living room Ikea "built-ins"
Definitely an improvement, but these are inexpensive bookshelves and they look SO much better when you add trim.  We did something similar in our master bathroom in our Nashville house {here}.  Also, Amy did a wall like this in her library HERE.

Bliss at Home DIY IKEA library wall
 You’ll remember that we are living in military housing and will be moving again next summer, so as much as we really wanted these to be “real” built-ins, we kind of had to fake it so we can take them along with us when we move.  However, just a few pieces of trim, some nails and caulk, and it looks like this was purchased as a single unit.

IKEA Billy built in shelves TV unit

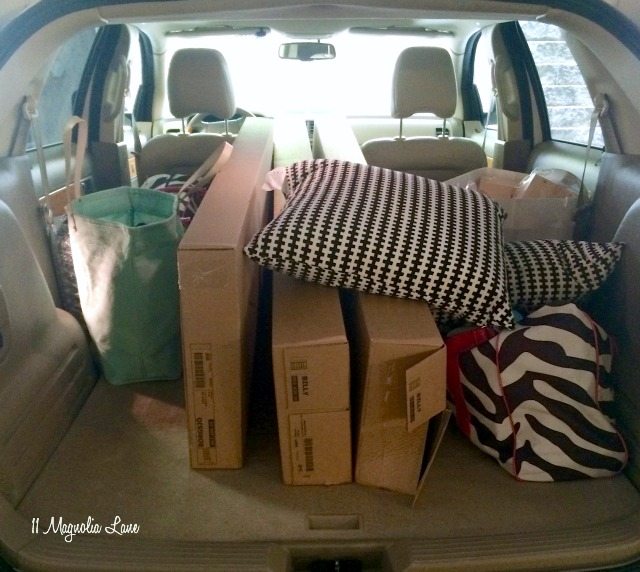
I started with a trip to Home Depot and bought crown molding to go around the tops of both Billys, base molding to go around the bottoms of the Billys (although only the front and one side of each, since they sit flush against the TV unit), and lattice molding to trim the sides of both Billys and the tops.  While you should absolutely measure on your own first, because I am known for being a really terrible measurer, here’s my supply list (the links will take you to the exact item I bought):

  • Crown Molding 12′ (I had some leftover but I always struggle with crown molding and wanted to have extra inches in case I messed up my cuts.  Three cheers that I didn’t this time–I can’t tell you how often I’ve had to run back to the store for more molding!.  You can cut this in two 6′ sections to get it in your car.
  • Base Molding 4″ and I bought 8′
  • Lattice Molding approximately 31′ (can be cut into two 32″ sections and four 76″ sections)
  • A quart of paint to match the Billys–take a shelf in so they can color match it.  I used an eggshell finish and interior latex paint.
  • a tube of caulk

You’ll also need a compound miter saw and a pneumatic nail gun for this job.

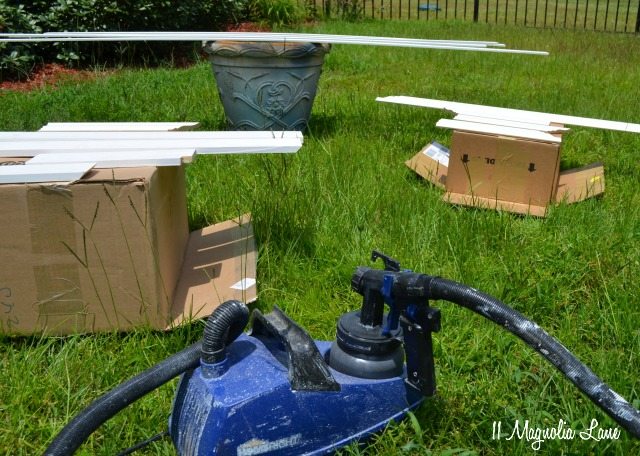
I measured and cut all of my moulding pieces, then painted them, and then installed them into place.  I then filled nail holes, caulked, and patch painted as needed.  I’ll go into more detail about the measuring and cutting in just a minute, but for the painting I used my HomeRight FinishMax Pro to give all of my (pre-primed) trim a quick coat of paint, and it was lightning fast.  I also gave the TV unit a quick coat of paint because it’s just a slightly different finish than the Billys (go figure!).

This paint sprayer is the. best. ever and it cleans up lightning fast.  You can read more about it in this post, and don’t forget that we’re giving one away at the end of this post!

My highly professional spray paint set up:

painted-moulding

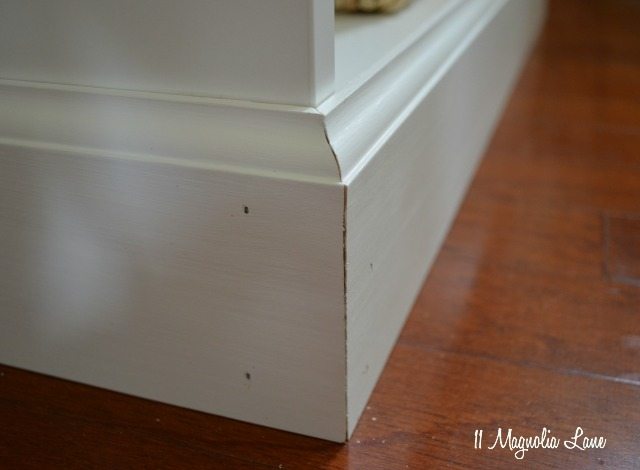
I added the base moulding first, using a straight 45° angle.  You’ll need to notch the side piece to fit around the shoe moulding (also called quarter-round) if you don’t plan on removing it. The Billys are constructed with a notch in the back of the bookcase so they’ll sit flush against the wall.  Since we’re renting and we didn’t want to pull off the shoe moulding or the baseboards, I just used a hand saw to notch our baseboard and then sanded the edge.

notch-moulding-base

Use your nail gun to fix the baseboard in place.  Your moldings should line up pretty well; but you’ll use caulk and paint to fill in the imperfections when you’re done with the project.

baseboard-joint

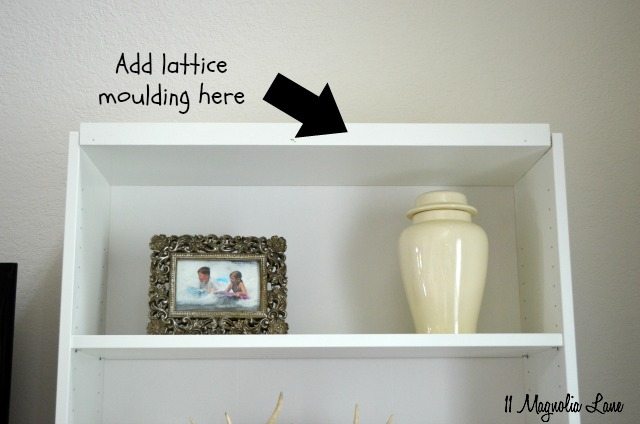
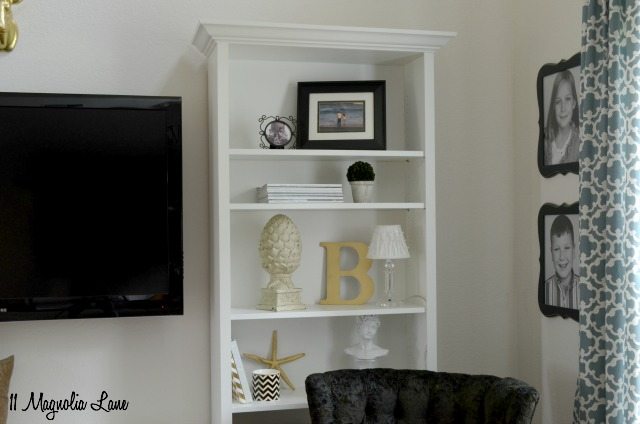
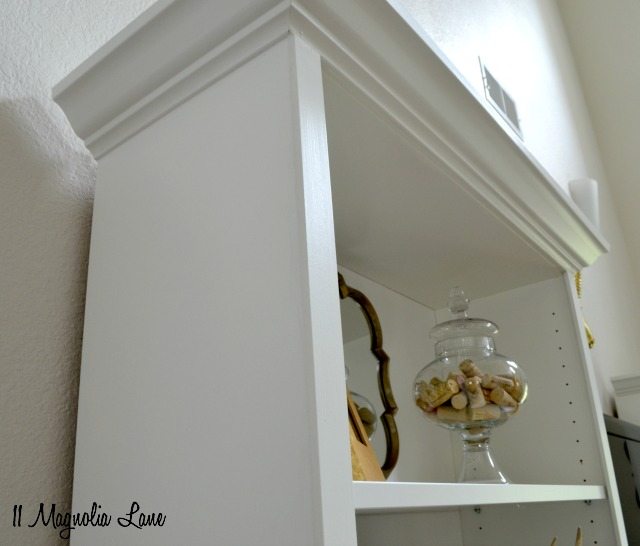
The next step is to add lattice moulding to the top of the bookcases in preparation for the crown moulding; if you skip this step your crown molding will not sit flush against the front of the bookshelves.

lattice-moulding-top

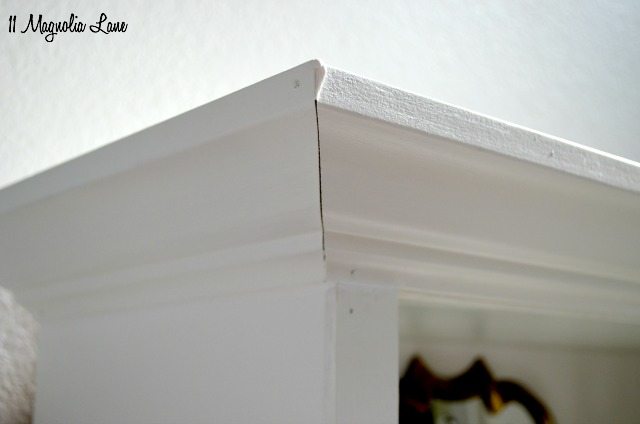
Cutting crown moulding is always tricky; if you think you’re doing it exactly backwards from what you should be doing, then you’re probably doing it right!  I will say that I only cut ONCE for this project–a new record!  This is one of the best videos that I’ve used on how the process works, and I was able to cut my angles without coping them.

Unless you want to lose your mind, you should always cut all of the angles from the same continuous piece of crown molding.  So, one 6′ piece for the one bookshelf, and one 6′ piece for the other.  You also might not want to cut crown molding with your husband, unless, of course, you never argue.

This isn’t a bad joint for a DIY’er:

crown-molding

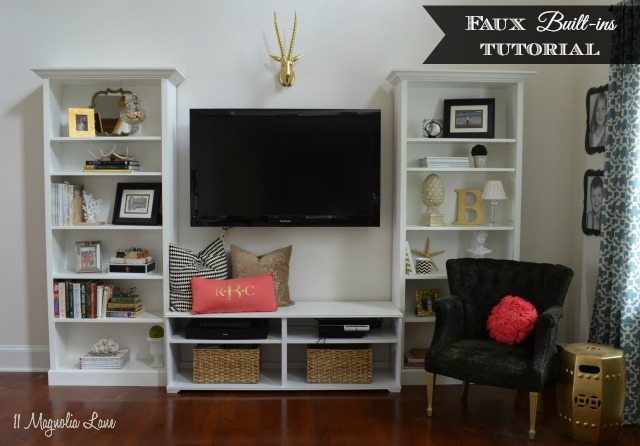
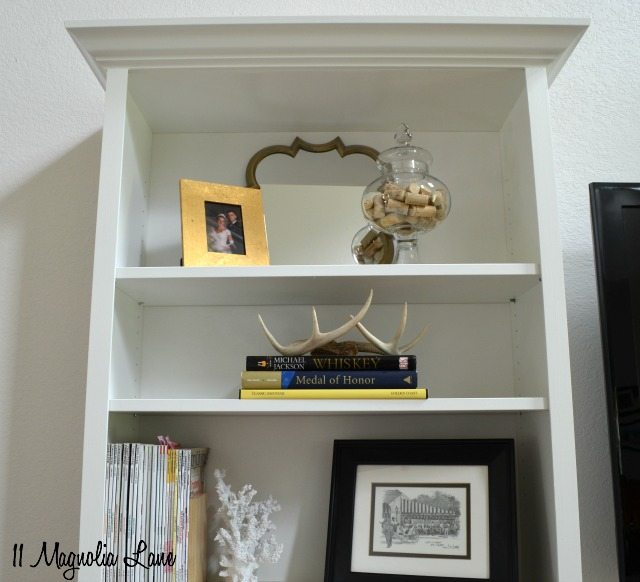
I added the lattice trim last of all, on the sides. This just gives the illusion of the bookcases being thicker and more substantial.

lattice-trim

Then I filled the nail holes with spackle, the cracks with caulk, and painted a top coat.

That’s it!  And since the pieces aren’t attached, we can reconfigure the setup in our next house if we need to.

after-left

IKEA hack--Billy built ins

after-right

side-after

shelves-left

IKEA hack built in shelves

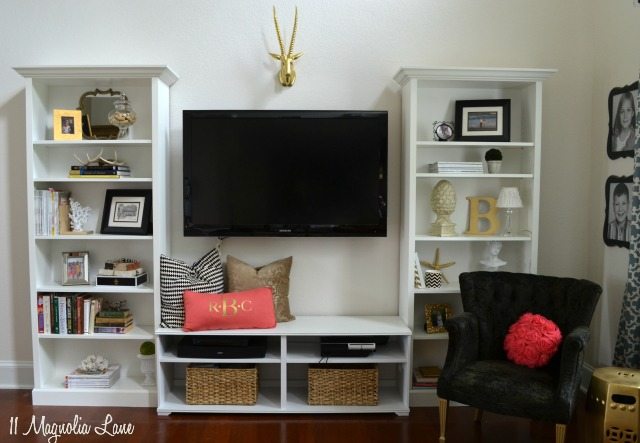
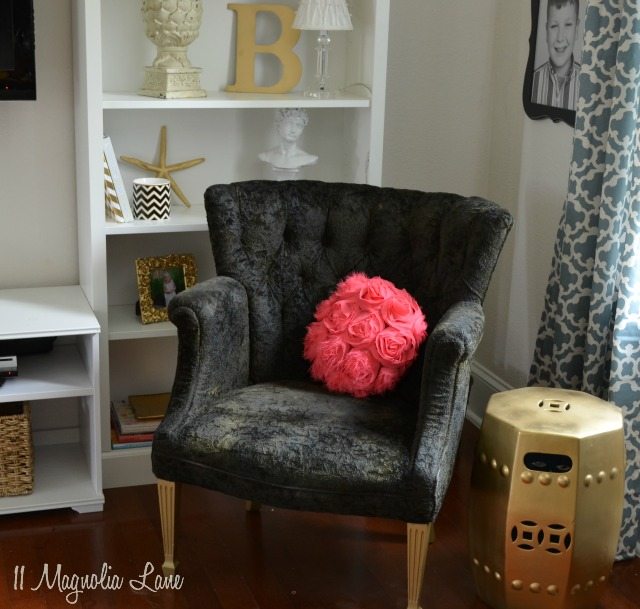
The post on the velvet chair is here and the post on the gold garden stool is here.  Someone always asks about the coral pillow–it’s from Stein-mart and I added the iron-on gold monogram.

left-side

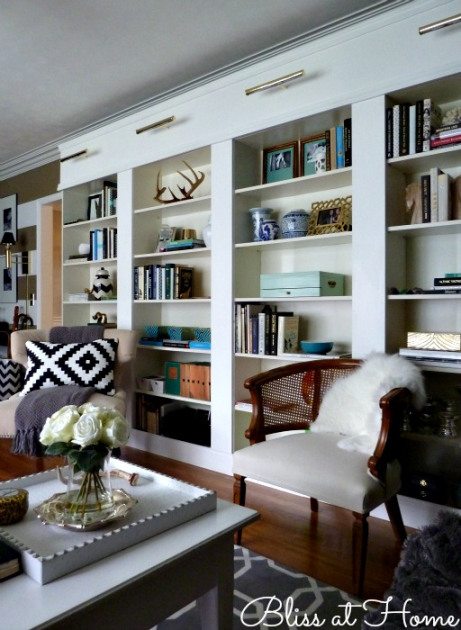
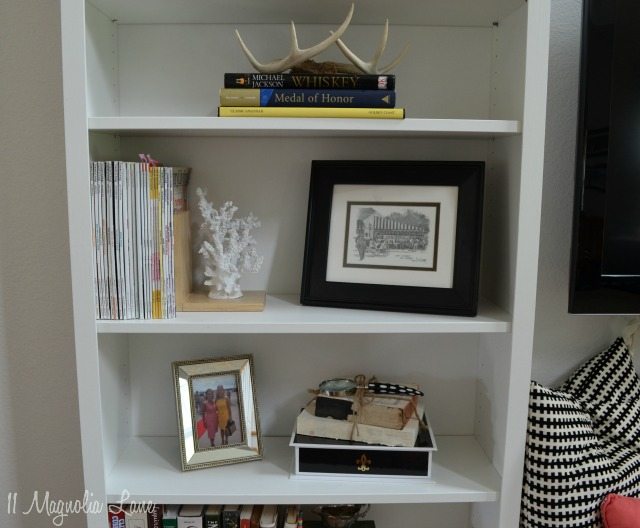
We haven’t gotten our books out of storage yet, but they’ll be moving into their new home very, very soon!

As promised, here are the other posts on this room update:

Living Room:  The Redo Reveal

Built-ins, part 1

Garden Stool

Couch and Pillows

Black Velvet Chair

Gold Vase

Thanks for stopping by-

icon-facebook-1icon-instagram-1icon-mail-1icon-pinterest-1icon-twitter-1

YOU MIGHT ALSO LIKE THESE POSTS... :

Kathie's Living Room Mini-Tour
Crushing On: Velvet Couches
Holiday Tour of Homes--Amy's Living Room {Day...
Our New Living Room Sofas

Filed Under: DIY/Projects/Tutorials, Furniture, HomeRight Projects, Living/Great Rooms, Room Makeovers, Wall & Door Decor Tagged With: Billy, bookshelves, built-ins, hack, Ikea, living room, shelves

Reader Interactions

Comments

  1. Debbie says

    August 1, 2014 at 7:39 pm

    Great job! They look awesome, I’m calling you when I need crown molding 😉
    Debbie

    Reply
    • Christy says

      August 3, 2014 at 11:41 pm

      I’d say no problem, Debbie, but I’m not entirely sure I can repeat that performance! LOL

      Reply
  2. Lisa Fitzgerald says

    August 1, 2014 at 7:42 pm

    Love that awesome sprayer

    Reply
    • Christy says

      August 3, 2014 at 11:42 pm

      It rocks. Good luck to you, Lisa!

      Reply
  3. Katherine Botsford says

    August 2, 2014 at 9:45 pm

    Hi Chrisy, I just found your blog and LOVE your home! I found your blog because I was doing a search to find out if I could paint my backsplash kitchen tiles white. I see you did and they look beautiful. What I am wondering though is do they have a bit of a shine to them? I know you said you used the glossy paint, but just wondering if you think that is enough. They look beautiful, but it’s hard for me to see if they look shiny/glossy. Thank you so much for your time, and I look forward to following your blog and your ideas!

    Katherine

    Reply
    • Christy says

      August 3, 2014 at 11:44 pm

      Katherine–thanks for writing. I’m so glad you found us and that you’re following along now. Yes, the tiles do look shiny. If you paint yours with a gloss paint and still want more shine when you’re done, you could always put a coat of polyurethane on top, but I didn’t do that. Good luck with your backsplash!

      Reply
  4. the cape on the corner says

    August 5, 2014 at 10:52 am

    that looks fabulous, and something you can definitely re use at your next location. i love the way you accessorized everything, too.
    enjoy,
    b

    Reply
    • Christy says

      August 6, 2014 at 11:19 pm

      Thank you! I feel kind of bad that I took the “after” pictures before I brought all of our books back in, but it was fun to dress up the shelves in the meantime!

      Reply
  5. Astral Riles says

    August 5, 2014 at 12:36 pm

    I absolutely love this. I am definitely going to have to add this to my DIY “to-do-list”. Thanks for the inspiration! Great job.

    Reply
    • Christy says

      August 6, 2014 at 11:19 pm

      Thank you, Astral! 🙂

      Reply
  6. Kristina says

    August 7, 2014 at 9:00 pm

    Hi! I saw you at TDC link party and could not resist clicking on your photo – it looked so much like mine! I loved reading about your project and really like how you added the lattice trim to the sides of your bookcase. I may do that to mine too. Thanks so much for that tip and inspiration!!!
    http://www.thriftysouthernpilgrim.com/2014/08/billy-built-in-unit.html

    Reply
    • Christy says

      August 10, 2014 at 6:38 pm

      Hey, Kristina–I’m so glad you stopped by! The bottom doors on your Billys are a great idea. Yes, the lattice trim is a nice touch. I “hacked” my first Billy back in 2011 and that was one of my favorite parts of the project–it just adds a little something extra.

      Reply

Leave a Reply Cancel reply

Your email address will not be published. Required fields are marked *

Recipe Rating


This site uses Akismet to reduce spam. Learn how your comment data is processed.

Primary Sidebar

Lowest prices. Straight Teeth,

•Don’t Miss A Thing!!•

•Do You Know Jesus?•

•Featured In•

Holiday Gift Ideas

Footer

  • Email
  • Facebook
  • Instagram
  • Pinterest

Copyright © 2023 · 11 Magnolia Lane· Blog Design by Little Blue Deer
Privacy Policy

11 MAGNOLIA LANE IS A PARTICIPANT IN THE AMAZON SERVICES LLC ASSOCIATES PROGRAM, AN AFFILIATE ADVERTISING PROGRAM DESIGNED TO PROVIDE A MEANS FOR US TO EARN ADVERTISING FEES BY ADVERTISING AND LINKING TO AMAZON.COM AND AFFILIATED SITES. AS AN AMAZON ASSOCIATE, WE EARN FROM QUALIFYING PURCHASES. WE ALSO PARTICIPATE IN SEVERAL OTHER AFFILIATE PROGRAMS; THIS INCOME ALLOWS US TO MAINTAIN THE QUALITY OF YOUR USER EXPERIENCE AND KEEPS OUR CONTENT FREE. WHEN YOU PURCHASE THROUGH ANY OF OUR AFFILIATE LINKS, WE EARN A SMALL COMMISSION AND YOU DON’T PAY A CENT MORE THAN YOU WOULD OTHERWISE; THAT WOULD BE TACKY!   READ OUR FULL PRIVACY AND DISCLOSURE POLICY {HERE}.
  ©11 Magnolia Lane 2019. Unauthorized use and/or duplication of this material without express and written permission from this blog’s authors and/or owners is strictly prohibited. Please email us at admin@11magnolialane.com for more information.

  • MEET CHRISTY & AMY
    • IF YOU’RE NEW HERE…
    • WORK WITH US
    • 11 MAGNOLIA LANE 101
    • DISCLOSURE + PRIVACY (the fine print)
    • BEST OF 11 MAGNOLIA LANE
    • Back
  • TOUR OUR HOMES
    • TOUR OUR HOMES
    • CHRISTY’S MAGNOLIA COTTAGE
    • CHRISTY’S MCC HOUSE
    • AMY’S NEW HOME BUILD
    • HOLIDAY HOME TOUR SERIES
    • SPRING HOME TOUR SERIES
    • Back
  • CELEBRATIONS
    • EVENTS + ENTERTAINING
    • GIFTS
    • HOLIDAYS
    • RECIPES
    • Back
  • HOME
    • CLEANING
    • DECORATING
    • ORGANIZING
    • ROOM BY ROOM
      • BATHROOMS
      • BEDROOMS
      • CLOSETS
      • CRAFT ROOMS + OFFICES
      • DINING ROOMS
      • KIDS’ ROOMS
      • KITCHENS
      • LAUNDRY ROOMS
      • LIVING + GREAT ROOMS
      • OTHER SPACES
      • PANTRIES
      • PLAYROOMS + BONUS ROOMS
      • PORCHES + OUTDOOR SPACES
      • Back
    • TIPS
    • Back
  • SHOP
    • SHOP OUR INSTAGRAM
    • SHOP OUR AMAZON STORE
    • FRIDAY FAVORITE FINDS
    • 11 ML ETSY SHOP
    • 11ML ORGANIZING SHOP
    • Back
  • PROJECTS
    • CRAFTS
    • DIY PROJECTS + TUTORIALS
    • FURNITURE
    • PRINTABLES
    • WINDOWS, DOORS, + WALLS
    • Back
  • LIFE
    • FRIDAY FREE FOR ALL
    • HEALTH
    • SIMPLY ON SUNDAY
    • TRAVEL
    • Back
  • CONTACT
    • Email
    • Facebook
    • Instagram
    • Pinterest
1890 shares
  • 26