Here is the preview of the “After”, instant gratification!
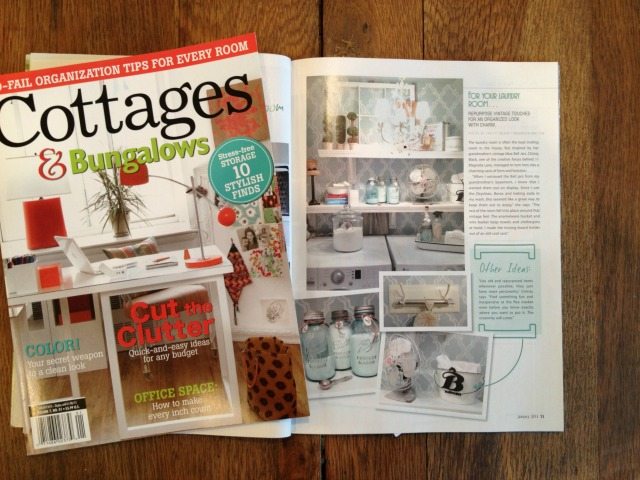
Too exciting: this laundry room redo was featured in the January 2012 issue of Cottages & Bungalows Magazine! Read on for all the details…
I’ve been struggling with what to do with our laundry room since we moved into our new house in Nashville this summer. It’s located off the kitchen, and to be honest, it’s pretty small compared to the overall square footage of the house. The laundry room was definitely an area where I compromised–I wanted lots of room, cabinets, and a laundry sink. I got none of those things, but obviously I liked the rest of the house enough to make it work.
There’s a quirky area to the right that’s under the steps to the second floor, but it’s hard to access when the washer and dryer are unstacked. The previous owners had their machines stacked and put white wire shelving off to the right.
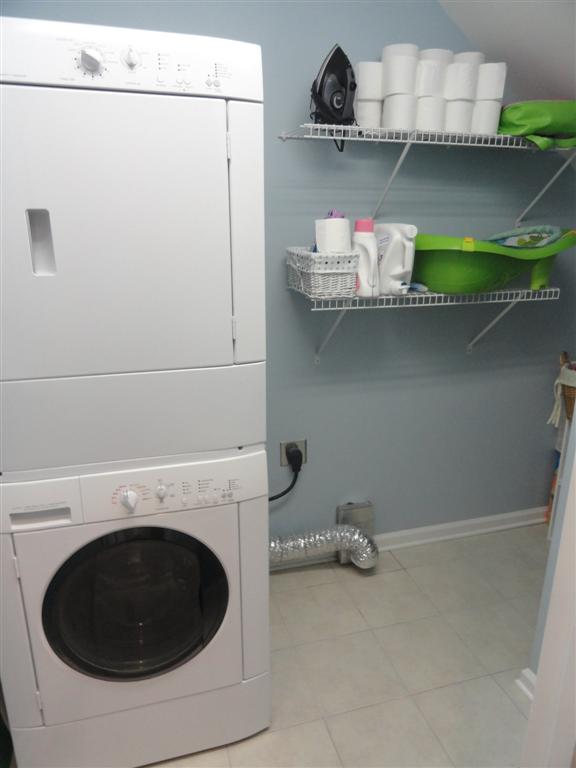
Here’s what the previous owners had done.
We had a stackable (not full-size) washer and dryer in our previous house, and a laundry closet, so I was still moving up in the world to get an actual laundry room this time! However, I really didn’t want to stack the washer and dryer, if I could avoid it. It’s harder for me to load and unload (I know others will say the exact opposite, but it’s just personal preference), and I hate it when I see visible dryer vent. I also despise, with a passion, white wire shelving, which is a terrible shame since all newer homes are *full* of it! My stuff is always falling over crooked and I can’t stand it! So, I knew the shelving would go for sure.
Here’s what the laundry room looked like while I was just making it work, and getting the other (and more visible) parts of the house done:
Laundry room before
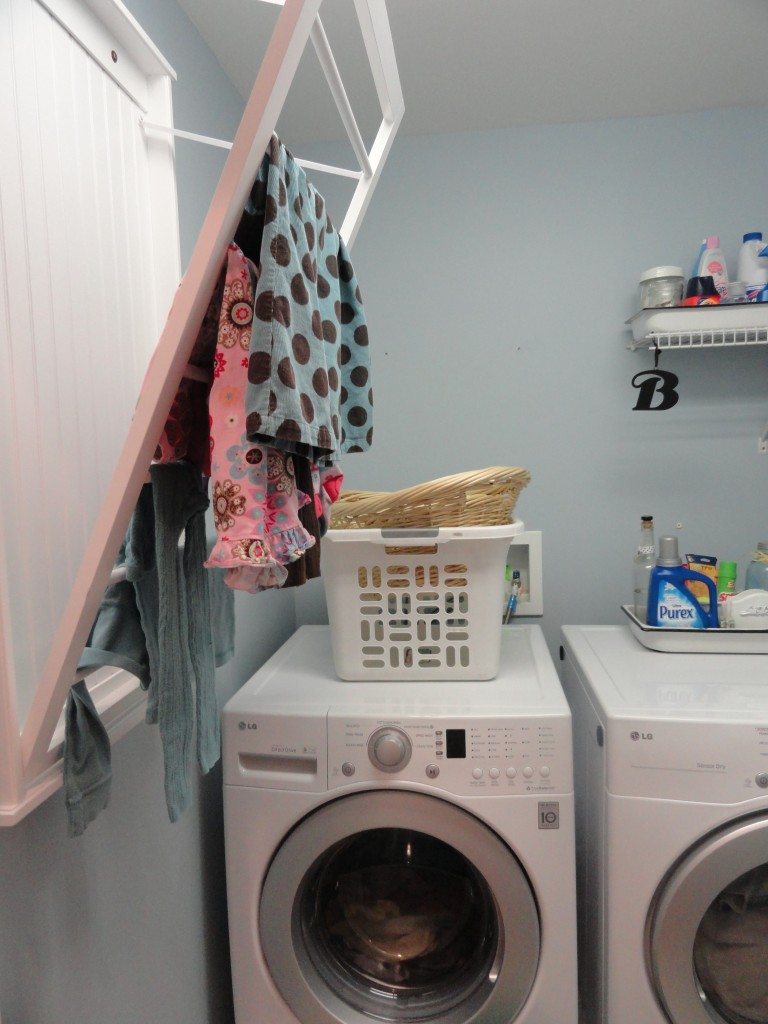
Note that there’s laundry in the washer and dryer (because there ALWAYS is!) and stuff hanging on my awesome Ballard Designs drying rack. Also note how sad my shelving looks now that washer and dryer are unstacked–it’s almost impossible to reach anything. That stuff’s got to go!
My crazy under-the-stairs wasted space!
Notice that I can’t even get to the space under the stairs right now…I’ve got maybe four inches between the dryer and the wall. I have to vault over the dryer to get back there! The problem is the aluminum dryer venting–it’s the round coiling kind, but I need something made for small spaces that lets you push the dryer almost flush against the wall. Fortunately, they make exactly what I needed–periscope-style rigid ducting that allow me to use every inch of my space. That was the first thing I fixed, and it made a huge difference!
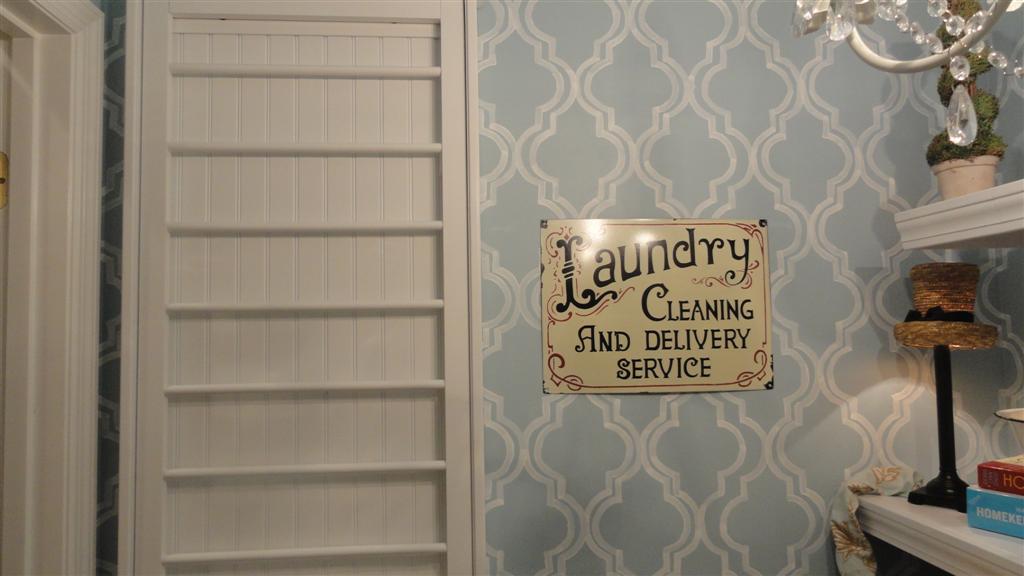
I liked the blue color on the walls, and the previous owners had left the can of paint for me in the garage, so I patched the walls (especially the huge holes when I took the white wire shelving down) and painted the ceiling. I like to paint the ceiling in a small space, especially when it’s a lighter color. I also decided to get crazy and do Jones Design Company’s painted wallpaper treatment on the walls, figuring that it wouldn’t take too long in such a small space. I was wrong–it seems like it took forever, but I love it so much that it was well worth it!!

This is my only shot of “during” the wallpaper painting, taken on my phone, so it’s probably not the best quality. Notice the patterns on the washing machine–I traced those a thousand times!
Once I had the walls painted, I turned my attention to the hideous fluorescent lighting on the ceiling. Really? I pulled that sucker off and stuck it on Craigslist. No one’s bought it yet, and I am not surprised!
Obviously, when I pulled the light down, I was expecting to have to paint the rest of the ceiling–no problem–but I was bit surprised when there was no electrical box in the ceiling, just a 4″ x 4″ hole cut in the drywall with the wires hanging out. I can hang lighting fixtures no problem, but I’ve never had to install a box. Off to Home Depot (which was so annoying–I was ready to hang my chandelier that night!!).
")
My nasty surprise in the ceiling!
The Home Depot guy hooked me up with a joist bar mount (you can see it in the picture after I’d already put it in) that you screw into two ceiling joists, and then you mount the box on the bar. Nothing’s ever easy for me, though, and I had to make the hole a little bigger. Drywall dust EVERYWHERE! Finally, though, I got the chandelier installed and swagged over so that it hangs between the washer and dryer. I had it sitting in my bedroom for a couple of months; originally I intended to put it in my closet, but this seemed like a better idea. I bought it on clearance at Home Depot.
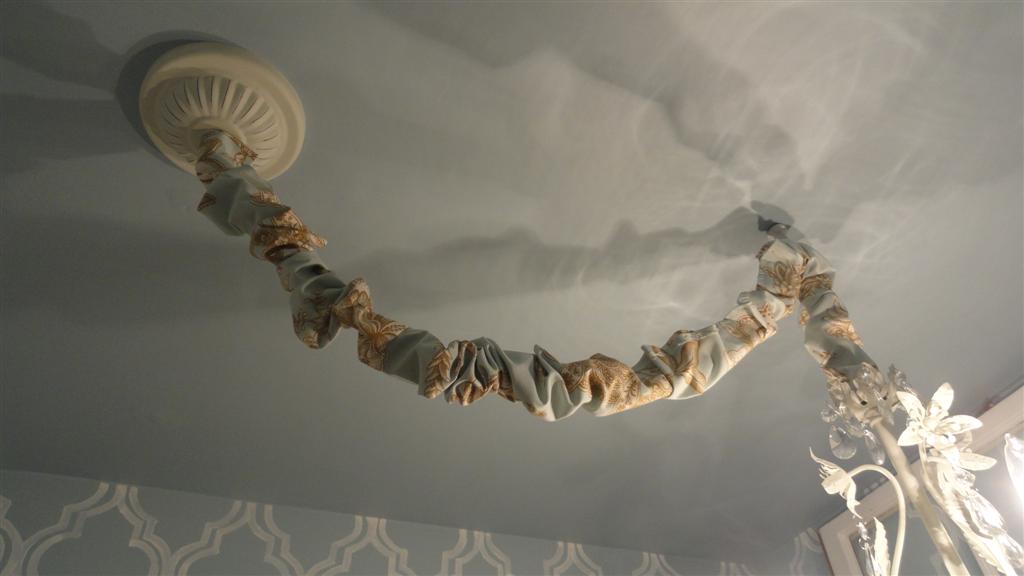
Chandelier installed–check. Ceiling painted–check. Cord cover sewed–check.
I did a quick and dirty cord cover (who looks that closely at the ceiling, right?) for the chandy and the little lamp I put on the shelves with fabric that I already had that matches my ironing board cover. That fabric has been everywhere over the years–Amy had it in her kitchen until she moved and then she returned it to me to use in my kitchen and laundry room!
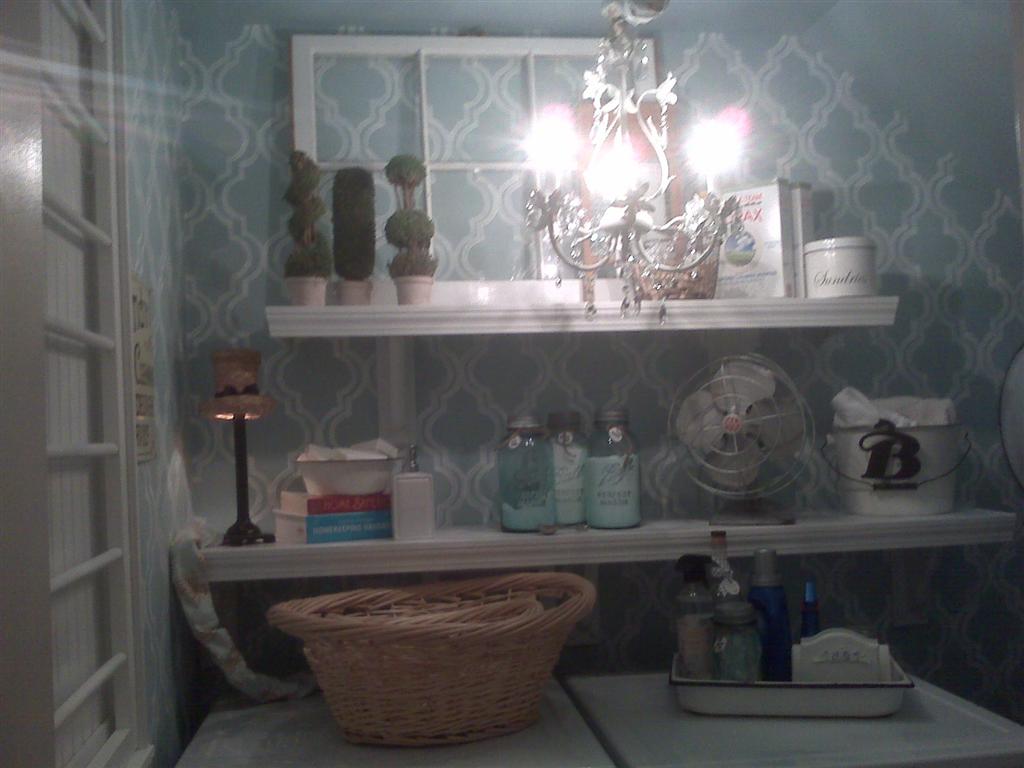
Next, it was time to make cafe-style shelving. I bought wood brackets and white MDF shelves at Home Depot and simply glued trim around the sides so that they looked more substantial. I could have skipped the trim but now that I’m done, I’m glad that I did it. Take a close look at the top shelf and see if you can see where I messed up (measure twice, cut once, measure twice, cut once!). I made the top shelf a little smaller than the bottom one, but they’re the same depth (12″).

Top shelf–I made it a little smaller than the bottom one, but they’re the same depth (12″)
I screwed the brackets into the studs and then screwed the shelves onto the brackets–those babies aren’t going anywhere!
Now, the fun part–accessorizing! I had everything already, with the exception of the rug, so it was just a question of deciding where to put it. This is my absolute favorite part of redoing a room, and the reason that I tend to rush through the more important construction-type work (a major character flaw, I know).
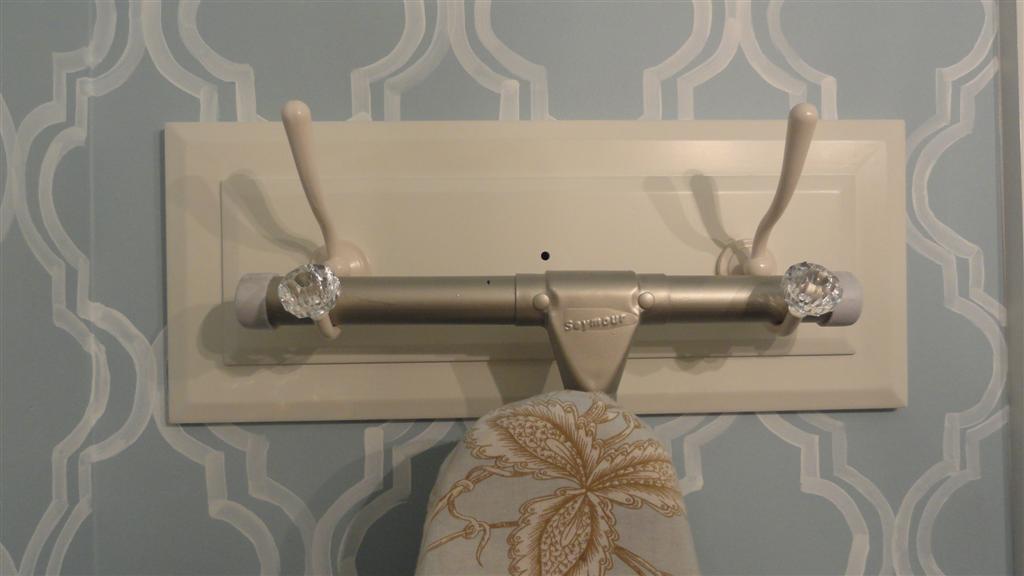
I borrowed the concept of Shelley’s ironing board hanger at House of Smiths and tweaked it a little to use what I already had–a shabby chic hook rack from HomeGOods. I unscrewed the middle hook (still need to fill that hole somehow) and hung the ironing board from it. I also gave the legs of my ironing board a coat of Pewter spray paint–they were cobalt blue and I hated that look. The ironing board cover is the same fabric as my cord covers, as I mentioned earlier.
My ironing board is crooked–I never noticed that before!
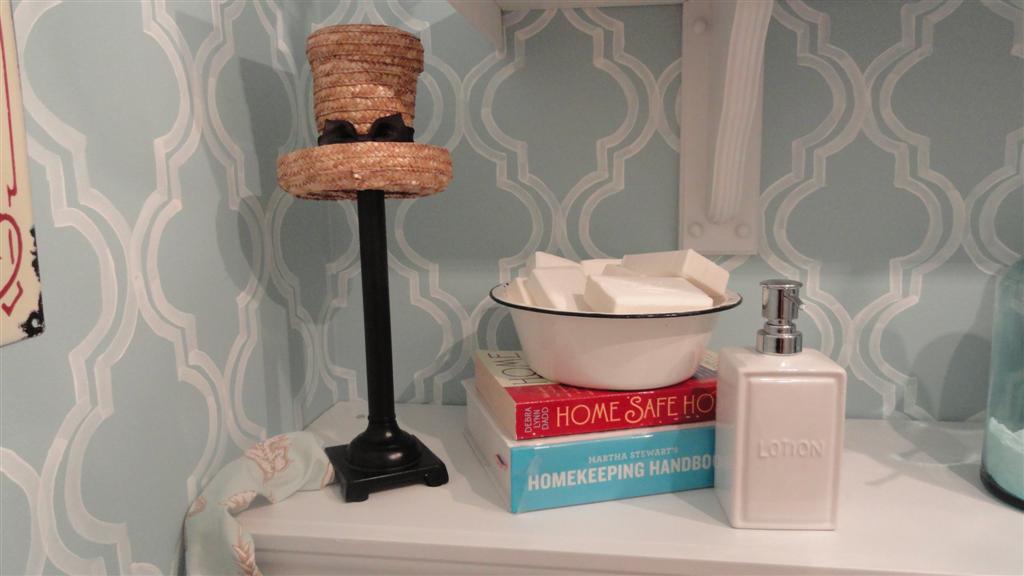
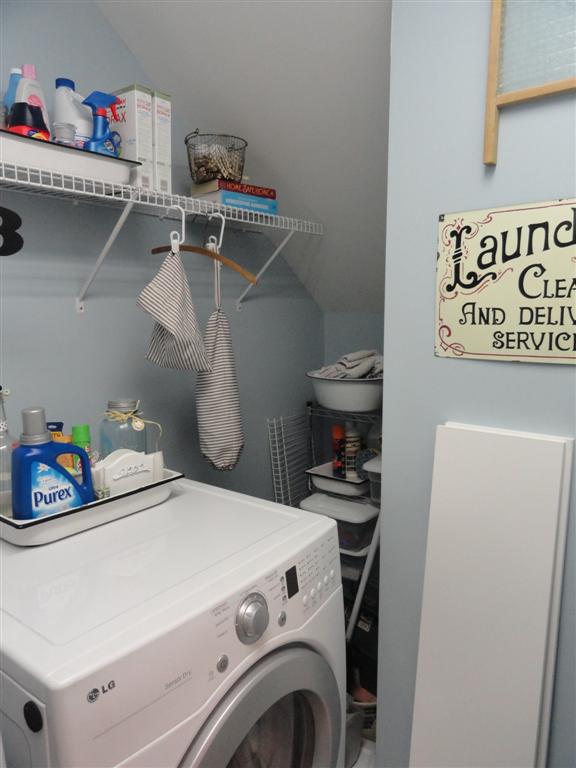
Gotta have my Martha Stewart Homekeeping manual within reach!
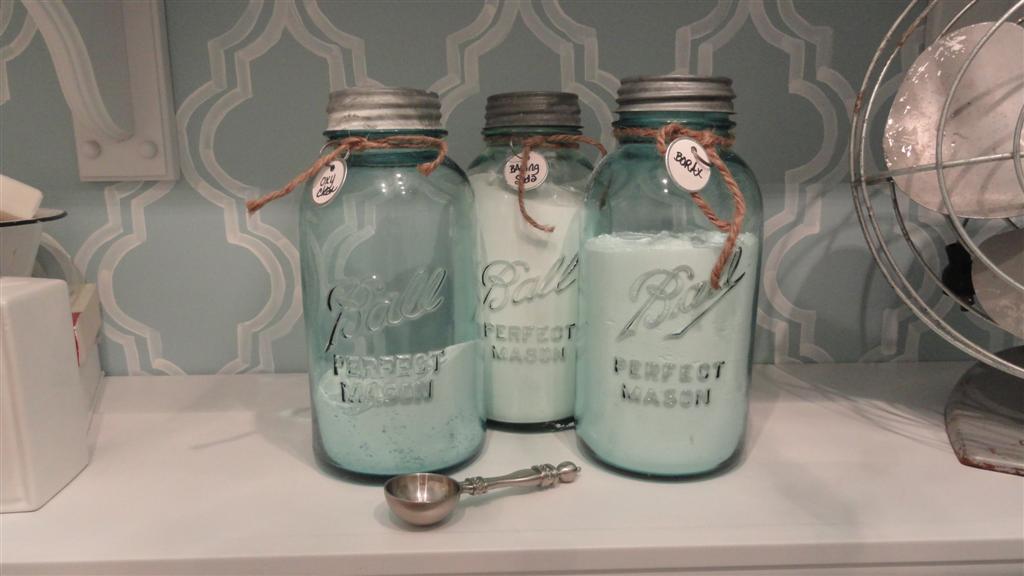
Grandma’s mason jars hold OxyClean, baking soda, and borax–I use them all in my laundry.
The Ballard drying rack was my Mother’s Day present this year (because I am a dork and love stuff like that for Mother’s Day!).
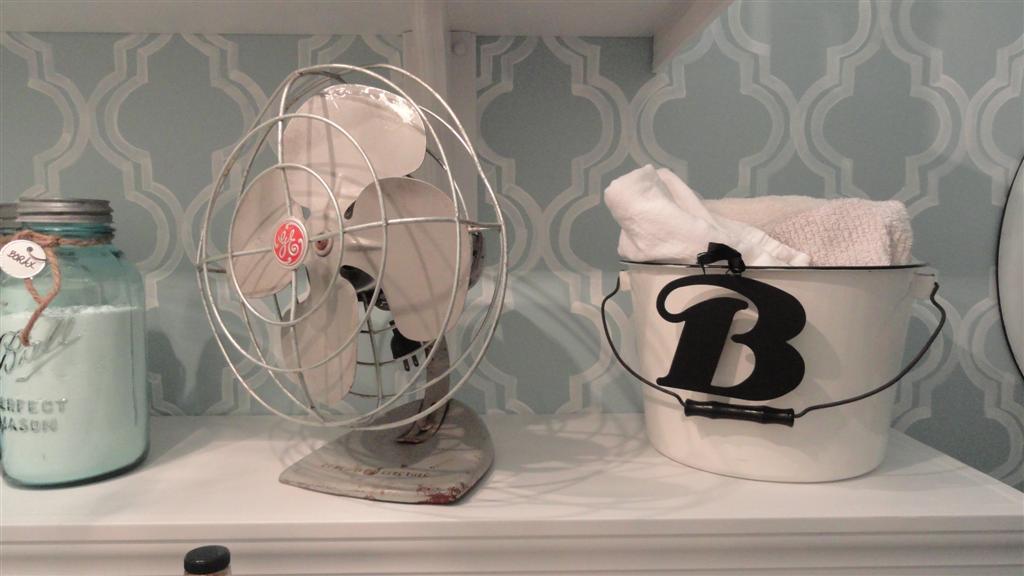
The vintage fan was $2 at a yard sale (it works) and the enamel bucket holds my cleaning rags.
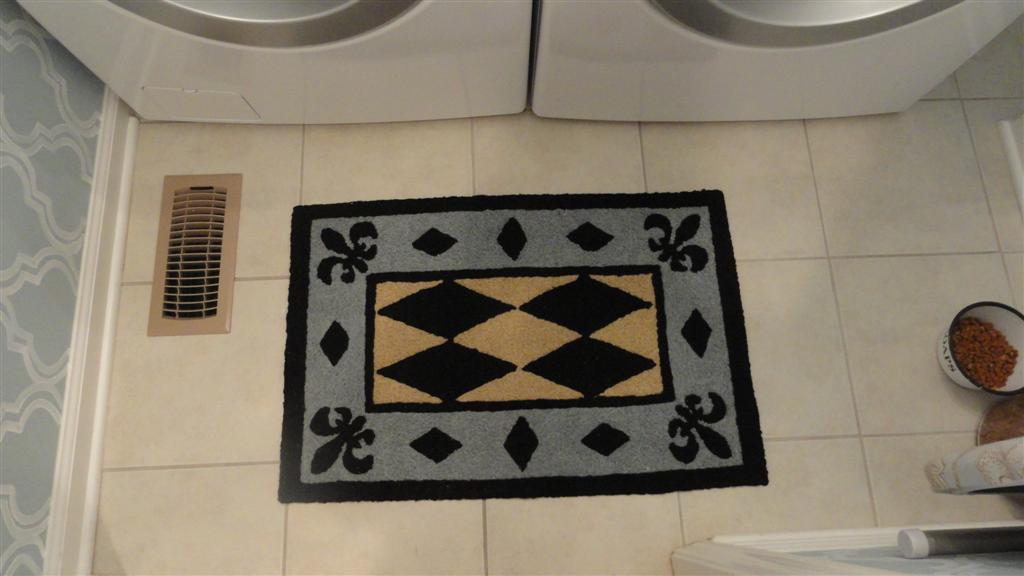
I grabbed the rug at Hobby Lobby with my coupon–I think it ties it all together!
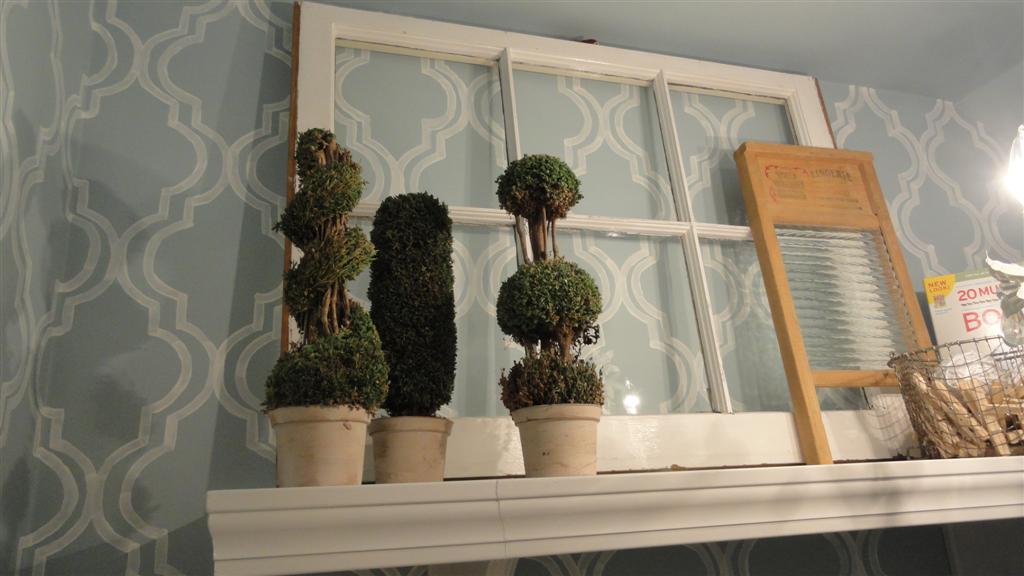
HomeGoods topiaries and flea market window and washboard.
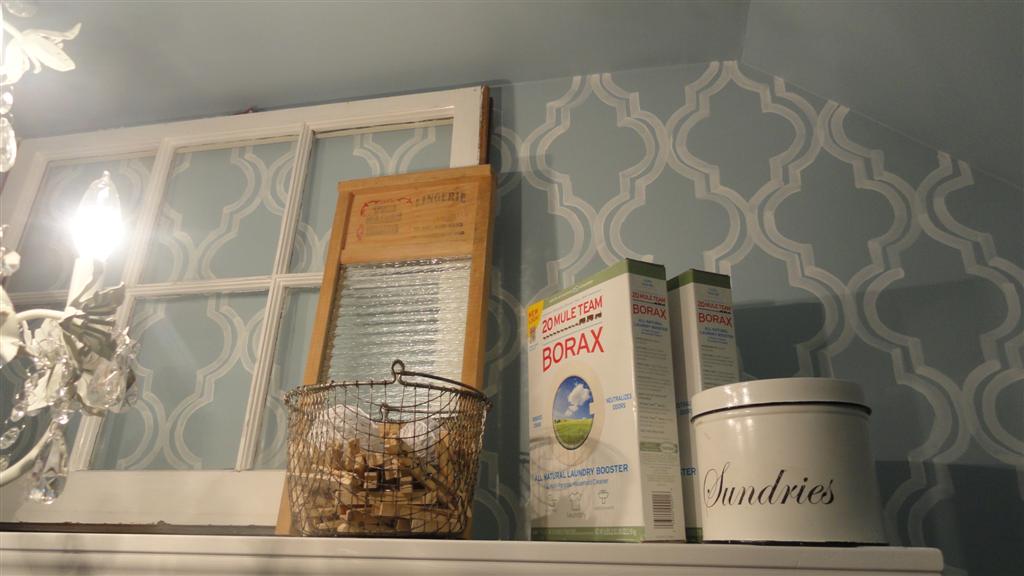
A couple of spare boxes of borax (hey, they’re decorative!) and a basket of clothespins.
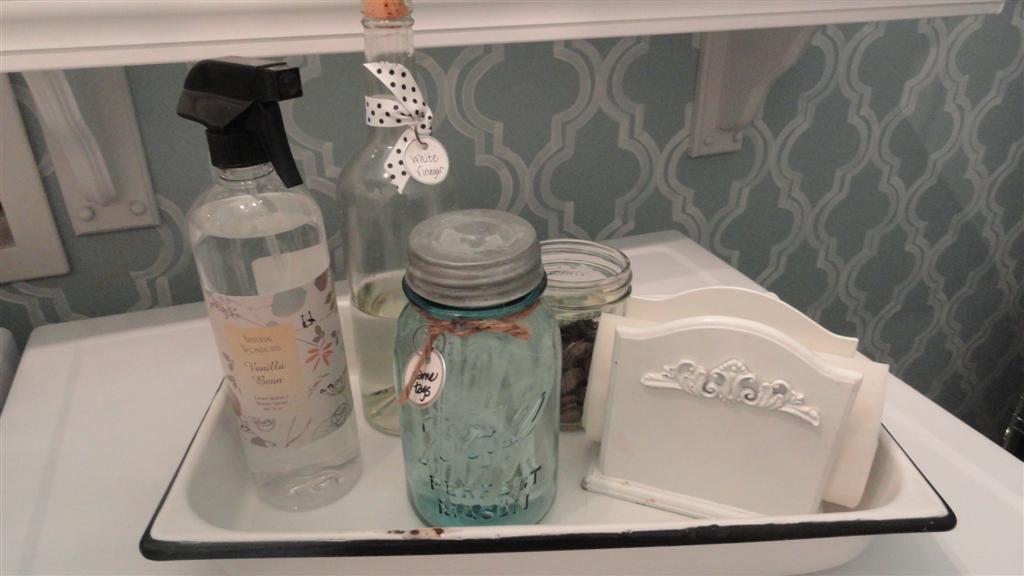
Vinegar (for the rinse cycle), ironing spray (HomeGoods), change jar, and dryer softener sheets in a napkin holder.
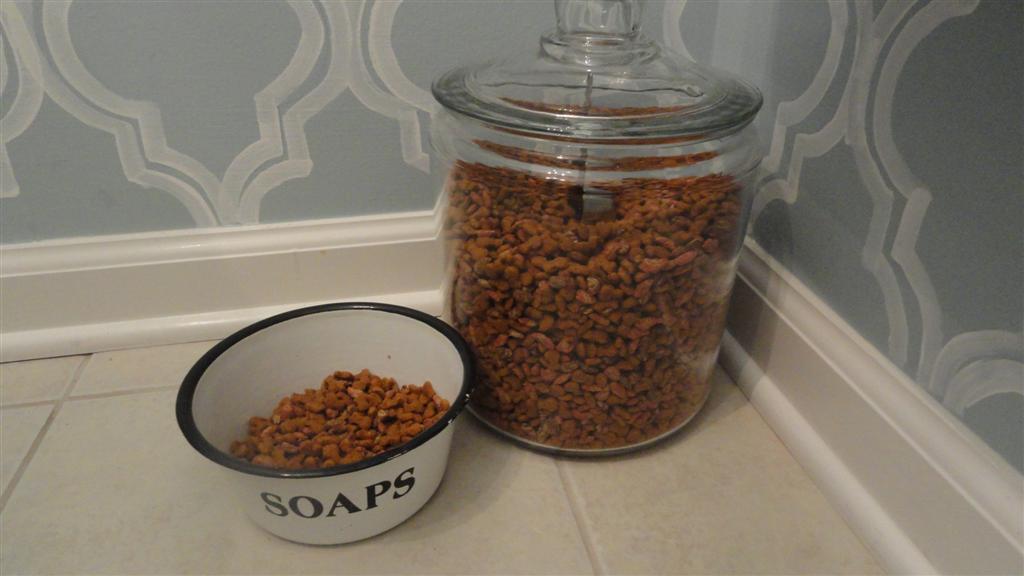
Kitty’s dining room.
A couple more things need to happen before this room is totally done. First, I may pop the door off and hang a curtain so that I can see my beautiful laundry room all day long. Second, I need to figure out what to do with the yucky area where the hoses plug in. I’m hiding them behind my wicker laundry baskets, but they might need a little curtain sewed at some point. Third, I need to find a metal cabinet that will fit in the area under the steps to hold (and hide) all my cleaning supplies and other uglies that are currently hanging out on wire shelving. The good news is that I now have about 8 inches to get back there, so I can hold my breath and squeeze through. When I can’t make it anymore, it’ll be time for a diet!
")
Remaining problem area!
**A quick update: I found a great metal cabinet at the Nashville flea market, painted it white, and now it’s disguising all the cleaning supplies in my former “problem area.” Here it is:

I can’t end on that note, so here’s one more of the after. Thanks for bearing with me through all those photos!!

*Love* my new laundry room!
Update: We’ve moved (yes, again) and our new laundry room is {here}, although I will confess that I don’t like it quite as much as this one. Amy’s pretty laundry room is {here}.
(Don’t miss a thing! Follow us on social media using the black buttons underneath my photo, or sign up to receive email updates whenever we post something new {here}).
And as always, thanks for stopping by.