• Skip to primary navigation
  • Skip to main content
  • Skip to primary sidebar
  • Skip to footer
  • MEET CHRISTY & AMY
    • IF YOU’RE NEW HERE…
    • WORK WITH US
    • 11 MAGNOLIA LANE 101
    • DISCLOSURE + PRIVACY (the fine print)
    • BEST OF 11 MAGNOLIA LANE
  • TOUR OUR HOMES
    • TOUR OUR HOMES
    • CHRISTY’S MAGNOLIA COTTAGE
    • CHRISTY’S MCC HOUSE
    • Christy’s Stuttgart Flat
    • Amy’s Virginia Craftsman Home Tour
    • AMY’S VIRGINIA CRAFTSMAN Building Process
    • HOLIDAY HOME TOUR SERIES
  • CELEBRATIONS
    • EVENTS + ENTERTAINING
    • GIFTS
    • HOLIDAYS
    • RECIPES
  • HOME
    • CLEANING
    • DECORATING
    • ORGANIZING
    • ROOM BY ROOM
      • BATHROOMS
      • BEDROOMS
      • CLOSETS
      • CRAFT ROOMS + OFFICES
      • DINING ROOMS
      • KIDS’ ROOMS
      • KITCHENS
      • LAUNDRY ROOMS
      • LIVING + GREAT ROOMS
      • OTHER SPACES
      • PANTRIES
      • PLAYROOMS + BONUS ROOMS
      • PORCHES + OUTDOOR SPACES
    • TIPS
  • SHOP
    • SHOP OUR INSTAGRAM
    • SHOP OUR AMAZON STORE
    • FRIDAY FAVORITE FINDS
  • PROJECTS
    • CRAFTS
    • DIY PROJECTS + TUTORIALS
    • FURNITURE
    • PRINTABLES
    • WINDOWS, DOORS, + WALLS
  • LIFE
    • FRIDAY FREE FOR ALL
    • HEALTH
    • SIMPLY ON SUNDAY
  • TRAVEL
  • CONTACT
    • Email
    • Facebook
    • Instagram
    • Pinterest

11 Magnolia Lane

Sharing our easy DIYs, decorating, entertaining and more!

How to Paint Upholstery Fabric–Black Velvet Chair

July 27, 2014 By Christy 21 Comments

This Post Contains Affiliate Links

3339 shares
  • 42

Painted fabric: black velvet thrift store chair
If you’re a regular here, then you’ve seen that I’m working on updating our living room, with a palette of black, white, gold, coral pink, and a little teal green/blue.  Doesn’t that sound like a wild color combination?!  I promise, it’s going to work!  Here’s a sneak peek:

Glam living room--black, white, gold, and pink
You can see pictures on the progress here and here.  I’ve finished trimming the faux built-ins (the befores are here) and will post on that later this week.  We do this in every single house we live in, and it’s a great DIY trick to save money!  (Here’s our master bedroom in our Nashville house, complete with built-ins.)

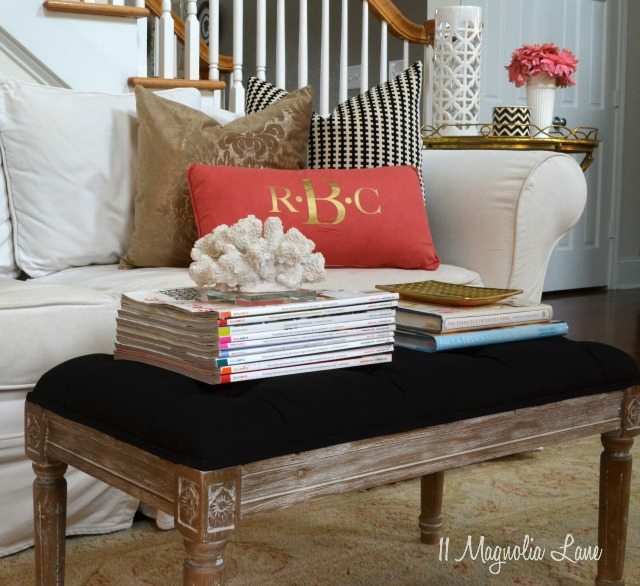
Part of the process of making our living room prettier and more functional is to add extra seating.  As you all know, we’re a military family, and we entertain A LOT.  Whether it’s 50 ladies coming for a luncheon reception, or neighbors coming over for drinks, we do it all–and it’s lots of fun.  But I’m always short on seating, and for some reason no one wants to sit on the floor with the dogs!

Enter my “new” thrift store chair:

Gold velvet thrift store chair

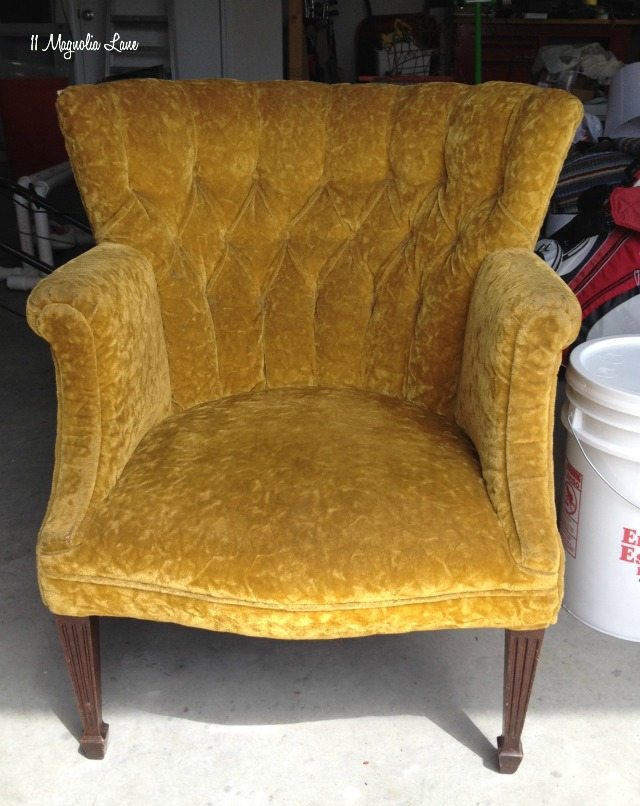
I scored this chair back in April at the Salvation Army thrift store, and “she’s” been sitting in my garage patiently ever since.  I LOVE the shape, and it’s really a very comfortable chair.  I did my usual weird thing and sniffed the chair in the store (you can’t be too careful with used furniture, right?!), but all smelled fine and so I wrestled her into the back of my car.

My husband just shakes his head and parks in the driveway; God bless him!

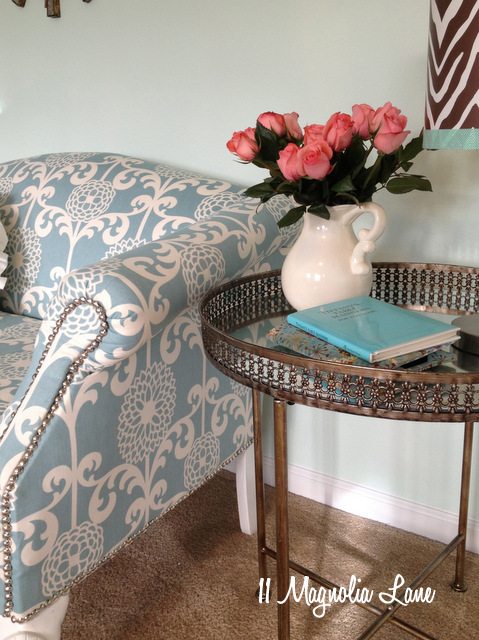
You’ll remember that I tried reupholstering for the first time with my daughter’s loveseat {here}:

loveseat with table

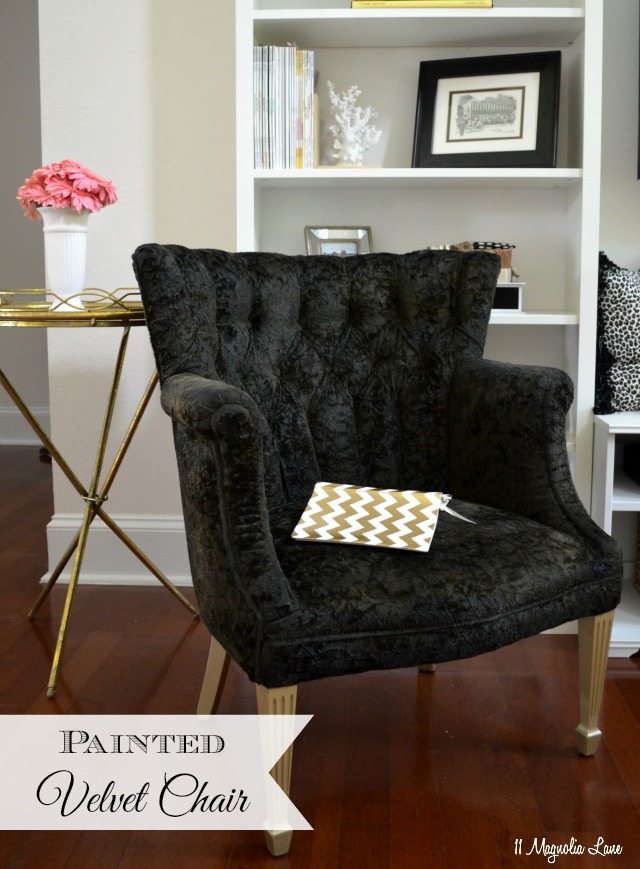
And while I love how that project turned out, I wanted a quick fix.  You’ve probably seen how I painted this thrift store chair, and I decided to use the same technique on my gold chair.

painted-chair-after-long-001

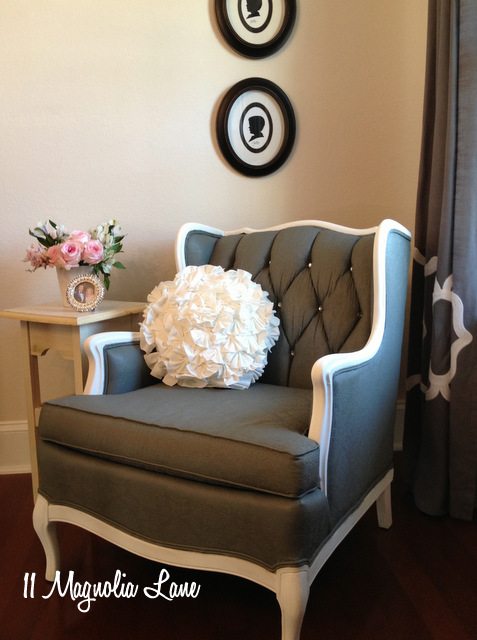
Besides, I was curious as to whether velvet would be harder or easier to paint.

For the step-by-step details, I’d like to refer you to the post on how I painted the gray chair, and the post I wrote to answer the hundreds of questions that I got about the project.

I started by taping off the legs and giving them a quick once-over with sand paper, and then a shot of metallic gold spray paint.  I then mixed a 1:1:1 mixture of black acrylic craft paint, fabric medium, and water, and started painting:

painted-chair-during

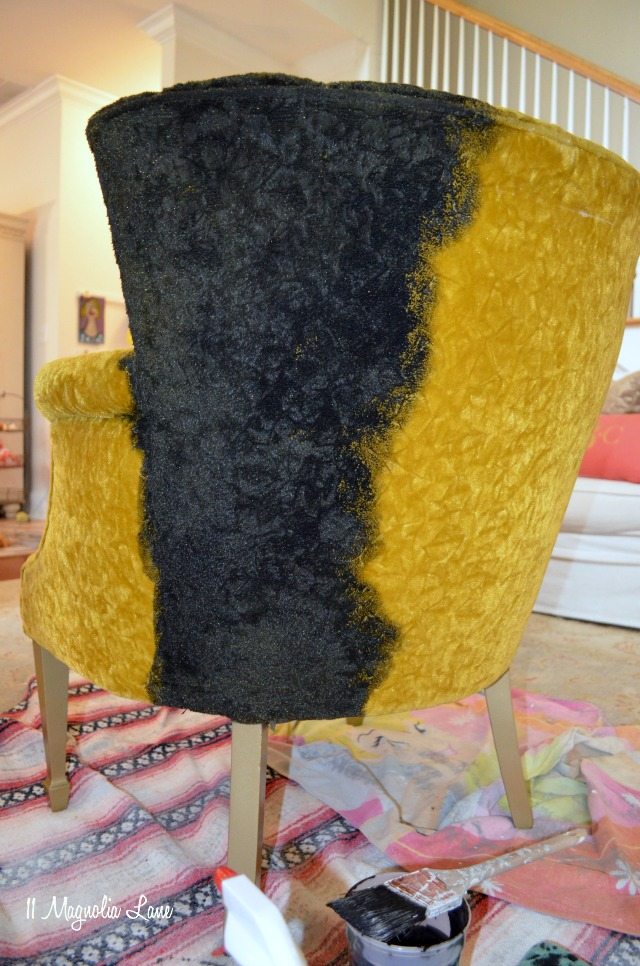
I used the same technique:  first, spritz the fabric with water, then, apply the paint/fabric medium/water mixture using a regular 2″ paint brush.  I found that the velvet took the paint really well on the first coat, and that the black almost covered the gold completely with the first coat.  So, here’s the first thing to take away from this project:  the darker the paint color you’re using, the fewer coats you’ll need.  Common sense, I know, but just realize that if you’re using white or baby pink to cover something like this gold, it’s going to take you five (or six, or seven…) coats of paint.

Because someone always asks, this is the fabric medium that I use, and you should estimate about 1 bottle per coat for a chair this size:


Here it is after the first coat:

first-coat

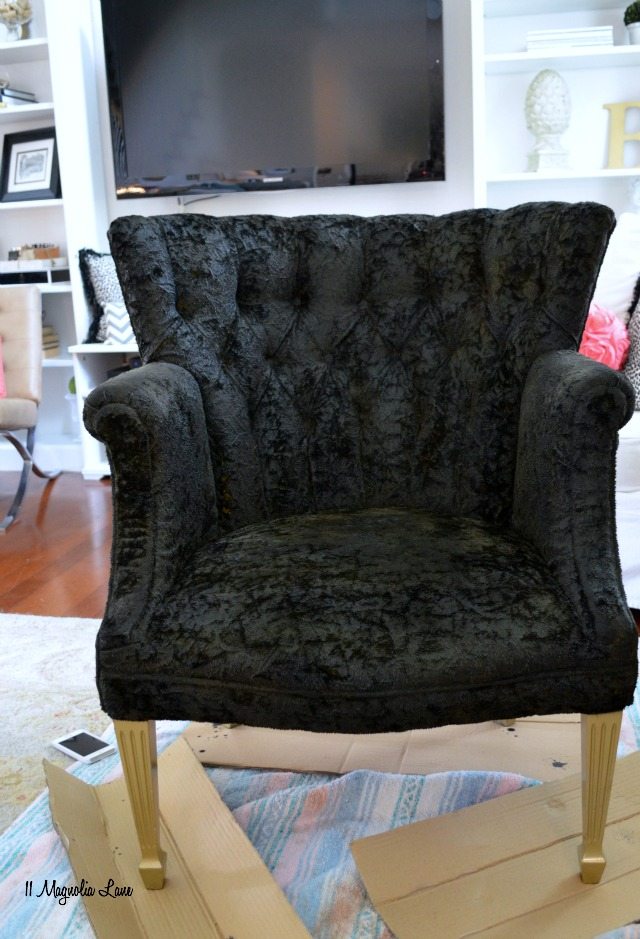
OK, so at this point I LOVED how it looked, but I HATED how it felt!  My gray chair feels like a naugahyde or leather restaurant booth–you get the idea, right?  Velvet that has been painted feels like you’re sitting on velcro or sandpaper!  Speaking of sandpaper, I used it to try to sand the rougher areas.  I also tried a wire brush.  No dice.  My only suggestion for you is to up the amount of fabric medium to 2 parts, keeping 1 part paint and 1 part water.  That’s what I’ll do next time.

I think it’s so stiff because it’s a nice, thick velvet pile, and my other chair was a very smooth fabric.  That makes sense if you think about it.  I was disappointed that I couldn’t go back and soften it up, but since I wasn’t having much success, I went ahead with the second coat (at 2:1:1 fabric medium/paint/water, although it was a bit late for that by now!).  I covered the whole thing in two coats and let it dry.

I will say that she looks beautiful:

Black velvet painted chair

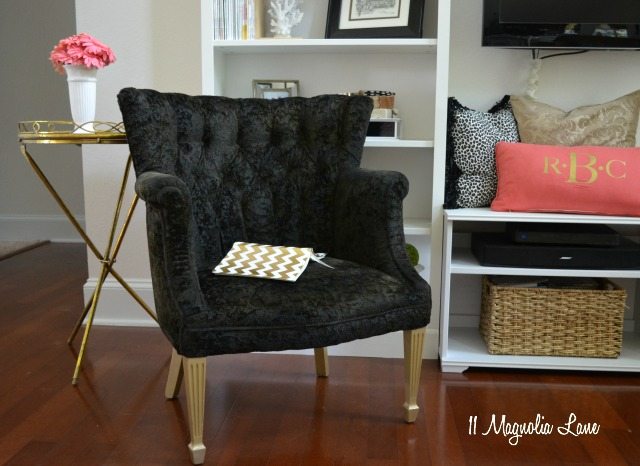
And she’s got great legs:

Chair legs painted gold

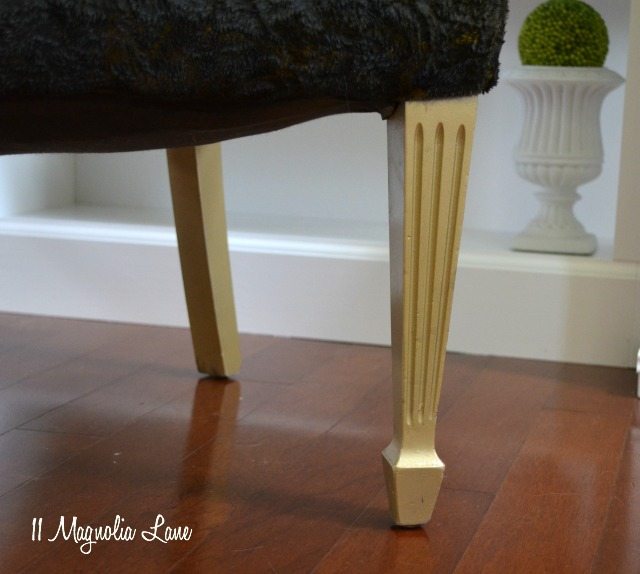
This is the gold paint I used, by the way (along with the rest of the supplies for this project):

Here’s the funny thing, though.  Even though she’s still a bit bristly, I sit in this chair every. single. night. to watch TV and read.  I love it!  I just don’t sit on it wearing shorts, or a short skirt!

{UPDATE:  three years later, I had the chair recovered in blue velvet.  See the new “after” here}

Oh, and be sure to follow us on social media (the black buttons underneath my picture) or via email updates (the envelope button under my picture) if you’re interested in seeing the rest of the living room as work progresses.

(Disclosure:  Amazon affiliate links used in this post)


UPDATE:  As promised, here are the other posts on this room update:

Living Room:  The Room Reveal

Built-ins, part 1

Garden Stool

Couch and Pillows

Gold Vase

Tutorial on Built-ins (part 2)

Thanks for stopping by-

icon-facebook-1icon-instagram-1icon-mail-1icon-pinterest-1icon-twitter-1NEW Google+


YOU MIGHT ALSO LIKE THESE POSTS... :

Kathie's Living Room Mini-Tour
DIY Custom Plate Rack (For $40!)
Crushing On: Velvet Couches
Updated Mudroom + Painting Doors for Impact

Filed Under: DIY/Projects/Tutorials, Furniture, Living/Great Rooms, Room Makeovers Tagged With: diy, Furniture, living room, paint

Reader Interactions

Comments

  1. amyramseyinteriors says

    August 2, 2014 at 5:39 pm

    LOVE IT ALL!!

    Reply
    • Christy says

      August 3, 2014 at 11:43 pm

      Thanks, Amy. 🙂

      Reply
  2. shelley says

    August 12, 2014 at 10:15 pm

    have you tried a spritz of fabric softener mixed with water to soften it up a bit? just a thought

    Reply
    • Christy says

      August 14, 2014 at 9:55 am

      I haven’t, Shelley, but that’s a good idea. I’ll let you know if I give it a try!

      Reply
  3. Pat says

    August 20, 2014 at 11:56 am

    Love it!! I’m a lover of black/white/gold. The grey chair was awesome and this one is as well.

    xo
    Pat

    Reply
    • Christy says

      August 24, 2014 at 10:04 am

      Thanks so much, Pat!

      Reply
  4. Emily H says

    September 24, 2014 at 12:03 pm

    I’m using a 2:1:1 ratio, fabric medium:water:paint, but I’m finding it dilutes the colors intensity. Instead of black I have a slate gray. I happen to actually like the gray but am wondering if anyone has advice on how to remedy the issue. Thanks!

    Reply
    • Christy says

      September 24, 2014 at 6:27 pm

      Hey Emily–If you look at my chair after the first coat, the gray was so light. Of course, that was a 1:1:1 mixture, so it’s going to take you quite a few more coats than it took me. So hang in there and keep painting!

      Reply
      • Emily H says

        September 26, 2014 at 4:34 pm

        Thanks for the input. Don’t worry, I’m too stubborn to give up on this project. I’ll keep painting!

        Reply
        • Christy says

          September 28, 2014 at 4:19 pm

          Ha–love it! Let me know how it turns out!

          Reply
  5. Tammy says

    January 13, 2015 at 3:24 pm

    Thanks south for the Info in your blog. I picked up 2 chairs at an estate sale with intensions of recovering. After pricing there was no way I could bring myself to pay that! My sister-in-law sent me the link to your blog and the next day, I got to painting! So excited with the results!!!

    Reply
    • Tammy says

      January 13, 2015 at 3:27 pm

      Sorry for the typo! Thanks *so much*

      Reply
  6. Bri says

    January 19, 2015 at 1:37 am

    Have you successfully tried the 2:1:1 fabric medium:water:paint mixture on anymore painted fabric projects? Just wondering if I should try this on our RV cushions. They are a velour type fabric, and I don’t want them to be scratchy. Love the post. Thanks!

    Reply
    • Christy says

      January 20, 2015 at 10:18 am

      Hi, Bri! Yes, I’ve painted a few other things. A beautiful grey chair: https://www.11magnolialane.com/2013/09/09/tutorial-how-to-paint-upholstery-fabric-and-completely-transform-a-chair/ and my outdoor seating area cushions:
      https://www.11magnolialane.com/2014/05/20/diy-painted-outdoor-cushions-and-a-paint-sprayer-giveaway/

      I also wrote a pretty detailed Q & A post on painted fabric that might be helpful, too: https://www.11magnolialane.com/2014/04/03/followup-on-my-painted-chair-tutorial-your-questions-and-my-answers/

      Good luck!

      Reply
  7. Lindsay M says

    April 21, 2015 at 12:31 am

    This was so helpful! I just got a chair similar to this at a thrift store for $6. Can’t wait to try this.

    Reply
  8. Stewart says

    September 29, 2015 at 4:06 am

    Wonderful project, Diane. I have two simple, upholstered side chairs that I’ve been wanting to jazz up. Your instructions are easy to follow. I will be trying this soon.
    Thanks.

    Reply
  9. Jill Roberts says

    July 13, 2017 at 1:57 pm

    Love it Christy!!! Looks fantastic!

    Reply
  10. fran says

    December 7, 2017 at 3:43 pm

    what about some rit dye ?? will that work for a velvet chair

    Reply
    • Christy says

      December 9, 2017 at 1:23 pm

      It might…but I’ve since recovered it in royal blue. You can see the new “after” here: https://www.11magnolialane.com/2017/09/25/crushing-on-my-blue-velvet-chair/

      Reply
  11. Sheryl says

    April 10, 2018 at 9:19 am

    I am going to try this technique on an old velvet chair I have. I have a question though.
    What would happen if you added a liquid fabric softener to the paint mixture? Do you think it would help make the fabric softer?

    Reply
    • Christy says

      April 13, 2018 at 2:16 pm

      Sheryl, I honestly don’t know. Is there an area on the underside where you could test it out? Another option I’ve read about, but haven’t used myself, is to use chalk paint followed by a coat of clear wax. I think if you did a quick search on Pinterest you might get some great information, though. Sorry I can’t help more–good luck with your project! Christy

      Reply

Leave a Reply Cancel reply

Your email address will not be published. Required fields are marked *

Recipe Rating


This site uses Akismet to reduce spam. Learn how your comment data is processed.

Primary Sidebar

Lowest prices. Straight Teeth,

•Don’t Miss A Thing!!•

•Do You Know Jesus?•

•Featured In•

Holiday Gift Ideas

Footer

  • Email
  • Facebook
  • Instagram
  • Pinterest

Copyright © 2023 · 11 Magnolia Lane· Blog Design by Little Blue Deer
Privacy Policy

11 MAGNOLIA LANE IS A PARTICIPANT IN THE AMAZON SERVICES LLC ASSOCIATES PROGRAM, AN AFFILIATE ADVERTISING PROGRAM DESIGNED TO PROVIDE A MEANS FOR US TO EARN ADVERTISING FEES BY ADVERTISING AND LINKING TO AMAZON.COM AND AFFILIATED SITES. AS AN AMAZON ASSOCIATE, WE EARN FROM QUALIFYING PURCHASES. WE ALSO PARTICIPATE IN SEVERAL OTHER AFFILIATE PROGRAMS; THIS INCOME ALLOWS US TO MAINTAIN THE QUALITY OF YOUR USER EXPERIENCE AND KEEPS OUR CONTENT FREE. WHEN YOU PURCHASE THROUGH ANY OF OUR AFFILIATE LINKS, WE EARN A SMALL COMMISSION AND YOU DON’T PAY A CENT MORE THAN YOU WOULD OTHERWISE; THAT WOULD BE TACKY!   READ OUR FULL PRIVACY AND DISCLOSURE POLICY {HERE}.
  ©11 Magnolia Lane 2019. Unauthorized use and/or duplication of this material without express and written permission from this blog’s authors and/or owners is strictly prohibited. Please email us at admin@11magnolialane.com for more information.

  • MEET CHRISTY & AMY
    • IF YOU’RE NEW HERE…
    • WORK WITH US
    • 11 MAGNOLIA LANE 101
    • DISCLOSURE + PRIVACY (the fine print)
    • BEST OF 11 MAGNOLIA LANE
    • Back
  • TOUR OUR HOMES
    • TOUR OUR HOMES
    • CHRISTY’S MAGNOLIA COTTAGE
    • CHRISTY’S MCC HOUSE
    • AMY’S NEW HOME BUILD
    • HOLIDAY HOME TOUR SERIES
    • SPRING HOME TOUR SERIES
    • Back
  • CELEBRATIONS
    • EVENTS + ENTERTAINING
    • GIFTS
    • HOLIDAYS
    • RECIPES
    • Back
  • HOME
    • CLEANING
    • DECORATING
    • ORGANIZING
    • ROOM BY ROOM
      • BATHROOMS
      • BEDROOMS
      • CLOSETS
      • CRAFT ROOMS + OFFICES
      • DINING ROOMS
      • KIDS’ ROOMS
      • KITCHENS
      • LAUNDRY ROOMS
      • LIVING + GREAT ROOMS
      • OTHER SPACES
      • PANTRIES
      • PLAYROOMS + BONUS ROOMS
      • PORCHES + OUTDOOR SPACES
      • Back
    • TIPS
    • Back
  • SHOP
    • SHOP OUR INSTAGRAM
    • SHOP OUR AMAZON STORE
    • FRIDAY FAVORITE FINDS
    • 11 ML ETSY SHOP
    • 11ML ORGANIZING SHOP
    • Back
  • PROJECTS
    • CRAFTS
    • DIY PROJECTS + TUTORIALS
    • FURNITURE
    • PRINTABLES
    • WINDOWS, DOORS, + WALLS
    • Back
  • LIFE
    • FRIDAY FREE FOR ALL
    • HEALTH
    • SIMPLY ON SUNDAY
    • TRAVEL
    • Back
  • CONTACT
    • Email
    • Facebook
    • Instagram
    • Pinterest
3339 shares
  • 42