If you’re like me, sometimes you wonder how projects hold up over time. Remember in late 2011, when I decided to paint my dark ceramic tile kitchen backsplash with white paint on a whim? My reasoning was that it was going to be torn down and replaced anyway, so why not try to paint it first? I had nothing to lose, after all. It’s been almost 18 months since then, and I’m happy to report that it still looks great and I still love the look.

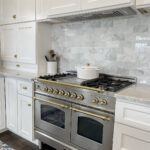
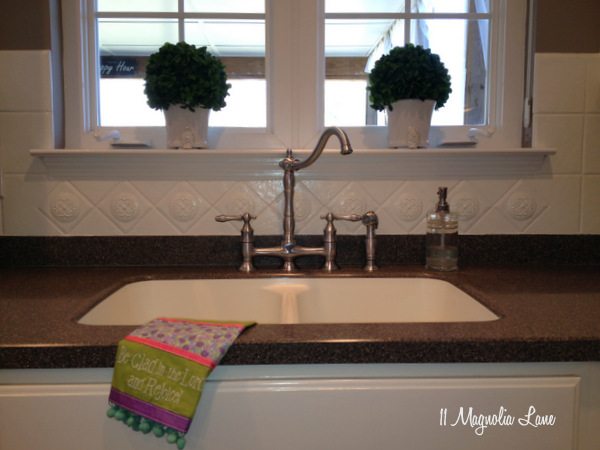
The photo below was taken today, and the backsplash still looks terrific.
If you haven’t read the saga of my kitchen redo, Part 1 is {here} and Part 2 is {here}. If you’ve been following for awhile, then you know that the finished product caught the eye of Bonnie Broten, editor at Better Homes & Gardens Kitchen + Bath Makeovers, and the kitchen was photographed for the Spring 2013 issue. I announced that big news when I showed you my pantry redo {here}. By the way, the magazine is due out on newsstands literally any day now, so keep an eye open for it!
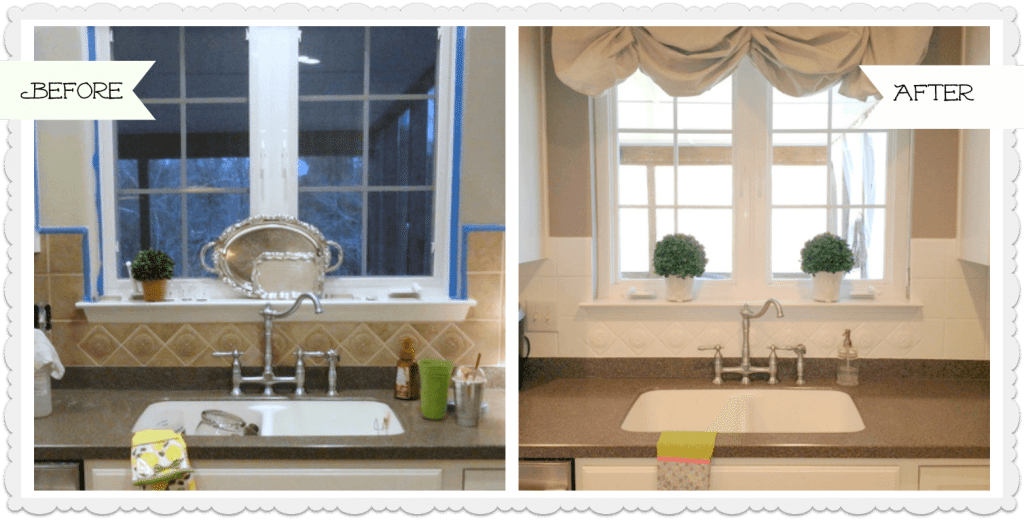
When I finished part 1 of my kitchen redo, the tile backsplash was its original brown/tan color. Here’s how it looked:
It was okay, but not great. Our previous home, in North Carolina {here}, had white subway tile in the kitchen, which I loved. I planned to take this tile down and put that up, but then I decided to paint it first, just in case I liked it and could save myself some time. I’m so glad I decided to give it a try!
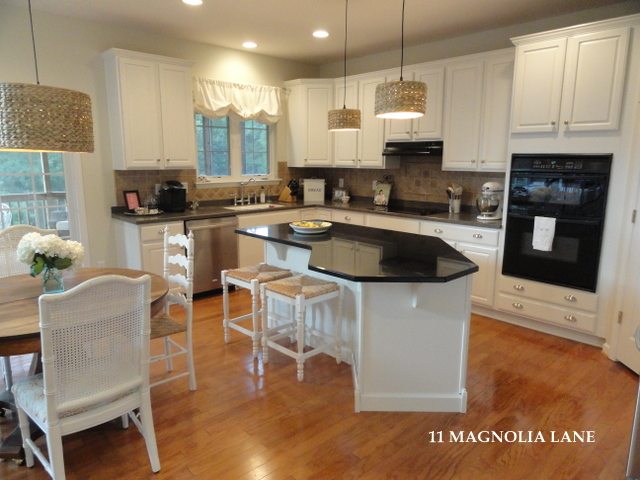
Here’s the after, part 2!
I talked about the process in Part 2 of my kitchen post, and here’s the section about painting the tile:
“After I painted the walls, I turned to the backsplash. I read up on painting tile, and decided that I really had nothing to lose, because I was already planning on taking the backsplash down. Why not try to paint it first and see if I could save time and money? The brown of the tile really clashed with my countertops–they have some brown in them but they’re really more gray. The warm and the cool tones right next to each other really bothered me (my husband thought I was nuts about that, although he admits that he likes the result).
First, I scrubbed the tiles really well. TSP works great, and I also used rubbing alcohol to degrease the tiles. Next, I had to wait a day or two before priming to let the grout dry (I HATE to wait to start a project!). I tried to sand the tiles but they were too hard to really get roughed up by the sandpaper, so I was sure to use a primer for glossy surfaces that specifically mentioned ceramic tile (Zinsser Bulls-Eye 123; although sometimes I use their oil based primer in the gold can, too). I primed with one coat, and then applied two coats of gloss oil-based paint. I bought a quart of Behr from Home Depot, tinted to match White Dove at half strength. I used a brush to prime and paint–you really have to work a bit to get the paint into the grout and a roller just wasn’t cutting it (If you’re using an oil-based paint, you must use a China bristle brush–this is my favorite). Plus, I have some decorative tiles that needed extra attention. While I think I should add a clear coat at some point, I’m really happy with how it’s turned out, and I’ve been able to wipe splatters off without removing any paint.”


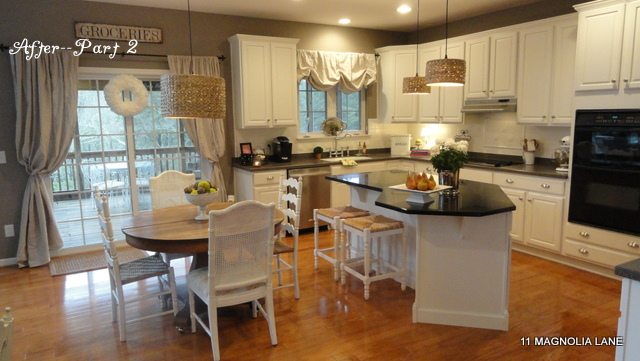
Here are a few more “after” shots, taken today.
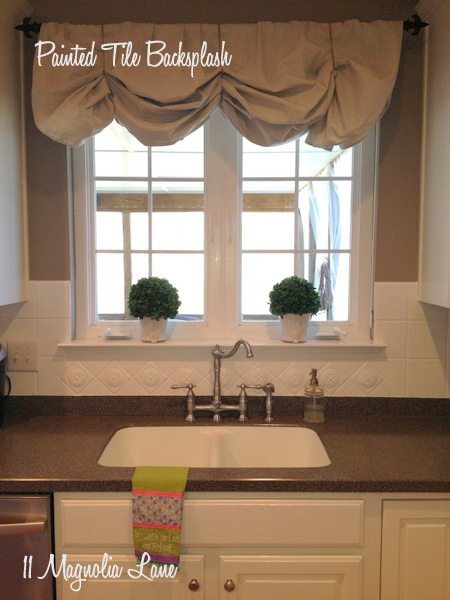
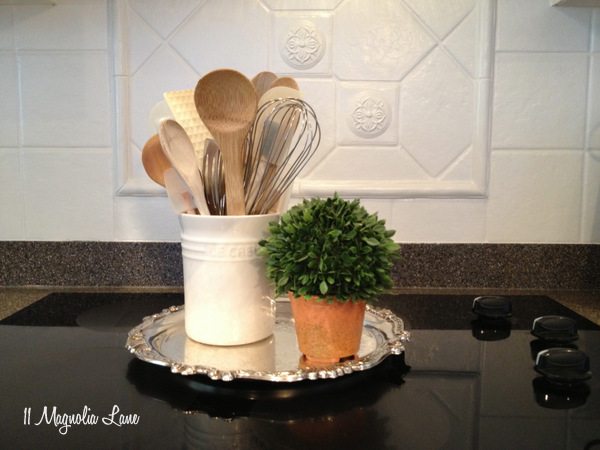
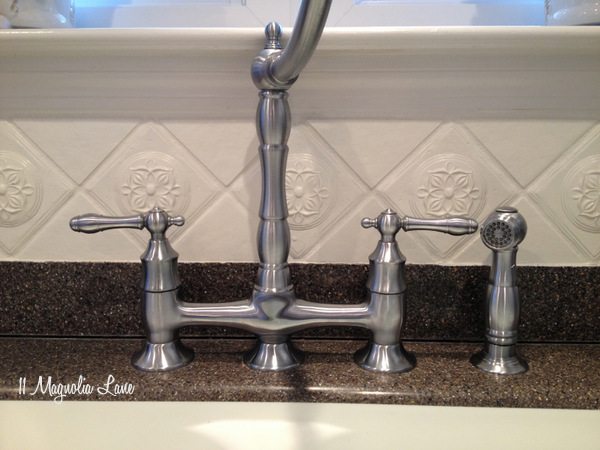
I have NOT put a clear coat on top of the oil-based paint, and I haven’t needed to. I chipped a tiny piece of paint away when a silver platter hit it, but I filled that in with some extra paint and it covered it beautifully. To clean it, I just used a damp sponge, although if I have a lot of splatters I use a spray cleaner (I make my own; see my favorite recipes here) and the abrasive side of the sponge. Splatters and grease wipe away easily and the oil-based paint is incredibly durable.
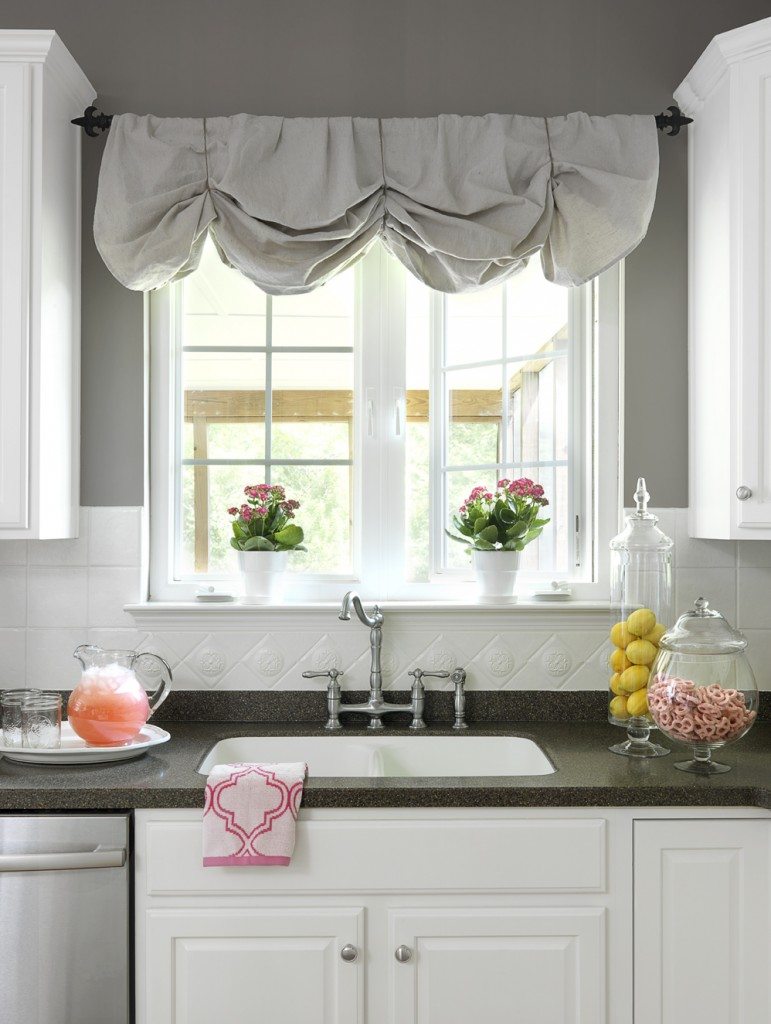
{Click HERE to read more about how we DIY’ed this kitchen, and HERE to see how I made the window valance}
UPDATE: July 2017: The backsplash still looks great! I did have to patch one small area that chipped when it got hit (hard) with a utensil, but other than that, it’s in perfect shape.
The bottom line is that if you want to paint your tile, then I think it’s an incredibly fast, easy, and inexpensive way to change things up a bit. Let me know if you have any questions, and thanks for stopping by!