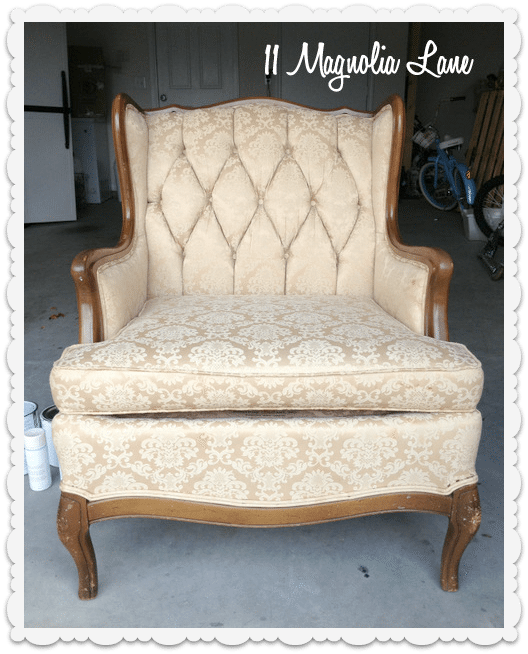
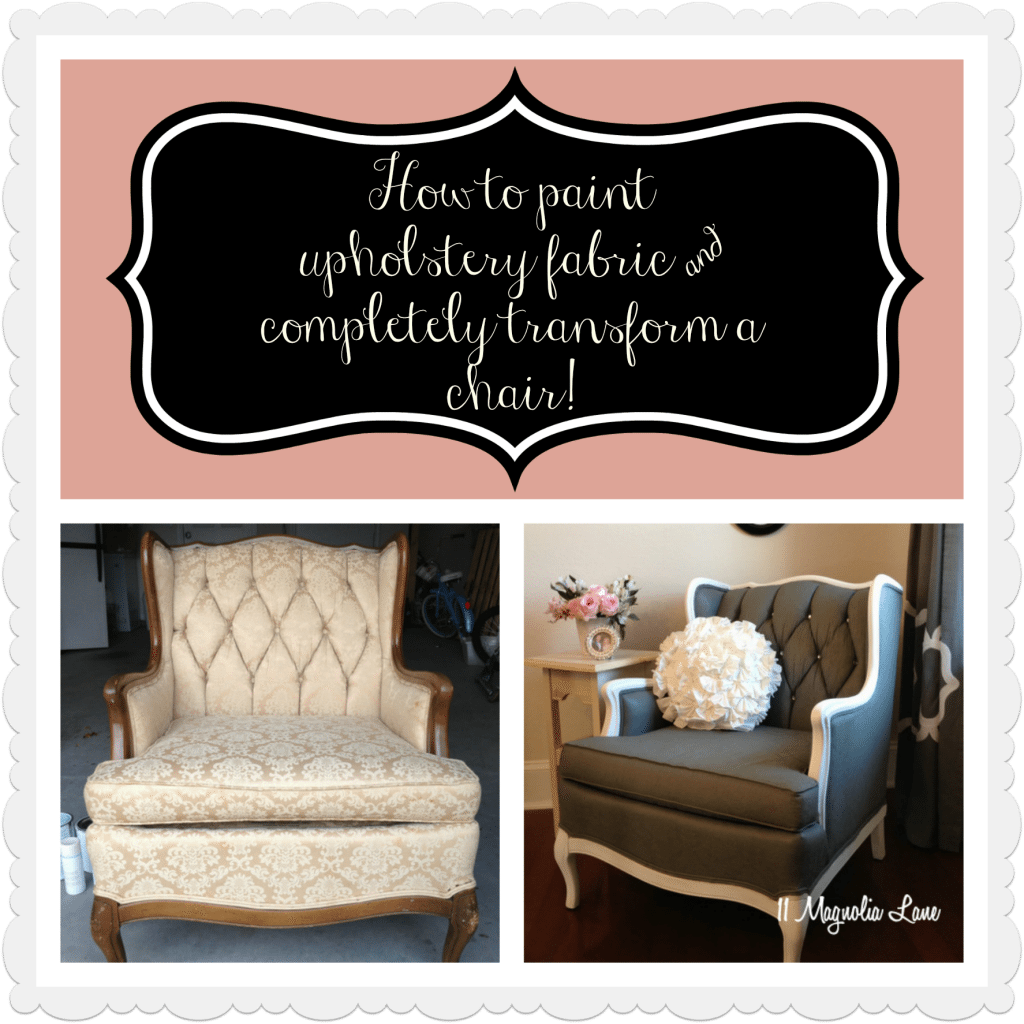
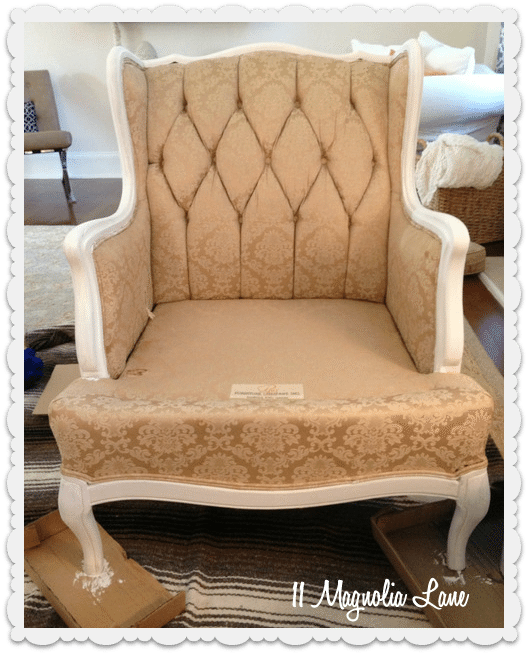
Here’s what I did:
{Ready to tackle your own project? Simply Click HERE to have a Step by Step list of instructions e-mailed to you along with a handy supply list!}
Here are the supplies I used:
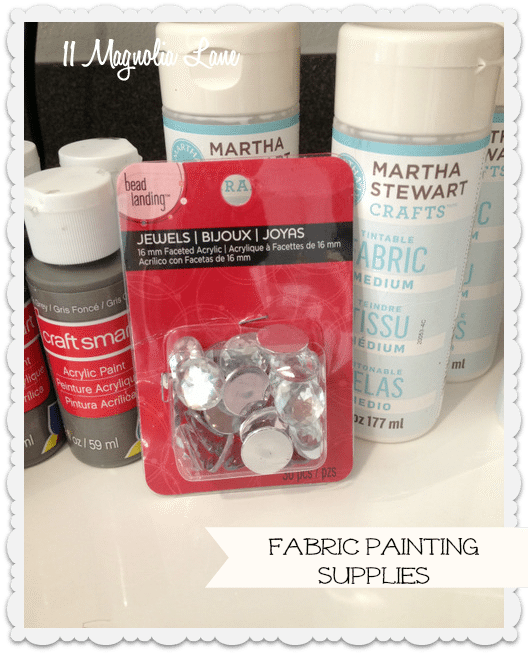
- I used four 8 oz. bottles of the Martha Stewart fabric medium and only had an eensy bit left over. Fabric medium is what keeps the fabric from becoming super-stiff after you paint it. It was on sale for about $4.50 a bottle at Michael’s. If you can’t find it there or don’t live near one, here’s a link to the same (or similar) items I used from Amazon through our affiliate program:
- I used ten 2 oz. bottles of Craft Smart acrylic paint in Dark Grey. They were $0.69 apiece so it was still cheaper than buying a quart of latex paint. If I was doing more than one chair, I would probably get paint mixed at the store, though.
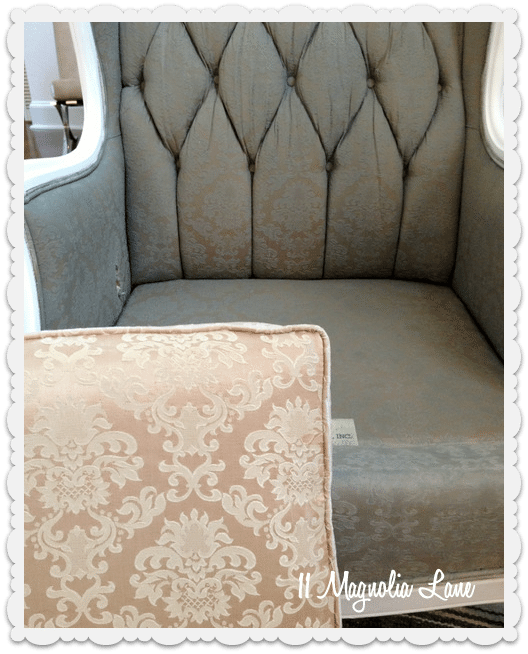
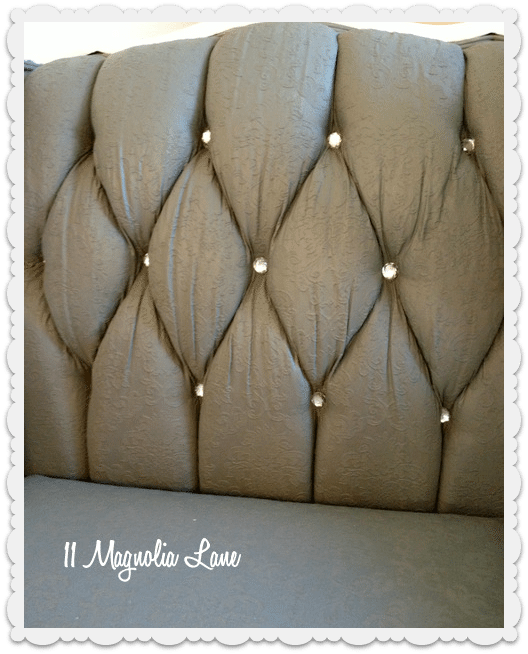
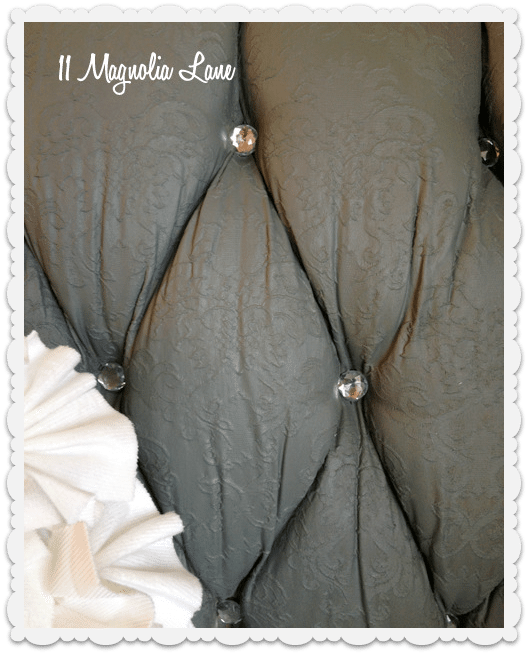
- The rhinestone jewels I used on the buttons–more on them later. They were $3.99 but I used a 40% off coupon.
- Also, a squirt bottle filled with water, a brush, and a clean up towel. I used a regular 2″ paint brush for all of the coats, and a small artist’s brush to paint the piping so that I didn’t get paint on the white wood trim.
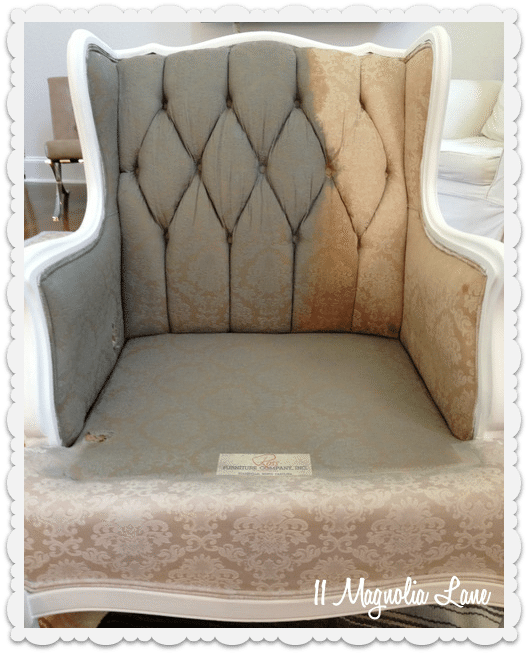
I mixed a 1:1:1 solution of paint, fabric medium, and water and used that for the first coat, since that was what the other ladies recommended. Because my fabric wasn’t as thick and dense, though, it was a little too thin. I mixed my other coats 1:1:1/2 and the lower water content worked much better for me.
Spraying a small area with water to make things spread more easily before painting, you can see that coat #1 gives partial coverage–the pinky gold is still showing through.
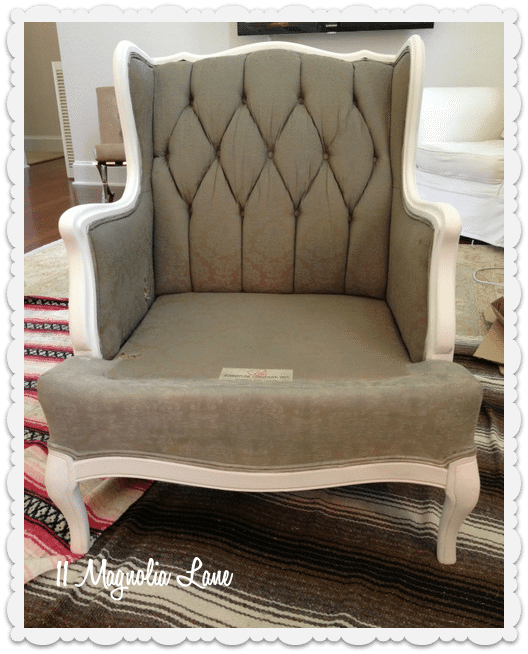
Because my seat had a removable cushion, I elevated it on a few soup cans and painted one side, let it dry, then painted the other. Times four!
I needed to get my hands a little dirty to get paint into all the folds and tufting on the front, but it was worth it. I discovered most of it during the sermon at church on Sunday (oops!).
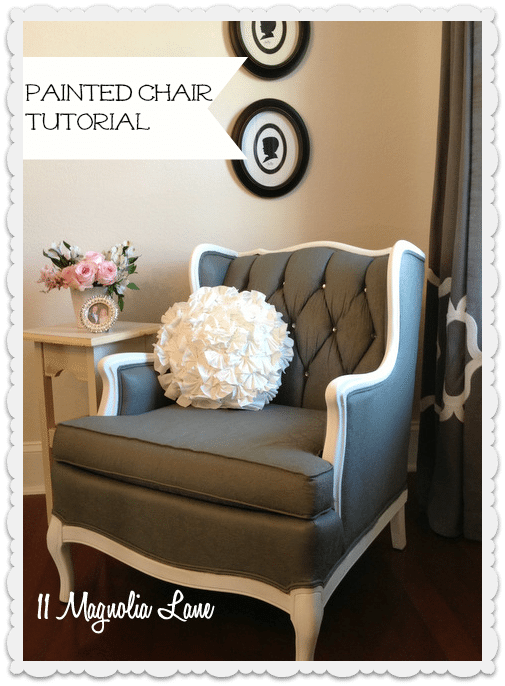
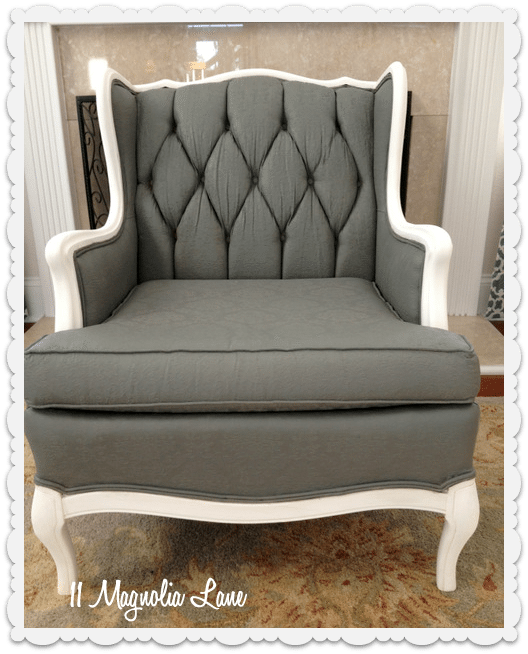
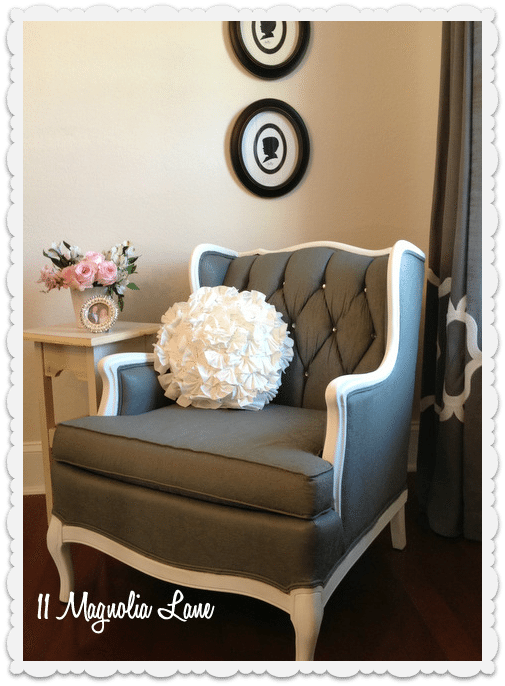
Here she is with all four coats of paint and her cushion back in place:
I haven’t tested it yet, but from what I’ve read the paint is now colorfast, even when wet. I’ve read tutorials where others used latex paint (flat and satin), chalk paint, and several other kinds, and it seems to work with all of them. I’ll definitely let you know in a few months how it’s held up.
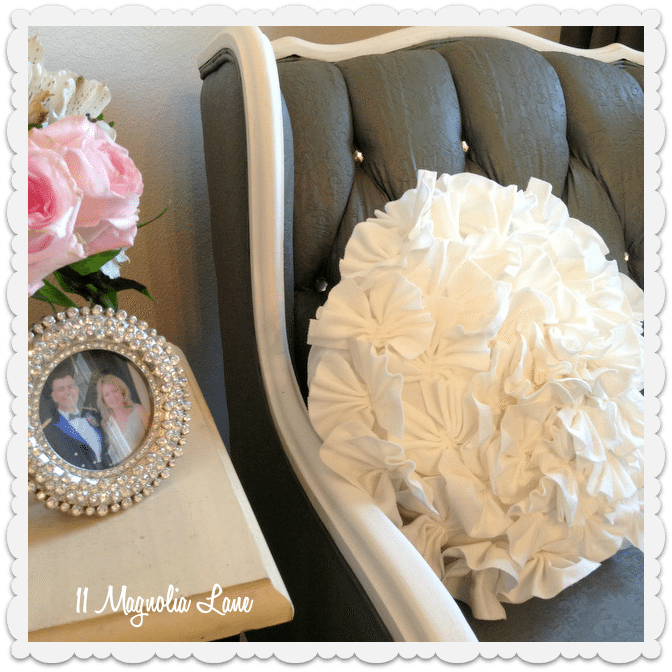
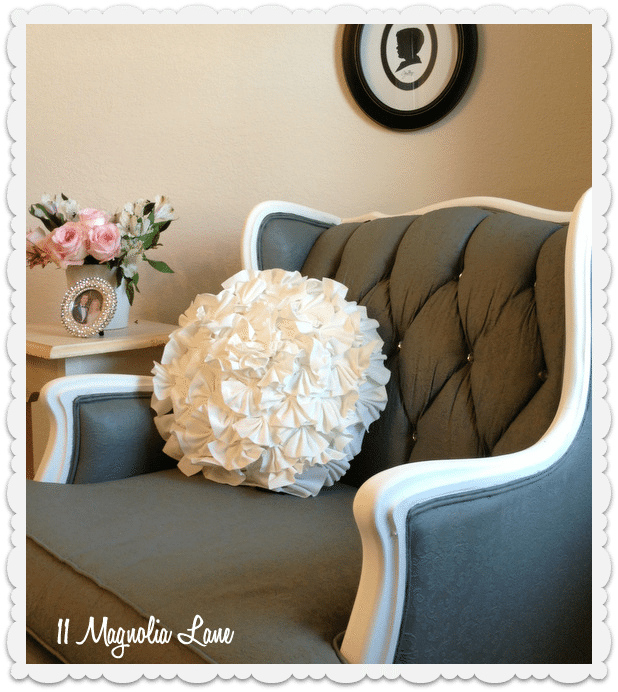
In the meantime, isn’t she *awesome*?!
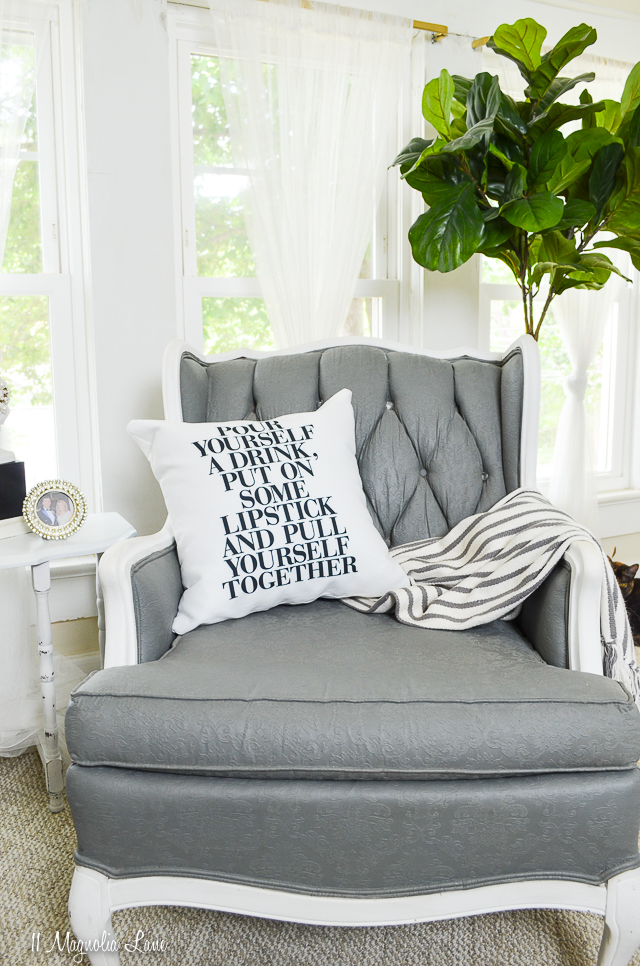
Update: Five years (!) later, my chair still looks gorgeous. Now it’s in my home office; here’s a recent photo:


Update: I have written a second post {read it here} answering your questions about the process I followed and how the chair is holding up, seven months later. Be sure to check it and the comments below if you have any questions–thanks!
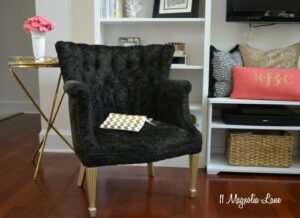
If you want to see a black velvet chair that I painted several months later, that post is here.
You can also use chalk paint to transform chair, that process is slightly different, you can see how to do that {here}.
And, I tried the same method on my outdoor cushions; that post is {here}.
Also, if you’re a renter (or live in military housing) I wrote a post that will give you tips for painting and decorating to make your rental feel like home; you can read it {here}.
*****
Thanks for stopping by!