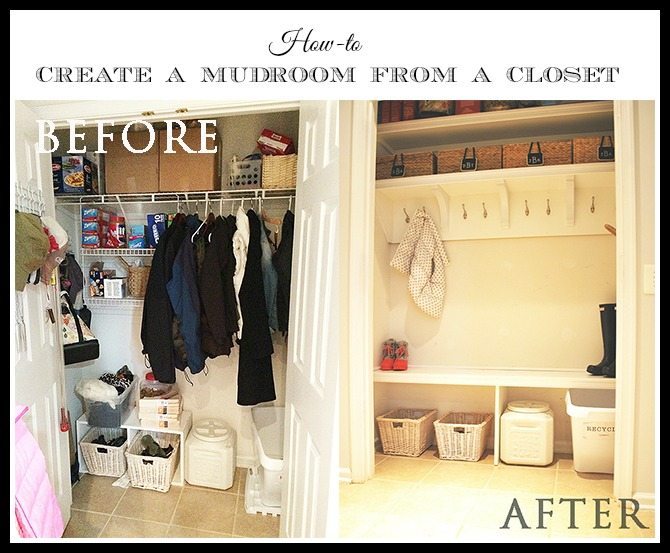
I am back today with a little more information about how we converted our hallway coat closet into a mudroom. Full disclosure: we hired this project out to our favorite handyman two weeks before Christmas when I couldn’t take the disorganization in the closet another day. Great timing huh? It was madness but it was done in time for the holiday and it has worked out great.
Here is what we started with.

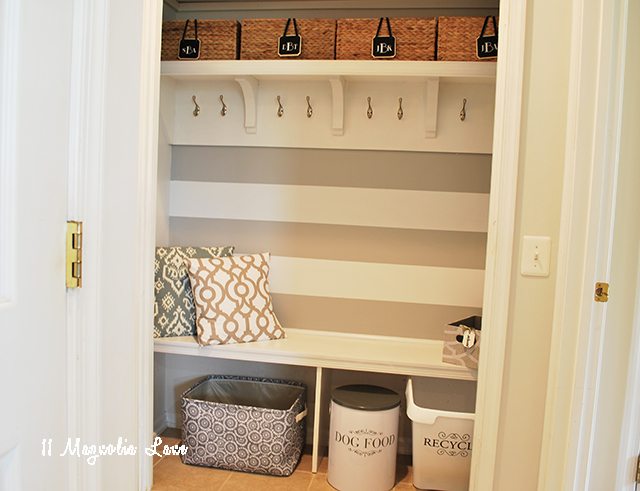
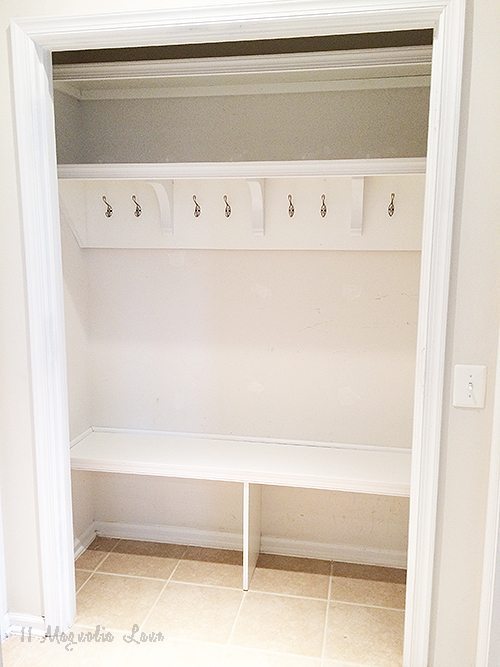
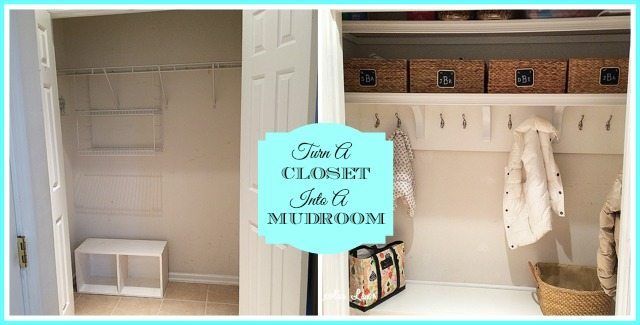
So your eyes don’t burn any longer than necessary, here is the “After”.
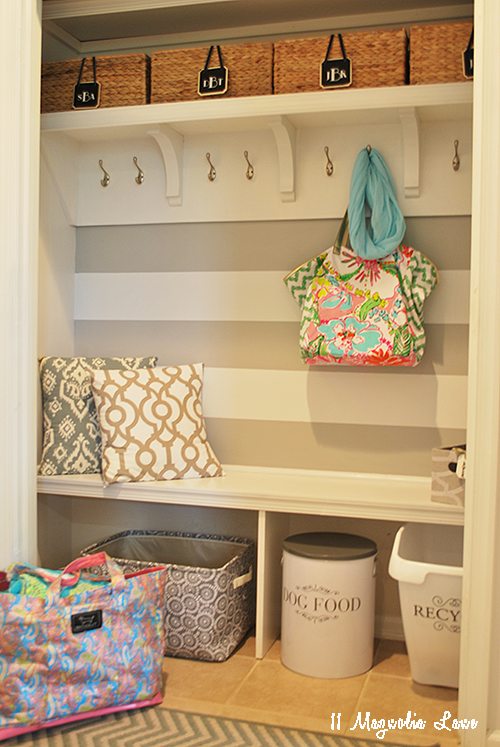
And, so you can see all it’s potential before I get to the how-to, here it is all decorated and styled (more in this post HERE).
Since our handyman knocked this project out so quickly, I actually don’t have measurements or step-by-step directions. I showed him some inspiration photos {Here and Here} for what I envisioned and he made it happen. The things we covered that were important: 1) A bench so the kids could sit down and put shoes on 2) Enough sections so we each had one–we went from 5 to 4 in the end so they wouldn’t be so narrow and my husband and I just share 3) That the bench was tall enough to slide the recycling bin underneath it and 4) that we could fit another high shelf out of sight so that I could store my overflow of paper goods–you can just barely see it behind the top wall.
In the end, everything that was in the closet was in the new mudroom with the exception of the the two cardboard boxes which have since been unpacked and put elsewhere {where it all should have gone in the first place, we moved less than a year ago and unpacking has been well, a little slow} and a few coats were relocated to our other coat closet by our front door. I try to just keep the ones we are wearing every day in here, I admit that it will be nice when it warms up to have less hanging on the hooks.
So here is the in-progress.
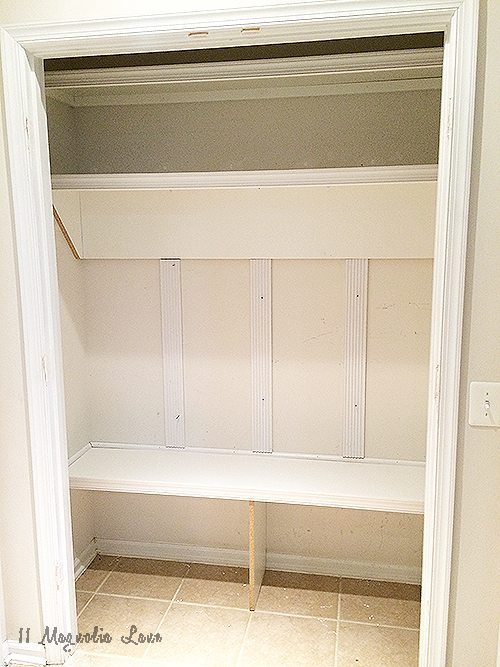
He built the basic shelves then added trim and molding so everything looked nice. We all decided the vertical boards on the wall weren’t necessary and pulled those down for a cleaner look.
I have been asked about the doors that were on the closet. We took the doors and hinges {Ok, our handyman took off the doors and hinges} and filled in the holes with white spackle. Since this is by the back door of our home I don’t worry about it being perfect, but honestly you can’t tell.
Here is why we took the doors off–

See how the doors opened in to each other? So while my kids were grabbing backpacks and coats inevitably one would be heading out the door while the other was trying to get in the closet and a battle would ensue. Now they just reach in and grab what they want and go. I still have the hooks on the left side of the hall for guests, purses etc. too.
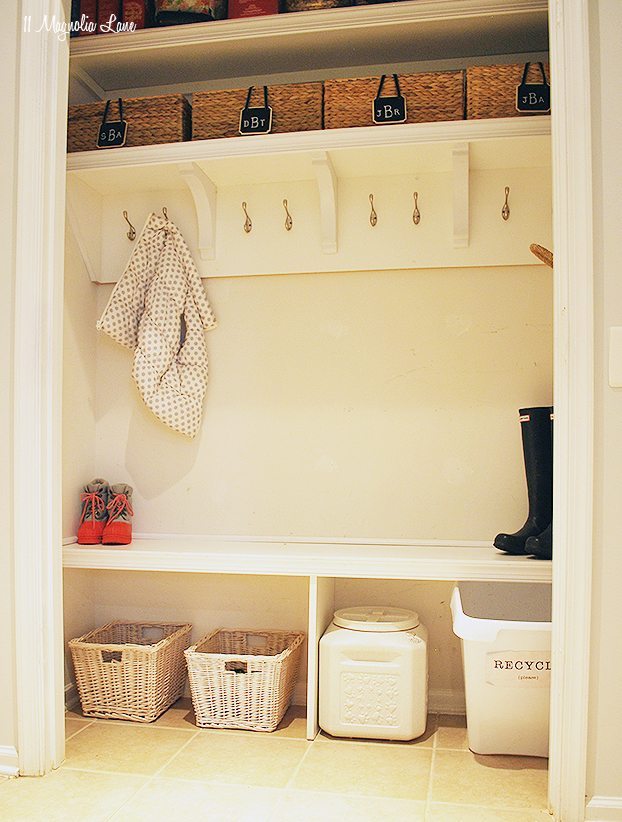
So here it is empty but after picture, so much better.
As I mentioned in the first post, I spent many hours trying to find the right baskets. I really wanted these but they were too small and Target would only allow me to buy one online {really, Target?} so I went back to the Container Store and went with 4 wider baskets, which even with shipping were reasonable in price. I wish they were a little taller, but I can just tip these down to grab what we need out of them so that is kind of nice in a lazy-girl sort of way.
I purchased some chalkboard tags at Michaels and used a chalk marker to mark each of our initials on the tags–my husband and I share a basket so using our married monogram worked {not a perfect system, he still asks me which basket he is supposed to use so apparently those details are lost on men!}.
I still plan to add some prettier accessories, like a pretty dog food container and will probably add some new larger baskets to go under the bench where the kids store their shoes.
I can definitely say looking back on that before picture, I don’t know how we lived with it for so long like it was. I am thrilled we made the investment in our sanity and had the project done to suit our family needs.
Here is one more before/after for pinning purposes!
UPDATE: See the summer mudroom with updates in the space HERE!
If I didn’t answer any questions, please feel free to leave me a comment.
See our entire home tour HERE.
Thanks for stopping by!

Our posts contain affiliate links. If you make a purchase after clicking on these links, we will earn a small commission, which helps to keep our content free. You don’t pay a cent more than you would otherwise, since that would be tacky! Please see our full disclosure policy here.