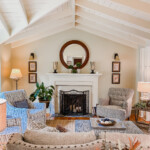
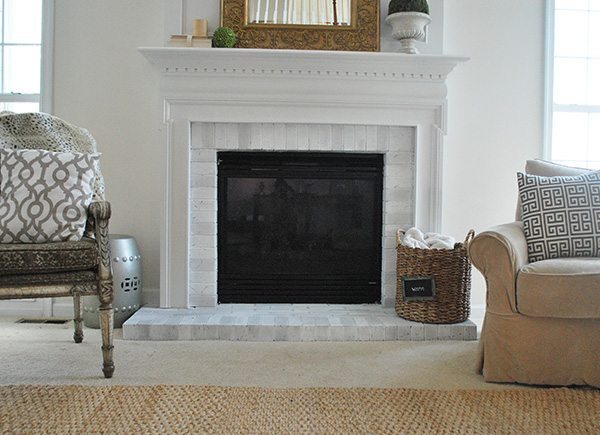
As I shared in this post here, I started overhauling the room decor by refreshing the brick around our fireplace. Sometimes a small change has a major impact in a room and this was definitely one of those times. Now that the dark brick doesn’t catch your eye the whole room seems fresher and lighter.
As I wrote about in this post–it was with mild trepidation that I took paint to brick, but it worked out really well. Ironically, most people who come over all the time didn’t even notice the change {Mom} and a few other regular guests saw the post but have told me they’d “never dare” paint their brick. I am of the opinion that it’s important to do what you love in your home but of course, I did have a pretty solid fallback plan of tiling over it with marble tiles–which may happen someday anyway–so this was a relatively low-risk proposition for me.

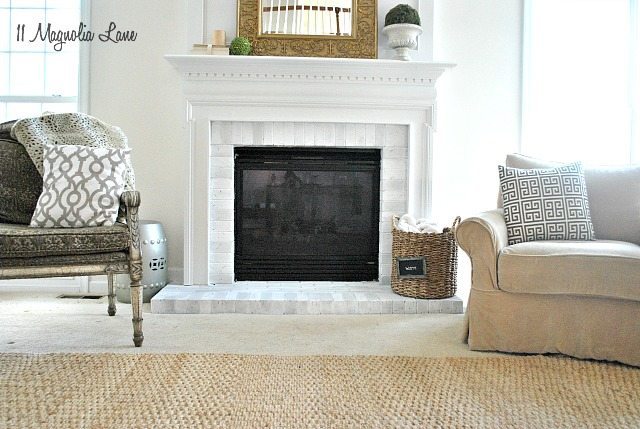
Now that I can “post-game” on it–I love it, and I am so glad I dared to do it. It made a huge difference in how the room feels to not have a huge dark focal point smack in the middle of the central wall.
As you saw in the other post, we are getting ready to replace that dirty carpet {it came with the house} you see above. One thing that made this much easier was I didn’t care if I painted over on the carpet, but if you don’t have that luxury you will need to tape off the floor around your brick pretty carefully. We have been planning to put hardwoods in, though we’re now considering carpet since our kids lounge on the floor in this room all the time, for their comfort, we now think a soft stain-resistant carpet may make more sense? We’ll see, suffice to say, it’s in progress.
Thanks to those of you who asked for details, here is how I did it:
I first gave all the brick a good cleaning with the hose of my vacuum and taped around the fireplace glass and insert.
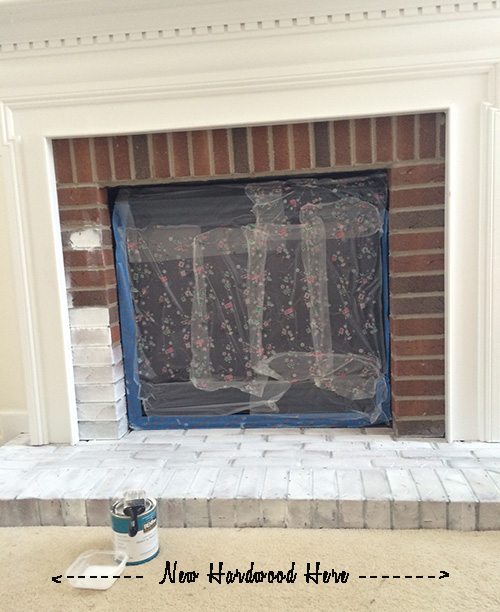
I may have shared this before but my secret weapon for many paint jobs is Glad Press and Seal plastic wrap {yes, the kind you use in the kitchen!}, it sticks instantly, whenever I paint a mirror or large surface it is my go-to product. In this case, I taped the fireplace edges with Scotch Blue Edge Lock tape and then used the plastic wrap over the middle to keep all the splatters away, and there were splatters, so do make sure to do this.
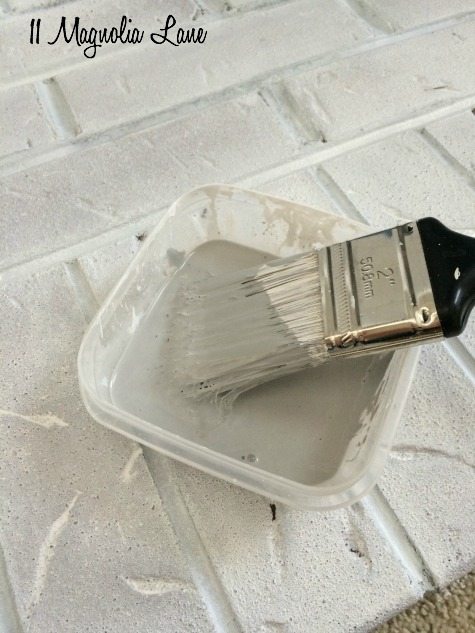
I used a basic Behr paint + primer in flat white {just off-the-shelf white}. I used a brush that I didn’t mind ruining and kept a small disposable plastic container filled with water close at hand.
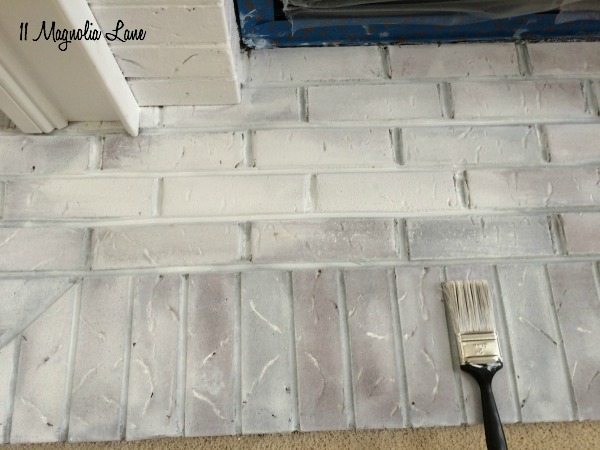
As you can see from the picture above, when I started this project I envisioned more of a white wash look for the brick, so I started by dipping my brush first in paint, then dipping it in a little water.
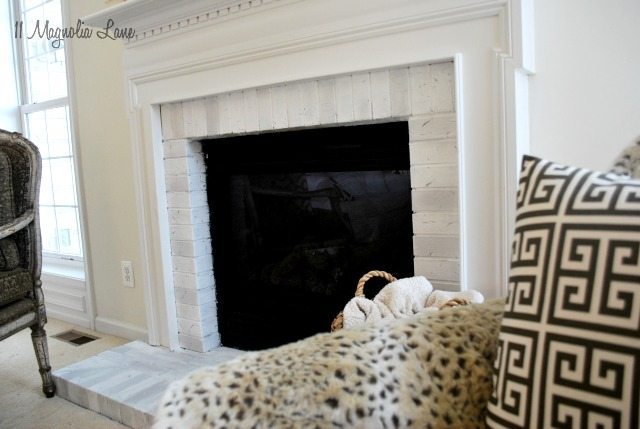
Above is the in-progress picture. I wasn’t thrilled with the result after the first coat, I was getting too much “white-wash” and not enough coverage with the paint. So I went over it again with a little less water and more paint and was much happier with the end result. Two coats did the trick, but you could do a third if you wanted a more dense look to your paint.
NOTE: the water is important to thin the paint enough to reach into the cracks and mortar and provide good coverage in the brick texture, I would not skip it.
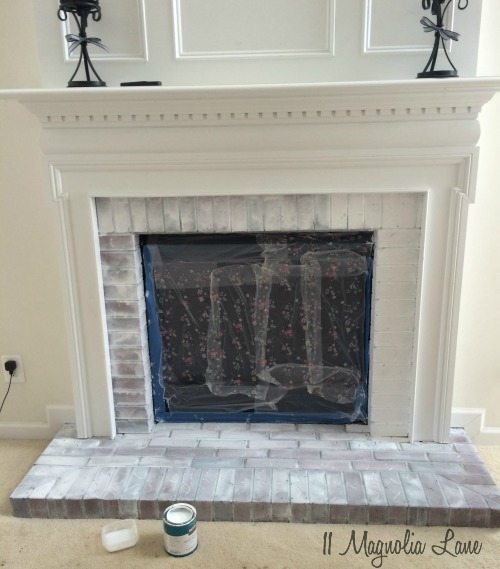
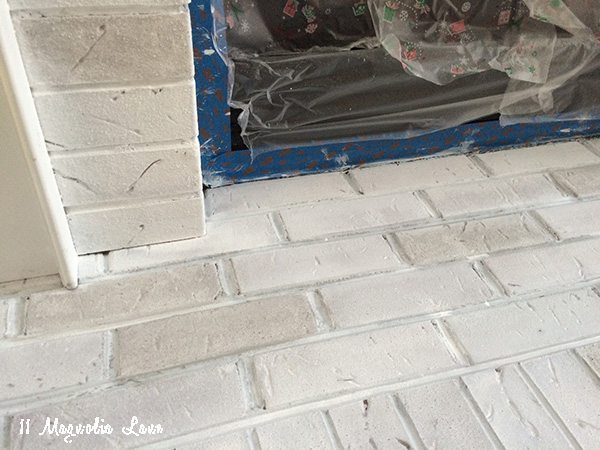
You can see on the right side of the fireplace {above} and at the top left {below} that the second coat of paint did the trick.
After the fireplace was completely covered with the white, I wanted to add more depth to it, so I mixed a little Annie Sloan Paris Gray Chalk Paint into some leftover white paint, just a touch, so I could mix in some gray bricks for interest.
I randomly picked some bricks and added some gray. I wish I could say I had a system for this, I just did what I thought looked best, and if they looked too gray I either sponged (with a paper towel) some of the gray paint off, or just mixed in a little more white over top. Doing it this way none of the bricks are the exact same and I think it makes it look more like it’s aged over time and less like it was just painted.
Overall the process took about 3 hours–the exact length of a playoff football game in fact–it was the perfect mindless project on a cold day.
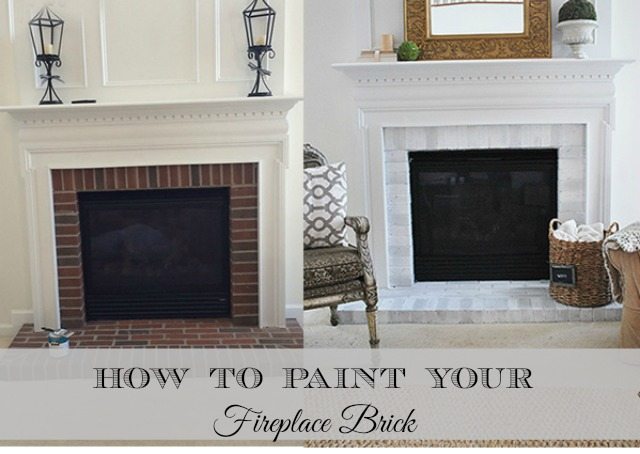
Here is another look at the before and after…
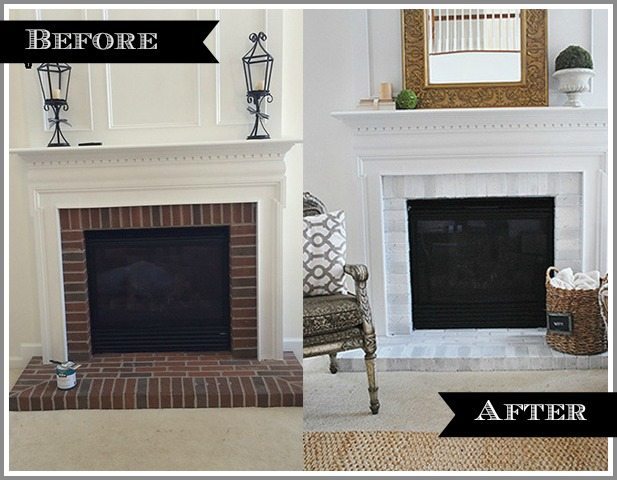
I know that this look may not be for everyone–I am sure that the painted brick haters out there are shaking their heads in frustration that anyone would do this–but I love it. Overall it’s lightened our room and the fireplace blends in nicely with our current decor instead of competing with it.
Overall, it was a very simple project. I am finishing up the entire room and will share it soon. If I didn’t answer all the “How-To” questions, please leave them in the comments.
Here is an easy to pin graphic to save!
![]()

Thanks for stopping by!
XO,

We have a You Tube Channel, you can see our videos HERE!
Our posts contain affiliate links. If you make a purchase after clicking on these links, we will earn a small commission, which helps to keep our content free. You don’t pay a cent more than you would otherwise, since that would be tacky! Please see our full disclosure policy here.