• Skip to primary navigation
  • Skip to main content
  • Skip to primary sidebar
  • Skip to footer
  • MEET CHRISTY & AMY
    • IF YOU’RE NEW HERE…
    • WORK WITH US
    • 11 MAGNOLIA LANE 101
    • DISCLOSURE + PRIVACY (the fine print)
    • BEST OF 11 MAGNOLIA LANE
  • TOUR OUR HOMES
    • TOUR OUR HOMES
    • CHRISTY’S MAGNOLIA COTTAGE
    • CHRISTY’S MCC HOUSE
    • Christy’s Stuttgart Flat
    • Amy’s Virginia Craftsman Home Tour
    • AMY’S VIRGINIA CRAFTSMAN Building Process
    • HOLIDAY HOME TOUR SERIES
  • CELEBRATIONS
    • EVENTS + ENTERTAINING
    • GIFTS
    • HOLIDAYS
    • RECIPES
  • HOME
    • CLEANING
    • DECORATING
    • ORGANIZING
    • ROOM BY ROOM
      • BATHROOMS
      • BEDROOMS
      • CLOSETS
      • CRAFT ROOMS + OFFICES
      • DINING ROOMS
      • KIDS’ ROOMS
      • KITCHENS
      • LAUNDRY ROOMS
      • LIVING + GREAT ROOMS
      • OTHER SPACES
      • PANTRIES
      • PLAYROOMS + BONUS ROOMS
      • PORCHES + OUTDOOR SPACES
    • TIPS
  • SHOP
    • SHOP OUR INSTAGRAM
    • SHOP OUR AMAZON STORE
    • FRIDAY FAVORITE FINDS
  • PROJECTS
    • CRAFTS
    • DIY PROJECTS + TUTORIALS
    • FURNITURE
    • PRINTABLES
    • WINDOWS, DOORS, + WALLS
  • LIFE
    • FRIDAY FREE FOR ALL
    • HEALTH
    • SIMPLY ON SUNDAY
  • TRAVEL
  • CONTACT
    • Email
    • Facebook
    • Instagram
    • Pinterest

11 Magnolia Lane

Sharing our easy DIYs, decorating, entertaining and more!

How To Build Stained Wood Open Shelving

June 20, 2018 By Amy 1 Comment

This Post Contains Affiliate Links

45 shares

Tutorial for easy DIY open shelving | 11 Magnolia Lane
 

We’re back with another one of our ‘greatest hits’ to share today, if you’ve been around awhile then you may have seen this project before, but for our new readers we thought we’d show how we built these rustic farmouse style stained, open shelves with brackets in my {former} kitchen. These were so easy, and made such a big difference, we wanted to bring it back again for those of you who might have missed it.

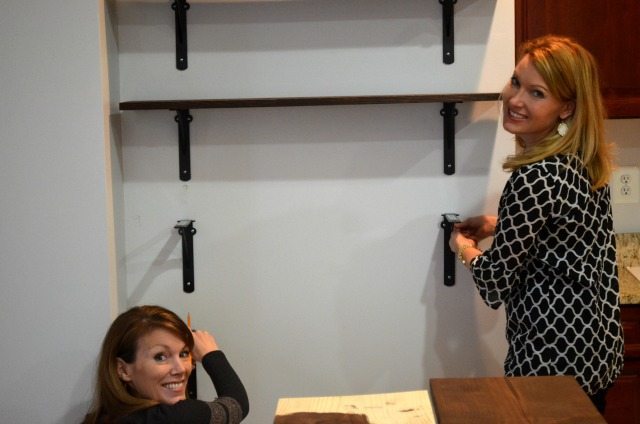
This is one of the best projects on our blog because it’s one of the few that Christy and I have completed together. Several years ago we had some time to knock out this project while Christy and her daughter were in town visiting.  This is easily possible as a single person job, but doing it together was way more fun.


kitchen-before

How to Build Stained Wood Open Shelving

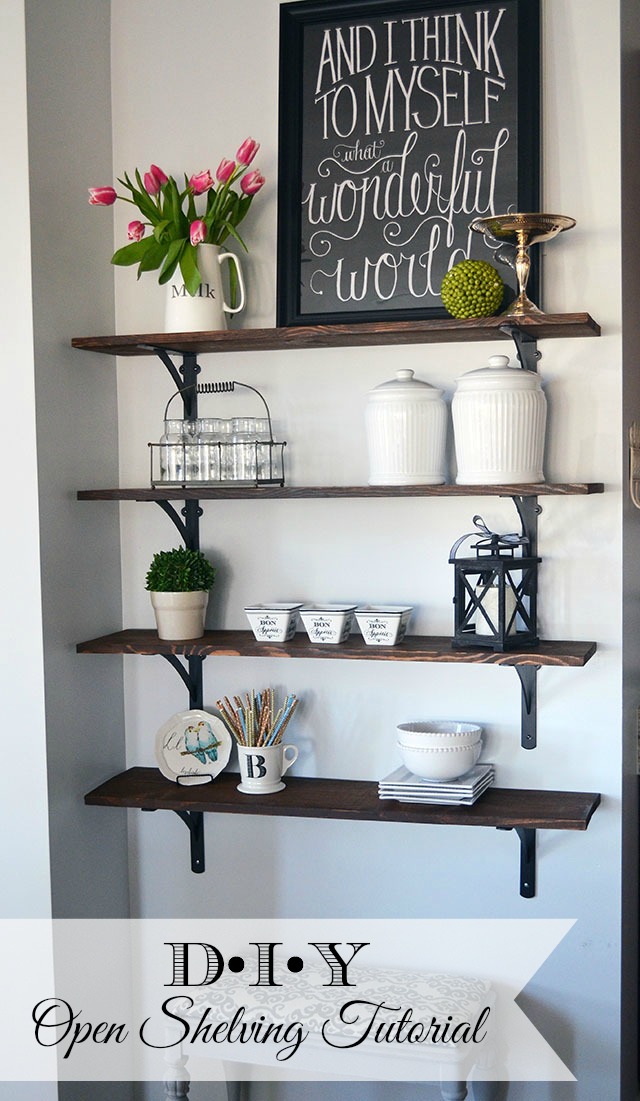
I’d been envisioning building shelves in that little niche with the blank wall you see in the photo above.  The area was too shallow for a piece of furniture, so it was really wasted space. We decided that adding a wall of open shelving would be the perfect solution since it would add to our storage (always a plus in the kitchen) and create visual interest on an otherwise boring wall.

For this project, we went with a dark stain for these shelves, because eventually the cabinets were going to be painted white [update you can see the full ‘after’ kitchen here], and the dark wood would be a nice contrast to light cabinets. Keep reading, because we actually created a video about the entire project, you’ll see it later in the post.


Tutorial for easy DIY open shelving | 11 Magnolia Lane

Supplies (for four shelves):

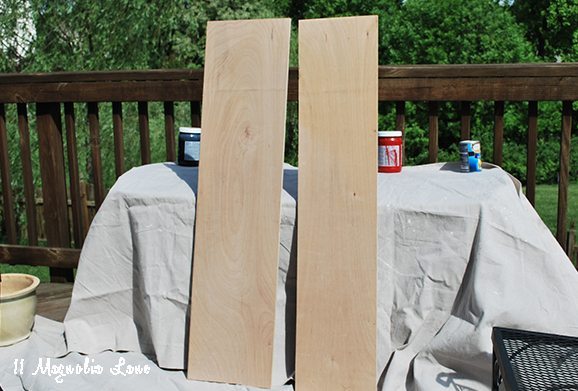
  • 4 lengths of pine (we chose pine because it’s so inexpensive, but you should inspect your wood to be sure that it’s free of knots and cracks)
  • 8 brackets
  • Drywall anchors (or screws if you’ll be able to install the brackets into studs)
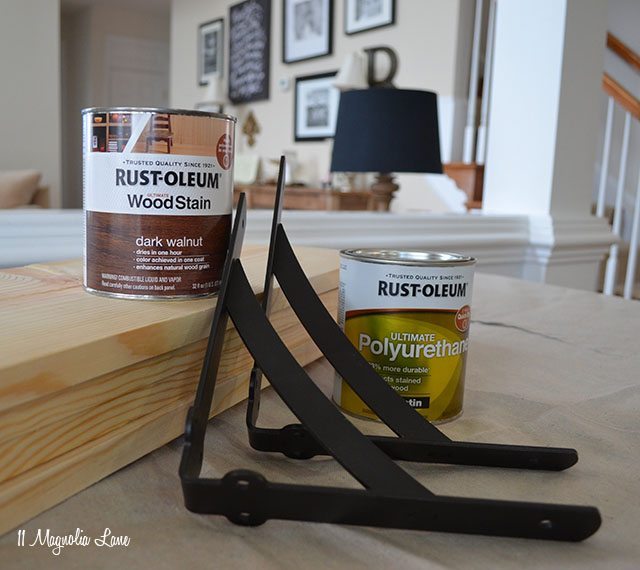
  • Rust-Oleum Ultimate Wood Stain in Dark Walnut and Rust-Oleum Ultimate Polyurethane in Satin
  • Sandpaper
  • Drill, screwdriver, tape measure, and level
  • HomeRight Finish Max Pro Sprayer
  • Rags, mineral spirits

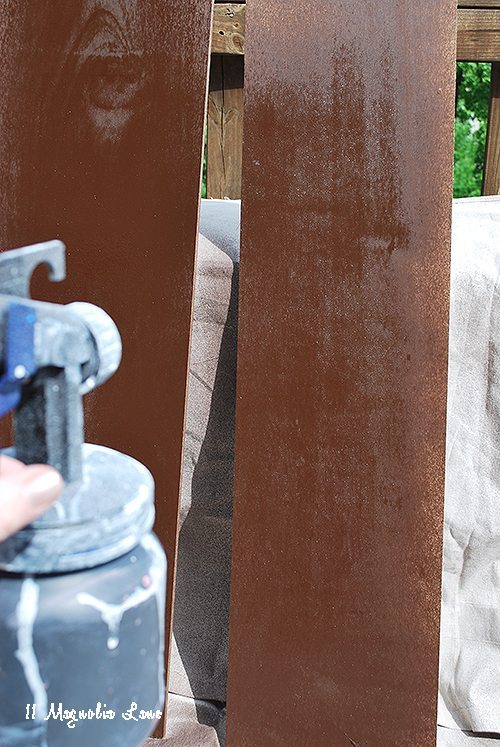
We used a walnut-toned stain and simply sprayed it on the wood.  You can also just paint stain on the unfinished pine boards, but make sure you sand, stain, sand, stain etc. then apply the poly (possibly 2-3 coats depending on the color)–and don’t forget the drying time in between all of those layers.  Spraying stain on instead of using a brush made this go so much faster. Then we just sealed with a top coat of polyurethane.

Using the stain in a sprayer was so easy because stain by nature is thinner than paint, so you can skip the usual step of thinning it with water before you put in in the sprayer. I just set up a little spray area on my deck and we gave the wood two coats of stain, it dries super quick which was important since this was a weekend project!


stained shelves before
 

sprayed shelves after
 

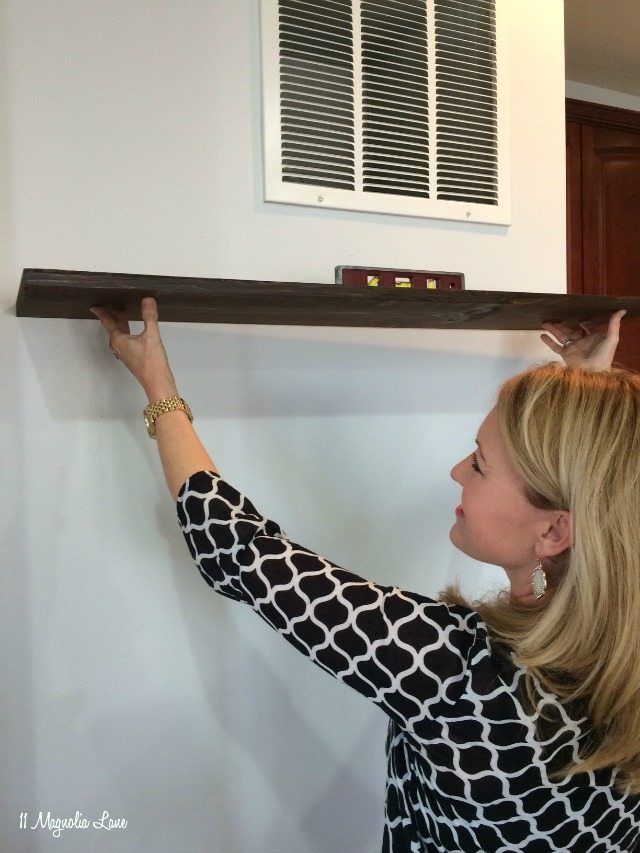
After the shelves were stained, given a clear coat for protection, and enough time to dry, we moved on to the next step–actually hanging them on the wall.

Here is the “How-To” video of the project–it’s rare Christy and I are even in the same state much less creating a project together so we decided to create a video!


With tape measure and level in hand, we did some advanced math (not really) and decided on the placement and spacing of our shelves. We wanted them about 12″ apart, although we probably could have gone as far as 15″ apart and they still would have looked good. If you know that you have a taller item that you want to store on your shelves, just plan their height accordingly.


Tutorial for easy DIY open shelving | 11 Magnolia Lane

Two sets of hands were so helpful as we installed the brackets and checked (over and over again) to be sure we had the shelves level! Since we didn’t have wall studs located where we wanted our brackets, we used 50lb. drywall anchors to be sure that our shelves would be able to hold quite a bit of weight.


Tutorial for easy DIY open shelving | 11 Magnolia Lane

Before we knew it, it was time for the best part of every DIY project–decorating the results! We operate in a similar manner when we’re staging a space–place an item, step back and stare at it, move it an inch to the right, step back and stare at it, move it to another shelf, step back and stare at it…you get the idea. It’s not very scientific, but I love what we came up with:


Tutorial for easy DIY open shelving | 11 Magnolia Lane


Tutorial for easy DIY open shelving | 11 Magnolia Lane
 

Tutorial for easy DIY open shelving | 11 Magnolia Lane
 

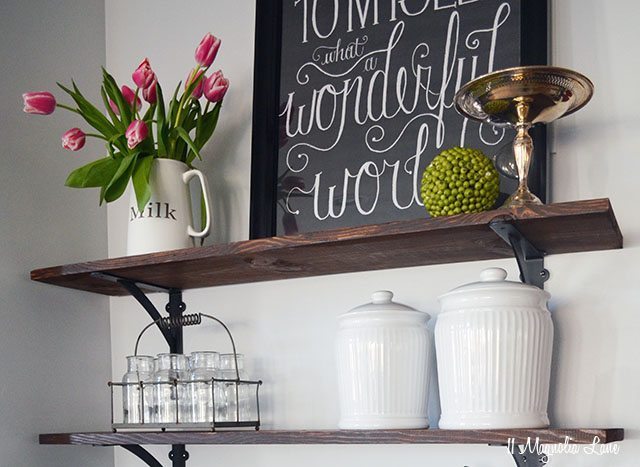
I have been asked about the “Wonderful World” art covering the AC return vent, and yes, unfortunately, I wasn’t able to keep it here long-term but it looked pretty in the photos, didn’t it?


Tutorial for easy DIY open shelving | 11 Magnolia Lane
 

Projects are so much easier and much more fun with a friend! The art is by one of our favorite bloggers, Jennifer at Dear Lillie and is available in her store.


11 Magnolia Lane | Amy & Christy
A rare picture of the two of us in the same state! We don’t get the chance to get together that often (and usually we make the most of our time by spending it at HomeGoods and drinking wine), but this visit we had a project to show for our time together too!

For other easy project ideas, see this post HERE. For a more updated look, you could also use a gray stain like I did in this post about how to get the ‘Restoration Hardware Gray‘ look on wood.  Also, be sure to read one post back because we are giving away a HomeRight Super FinishMax which is the perfect tool for a job like this, just click HERE to enter to win.

You can see the original post on this project HERE.

XO,


small-amy-new-headshot-summer-2016-2 copy
icon-facebook-1icon-instagram-1icon-pinterest-1icon-twitter-1NEW Google+

We have a You Tube Channel, you can see our videos HERE!

Our posts contain affiliate links.  If you make a purchase after clicking on these links, we will earn a small commission, which helps to keep our content free.  You don’t pay a cent more than you would otherwise, since that would be tacky! Please see our full disclosure policy here.

Click here to subscribe

YOU MIGHT ALSO LIKE THESE POSTS... :

The Story of Our New Kitchen Table + Chairs
How We Added Cabinets in our Breakfast Room
Fall Baking, Colorful Touches in Our New Kitc...
Builder Kitchen Makeover Details (Amy's House...

Filed Under: DIY/Projects/Tutorials, HOME DECOR, Wall & Door Decor Tagged With: DIY project, kitchen, open shelving

Reader Interactions

Comments

  1. Marty Oravetz says

    June 20, 2018 at 3:03 pm

    Looks fabulous and just what that wall needed.

    Reply

Leave a Reply Cancel reply

Your email address will not be published. Required fields are marked *

Recipe Rating


This site uses Akismet to reduce spam. Learn how your comment data is processed.

Primary Sidebar

Lowest prices. Straight Teeth,

•Don’t Miss A Thing!!•

•Do You Know Jesus?•

•Featured In•

Holiday Gift Ideas

Footer

  • Email
  • Facebook
  • Instagram
  • Pinterest

Copyright © 2023 · 11 Magnolia Lane· Blog Design by Little Blue Deer
Privacy Policy

11 MAGNOLIA LANE IS A PARTICIPANT IN THE AMAZON SERVICES LLC ASSOCIATES PROGRAM, AN AFFILIATE ADVERTISING PROGRAM DESIGNED TO PROVIDE A MEANS FOR US TO EARN ADVERTISING FEES BY ADVERTISING AND LINKING TO AMAZON.COM AND AFFILIATED SITES. AS AN AMAZON ASSOCIATE, WE EARN FROM QUALIFYING PURCHASES. WE ALSO PARTICIPATE IN SEVERAL OTHER AFFILIATE PROGRAMS; THIS INCOME ALLOWS US TO MAINTAIN THE QUALITY OF YOUR USER EXPERIENCE AND KEEPS OUR CONTENT FREE. WHEN YOU PURCHASE THROUGH ANY OF OUR AFFILIATE LINKS, WE EARN A SMALL COMMISSION AND YOU DON’T PAY A CENT MORE THAN YOU WOULD OTHERWISE; THAT WOULD BE TACKY!   READ OUR FULL PRIVACY AND DISCLOSURE POLICY {HERE}.
  ©11 Magnolia Lane 2019. Unauthorized use and/or duplication of this material without express and written permission from this blog’s authors and/or owners is strictly prohibited. Please email us at admin@11magnolialane.com for more information.

  • MEET CHRISTY & AMY
    • IF YOU’RE NEW HERE…
    • WORK WITH US
    • 11 MAGNOLIA LANE 101
    • DISCLOSURE + PRIVACY (the fine print)
    • BEST OF 11 MAGNOLIA LANE
    • Back
  • TOUR OUR HOMES
    • TOUR OUR HOMES
    • CHRISTY’S MAGNOLIA COTTAGE
    • CHRISTY’S MCC HOUSE
    • AMY’S NEW HOME BUILD
    • HOLIDAY HOME TOUR SERIES
    • SPRING HOME TOUR SERIES
    • Back
  • CELEBRATIONS
    • EVENTS + ENTERTAINING
    • GIFTS
    • HOLIDAYS
    • RECIPES
    • Back
  • HOME
    • CLEANING
    • DECORATING
    • ORGANIZING
    • ROOM BY ROOM
      • BATHROOMS
      • BEDROOMS
      • CLOSETS
      • CRAFT ROOMS + OFFICES
      • DINING ROOMS
      • KIDS’ ROOMS
      • KITCHENS
      • LAUNDRY ROOMS
      • LIVING + GREAT ROOMS
      • OTHER SPACES
      • PANTRIES
      • PLAYROOMS + BONUS ROOMS
      • PORCHES + OUTDOOR SPACES
      • Back
    • TIPS
    • Back
  • SHOP
    • SHOP OUR INSTAGRAM
    • SHOP OUR AMAZON STORE
    • FRIDAY FAVORITE FINDS
    • 11 ML ETSY SHOP
    • 11ML ORGANIZING SHOP
    • Back
  • PROJECTS
    • CRAFTS
    • DIY PROJECTS + TUTORIALS
    • FURNITURE
    • PRINTABLES
    • WINDOWS, DOORS, + WALLS
    • Back
  • LIFE
    • FRIDAY FREE FOR ALL
    • HEALTH
    • SIMPLY ON SUNDAY
    • TRAVEL
    • Back
  • CONTACT
    • Email
    • Facebook
    • Instagram
    • Pinterest
45 shares