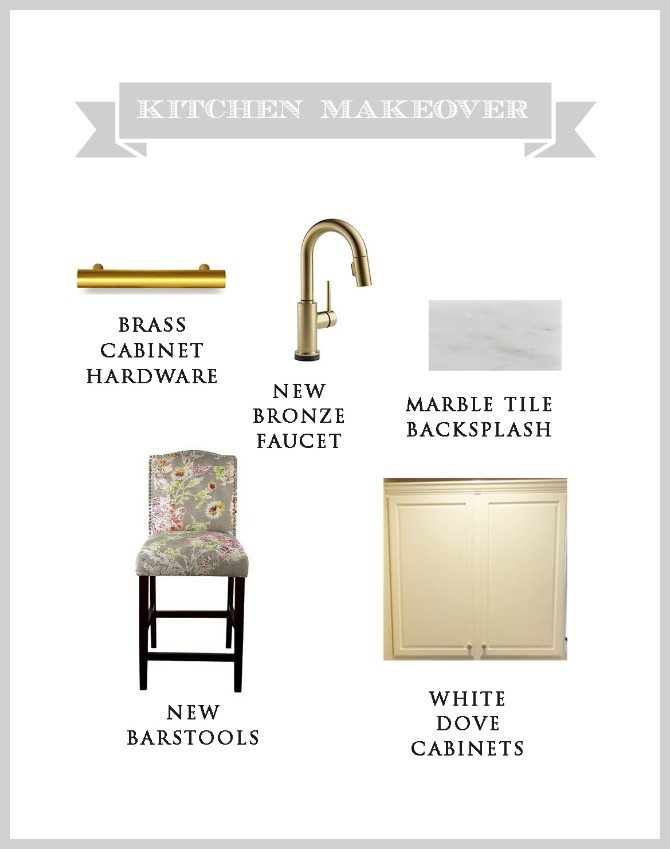
I am so excited to be back today to share the next installment of our kitchen makeover. As I mentioned in this post HERE about our kitchen makeover and showed in my inspiration board below, I had our backsplash tile in progress–and now it is complete!
I had the fun task of selecting a product {which I will say choosing from everything they have was so hard!} to use in my home to show how easy it is to update your home with Floor & Decor. Talk about perfect timing, this opportunity came right as we were planning to overhaul the kitchen in our new home and were in need of a backsplash so it was pretty easy to pick a direction to go. Their tile selection is phenomenal and they have these wonderful in-store displays to inspire you if you need ideas.
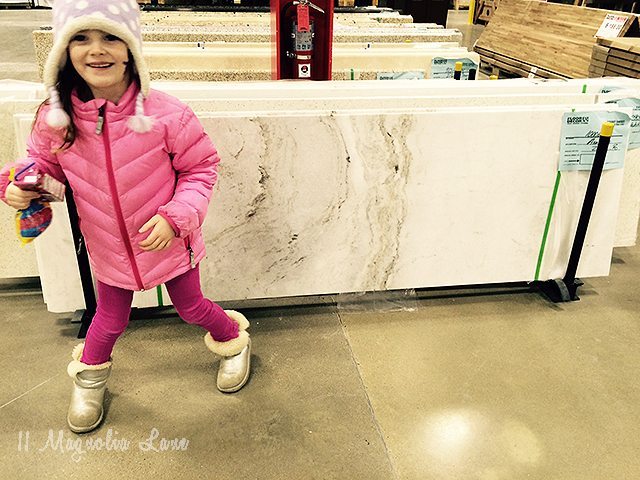
Before selecting anything I did have to spend quite a while wandering through the store looking at everything else they have–like this gorgeous slab of white granite that would just work so perfectly on my island, wouldn’t it? Do you love my photobomber? She is my shopping partner in crime, and I can definitely say it is always much more entertaining having her along.
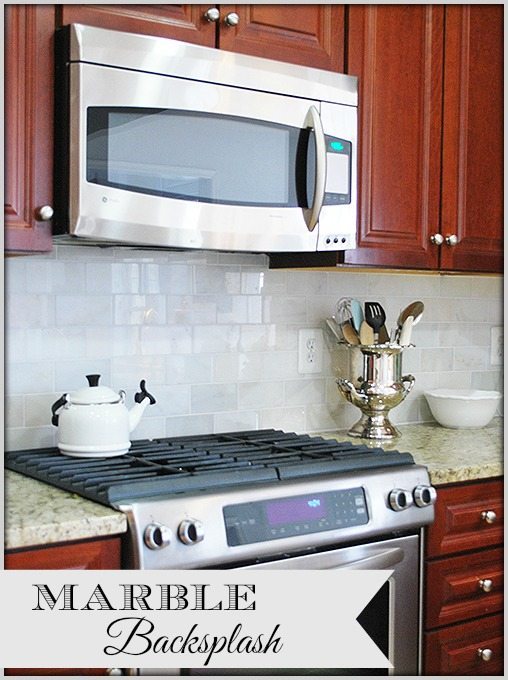
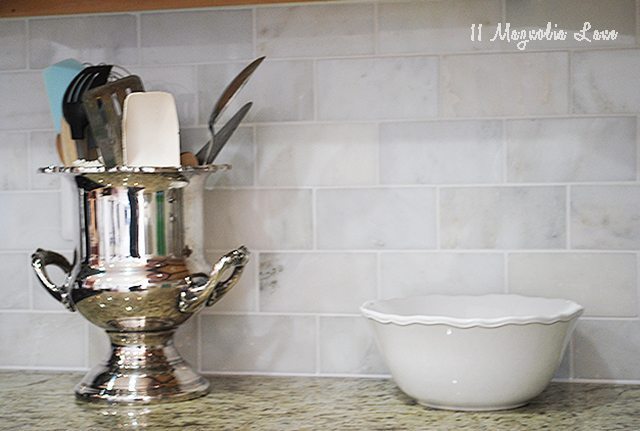
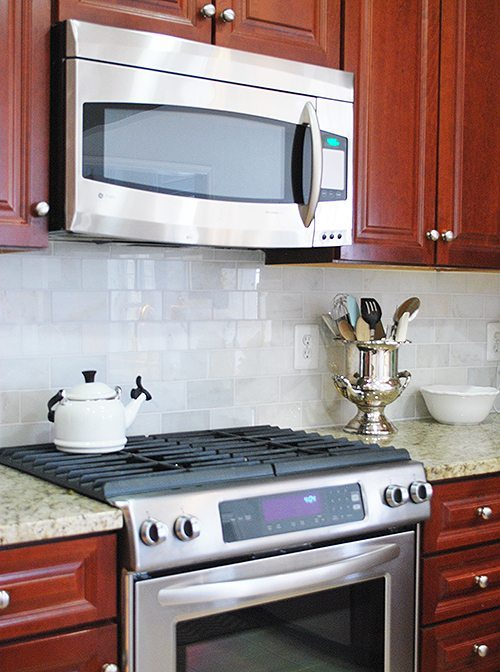
But, back to the backsplash. After looking at ALL the tile in the store and they really have a HUGE selection, I settled on the marble. Now that the tile is installed, I can honestly say I am so glad I didn’t grab something generic at the local home improvement store. Since I know I probably won’t have marble counters again {you can read my experience HERE}, but I love, love, LOVE how marble looks, incorporating this style of tile into the backsplash made perfect sense. My conservative side said to just go with a classic white subway tile but in the end, I went with what I love and it seems that always makes me happiest.
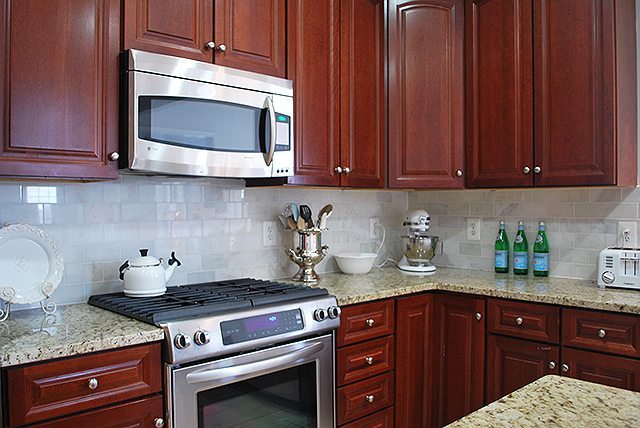
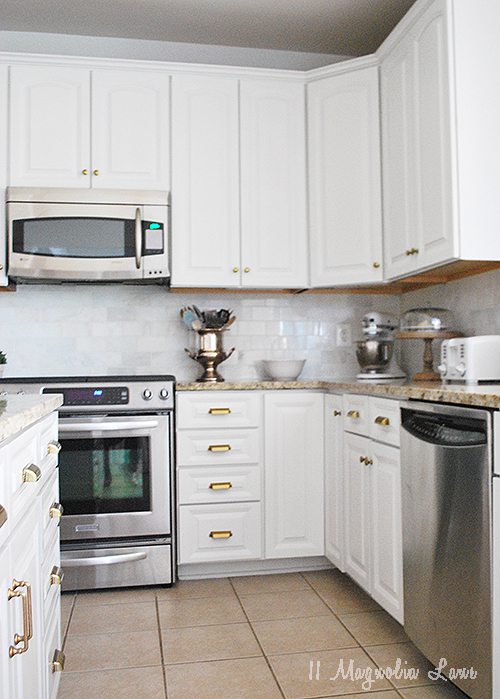
I’ll stop right here and say, while I love the tile I am not a huge fan of the way the cool marble mixes with my current busier and “warmer” granite. That means eventually these countertops will just have to get replaced, something I have been planning to do down the road anyway, but in the meantime, we’ll make it work. Since the dark, reddish cabinets will get updated with white paint here fairly shortly I think it will all blend much more nicely together once that is done.
This tile is gorgeous, it caught my eye as soon as I walked in the store. In the end, while tiling a backsplash is a simple and easy DIY project, we have a friend who tiles for a living and my husband convinced me to involve him in this job. It was well worth it, his tile work was exacting and perfect. Mine would have been a bit more slapdash {my husband knows me well!}, so this was a good choice, he did an amazing job.
Here is a bit more about the process. As I mentioned, I first made a trip to Floor & Decor to preview the tile and decide what I wanted. I was pretty sure as soon as I saw this tile display below, it would be what I would pick. They offer a sample pack for a nominal cost that you can bring home, so I did that just to be sure then returned a week later to pick up the tile and other supplies.

Terry came with me to pick up the tile and to give me a final buy-in, after all, once tile goes up it really doesn’t easily come down. We worked with the best Floor & Decor employee {actually two girls helped us on and off} walk us through the whole process. While I’ll just share I didn’t disclose anything about writing a blog post about the tile project, they could not have been more helpful to us, the customer service there is amazing.
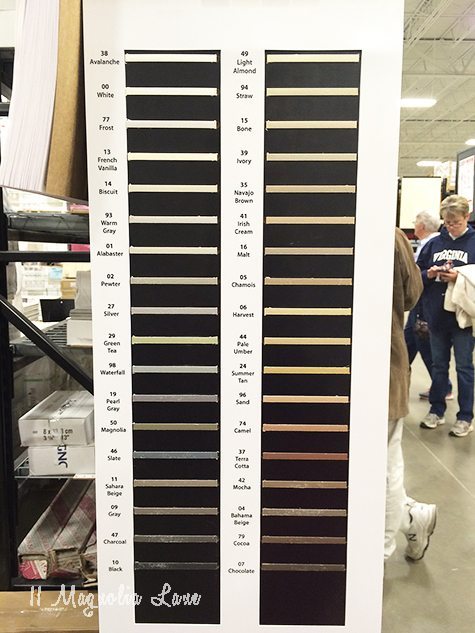
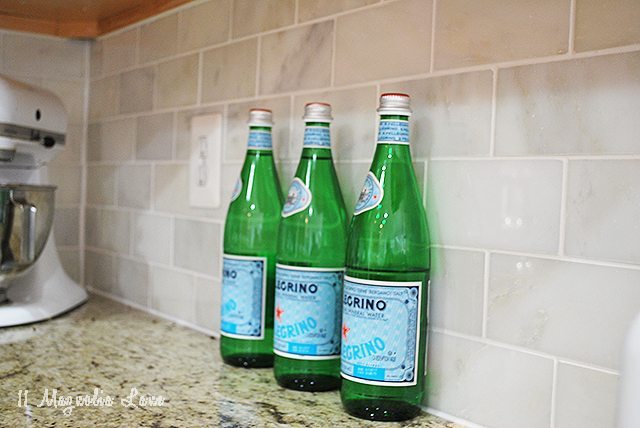
Not only did they help calculate exactly how much tile I needed, they helped me pick the right grout–I used the whitest white, Avalance {the first one in the handy chart they have above} and the store employees searched the store for just the right grout for me. They also taught us the difference between sanded and unsanded grout–I used unsanded so it wouldn’t scratch the finish on the tile, but we had to do a very thin grout line so it wouldn’t crack. They also helped us with getting the right sealer since I was leery about using marble again near our stove and most importantly, they worked exactly in my budget patiently and without any “upsale”. It was one of those beautiful shopping experiences!
Once I got the tile home, I couldn’t wait for the tiling part to begin but we had some prep work to do first. As I mentioned in my previous post about our kitchen, we had to remove the 4″ granite backsplash the builder had installed so the new tile would come all the way down to the countertops.
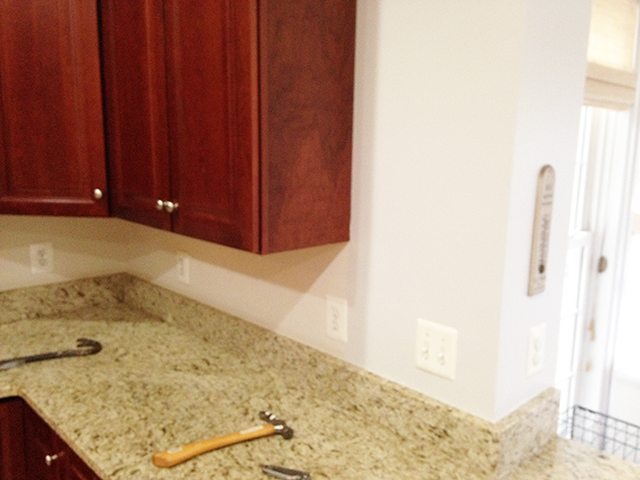
A crowbar made light work of that job, which my husband actually not only tackled but remembered to take “before pictures” of, he’s learning :). There was some damage to the drywall but since the tile was going to cover it up we didn’t have to worry about it.
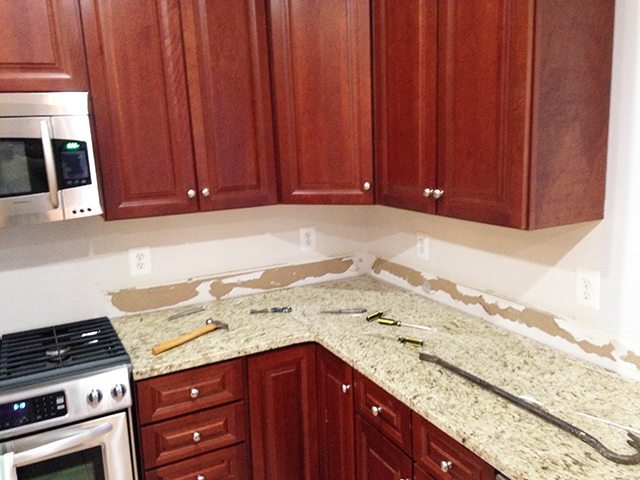
Next we removed all the switchplates and prepped the area. Our installer took over then and I didn’t get a picture but the first thing he did was to use a level to make a line across the entire backsplash area which ensured the tile would remain straight, something I would not necessarily thought to do, so again it was a good call we involved him.
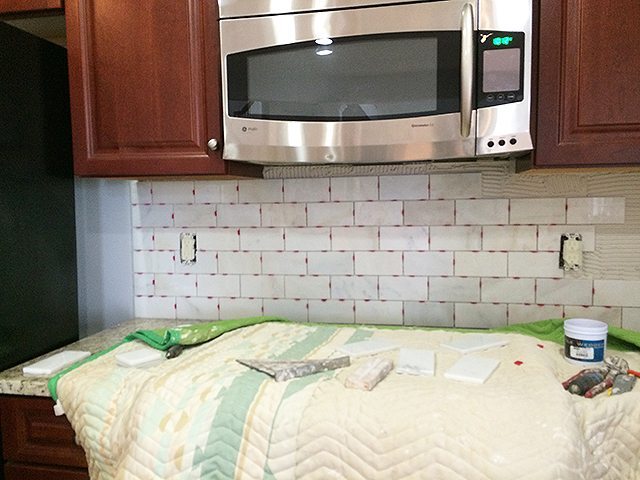
He applied mortar to the wall, then laid the tile in even rows across the wall. As I mentioned, since we were using unsanded grout we used a very thin grout line, I wanted the tile to be the star of the show not the grout.
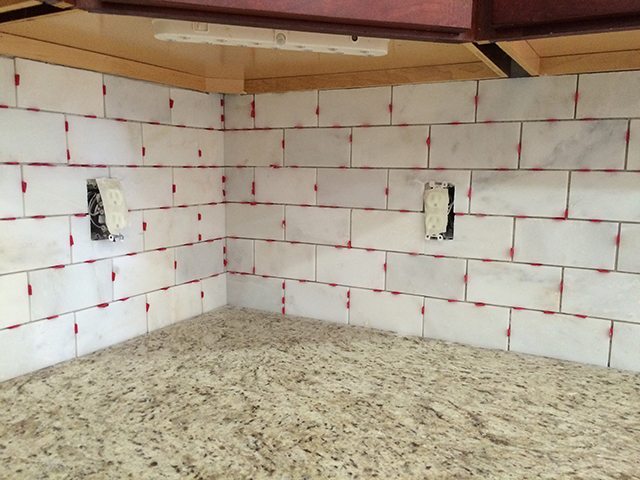
We let the tile set overnight, then the next day applied the grout. After another 24-hour waiting period, we applied sealer to ensure that the marble and the grout wouldn’t absorb any stains. Overall, a very easy project and one you could certainly tackle yourself.
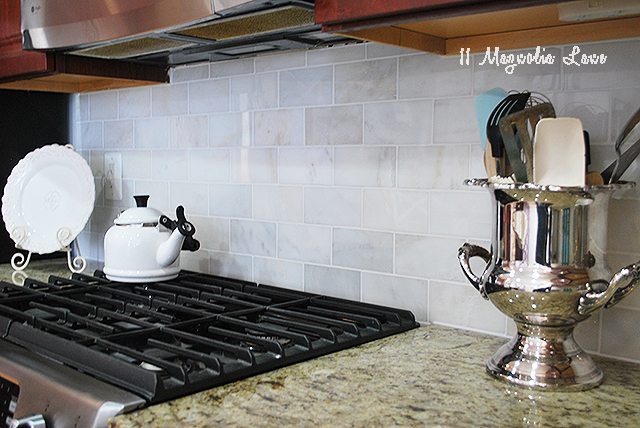
Now that I have a backsplash the kitchen seems so much more polished and pulled together. The tile is really beautiful, even our friend, who as I said installs tile for a living, complimented us on the quality and appearance of it. It’s really fun to see our kitchen coming together and becoming so much more us rather then builder-generic. It’s not going to happen overnight but we’re making progress!
And, what is even more exciting is that this is just the first of two projects I was able to do with Floor & Decor using their beautiful tile. We’re getting WAY more creative with our small Butler’s Pantry, and it will definitely have more “WOW” factor then the kitchen so we are quite excited to share that here in another month or so when that project will {hopefully} be complete.
Now that the backsplash is done it’s on to painting the cabinets. I can’t say I am excited about that huge job especially as the weather is getting nicer but of everything we are doing, lightening up our cabinets is going to go a long way toward changing the overall look of the kitchen.
Thanks so much to Floor & Decor for partnering with us on this project, I can truly say that it was a pleasure and their products are top-notch. You can see more inspiration at our Floor & Decor Pinterest board HERE and find a store near you HERE.
{UPDATE: See my kitchen makeover all finished HERE!}
Thanks for stopping by~