A few weeks ago, I went on a personal mission to find a cute door sign that would easily telegraph to the neighborhood kiddos whether my two were available (or not) to play. Some days it’s just easier to hang up the sign than to answer the door multiple times, right?
Remembering that I used to have a darling door sign when my kids were little that warned visitors away from ringing the doorbell while Baby was sleeping, I told Amy what I was looking for in regards to play time and asked her if we could put our heads together and create a cute sign. But, as sometimes happens, before we could get to work, I found the perfect sign at Positively Splendid and figured, why reinvent the wheel when I can just follow a tutorial? I loved what Amy (Positively Splendid’s Amy, not our Amy 🙂 ) had done with the idea, as well as the colors she chose. Please head on over by clicking {here} and let her know that I sent you! Here’s what she came up with:
 How cute is that? Don’t you just love the Tiffany blue paint combined with the black and white striped ribbon? Can you see why I chucked the idea of coming up with my own concept and just followed her easy tutorial? I got to work right away because I had everything I needed in the house already to make this project. Here’s what I did:
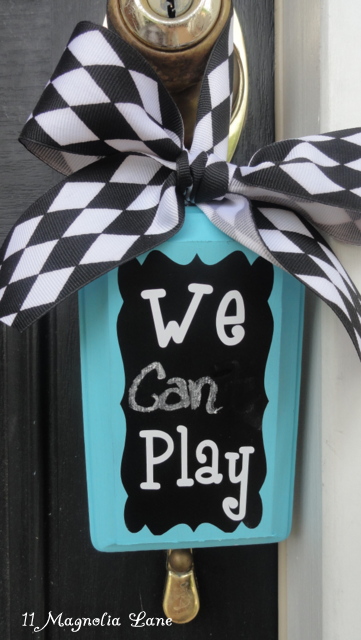
1. I painted wooden plaques I had from the craft store (they were 80 cents apiece). I used regular acrylic paint and did two in robin’s egg blue and one in light green. I’m going to do hot pink next time!
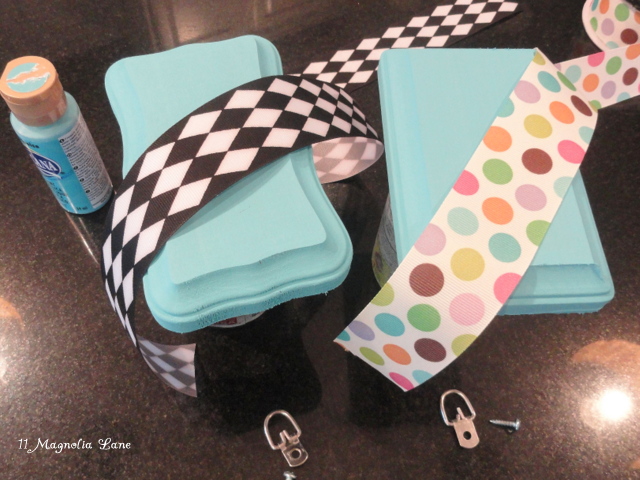 2. I used my Silhouette Cameo to cut out chalkboard contact paper for the sign. I used chalkboard contact paper because I had scraps of it left from my North Carolina pantry makeover. Silhouette makes chalkboard vinyl, which I’ll be buying and using from here on out, but the contact paper worked perfectly. I just used the cutting mat because I had only a few small scraps left. If you don’t have a Silhouette or other craft cutter, why not use chalkboard paint (spray or brush-on) to paint your sign? You can use tape to tape off the edges and do those in a bright color; or, chalkboard paint now comes in some gorgeous shades!
3. I screwed a small ring hanger on the back of each plaque (eye screws would work, too, but I just used what I had) to hold the ribbon.
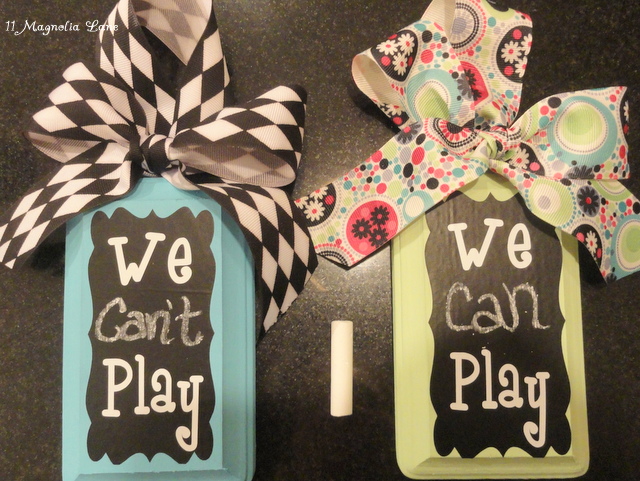
4. Using the Silhouette again, I cut out the words “We” and “Play” from white vinyl. I used the free font “Boyz R Gross” and I love how playful it looks. I like Amy’s idea of using a white chalkboard marker (or chalk) to write “Can” or “Can’t” in the middle, but you could certainly write the entire message out with chalk, and that way you could use the sign for other things (like “We’re Around Back” or “Shh…Baby Sleeping!”).
5. I cut a length of 2″ ribbon and fashioned a loop and bow (see my video tutorial on how to tie the perfect bow {here}). I have a ribbon addiction so I had lots to choose from, but I just loved Amy’s black, white, and blue color combination so I made mine out of those shades. The green one I gave to a friend as a little birthday gift, and I gave another one to my neighbor (so my kids know when to stay away from her house, too!). So cute and easy–and inexpensive! Amy, thanks for the great idea–we all need one of these before summer!

 Thanks for stopping by!