• Skip to primary navigation
  • Skip to main content
  • Skip to primary sidebar
  • Skip to footer
  • MEET CHRISTY & AMY
    • IF YOU’RE NEW HERE…
    • WORK WITH US
    • 11 MAGNOLIA LANE 101
    • DISCLOSURE + PRIVACY (the fine print)
    • BEST OF 11 MAGNOLIA LANE
  • TOUR OUR HOMES
    • TOUR OUR HOMES
    • CHRISTY’S MAGNOLIA COTTAGE
    • CHRISTY’S MCC HOUSE
    • Christy’s Stuttgart Flat
    • Amy’s Virginia Craftsman Home Tour
    • AMY’S VIRGINIA CRAFTSMAN Building Process
    • HOLIDAY HOME TOUR SERIES
  • CELEBRATIONS
    • EVENTS + ENTERTAINING
    • GIFTS
    • HOLIDAYS
    • RECIPES
  • HOME
    • CLEANING
    • DECORATING
    • ORGANIZING
    • ROOM BY ROOM
      • BATHROOMS
      • BEDROOMS
      • CLOSETS
      • CRAFT ROOMS + OFFICES
      • DINING ROOMS
      • KIDS’ ROOMS
      • KITCHENS
      • LAUNDRY ROOMS
      • LIVING + GREAT ROOMS
      • OTHER SPACES
      • PANTRIES
      • PLAYROOMS + BONUS ROOMS
      • PORCHES + OUTDOOR SPACES
    • TIPS
  • SHOP
    • SHOP OUR INSTAGRAM
    • SHOP OUR AMAZON STORE
    • FRIDAY FAVORITE FINDS
  • PROJECTS
    • CRAFTS
    • DIY PROJECTS + TUTORIALS
    • FURNITURE
    • PRINTABLES
    • WINDOWS, DOORS, + WALLS
  • LIFE
    • FRIDAY FREE FOR ALL
    • HEALTH
    • SIMPLY ON SUNDAY
  • TRAVEL
  • CONTACT
    • Email
    • Facebook
    • Instagram
    • Pinterest

11 Magnolia Lane

Sharing our easy DIYs, decorating, entertaining and more!

DIY Stained Open Shelving {and a Giveaway}

May 13, 2015 By Amy 67 Comments

This Post Contains Affiliate Links

36108 shares
  • 57

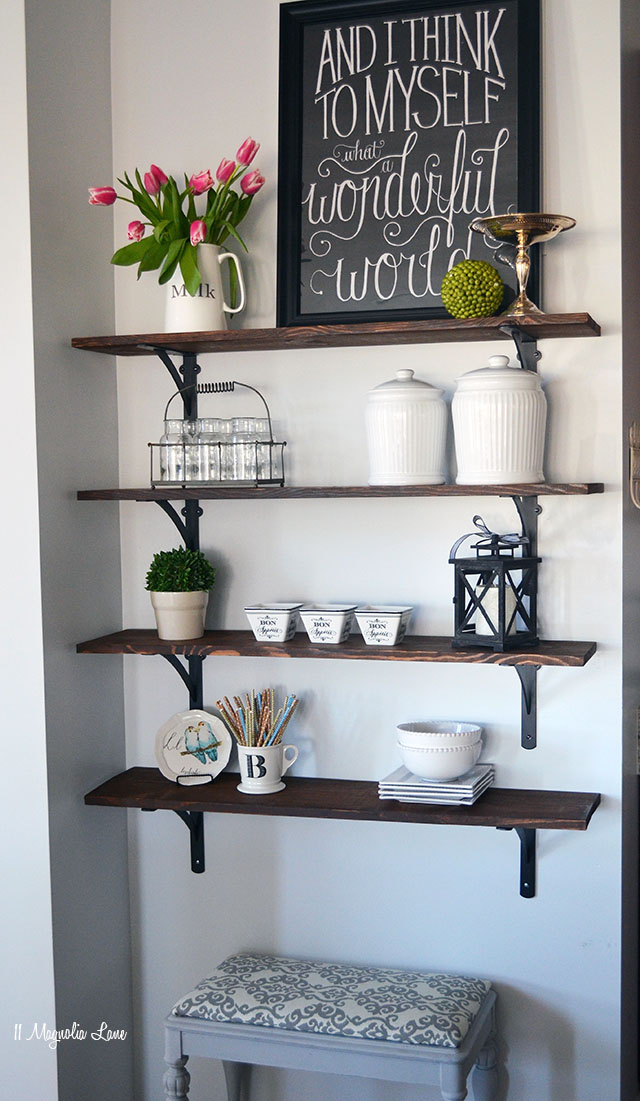
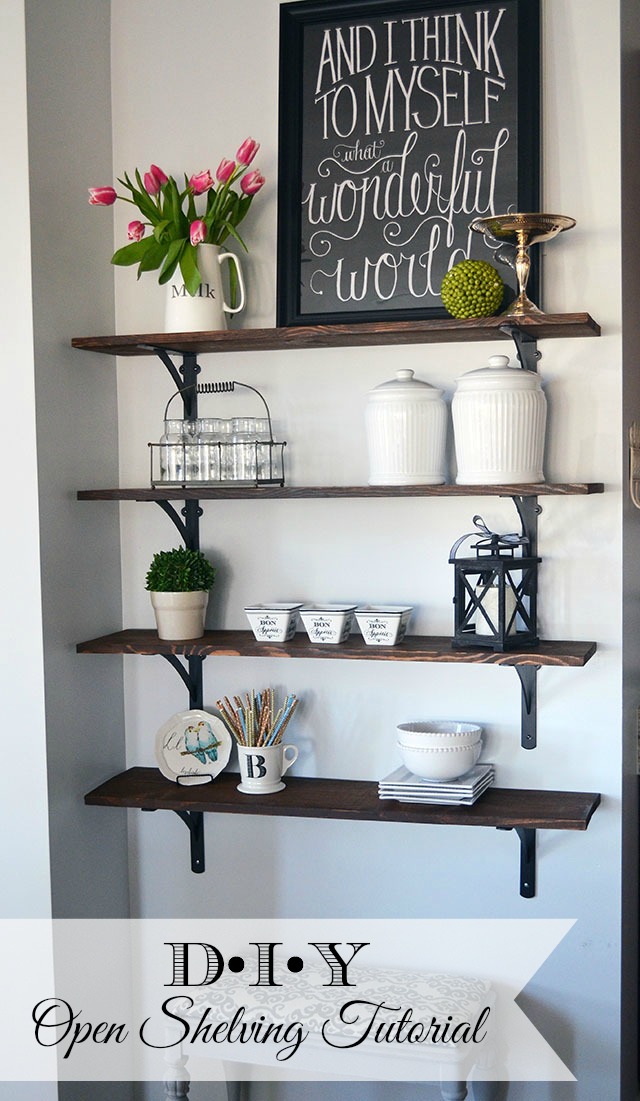
Tutorial for easy DIY open shelving | 11 Magnolia Lane
Christy came to visit me a few weeks ago and in true weekend warrior fashion, we knocked out a fun DIY project together–these DIY Stained Shelves! Aren’t they great? The whole “How-We-Did-It” is in our first combined video featuring both of us, check that out below!

By now everyone knows that our new house is just FULL of projects–sometimes I don’t know which one to tackle next. We started our Kitchen Makeover slowly but surely and while Christy was here I asked her to help me build shelves in that little niche with the blank wall, you can see it below.  It was shallow for a piece of furniture, so it was wasted space:
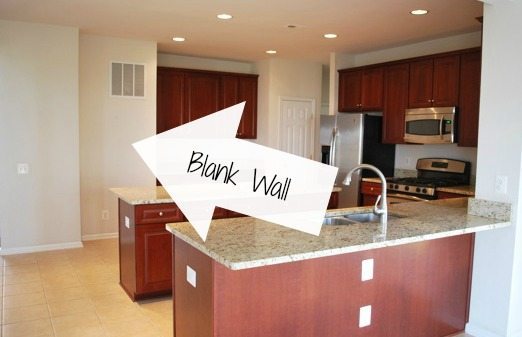
kitchen-before

We decided that adding a wall of open shelving would be the perfect solution since it would add to our storage (always a plus in the kitchen) and create visual interest on an otherwise boring wall.

For this project we went with a dark stain for these shelves, because eventually the cabinets are going to be painted white, and I figured the dark wood would be a nice contrast to light cabinets. Keep reading, we actually created a video about the entire project, you’ll see it later in the post.

This was such an easy project with huge impact! I gathered our supplies ahead of time since our time together was limited.  And since, we’re HomeRight Ambassadors and their products make DIY’ing so much easier, we used our HomeRight Paint Sprayer which cut the shelf preparation time down to next to nothing.
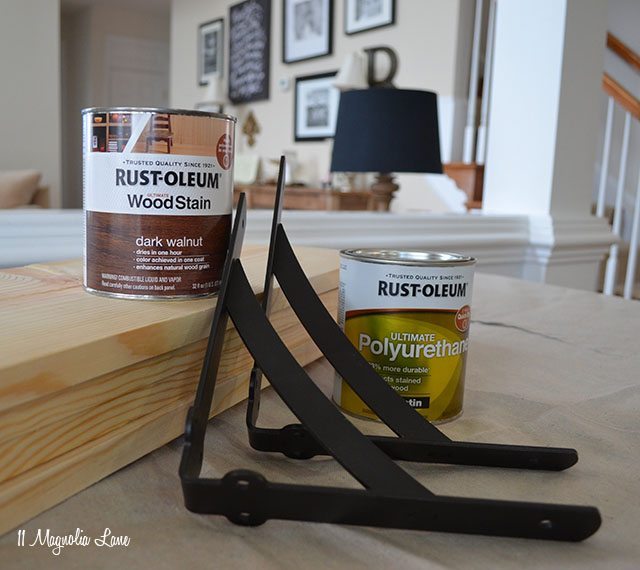
Tutorial for easy DIY open shelving | 11 Magnolia Lane

Supplies (for four shelves):

  • 4 lengths of pine (we chose pine because it’s so inexpensive, but you should inspect your wood to be sure that it’s free of knots and cracks)
  • 8 brackets {from Home Depot}
  • Drywall anchors (or screws if you’ll be able to install the brackets into studs)
  •  Wood Stain in Dark Walnut and Rust-Oleum Ultimate Polyurethane in Satin
  • Sandpaper
  • Drill, screwdriver, tape measure, and level
  • HomeRight Finish Max Pro Sprayer
  • Rags, mineral spirits

We used a walnut-toned stain and simply sprayed it on the wood. If we were painting a similar piece of unfinished pine, we would need to sand, prime, sand, paint (possibly 2-3 coats depending on the color), and so on–and don’t forget the drying time in between all of those layers–so spraying stain on instead of paint made this go so much faster. Then we just sealed with a top coat of polyurethane.

Using the stain in a sprayer was so easy!  Stain by nature is thinner than paint, so you can skip the usual step of thinning it with water before you put in in the sprayer. The FinishMax gave it a nice even coat of stain, just do several coats until you get the desired amount of coverage. I just set up a little spray area on my deck and we gave the wood two coats of stain, it dries super quick which was important since this was a weekend project!
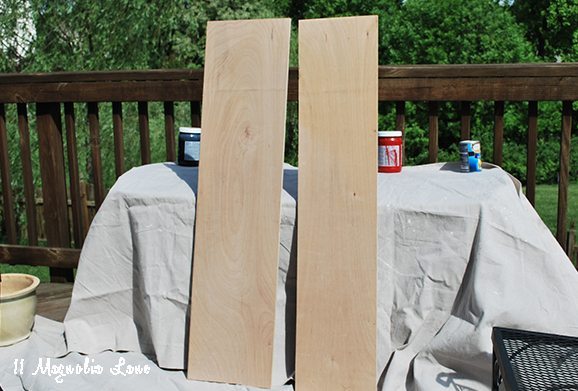
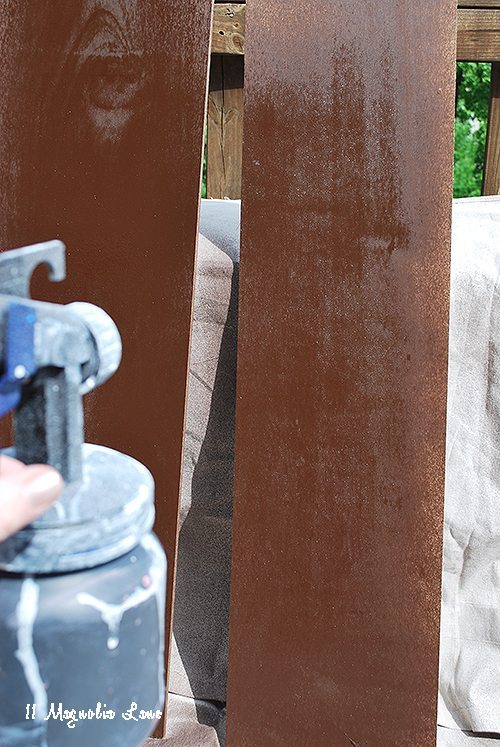
stained shelves before

sprayed shelves after

After the shelves were stained, given a clear coat for protection, and enough time to dry, we moved on to the next step–actually hanging them on the wall.

Here is the “How-To” video of the project–it’s rare Christy and I are even in the same state much less creating a project together so we decided to create a video! Take a look, but don’t forget to keep reading to the end of the post because there is a giveaway for a HomeRight FinishMax Pro Sprayer.

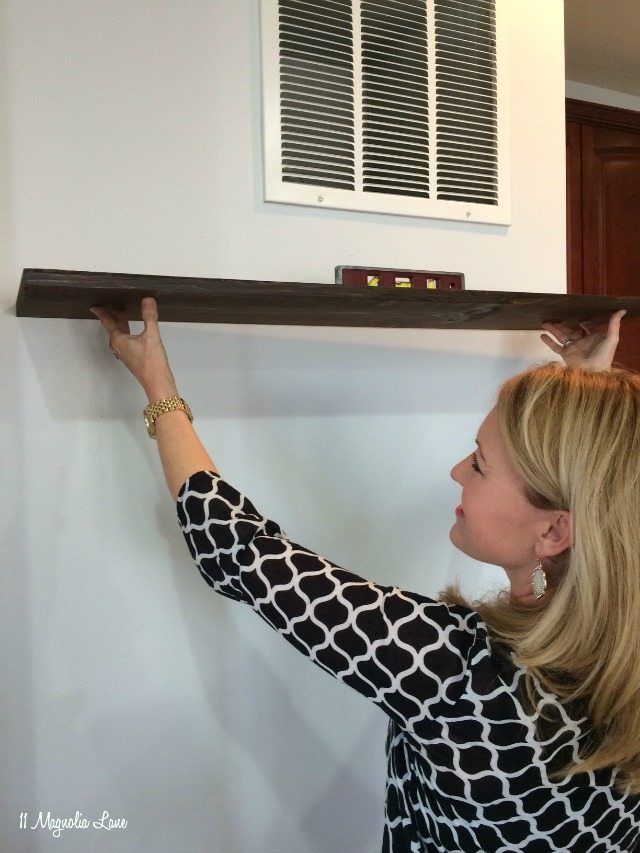
With tape measure and level in hand, we did some advanced math (not really) and decided on the placement and spacing of our shelves. We wanted them about 12″ apart, although we probably could have gone as far as 15″ apart and they still would have looked good. If you know that you have a taller item that you want to store on your shelves, just plan their height accordingly.
Tutorial for easy DIY open shelving | 11 Magnolia Lane

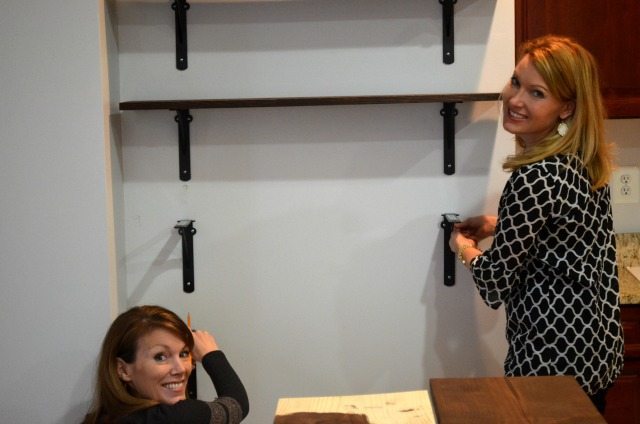
Two sets of hands were so helpful as we installed the brackets and checked (over and over again) to be sure we had the shelves level! Since we didn’t have wall studs located where we wanted our brackets, we used 50lb. drywall anchors to be sure that our shelves would be able to hold quite a bit of weight.
Tutorial for easy DIY open shelving | 11 Magnolia Lane

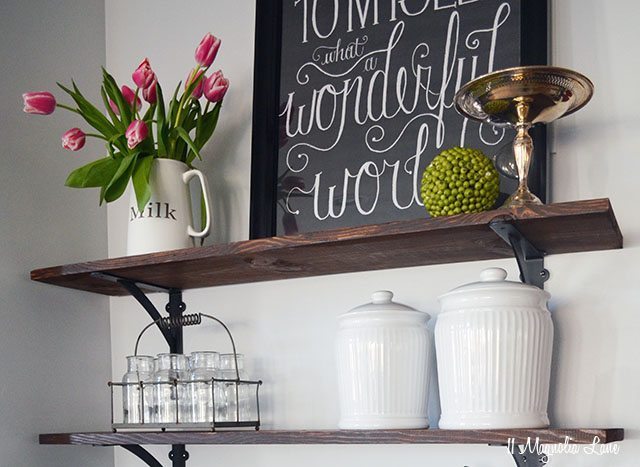
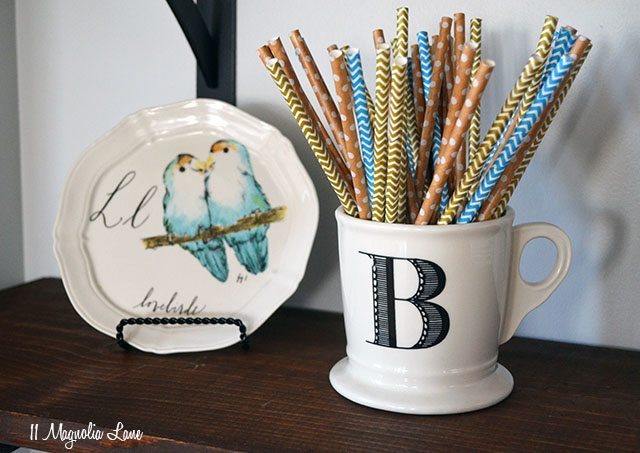
Before we knew it, it was time for the best part of every DIY project–decorating the results! We operate in a similar manner when we’re staging a space–place an item, step back and stare at it, move it an inch to the right, step back and stare at it, move it to another shelf, step back and stare at it…you get the idea. It’s not very scientific, but I love what we came up with:

Tutorial for easy DIY open shelving | 11 Magnolia Lane

The little bench might get replaced by a covered basket one day, but for now it’s the perfect place for my daughter to sit and pull her shoes on and off.
Tutorial for easy DIY open shelving | 11 Magnolia Lane

Tutorial for easy DIY open shelving | 11 Magnolia Lane

Tutorial for easy DIY open shelving | 11 Magnolia Lane

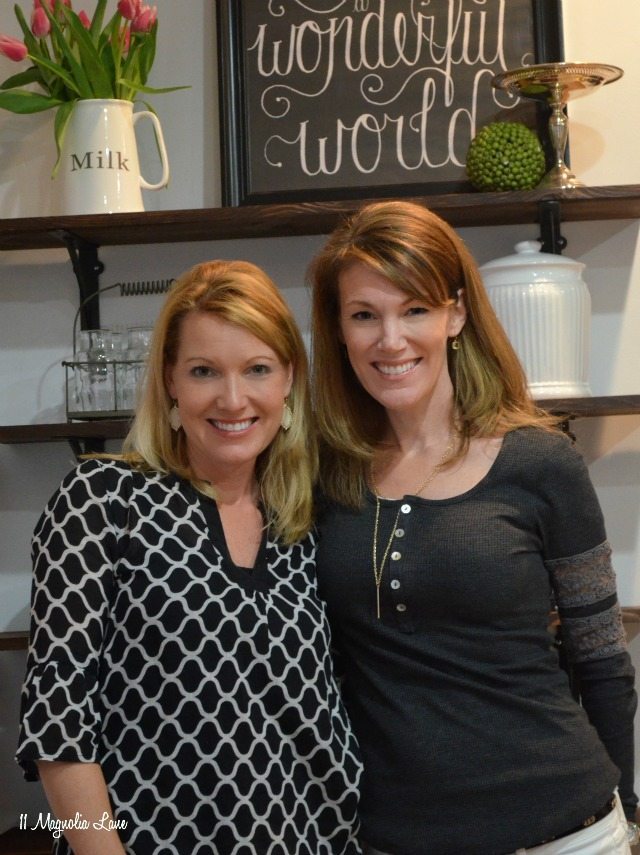
Projects are so much easier and much more fun with a friend. Next up we’ll have to tackle something in Christy’s new house, since I am the lucky one that gets to enjoy these every day.
11 Magnolia Lane | Amy & Christy

Thanks Christy, for making the trek to do this project with me. And thanks to HomeRight for sponsoring this post 🙂

Did you like our video? We need to make some more “how-to” videos, in fact I think Christy and I need to plan another DIY weekend again soon.  Good luck with the giveaway everyone!

{The fine print: We are proud to work with HomeRight as a brand ambassador and they sponsored this post, however our opinions are always our own. Affiliate links are used in this post}.

XO,
AB New Headshot Small Blog

icon-facebook-1icon-instagram-1icon-mail-1icon-pinterest-1icon-twitter-1NEW Google+

YOU MIGHT ALSO LIKE THESE POSTS... :

The Story of Our New Kitchen Table + Chairs
How We Added Cabinets in our Breakfast Room
DIY Custom Plate Rack (For $40!)
Fall Baking, Colorful Touches in Our New Kitc...

Filed Under: DIY/Projects/Tutorials, HOME DECOR, HomeRight Projects, PROJECTS, Wall & Door Decor Tagged With: diy, homeright, kitchen, open shelves, shelving

Reader Interactions

Comments

  1. Megan LaMacchia (It's a Grandville Life) says

    May 13, 2015 at 3:09 pm

    Your shelves turned out beautiful and I loved the video!!! xo Megan

    Reply
  2. Megan LaMacchia (It's a Grandville Life) says

    May 13, 2015 at 3:11 pm

    The shelves turned out beautiful and I love the video!! This Max Pro Sprayer would be perfect for so many projects!! Great giveaway! xo Megan

    Reply
  3. carollynn says

    May 13, 2015 at 4:46 pm

    The shelves are great. OMG! What I could do with a sprayer like that! Walls, doors, furniture would all become new again using that magic tool!

    Reply
  4. Esther says

    May 13, 2015 at 7:13 pm

    Love the shelves – I’m going to be doing some myself in a few weeks. I will be painting them rather than staining though. I’m sure the sprayer would be a real asset!! (For more than just that project!

    Reply
  5. Amy says

    May 13, 2015 at 9:44 pm

    lots of furniture projects this summer! Can’t wait to get started!

    Reply
  6. Sandy A says

    May 14, 2015 at 9:40 am

    We have several projects planned and what a time saver this would be…

    Reply
  7. Bree T says

    May 14, 2015 at 1:27 pm

    I love how you styled the shelves! It makes such a beautiful impact!

    Reply
  8. adriana esparta says

    May 14, 2015 at 1:57 pm

    great work girls!!!
    another beautiful project on my to do list…

    Reply
  9. Kristin says

    May 14, 2015 at 2:27 pm

    I love all the projects you do with your sprayer–I definitely need one!

    Reply
  10. Lisa R. says

    May 14, 2015 at 4:07 pm

    I think I will add this to my list of future projects! The sprayer would be great for my dining room table top!

    Reply
  11. Carol says

    May 14, 2015 at 4:23 pm

    Oh the projects I could do! What a great giveaway!

    Reply
  12. tracey says

    May 14, 2015 at 4:45 pm

    I live this whole look but wouldn’t covering the air return cause problems? I know they are ugly, I’d love to cover all mine too!

    Reply
  13. Karen C says

    May 14, 2015 at 10:24 pm

    Love the shelves and the video!

    Reply
  14. beverly e says

    May 14, 2015 at 10:54 pm

    I’m putting a new top on an old table. I was going to paint it, but now I’m thinking about the dark walnut stain!

    Reply
  15. Judy W says

    May 15, 2015 at 12:14 am

    We are redoing the top of our kitchen table. Hopefully it turns out well!

    Reply
  16. Judy Helser says

    May 15, 2015 at 9:15 am

    I’m refinishing the molding in my house and adding some wood accents to our ceilings. Thanks for the great ideas!!

    Reply
  17. Anita Skelton says

    May 15, 2015 at 10:30 am

    Love the shelves! And I loved you had a special friend to help you with this project!

    Reply
  18. Stacy Green says

    May 15, 2015 at 12:47 pm

    Looks great! I have several projects in the works and this would be perfect for them. Shelves in my son’s room and a library in my dining room.

    Reply
  19. Stacy D. says

    May 15, 2015 at 1:40 pm

    I would like to stain my kitchen chairs! They are looking a little rough.

    Reply
  20. Tobi Schaap says

    May 15, 2015 at 2:13 pm

    Moving to a new house in the Boston area…needing this sprayer to refinish some kitchen cabinets!!!

    Reply
  21. Leiah says

    May 15, 2015 at 2:48 pm

    I just picked up a three-legged table on the side of the road and I’m debating on paint or stain.

    Reply
  22. Sharlene Piscitelli says

    May 15, 2015 at 3:50 pm

    I have a dresser that I am redoing for storage in the living room.

    Reply
  23. Tara Singer says

    May 15, 2015 at 3:55 pm

    NIC WORK on the video!!! Love, love, love it. 🙂

    Reply
  24. Chelsea G says

    May 16, 2015 at 1:25 am

    I need to stain my deck!

    Reply
  25. Trish F says

    May 16, 2015 at 3:50 pm

    Yes, I have an outdoor wooden table and chair set that is just dying for a new stain job. Thanks for a great giveaway!

    Reply
  26. Patricia C says

    May 16, 2015 at 11:29 pm

    I’m planning on putting some shelves on some fences with lattice for plant window boxes. I want to plant morning glories for a privacy screen

    Reply
  27. Ann says

    May 17, 2015 at 12:48 am

    What a wonderful giveaway!! Thanks for the chance!

    Reply
  28. Mrs. Waller says

    May 17, 2015 at 9:19 am

    Thanks for the opportunity, ladies! Your site is amazing!

    Reply
  29. Caz says

    May 17, 2015 at 12:59 pm

    This would be such a godsend ! We’re just about to move into a 1957 house with a 1980’skitchen and I would love to paint the cabinets !

    Reply
  30. Angelia W. says

    May 17, 2015 at 1:52 pm

    The shelves look fantastic! We are about to start painting our kitchen cabinets, so the sprayer would come in quite useful. Thanks for the opportunity 🙂

    Reply
  31. Gypie says

    May 17, 2015 at 2:44 pm

    We are rebuilding a bench with new boards….they have all been sanded. waiting to be stained. HomeRight Finish
    Pro Sprayer would be wonderful to finish this job!
    Love your blog and enjoyed the video.

    Reply
  32. Ashleigh Hall says

    May 17, 2015 at 4:02 pm

    I am actually in the middle of 2 big staining projects!! We are restaining our exterior wooden stairs and I am restaining a huge table I just finished stripping and sanding!

    Reply
  33. phyllis says

    May 17, 2015 at 4:26 pm

    I’m a new follower, but already I’m becoming addicted to your posts and videos. You’re ideas are inspirational and achievable. Thanks for bringing all of this wonderful information.

    Reply
  34. Abby Barge says

    May 18, 2015 at 6:29 am

    Yes actually! We’re renovating my house and we want to tear apart a bunch of skids so we can stain them and nail them to the wall. Such perfect timing for this giveaway!

    Reply
  35. mysweetiepiepie says

    May 18, 2015 at 12:18 pm

    I have a bedroom dresser that I’d love to restain.

    Reply
  36. carollynn says

    May 18, 2015 at 12:36 pm

    So many projects would be made easier by this wonderful tool. Painting walls – I change my mind regularly on what color they should be, furniture and doors could easily get painted with this magical tool. Not to mention the time it would save.

    Reply
  37. Kelly D says

    May 18, 2015 at 2:45 pm

    I need to stain my deck this spring.

    Reply
  38. rachel0 says

    May 18, 2015 at 3:51 pm

    I have a kitchen table and a desk for my son that desperately need repainting.

    Reply
  39. Holly says

    May 18, 2015 at 4:51 pm

    Love the shelves! I would love to have a paint sprayer. Currently, I have 2 projects (and more in my head) where this would be invaluable to save time.

    Reply
  40. Angela Cash says

    May 18, 2015 at 6:00 pm

    I would love to strip the paint from an old desk that I have and stain it. It is a blah gray color but I bet the wood underneath all that paint is gorgeous.

    Reply
  41. brett says

    May 19, 2015 at 9:45 am

    How cute are you two??? I’m sure this was a fun day! The shelves look fabulous and finish the space so well – love the decorating accents atop the dark stained wood … looks perfect! xx, b

    Reply
  42. Silvia says

    May 19, 2015 at 2:03 pm

    Beautiful!!! im trying this in my kitchen

    Reply
  43. anne says

    May 19, 2015 at 5:21 pm

    As another military wife, I love love your blog (saw it first on a Spouses board online!), especially ways to liven up our rental. (And to spruce up our “forever home” which is currently rented!) That sprayer would help! ; )

    Reply
  44. Kelly says

    May 19, 2015 at 6:09 pm

    I would love to try this on shelves for my family room.

    Reply
  45. Holly E says

    May 19, 2015 at 7:21 pm

    I would love to try this on some bookcases in our living room.

    Reply
  46. Khakki says

    May 19, 2015 at 8:08 pm

    Always love y’all’s posts!

    Reply
  47. sara says

    May 19, 2015 at 10:21 pm

    I really need to do some of those open shelves! Love them!

    Reply
  48. MARTHAIA says

    May 19, 2015 at 11:30 pm

    The decks need updated this would certainly do it..

    Reply
  49. Elaine says

    May 21, 2015 at 8:19 am

    I love what you did!! and the brackets…WOW!! Could you tell me where you got the brackets?

    Reply
    • Amy says

      May 21, 2015 at 9:35 am

      Thanks, Elaine. Home Depot–I added the link to the ones we used under the “sources” in the post.

      Reply
  50. Terri says

    May 21, 2015 at 8:41 am

    I love it but can you please tell me where you got the sign about “Wonderful thing”
    Thanks

    Reply
    • Amy says

      May 21, 2015 at 9:36 am

      The sign is from Dear Lillie’s shop online. There is a link below the post or http://www.dearlillie.com. Thanks!

      Reply
      • Terri says

        May 21, 2015 at 9:47 am

        Thanks. I didn’t scroll down enough!

        Reply
  51. Rachel @TrailerTrashTreasureTrove says

    May 26, 2015 at 3:44 pm

    I love the shelves, and especially how you have them styled! Great tutorial…you make it look so easy! Will definitely pin this for future use!

    Reply
  52. Ashlyn says

    January 23, 2016 at 8:30 am

    Great tutorial! I love this idea. I will have to put some shelving in my kitchen now. http://www.lovesthefind.com

    Reply
    • Amy says

      January 25, 2016 at 11:20 am

      Thanks Ashlyn, It’s such an easy project you should try it! XOXO

      Reply
  53. Rachel says

    February 2, 2016 at 2:24 pm

    Love this – doing something very similar in my kitchen! One question – did you attach the shelves to the brackets in some way?

    Reply
    • Amy says

      February 2, 2016 at 8:13 pm

      Hi Rachel, no they just rest on the brackets. They don’t move at all! 🙂 Good luck with your project!
      Amy

      Reply
  54. Toolpro says

    July 20, 2016 at 6:02 am

    Love this – accomplishing something fundamentally the same as in my kitchen! One inquiry – did you connect the racks to the sections somehow?

    Reply
    • Amy says

      July 20, 2016 at 2:48 pm

      No–the shelves are just sitting on the brackets. They haven’t moved in the year + we’ve had them!

      Reply
  55. Roberta says

    November 13, 2016 at 5:26 pm

    So functional! I am sharing this on Pinterest.

    Reply
  56. Kelly says

    June 19, 2017 at 8:43 pm

    Where did you find the little milk bottle holder? I love it!

    Reply
    • Amy says

      June 28, 2017 at 8:40 am

      That came from a small store in my town, but I have seen similar ones at HomeGoods and online at Antique Farmhouse! Good luck 🙂 Amy

      Reply
  57. heather says

    November 7, 2017 at 8:52 am

    What size pine did you use? I don’t see the depth listed. Thanks!

    Reply
  58. Emily says

    November 16, 2017 at 8:29 pm

    how wide were your planks, are they 10 or 12 inch?

    Reply
    • Amy says

      November 27, 2017 at 4:59 pm

      Hi Emily–sorry for the delay. I had to measure! Mine are actually 9″, because I had a niche that was the depth I had to work with. I hope that helps!
      Amy

      Reply
  59. Kim Shirley says

    March 3, 2018 at 12:11 am

    We are about to start a kitchen remodel & ive gone back & forth about painting the garage existing cabinets. You have inspired me to do it! Great tips.

    Reply

Leave a Reply to Lisa R. Cancel reply

Your email address will not be published. Required fields are marked *

Recipe Rating


This site uses Akismet to reduce spam. Learn how your comment data is processed.

Primary Sidebar

Lowest prices. Straight Teeth,

•Don’t Miss A Thing!!•

•Do You Know Jesus?•

•Featured In•

Holiday Gift Ideas

Footer

  • Email
  • Facebook
  • Instagram
  • Pinterest

Copyright © 2023 · 11 Magnolia Lane· Blog Design by Little Blue Deer
Privacy Policy

11 MAGNOLIA LANE IS A PARTICIPANT IN THE AMAZON SERVICES LLC ASSOCIATES PROGRAM, AN AFFILIATE ADVERTISING PROGRAM DESIGNED TO PROVIDE A MEANS FOR US TO EARN ADVERTISING FEES BY ADVERTISING AND LINKING TO AMAZON.COM AND AFFILIATED SITES. AS AN AMAZON ASSOCIATE, WE EARN FROM QUALIFYING PURCHASES. WE ALSO PARTICIPATE IN SEVERAL OTHER AFFILIATE PROGRAMS; THIS INCOME ALLOWS US TO MAINTAIN THE QUALITY OF YOUR USER EXPERIENCE AND KEEPS OUR CONTENT FREE. WHEN YOU PURCHASE THROUGH ANY OF OUR AFFILIATE LINKS, WE EARN A SMALL COMMISSION AND YOU DON’T PAY A CENT MORE THAN YOU WOULD OTHERWISE; THAT WOULD BE TACKY!   READ OUR FULL PRIVACY AND DISCLOSURE POLICY {HERE}.
  ©11 Magnolia Lane 2019. Unauthorized use and/or duplication of this material without express and written permission from this blog’s authors and/or owners is strictly prohibited. Please email us at admin@11magnolialane.com for more information.

  • MEET CHRISTY & AMY
    • IF YOU’RE NEW HERE…
    • WORK WITH US
    • 11 MAGNOLIA LANE 101
    • DISCLOSURE + PRIVACY (the fine print)
    • BEST OF 11 MAGNOLIA LANE
    • Back
  • TOUR OUR HOMES
    • TOUR OUR HOMES
    • CHRISTY’S MAGNOLIA COTTAGE
    • CHRISTY’S MCC HOUSE
    • AMY’S NEW HOME BUILD
    • HOLIDAY HOME TOUR SERIES
    • SPRING HOME TOUR SERIES
    • Back
  • CELEBRATIONS
    • EVENTS + ENTERTAINING
    • GIFTS
    • HOLIDAYS
    • RECIPES
    • Back
  • HOME
    • CLEANING
    • DECORATING
    • ORGANIZING
    • ROOM BY ROOM
      • BATHROOMS
      • BEDROOMS
      • CLOSETS
      • CRAFT ROOMS + OFFICES
      • DINING ROOMS
      • KIDS’ ROOMS
      • KITCHENS
      • LAUNDRY ROOMS
      • LIVING + GREAT ROOMS
      • OTHER SPACES
      • PANTRIES
      • PLAYROOMS + BONUS ROOMS
      • PORCHES + OUTDOOR SPACES
      • Back
    • TIPS
    • Back
  • SHOP
    • SHOP OUR INSTAGRAM
    • SHOP OUR AMAZON STORE
    • FRIDAY FAVORITE FINDS
    • 11 ML ETSY SHOP
    • 11ML ORGANIZING SHOP
    • Back
  • PROJECTS
    • CRAFTS
    • DIY PROJECTS + TUTORIALS
    • FURNITURE
    • PRINTABLES
    • WINDOWS, DOORS, + WALLS
    • Back
  • LIFE
    • FRIDAY FREE FOR ALL
    • HEALTH
    • SIMPLY ON SUNDAY
    • TRAVEL
    • Back
  • CONTACT
    • Email
    • Facebook
    • Instagram
    • Pinterest
36108 shares
  • 57