This post is sponsored by HomeRight and may contain affiliate links, you can see our disclosure policy HERE. As always, all opinions are truly my own.
Two years ago (to the day!) I wrote this post about our kitchen, proudly revealing the freshly painted cabinets. I wanted to not only show off how much prettier it was with the lighter paint, but I also hoped to encourage anyone to tackle a project like this. If I can do it, pretty much anyone can do it!
{There is a giveaway at the end of this post, so keep reading to enter to win a fabulous paint sprayer}
Now two years later I thought I would provide an update on how our cabinets are holding up, but first here is a quick reminder of the before image of our kitchen, it looked like this when we moved in:
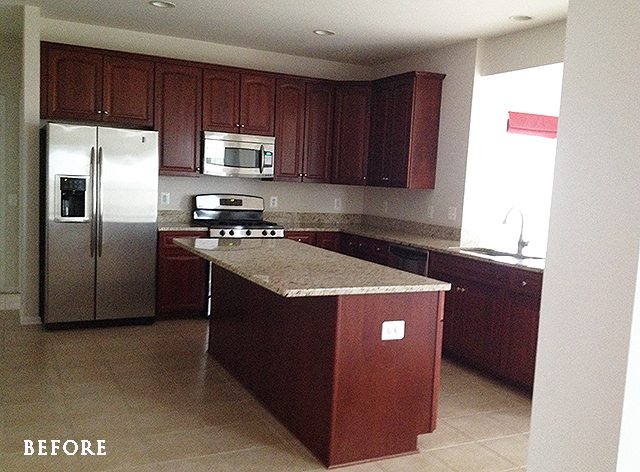
Not bad, but dark. We have a sunroom with windows adjacent to the kitchen, but no actual windows in the kitchen, which made it dark and shadowy.
I wrote several posts throughout this process including one on How to Select a Paint Color for your Cabinets discussing the process we used to decide on the paint color (after our first choice turned out to be the wrong choice!). Then I shared a post about how to get A Factory Smooth Finish on the surface using paint, and finally the full reveal post HERE.
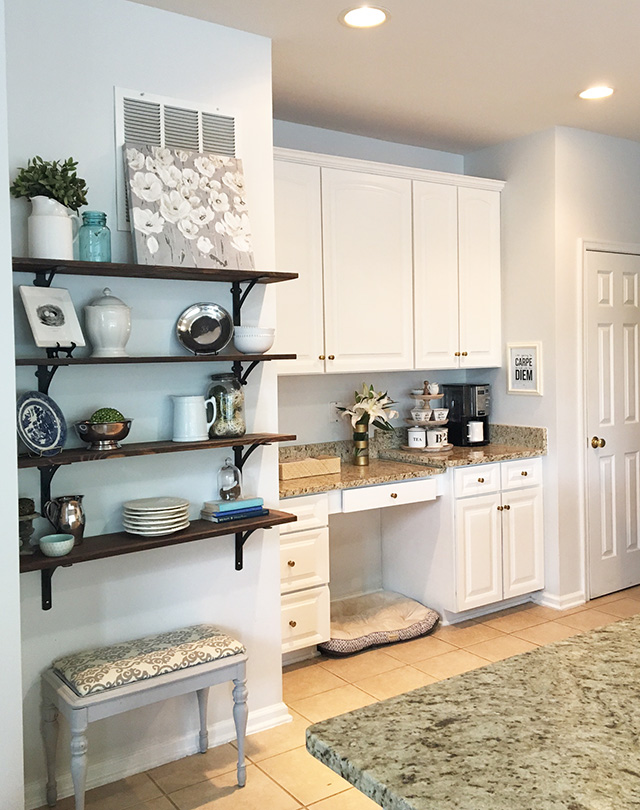
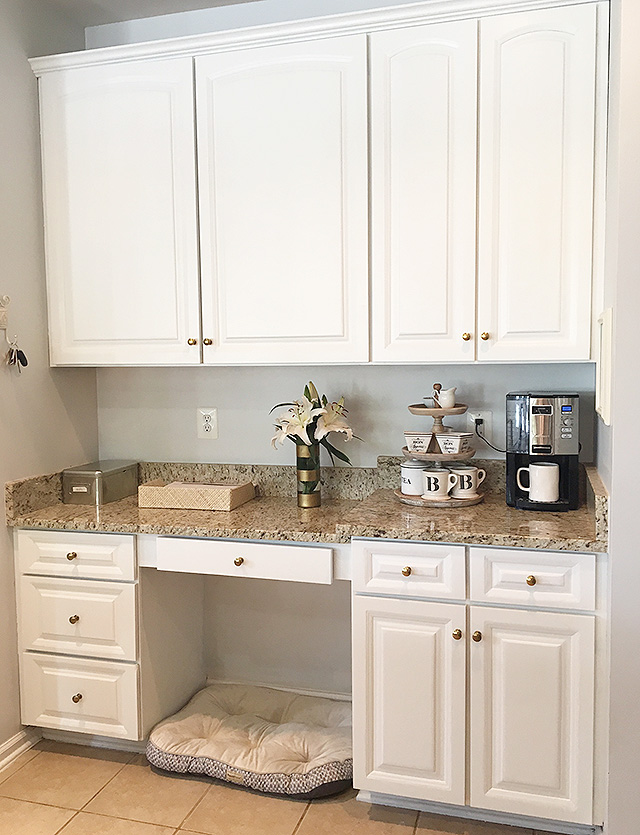
Since that time, I also painted another section of cabinets over by our desk area that wasn’t finished during the first go-round, and now I am thrilled that our kitchen is now complete, that post is HERE.
I get asked about my painted cabinets all the time. Most of my neighbors are facing the dilemma of whether they should update their darker stained cherry and oak cabinets to the more in-style painted look. Since replacing cabinets is costly (think the price of a new car) and hiring a professional to refinish your cabinets can run in the thousands, DIY’ing this task is a popular and economical option.
While this is not a quick project, it is one that will have a tremendous impact on how your home looks. Inevitably, people always ask me “but how are they holding up?”, because nobody wants to spend all the time it takes to paint cabinets only to regret having done so.
My answer is that ours are doing great! Before I answer that important question more specifically, I want to recap the process that I used to paint them since I believe doing it right has a lot to do with the painted finish staying perfectly intact.
- First, I removed all the doors and sanded them very well. I removed as much of the existing cherry stain as possible, making sure to at least remove all of the glossy top coat. I used a DeWalt Sander and a Ryobi Corner Cat to get in the grooves {tip: buy extra refills, you will go through plenty of sanding pads}.
- I started with a coat of primer on all the doors, drawers and cabinet frames. I used this primer here and sprayed it on using my HomeRight FinishMax Pro Paint Sprayer.
- I used Sherwin-Williams Pro Classic for Doors and Trim (in Decorator’s White) paint, the paint store recommended it and in this situation, I wanted to be sure to use the best quality paint I could find. {note: sign up for their emails they do frequently offer sales.}
- After priming, I used the HomeRight FinishMax to spray the paint on all the doors and drawers, giving them two coats each, with ample time to dry in between coats.
- I hand painted (or used a small roller) on the frames and island while the door and drawer fronts dried.
- I reattached everything, added hardware and corbels to the island, and did a dance of joy that it was done!
Here are my video instructions on how to paint your cabinets using a paint sprayer:
So, how are our cabinets really holding up after two years?
I should state right now that we have three kids (two boys age 12 and 15, otherwise known as eating machines), an 8 year old daughter, and two large dogs. The dogs don’t impact the cabinets too much, but we run a fairly hectic schedule and certainly don’t baby our cabinets. The answer is that truly they are doing great!
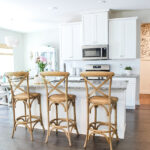
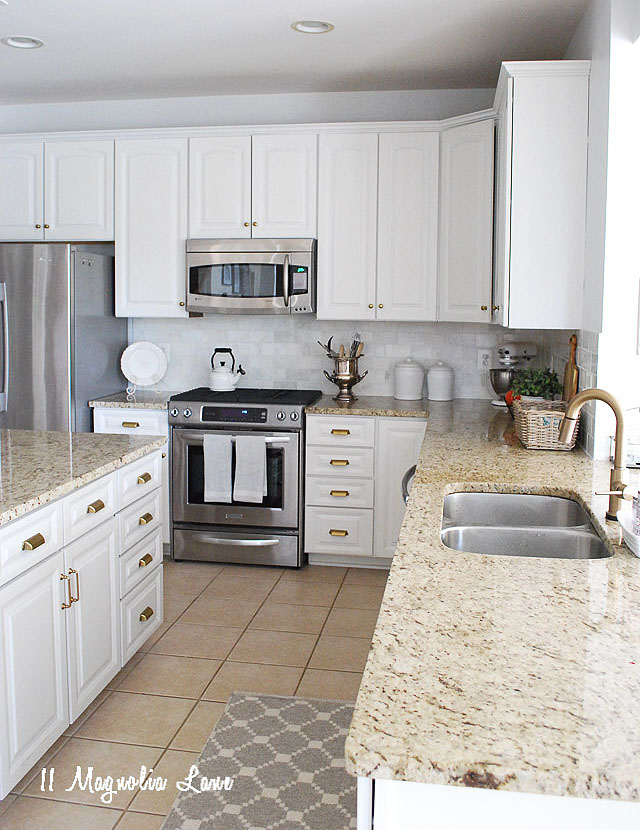
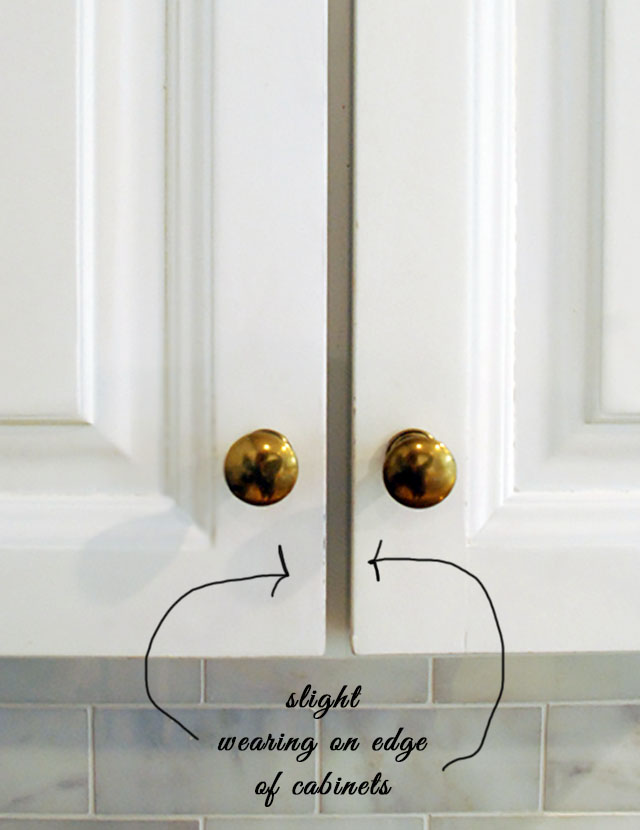
I expected a few dings, chips and scratches but really so far, we’ve seen almost no damage. I have heard complaints from other people that have had paint wear off on the doors they use the most frequently, but we haven’t had any issues in our kitchen. This is our most used cabinet, and as you can see there is some very small wear just on the edge. A quick touch up with some paint will take care of that, and this is the worst of any of them.
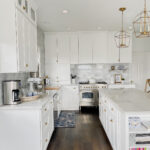
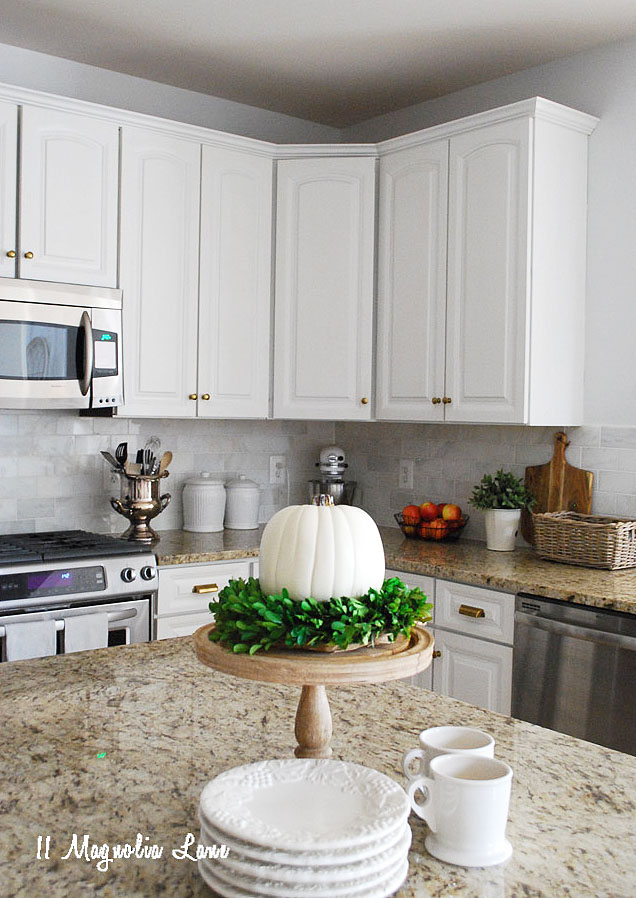
As I mentioned in the post about how we chose our colors, I selected a bright white (Benjamin Moore Decorator’s White) for the perimeter cabinets and so the white does show dirt. Every few months I give them a quick wipedown {usually with a magic eraser, but sometimes just a rag} and that pretty much takes care of it. So yes, they do get a little dirty but I think I am more comfortable knowing the dirt is there and removing it, I hate to think what built up on the darker cabinets over all those years (yuck).
So while taking on this project will take a few days to complete, it is well worth it. Our kitchen is lighter and brighter and feels much more updated. Here is my advice on making this process go as smoothly as possible:
*Work in sections and set up a dedicated ‘spray’ area. If you think you can just do this by hand with a roller, know that it will take you so much longer than with a sprayer, and you will fight roller marks. The HomeRight Super FinishMax {the newest model!} is available here for less than $100, and will make the painting part take just a few minutes for each coat. It is simple to use, no experience is necessary!
*The hardest part of this project, in my opinion, is the sanding. Again a few quality tools (the ones mentioned above) will make this go so much faster, while it isn’t hard it can be a little more time consuming than the painting part {if you are spraying}. Since this isn’t a skilled task, you might even be able to find a neighborhood teen willing to handle the sanding part for you, my older son was great at this task. Teens will do most anything for money 🙂
*I used the HomeRight Spray Shelter set up in our garage, this kept all the dust and debris off the wet cabinet paint and kept any overspray off the floor. Since this project will take several days of painting coats on and allowing dry time, you will want to set this up somewhere with good ventilation where you can leave it untouched. I also recommend these risers to keep the cabinets off the drop clothes to allow them to dry underneath, which speeds up your drying time and reduces the risk of the cabinets sticking to your drop cloths (that = “don’t ask me how I know”!).
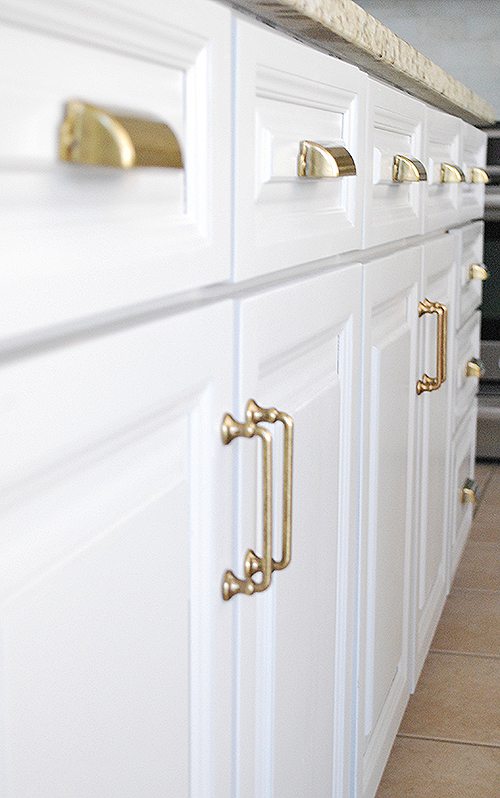
We do have brass pulls on our cabinets, and they offer a level of protection to the paint, but for the most part, our cabinets don’t look different than they did when they were first painted, so if you are considering this project, don’t let fear of ‘ruining’ your cabinets hold you back.
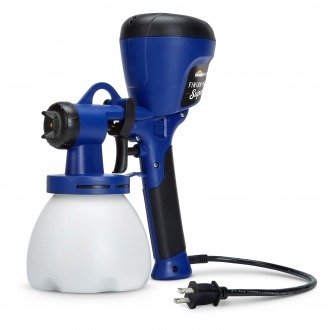
Now for the FUN part–we get to give away a Super Finish Max to one lucky reader. This is the newer, improved fabulous version of the HomeRight paint sprayer I used in our kitchen and for a ton of other projects. It is such a great tool, and the new version not only sprays paints and stains but it calls for less thinning of the paint. You can read all about it HERE. This is a must-have for this type project, so good luck to all!
To enter our giveaway simply follow the directions on the widget below:
a Rafflecopter giveaway
If you are contemplating a kitchen makeover, you might also be interested in this post about The Pros and Cons of Marble Counters and Painting a Kitchen Backsplash, and see Christy’s kitchen makeover in her Tennesee house HERE.
XO,

Our posts contain affiliate links. If you make a purchase after clicking on these links, we will earn a small commission, which helps to keep our content free. You don’t pay a cent more than you would otherwise, since that would be tacky! Please see our full disclosure policy here.