 I really love this project, so much I thought I would talk a little more about it today. I covered it in this post about our porch makeover, but here are ALL the details if you are interested.
I found this chest at a local thrift/consignment store. I don’t have a good picture of it in the true ‘before’ stage {bad blogger!} but just imagine that it had bumper stickers all over the sides and you’ll get the idea. The price was right {it was cheap!} so I brought it home to fix-up, figuring I could sell it along with the other items we’ve been working on.
Here it is once I got it home in my ‘dining-room-turned-painting-studio’.

I started by giving it a very good cleaning. I always use a water and white vinegar mixture to get rid of that “thrift” store smell, then I left it outside in the sun (with it wide open) for a few hours. The sunlight always does the trick and the lovely odor you can expect with pieces like this will typically disappear.
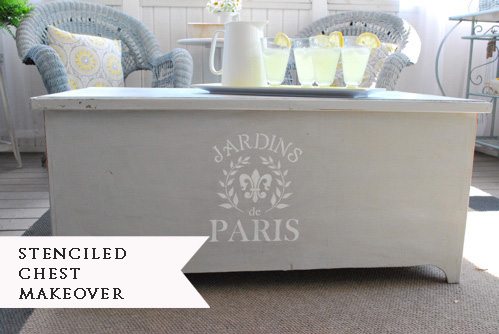
I then spent some time removing the bumper stickers. Once I pulled off the stickers, I was left with the residual glue backing. I took care of this with some homemade “Goo Gone”, which is just a mix of vegetable oil and baking soda, and it worked perfectly. The last step was just a light sand all over. Once it was all prepped, I gave it a good coat of Annie Sloan Paris Grey. Then topped it with another coat of paint, this time with a wet brush to thin the paint so the piece would retain some of its original character and grain. After the paint was dry, I distressed it with sand paper in the places I wanted it to show ‘wear’.
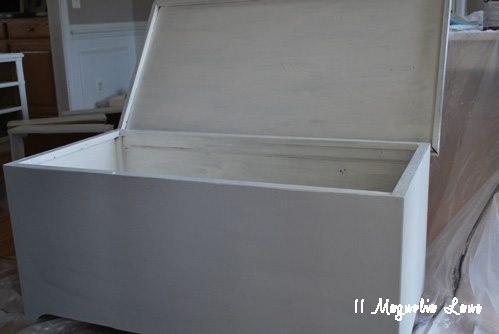
I also painted the inside, something I don’t usually do with furniture, but with this chest it made it feel so fresh and clean. I used some ASCP in Pure White, and then lined the bottom with some burlap. Since I store pillows and blankets in there for our porch, I can always pull out the burlap–its just attached on the corners with velcro dots– and give it a wash, need be!
Since I knew the top of the chest would get a lot of use and need to be durable to drinks and such, rather then using a wax, I gave a American Paint Company’s Clear Top Coat a try. It paints right on and was SO easy to use. I had purchased it to use for the table top on my new dining room set, since I had heard the traditional waxes designed for chalk paint aren’t quite as durable, so we’ll see how it goes when I get around to that project. So far on this project the top coat has been a great success. It has a nice shine and spills have wiped right off.
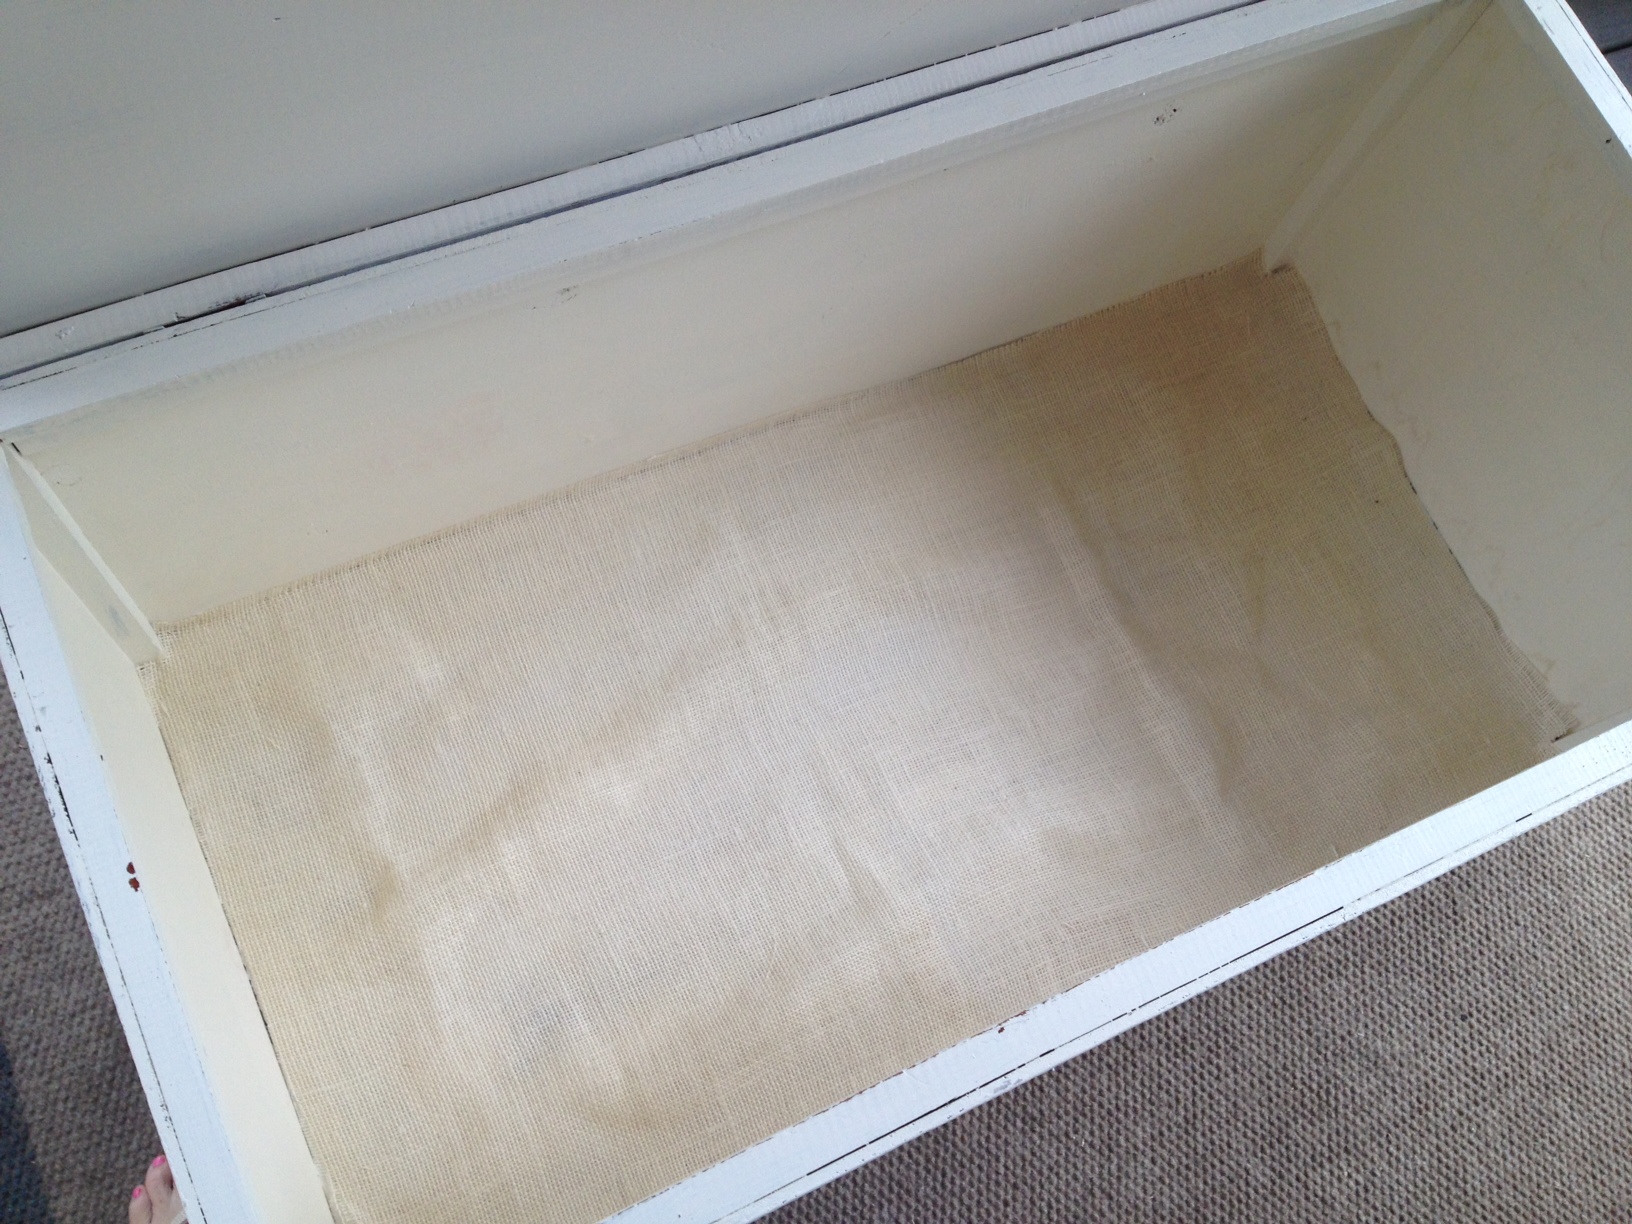
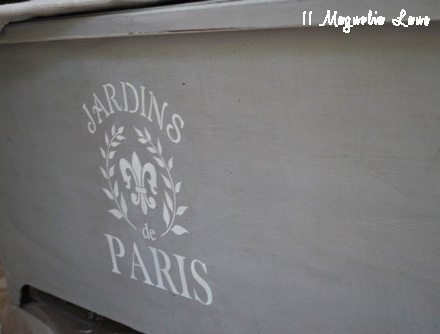
The final step was adding the stencil. I ordered the stencil HERE. I just used regular white craft paint. I think it makes it SO much more interesting then it would be as just a gray painted trunk, don’t you?
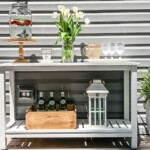
As I said, I didn’t intend originally to put it on my porch [see the whole space HERE} but it works out there perfectly. The added storage is just what we need, so I don’t see it going anywhere anytime soon.

That should answer all the questions, but let me know if I missed anything.
Thanks for stopping by!