I kicked it into gear right around Christmas and got to work on the master bathroom–because of course I didn’t have anything better to do but paint (ie bake, wrap presents, decorate the house, write Christmas cards…). I just couldn’t live with the green another minute, though! I have since painted the master bedroom and sitting area the same color, but they’re still being decorated and aren’t ready for public consumption yet. In the meantime, welcome to our new and improved master bathroom!
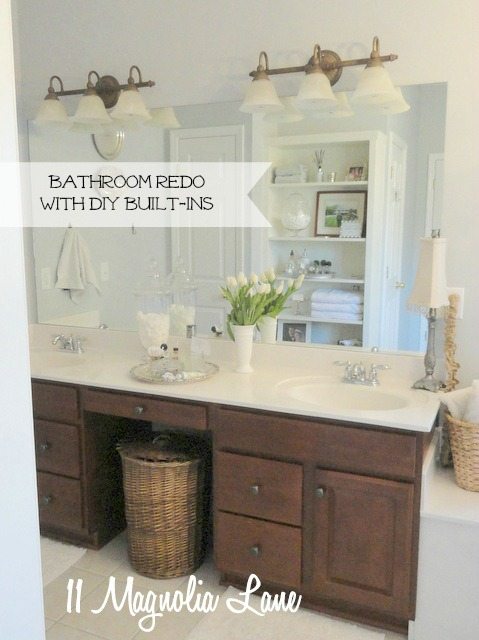
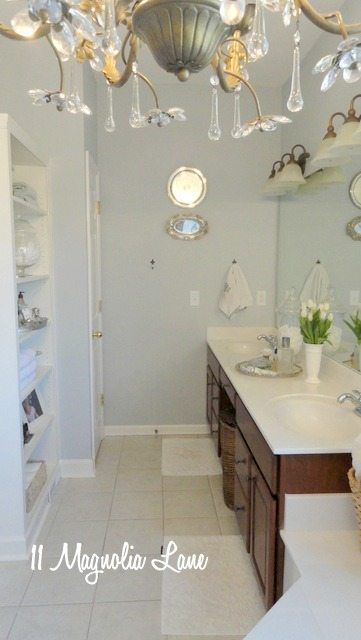
I actually took the above picture while standing in the bathtub. As is true of most bathrooms, it’s laid out in a way that makes one panoramic shot virtually impossible. I tried to get some good angles to show you what we’ve done.
The below shot is taken from the hallway where you enter the bathroom. The WC is off to the left in a separate room, but I figured you really didn’t need to see that, and the shower stall and soaking tub are to the right. The double vanity is to the left, obviously.
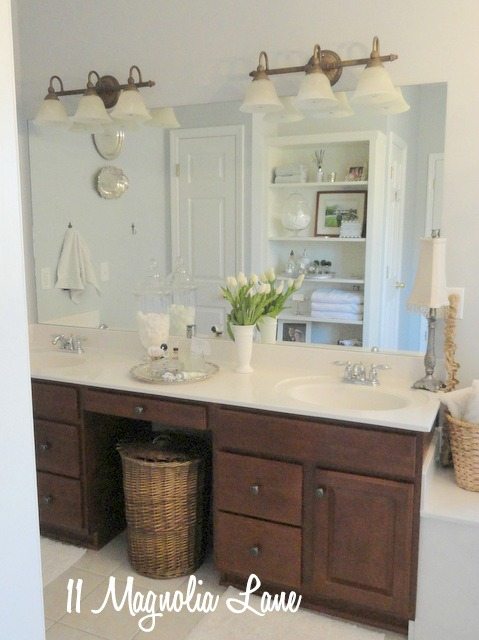
I decided not to paint the cabinets, which is odd for me since I love white cabinets. However, my paint color (Pebble Beach by Benjamin Moore) is a very light blue-gray, and it goes really well with the brown cabinets. I also opted to keep the existing lighting fixtures, which are an antiqued bronze/gold color, and found this chandelier on Craigslist to keep the theme going:
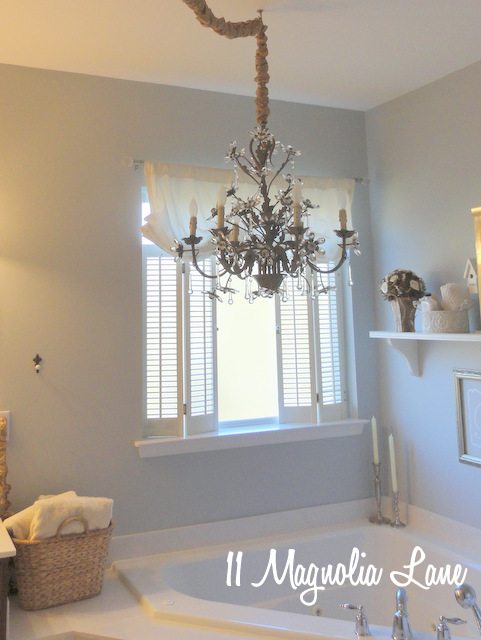
Just a note on chandeliers–I personally think they add a ton to a home’s resale value, but they’re pretty expensive when you buy them new (even at Lowe’s and Home Depot!). I comb Craigslist on a regular basis and have found some real steals. From my screened porch chandelier that I spent $20 on (here) and spray painted white, to the Ballard Designs Grande Claire that I found for my dining room and paid $100 for, to this beauty (from the same guy I bought the Grande Claire from), you can really make your home more beautiful, even if you’re on a budget. While I hang my own chandeliers, I know that some of you might not be comfortable working with electricity. It’s actually pretty simple once you know what to do. I would recommend that you hire an electrician to change your first light fixture for you, and make sure that he explains each step to you. Take pictures if you need to! There are also great online tutorials. I am at the point now where I can rewire the chandelier to fix non-functioning arms, and also lengthen the electrical cord and chain when I need more length than the previous owner did. In this case, the chandelier was way too big to hang in the exact place where my flush-mounted light was, because the door to the WC would have bumped into it. Instead of moving the box, which is a pain and probably something I’m not qualified to do :), I just lengthened the cord and chain and swagged the chandelier over to the bathtub. I’m sure it would make for a nice, luxurious soak with a chandy overhead, but of course I haven’t done that yet!
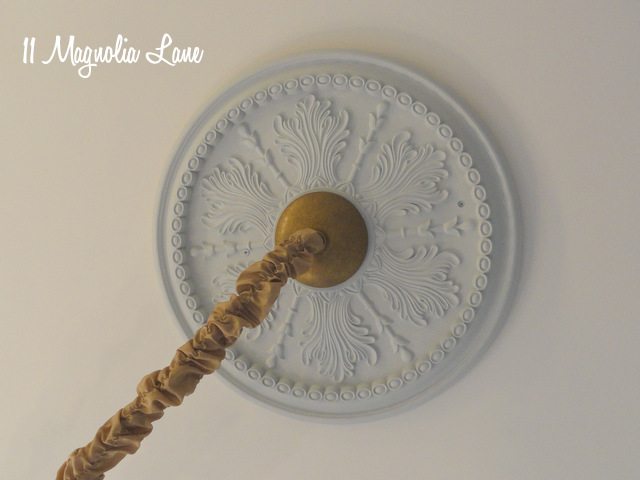
Large chandeliers look better with a ceiling medallion in place, and this one came along with the light fixture. I painted it Pebble Beach and screwed it in place, although some of them are light enough that the canopy of the chandelier holds them up.
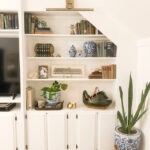
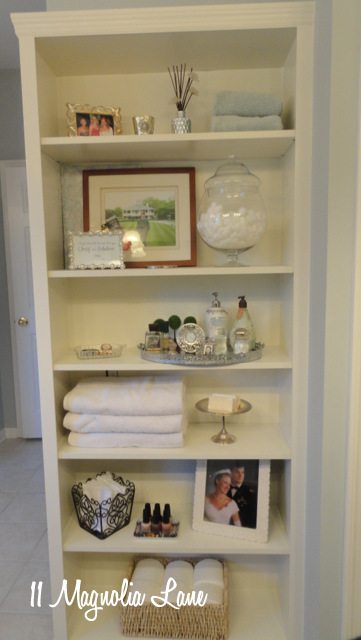
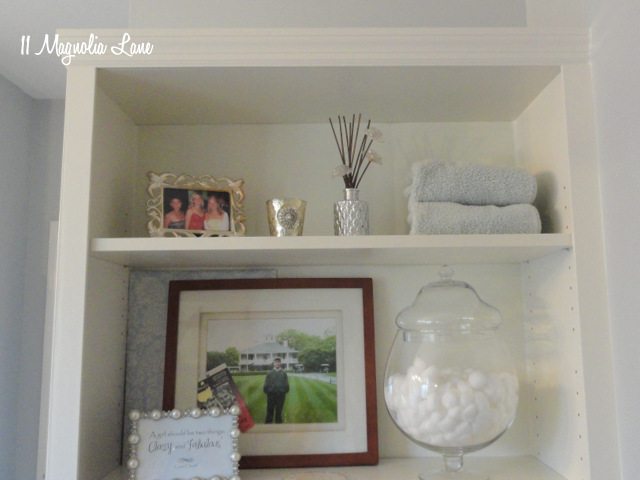
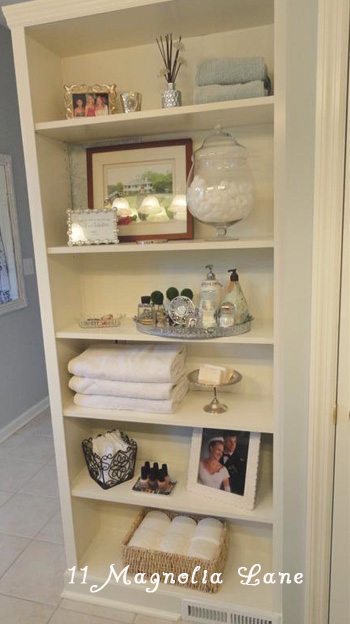
While we didn’t do much more than paint and add the chandelier in here to change things around, our one major project was to add shelves on the wall behind the sinks. We used an Ikea Billy bookcase as our starting point, and just added trim and molding to make it look like a built in. Kate at Centsational Girl has a great tutorial on how to do it here. We had to modify things a bit, because there’s a heating register under our Billy, but we took it slow and just figured it out as we went. Thank goodness for spackle and caulk! What was wasted space is now much more functional, and beautiful.
My one remaining goal for this room is to pull down the huge mirror that the builder put in and instead install two separate mirrors over each sink, but there are other things in the house that are going to have to happen first. I can live with it in the meantime. I’m also considering changing out the cabinet and drawer knobs for crystal ones, but I’ll wait until I find just the right ones.
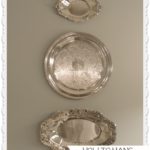
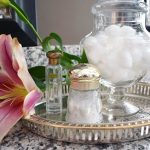
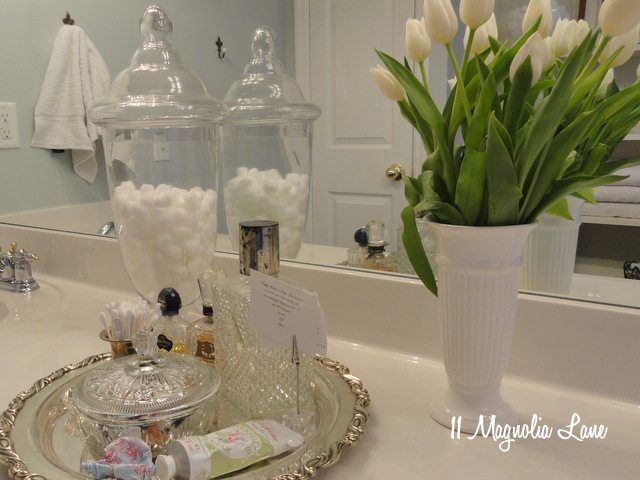
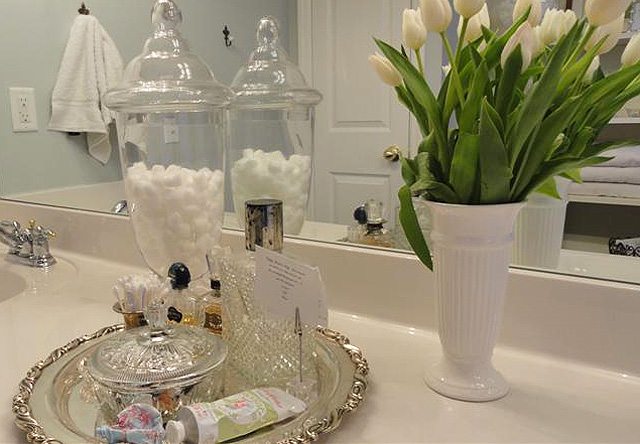
I had fun styling the room. Most of it is either flea market, thrift store, or just old stuff that was my mom’s. I added a shelf over the bathtub to display some of my old glass bottles and some bath accessories.
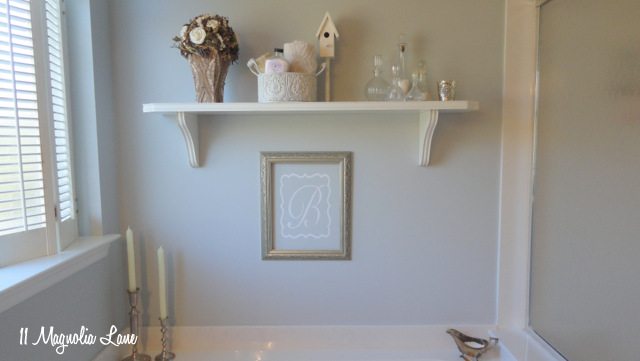
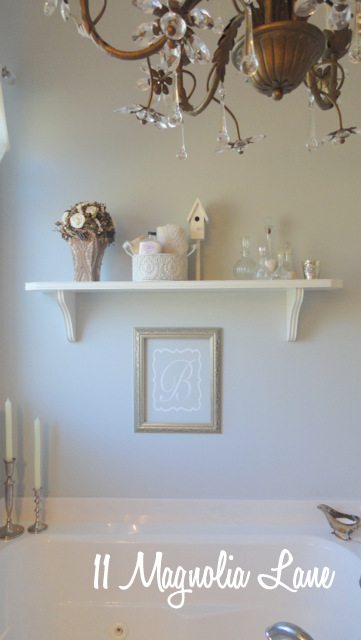
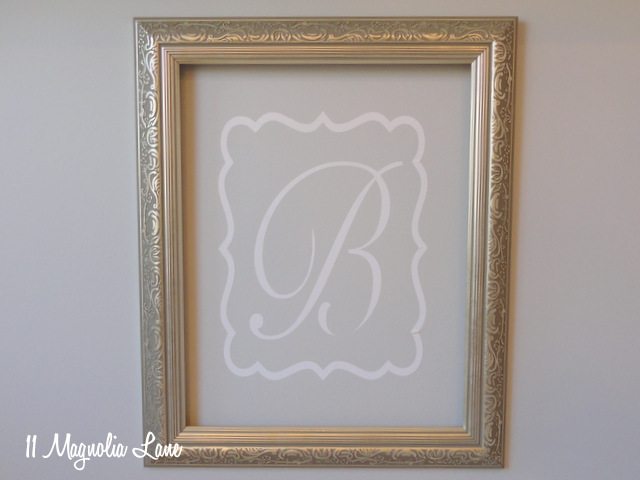
The B monogram in the silver frame is actually vinyl, applied directly to the wall, with the empty frame hung over it. I borrowed that great idea from my very creative friend, Andrea.
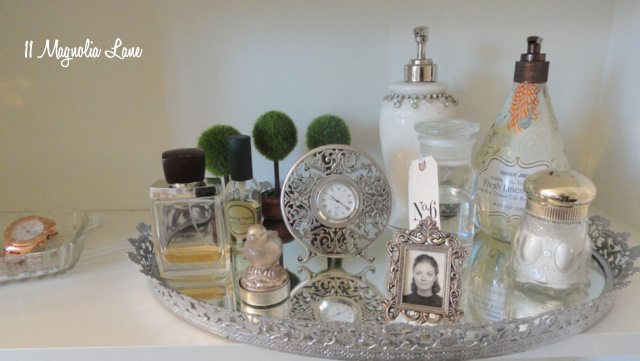
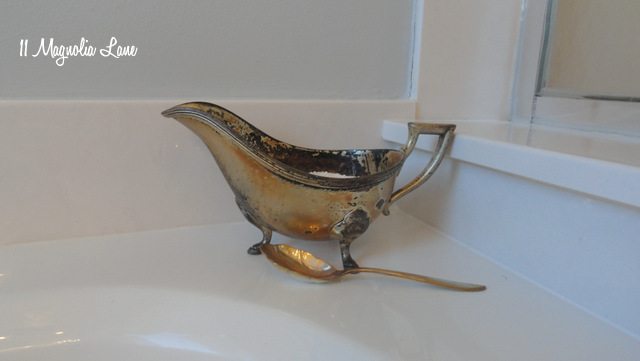
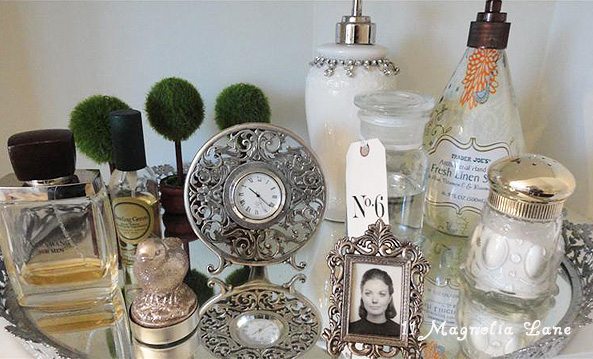
I love my old gravy boat that’s losing its silverplate. I found it at a thrift store and put it to work holding bath salts.
Here are a few other shots showing you how I decorated (always the best part):
Thanks for stopping by!