{This post is sponsored by HomeRight, all opinions are my own. Our posts contain affiliate links see our full disclosure here}
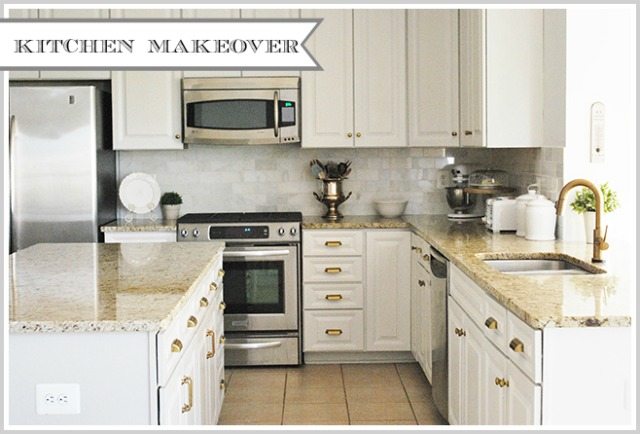
I admit that there may have been a time that I never thought this kitchen would be done. Finally, today I am so proud to show-off my newly refreshed kitchen! Cue the bells and fireworks–this has been a long time coming!
{Let me quickly mention that there is a Home Right FinishMax Pro giveaway at the end of this post, so keep reading to enter}
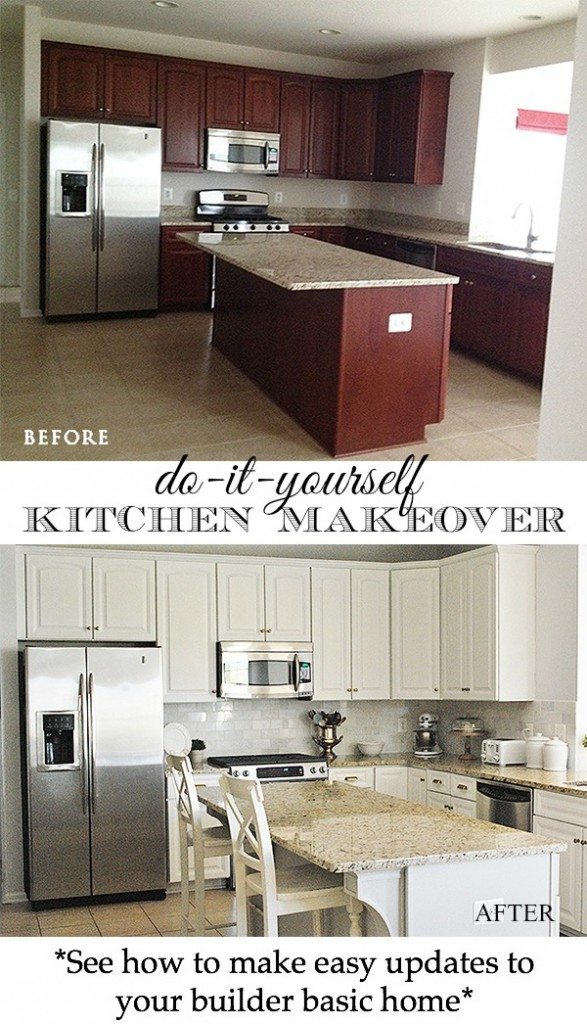
First to recap, let’s flash back to where we started over a year ago. We moved in to this builder-basic kitchen, functional yes, but getting dated and entirely too dark for my taste.
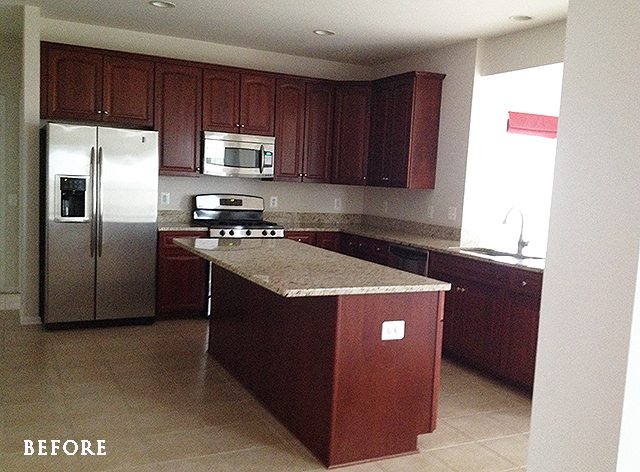
The cabinets were cherry-stained and had a very red tint. The appliances were all functional {except the stove, which we replaced upon moving in} but it felt dark and dreary much of the time. You can see how we fixed up the breakfast room behind the sink area HERE. Below I will get right to the “After” so you can see what a difference the paint and the other updates made.
I started with this kitchen makeover plan last winter, it was a guideline, some things certainly changed over the months that it took me to get to this point.
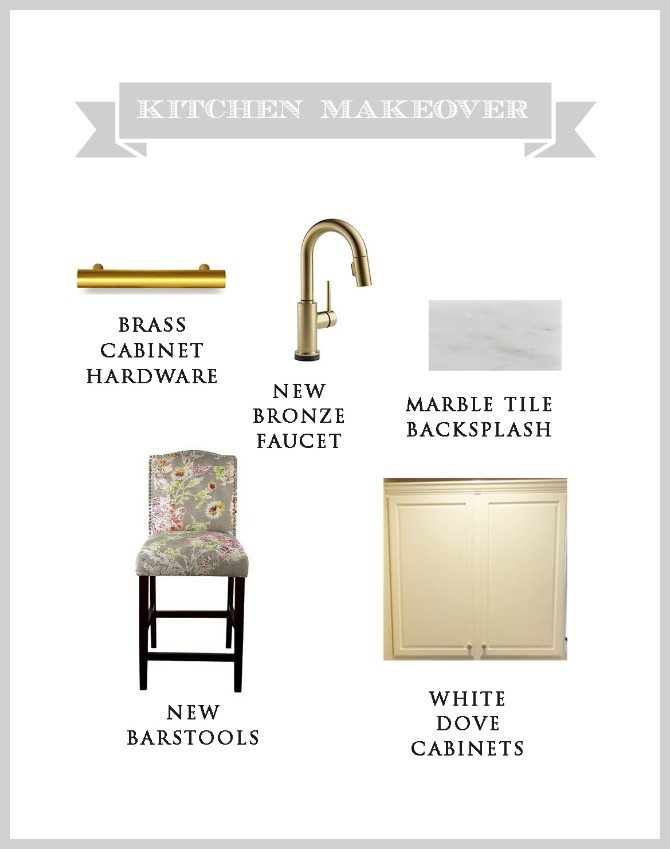
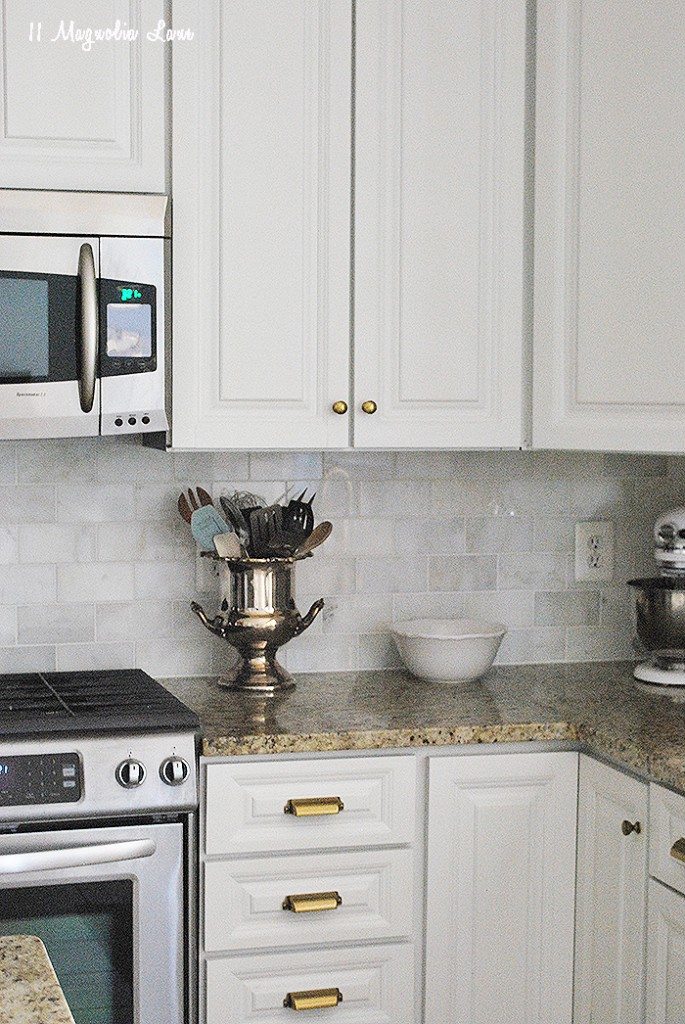
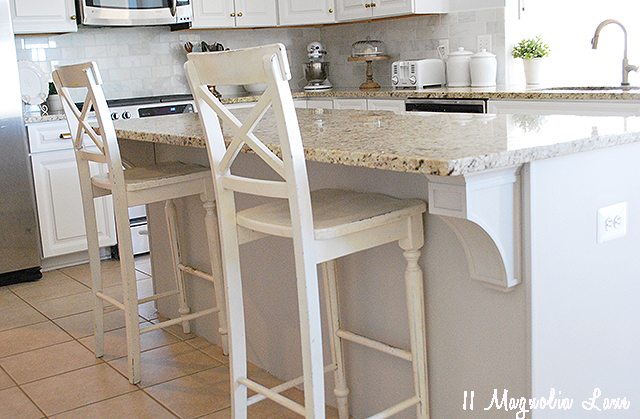
The cabinet paint color changed from the warmer Benjamin Moore White Dove to a cooler BM Decorator White, I talked about why I did that HERE. The island is BM Revere Pewter, more on that in a minute. I talked about the bar stool dilemma and sourced some inexpensive options here too, I haven’t replaced ours yet but plan to soon.
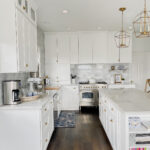
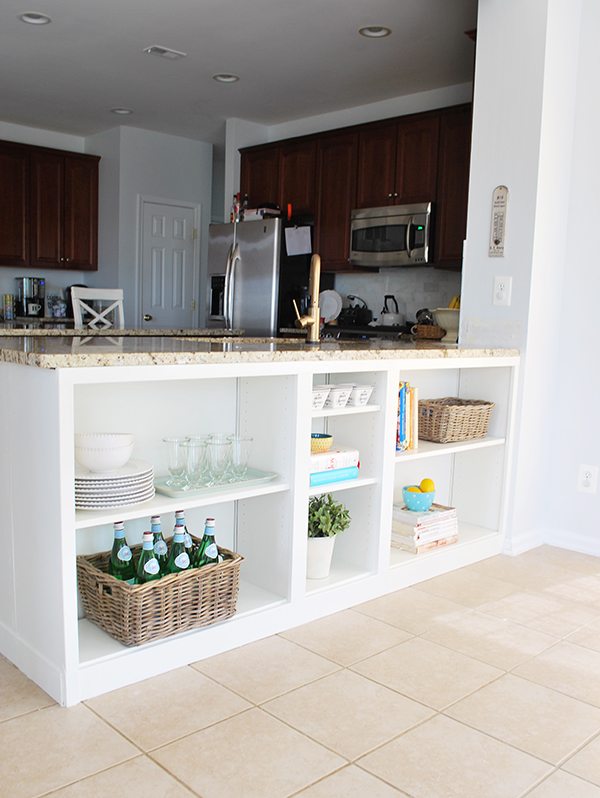
We started this process by first adding a new marble backsplash which finished off the counter area nicely, you can see more about that here. Then early this summer, I added these DIY bookshelves to the back of the counter behind the sink area.
Then we started painting the cabinets. Painting a kitchen, and ours is fairly substantial in size and quantity of cabinets, is not for the faint of heart. It is a process. I worked in sections and took my time so I didn’t have to live and cook in chaos for very long. The hard part of painting cabinets is actually the sanding/prep work, that seems to take forever. I sprayed the paint and primer on the doors using a HomeRight FinishMax Pro Fine Finish Sprayer so the painting part went very quickly.
How to paint kitchen cabinets using a paint sprayer:
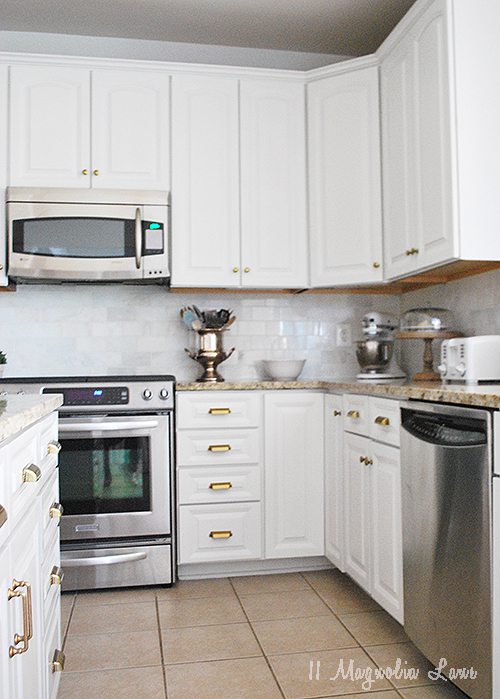
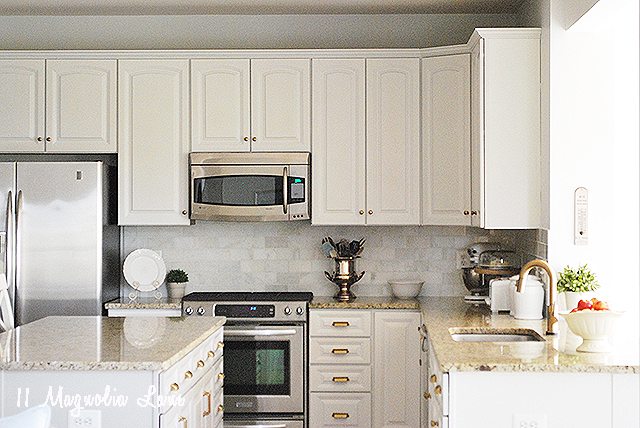
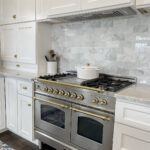
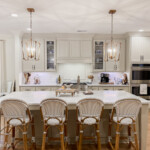
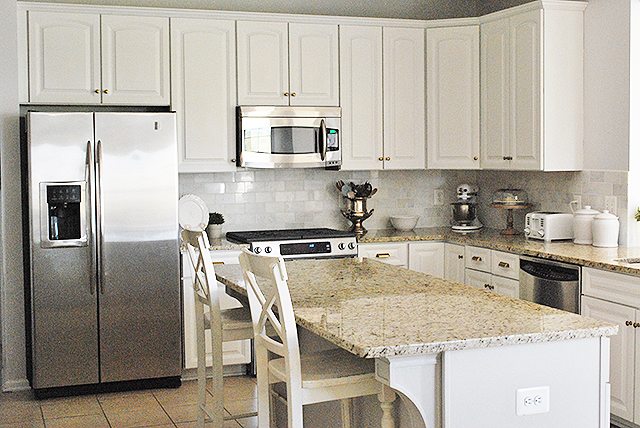
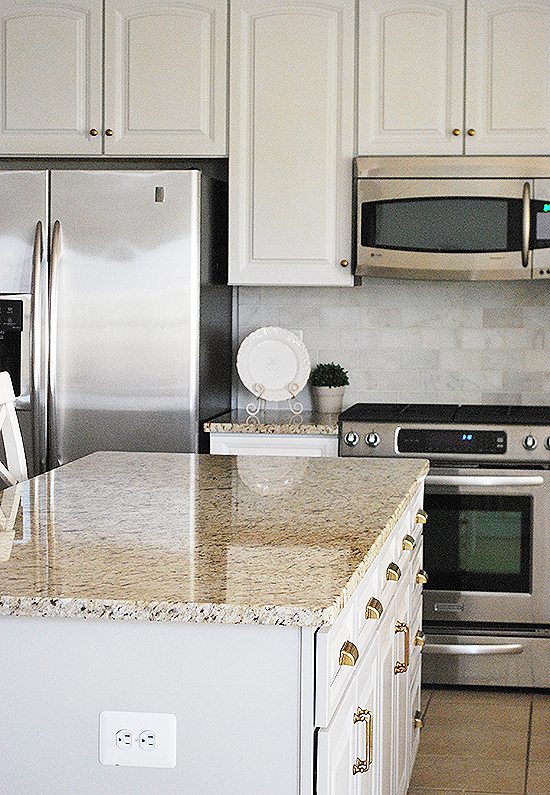
This week I finally finished up the island and installed all the hardware, it is my favorite part. I chose a slightly darker gray color for the island to tie in the marble backsplash, and Benjamin Moore Revere Pewter was the perfect color. I’ve had a few moments when I’ve thought I should have painted all the cabinets in that color, I love it that much! The contrast of the island really sets it apart in the kitchen, though the perimeter white keeps things light and bright, so I think my color selections were correct.
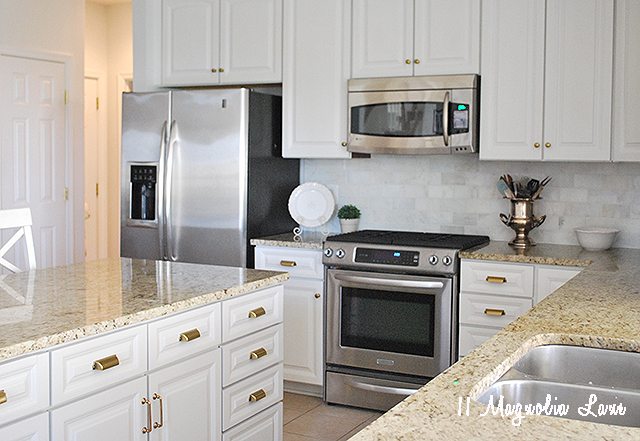
I should note that we do eventually plan to replace our counters. I have to say, the warmth and busy pattern of the granite bothers me but now that everything else is lighter, it doesn’t bother me quite as much. If I had planned to keep these counters forever, I would have selected a simpler backsplash such as white subway tile. In the end, I decided to go with what I truly loved even it it means I’ll have to wait for the perfect counters for awhile.
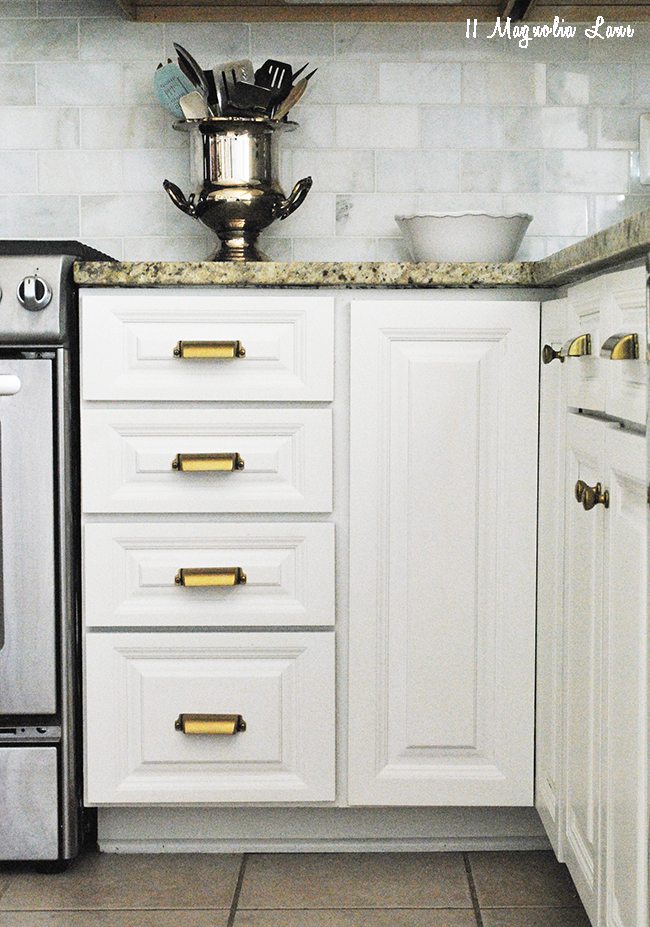
Now…let me share with you about the hardware selections. Cabinet hardware is truly like jewelry, it really dresses things up. As you saw in my inspiration board, I originally had planned to use a gold bar pull, something with a more modern touch. However, in the end, I decided on more traditional pull. I selected these brass drawer pulls and these knobs and love the vintage patina and warmth it brings to the space. I am sure there are a few people thinking the mix of metals looks terrible and that I broke a decorating rule, but I love the contrast of the cool stainless steel and the warm brass. In our former kitchen I had white cabinets, marble counters and stainless-everything and it always felt like living in an ice box. I love how much warmer this space is now.

Originally I hoped for very traditional latch pulls on the island doors but they are set too far apart to share hardware, so I switched to these simple curved pulls . I wanted the island to have it’s own feel in the space. All the other cabinet doors have these simple brass knobs.
Another of my favorite additions are the gorgeous corbels I attached to the island. This is the easiest way to make a standard builder island look custom and high-end. I had the opportunity to work again with Osborne Wood company and these are fabulous. I will cover more about these and also talk about attaching the cabinet hardware and all other details in another post. Today is just about being done, but I wanted to show them off, they are so pretty 🙂
Among the joy this new space brings to my life, another improvement is that I can finally take a picture of our living room couch without having to crop out the dark red cabinets in the background! I just thought that was worth mentioning, as someone who is constantly taking pictures of their house for obvious reasons, I have been shooting around this dark red kitchen for a year. Now I can show off entire rooms, that is going to make life so much easier 🙂
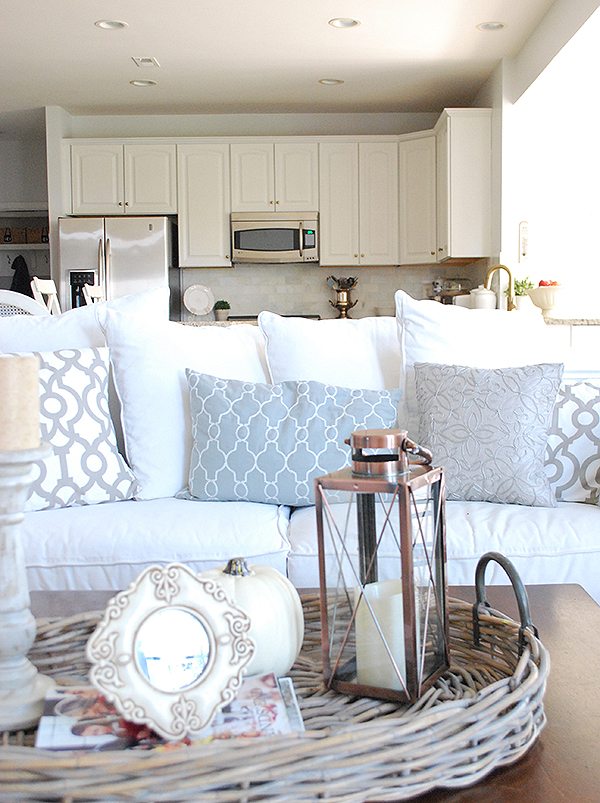
Everything seems to flow much better in our decor now, the colors between rooms are much more unified and everything feels fresh.
After weeks of painting, I thought I would share my best tips for tackling this type of project:
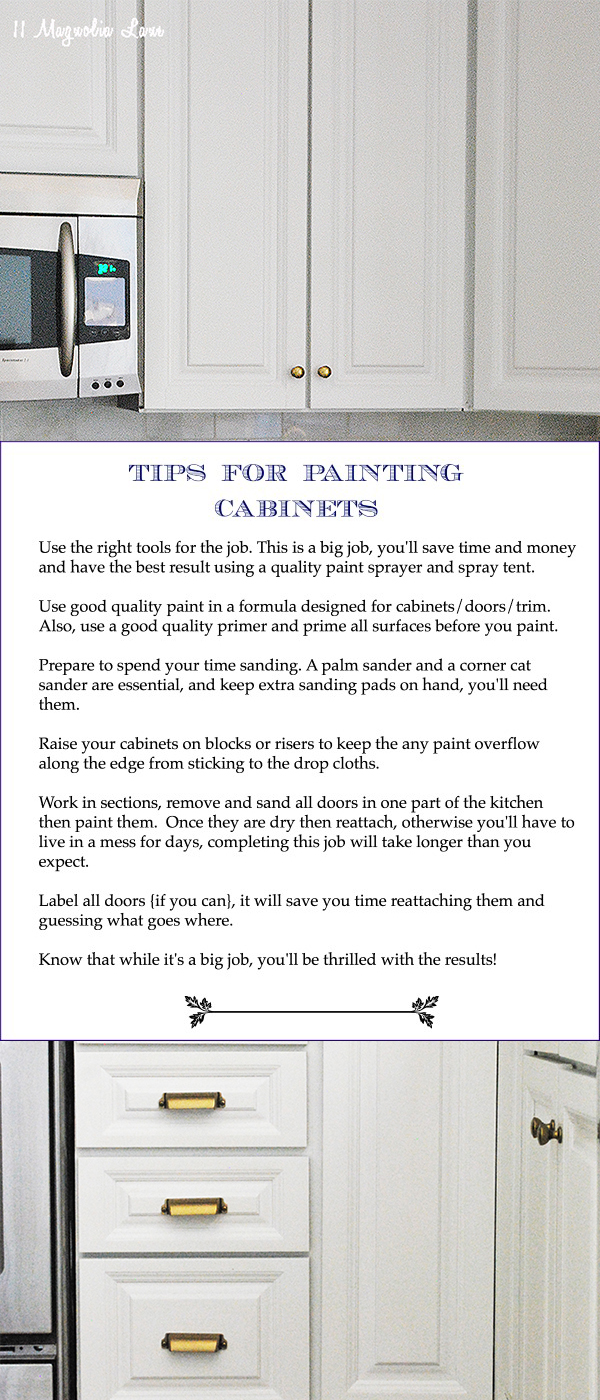
I have a complete list of what I used to paint and more about how I did it in this post HERE. If you plan to paint your cabinets I would recommend making an investment in some essential tools. Keep in mind, having a professional do this job would cost you thousands, it is worth a small investment to get amazing and long-lasting results.
HomeRight FinishMax Paint Sprayer
Quality angled paint brush
One more quick reminder of where we started and what a difference the new paint made, I set it up so you can Pin it for future reference.
See the whole background on this kitchen makeover in the posts below:
Kitchen/Breakfast Room Paint Color {my favorite color ever!}
The DIY Under Counter Shelves {IKEA hack}
How to get a factory finish when you paint cabinets
UPDATE: How these painted cabinets are holding up TWO YEARS later
Thanks so much everyone, for following along with me on this project! I appreciate your support 🙂
XO,

Our posts contain affiliate links. If you make a purchase after clicking on these links, we will earn a small commission, which helps to keep our content free. You don’t pay a cent more than you would otherwise, since that would be tacky! Please see our full disclosure policy here.