This is a sponsored post written by me on behalf of Freedom Outdoor Living for IZEA. All opinions are 100% mine.
One of the projects I mentioned that we’ve been working on this summer is sprucing up our backyard, especially in the area around where our fire pit is. Since that is where we typically entertain friends, I was overdue to make some improvements so the area is eye-pleasing and guest-friendly 🙂
I was given the opportunity to try out the Connections Decorative Fencing product {available at Lowe’s} and knew it would be a great way to cover up the unattractive space under our deck. As much as I’d love to say I am married to a guy who wants to spend his weekend tacking up lattice so our neighbors {and guests} don’t have to see all the sports gear and debris that is collecting underneath our deck, at this time of year my husband is fishing in his free time NOT doing home improvement. I promise the project requires nominal DIY skills, so don’t be afraid to try it yourself, I easily could have done this all myself no handy-husband needed! Also, we are giving away a Connections Fencing package so scroll down to enter to win your own!
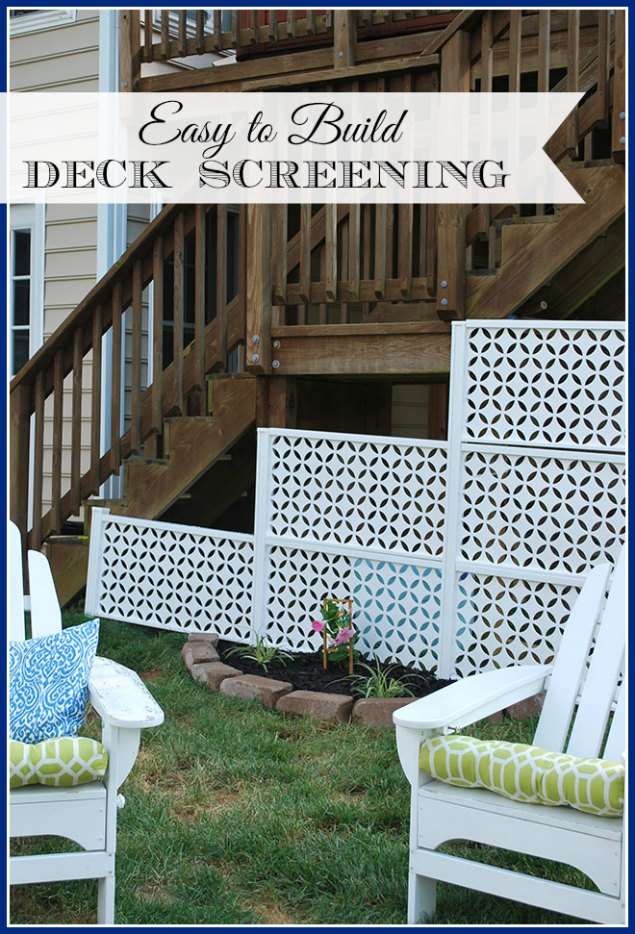
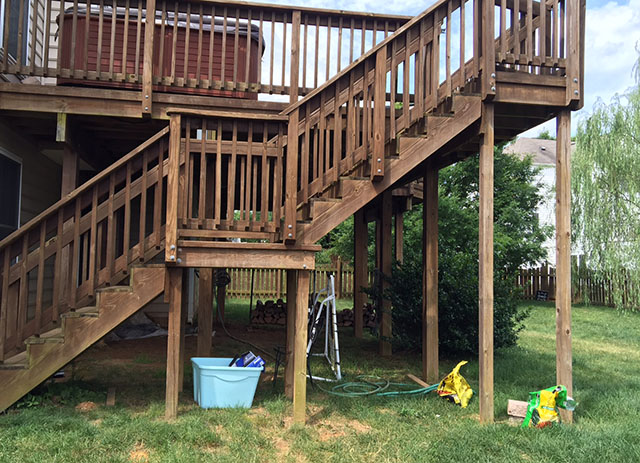
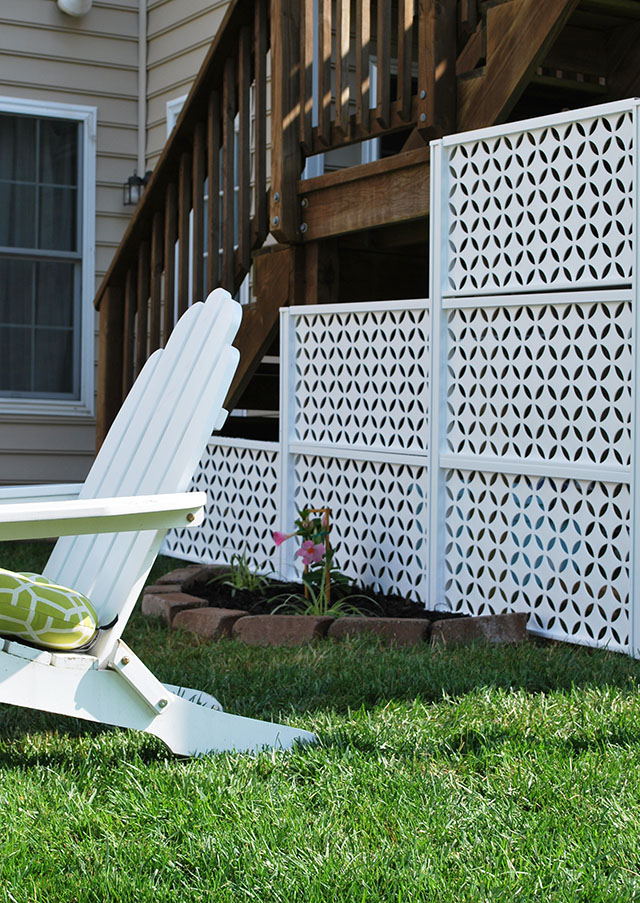
Here is the space I started with. I took this picture standing near our fire pit, so the lovely under- the-deck area was in full view when our friends are sitting around it. Since I am adding some landscaping {slowly} along the fence line on the other side of the fire pit, I thought it would be nice to add a flower garden along with the screening in this area too.
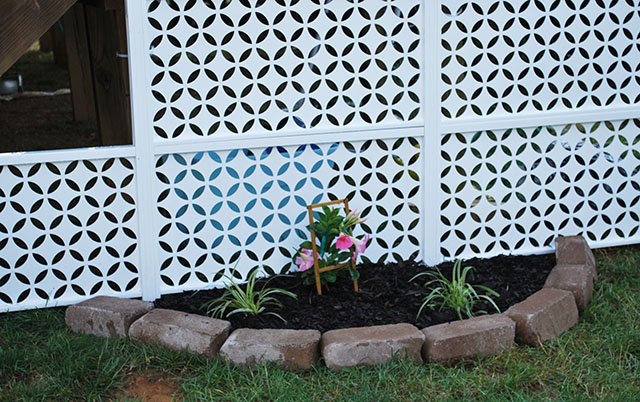
I’ll jump right to a quick “after” shot so you can see how easy it is to put together the Connections Decorative Fencing product. I enlisted my son to help me {though I promise one person can do this project} and in less than 30 minutes all three sections were installed, super quick and easy.
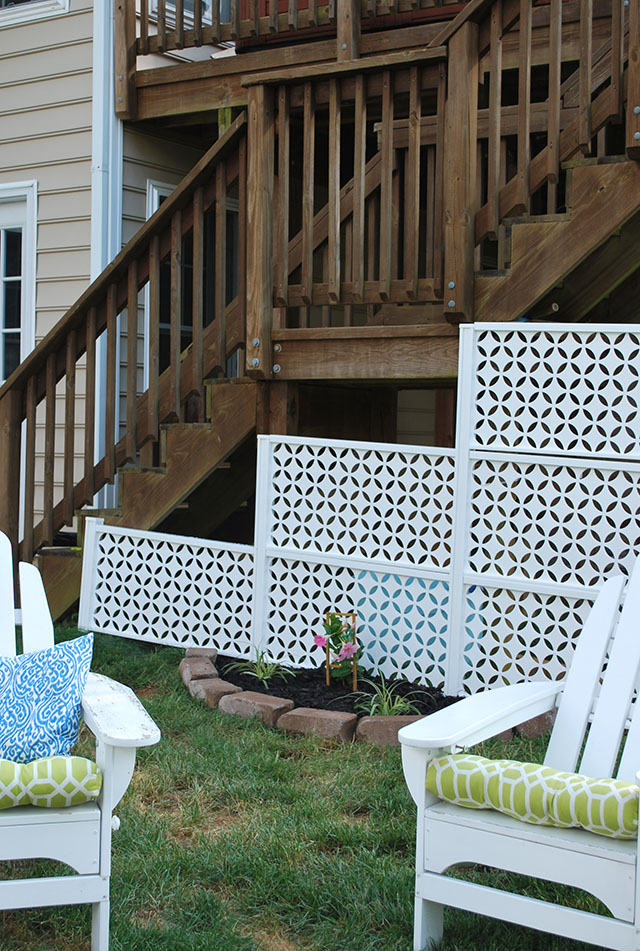
Since we are on a small hill {which actually the adjustable fencing allows for} and since it was under the stairs I went with a graduated one, two, three-tiered selection of the fencing. I selected the circle pattern but they have several to select from {see them here}. You can put together any combination of panels, sizes etc. based on what you need.
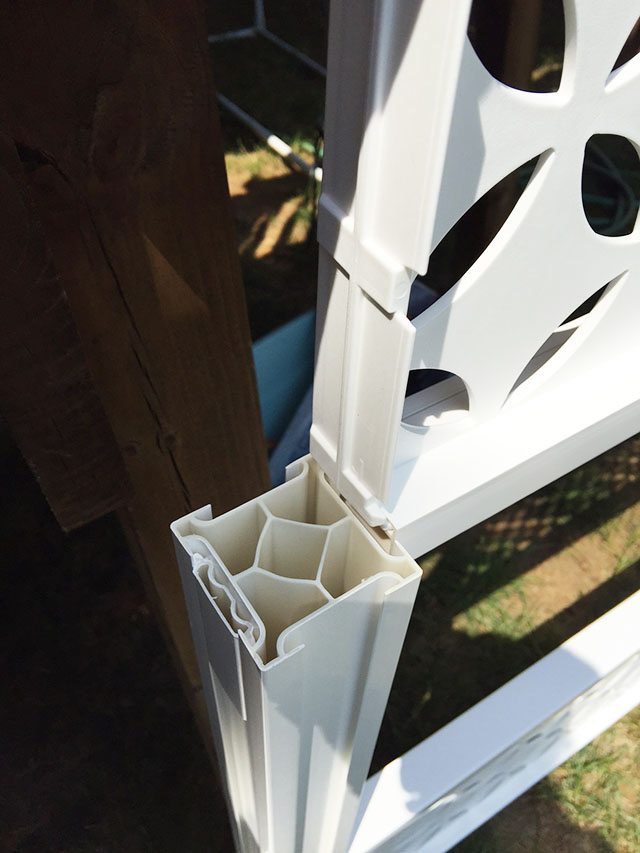
The installation is so easy. You start with a simple post that you stick in the ground, we used a 2×4 to hammer it deep into the soil, it holds the fence posts. Then you slide the end posts over on top of it. The end posts have a track so the connections fencing panels just slide right into it, and they can go in any direction you need them to.
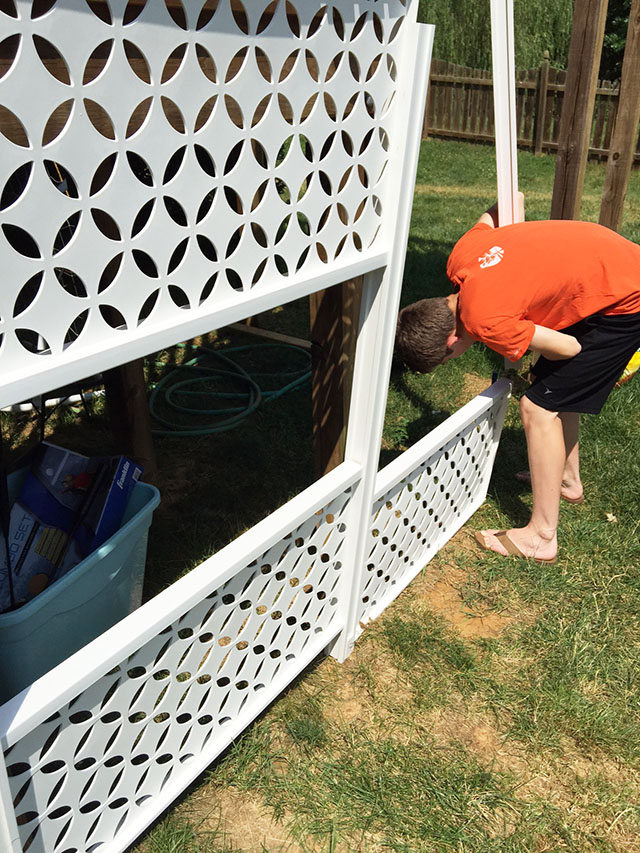
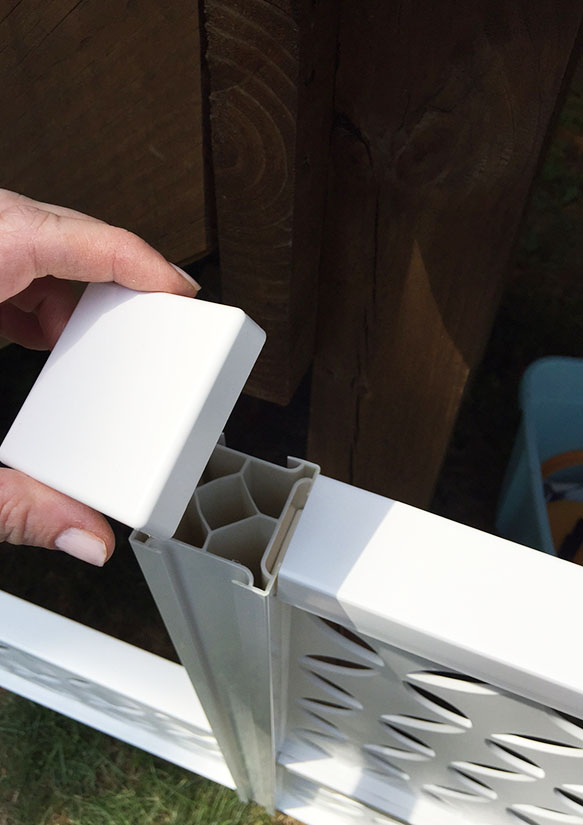
It comes with small inserts which help with the leveling, it was a quick and easy process. Having a teenager on hand to put them together with you is helpful but again, I promise not necessary! You really don’t even need any tools to assemble this, nor does the fencing need concrete footings. It would have taken an entire day to install lattice, but this was so much easier. Not to mention it is vinyl, so it is no maintenance and the components are very affordable. Once it is all assembled you finish it off by adding the post caps to the tops, and you are all set.
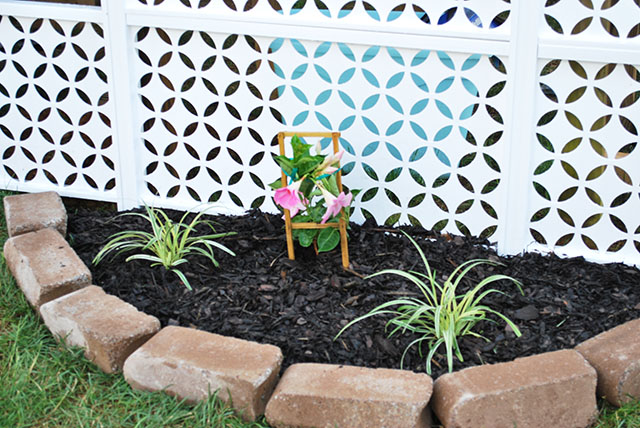
I put in a very simple flower bed to decorate the area for the time being. We’ll actually put shrubs, probably hydrangeas, along here eventually but we’re working on filling in the other side of the yard first. As anyone has done it knows, landscaping a yard takes a lot of energy and money, so we’re doing a little bit at a time.
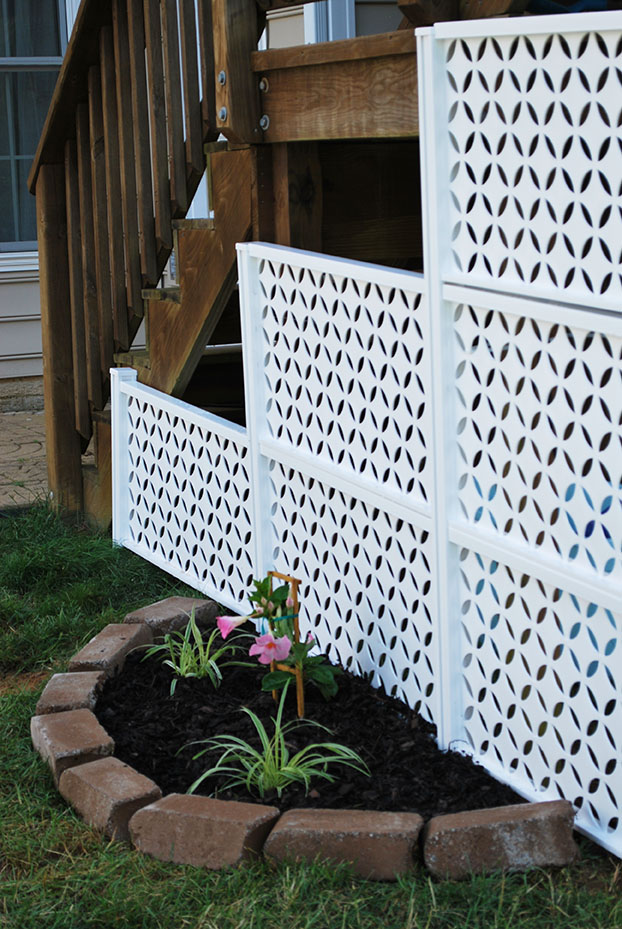
I couldn’t resist adding a climbing rose to the area, since the connections panels will be perfect to support the plant, I can just see it filled vertically with flowers.
Now that I see how easy this product is to use, we’ll probably use it again to build screening around our trash cans {I am sure the neighbors will appreciate not looking at those all day}, and it would be perfect to use around a hot tub or to even keep creatures out of gardens.
I am thrilled that the next time we have guests over, I’ll have a more finished space to entertain. It’s a small improvement but it makes the whole area look so much nicer.
This wasn’t even a weekend project–more like an easy DIY in an hour project– so don’t be afraid to tackle it yourself, even if you aren’t sure of your skills 🙂 I promise you can do it!
Thanks for stopping by!
XO, Amy