• Skip to primary navigation
  • Skip to main content
  • Skip to primary sidebar
  • Skip to footer
  • MEET CHRISTY & AMY
    • IF YOU’RE NEW HERE…
    • WORK WITH US
    • 11 MAGNOLIA LANE 101
    • DISCLOSURE + PRIVACY (the fine print)
    • BEST OF 11 MAGNOLIA LANE
  • TOUR OUR HOMES
    • TOUR OUR HOMES
    • CHRISTY’S MAGNOLIA COTTAGE
    • CHRISTY’S MCC HOUSE
    • Christy’s Stuttgart Flat
    • Amy’s Virginia Craftsman Home Tour
    • AMY’S VIRGINIA CRAFTSMAN Building Process
    • HOLIDAY HOME TOUR SERIES
  • CELEBRATIONS
    • EVENTS + ENTERTAINING
    • GIFTS
    • HOLIDAYS
    • RECIPES
  • HOME
    • CLEANING
    • DECORATING
    • ORGANIZING
    • ROOM BY ROOM
      • BATHROOMS
      • BEDROOMS
      • CLOSETS
      • CRAFT ROOMS + OFFICES
      • DINING ROOMS
      • KIDS’ ROOMS
      • KITCHENS
      • LAUNDRY ROOMS
      • LIVING + GREAT ROOMS
      • OTHER SPACES
      • PANTRIES
      • PLAYROOMS + BONUS ROOMS
      • PORCHES + OUTDOOR SPACES
    • TIPS
  • SHOP
    • SHOP OUR INSTAGRAM
    • SHOP OUR AMAZON STORE
    • FRIDAY FAVORITE FINDS
  • PROJECTS
    • CRAFTS
    • DIY PROJECTS + TUTORIALS
    • FURNITURE
    • PRINTABLES
    • WINDOWS, DOORS, + WALLS
  • LIFE
    • FRIDAY FREE FOR ALL
    • HEALTH
    • SIMPLY ON SUNDAY
  • TRAVEL
  • CONTACT
    • Email
    • Facebook
    • Instagram
    • Pinterest

11 Magnolia Lane

Sharing our easy DIYs, decorating, entertaining and more!

Follow~Up on My Painted Chair Tutorial: Your Questions and My Answers!

April 3, 2014 By Christy 45 Comments

This Post Contains Affiliate Links

1131 shares
  • 44

painted chair paint furniture fabric how to


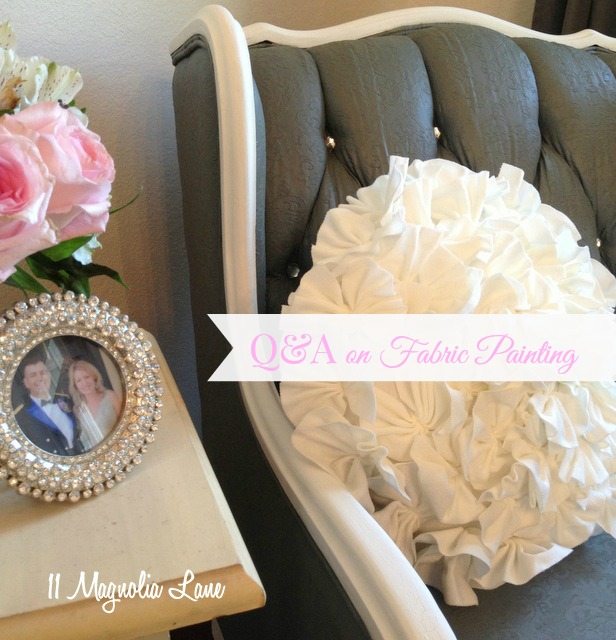
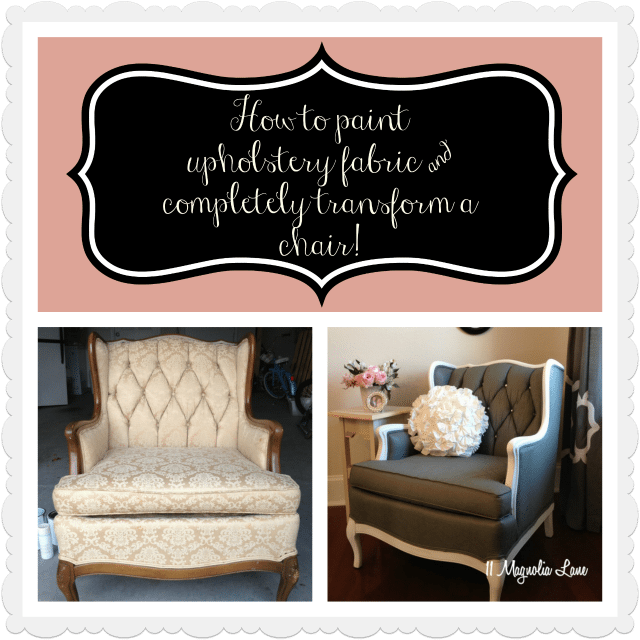
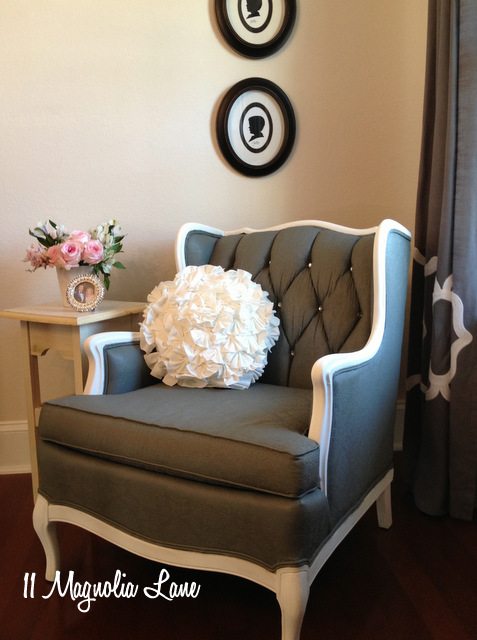
Remember this beautiful chair?  Well, the post on how I painted “her” and took her from frumpy to fabulous is still one of our top posts of all time, and I get comments and emailed questions virtually every day from people who want to undertake a similar project.
collage-640
I figured I’d answer your questions in detail in this post; while I think everything I mention in this post is covered in the comments of the original post {read that here}, I’ve actually had people email me and say, “I didn’t have time to read through all the comments and see if you already answered this, so can you answer this question…”   which even though I love you guys, it isn’t the wisest use of my time.  Might as well make it easy and put everything in one place!

Remember, the step by step tutorial is here; these are just the follow up questions.  If you’re attempting a project like this for the first time, I definitely recommend that you read both posts.
painted-chair-after-long-001

So, in no particular order:

1.  What kind of paint did you use?  Would XX kind of paint work?

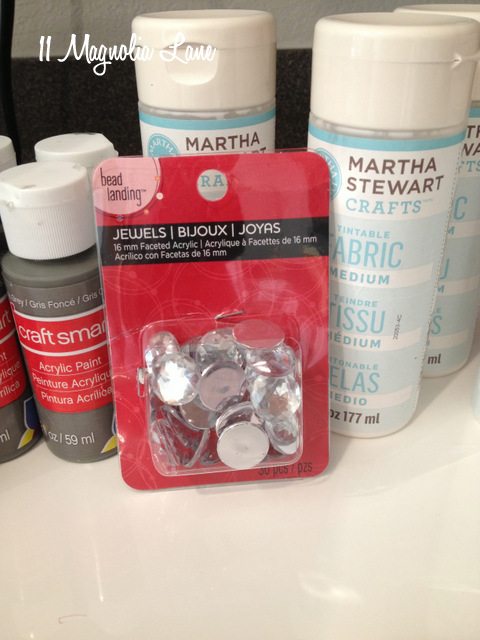
I used acrylic craft paint {the exact one is here}, the small bottles that you buy at the craft store, and they worked great.  I am about to undertake another upholstery painting project, and I’m going to use latex paint instead, and I’ll let you know how that goes.  Other bloggers who have used that seem to think it works fine (plus you can have the paint counter tint it to whatever color you want).  Update:  I used regular latex paint on my outdoor cushions {here} and I found that they were much stiffer.  I’m not sure if that was because of the paint or the fact that it was outdoor fabric, though.
paint chair fabric supplies
2.  What is the fabric medium that you used?  Do I have to use it?

The fabric medium is mixed with the paint and its purpose is to keep your fabric from being too stiff after it absorbs all the coats of paint.  It is a thin white liquid that you mix in with your colored paint.  You probably could skip it, but I would think you’d run the risk of your fabric cracking.

I buy mine at the craft store with a coupon, but you can find it online at Amazon (affiliate link):


3.  How does the chair/fabric feel after it’s painted?

Mine feels like outdoor fabric feels, but a little stiffer.  If you’ve ever sat on a naugahyde restaurant booth, it’s kind of like that.  That being said, I am about to use this process on my outdoor seating set, and I have a feeling that it will repel water beautifully.  And yes, I’ll let you know how it turns out!  Update:  that project is now done; read out it {here}.

The downside to the stiff fabric is that I wouldn’t necessarily recommend this for the couch you sit on every night, unless you don’t have another option.  The upside is that spills just wipe off and pet hair vacuums up easily.  I assume that we ever do stain it permanently, I can probably just put on another coat of paint!

I have read that a coat of clear wax worked into the fabric after painting makes it softer, but I haven’t tried this and can’t give you any more details on the process because of that.
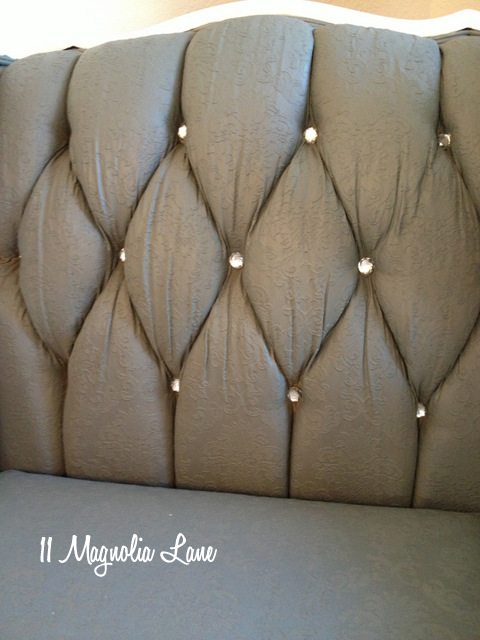
painted-chair-bling

I added the rhinestones to the buttons for a little “bling”

4. Does the paint rub off when people sit in the chair?

No.  After it’s dry, it’s dry.  If you lean up against my kitchen wall, which I painted a week ago, paint doesn’t rub off on your clothes.   I have wet a cleaning cloth and scrubbed really hard at the seat and there has been no color transfer.  Your white pants are safe!

3.  Can I paint a light color over a dark color or pattern?  Can I cover stains with this process?

Yes, I think so.  I only say I think so because I didn’t cover any stains myself on this chair.  However, I’ve seen other bloggers paint over dark colors, patterns, and stains, and it’s worked fine.  Just remember that you want to use multiple thin coats of paint (and fabric medium!) so that your finished product isn’t too stiff.
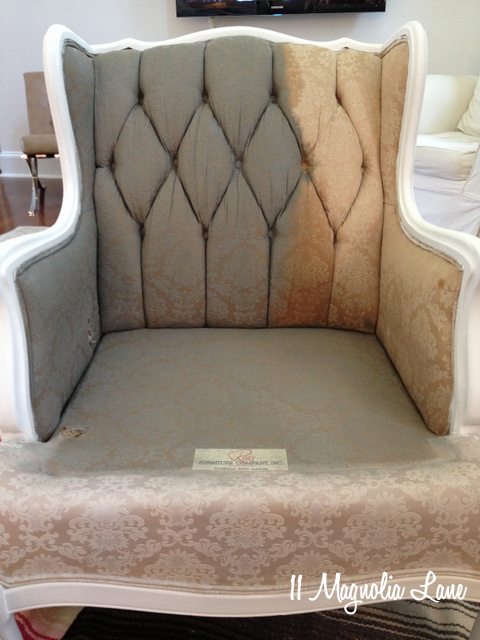
Use multiple thin coats of paint for the best results

Use multiple thin coats of paint for the best results

4.  Can I paint my velvet/needlepoint/silk chair/sofa/loveseat using this process?

The answer to this one is probably, but I don’t know.  Well, don’t paint leather, but other than that, give it a try!  If it’s a piece that I don’t love and want to use in my house as it is, and I’m either going to donate, sell, or reupholster it anyway, then what do I have to lose by giving it a try?  The same is probably true for you guys.

Update:  I’ve since painted a velvet chair.  You can read about that process {here}.  It’s gorgeous, but VERY stiff and scratchy!

5.  How does this compare to reupholstering?

Having done both {read about my loveseat reupholstery project here and here}, this takes WAY less time, is WAY less expensive, and WAY less difficult.  Seriously.  It’s my first choice for rehabbing furniture that’s in decent shape but needs updating.
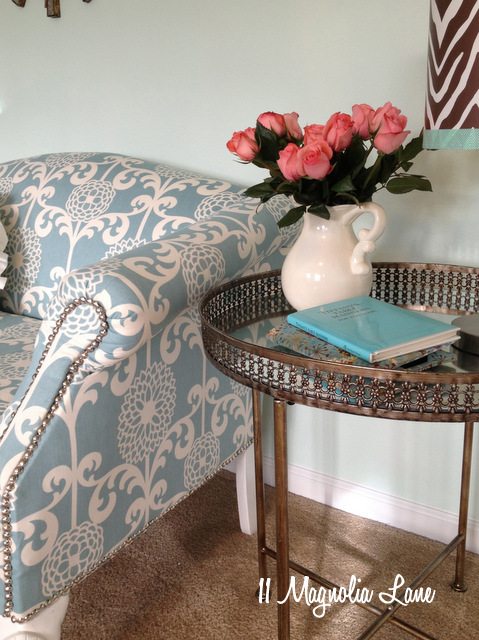
loveseat reupholstery how to

6. What kind of paint brush did you use?

This is in the tutorial post, but I just used a regular 2″ painter’s brush (like this).  I used a very fine artist’s brush (probably from a craft store) to paint the piping of the fabric so I didn’t get any gray paint on the white wood trim.

7.  Have you used XXX product to paint anything?  How did it work?

So far, this is my only fabric painting project, so I haven’t tried any of the fabric spray paints out there, or any that require heat or other steps.  I’ll be sure to let you know if I do!

Update:  I used regular old Rust-Oleum spray paint on some outdoor cushions {here} and wrote about that, and my outdoor seating set using the same technique I used on this chair {here}.

8.  How is it holding up over time?

I did this project in September 2013, so it’s been almost seven months.  The chair looks just as good as it did on the day I finished it.  Keep in mind, though, that it’s in my dining room and doesn’t get sat in on a regular basis–only when we’re entertaining.  (UPDATE:  It’s now been two years–this chair still looks amazing!)

9.  How much did your project cost?

I spent about $30 on fabric medium, paint, and the rhinestone buttons (those are optional, of course).  Your total cost will depend on what you pay for your chair; mine was a whopping $60 but I think she was worth every penny!

10.  Where did you get the white ruffled pillow?

Inquiring minds want to know!  HomeGoods for $12.99 🙂
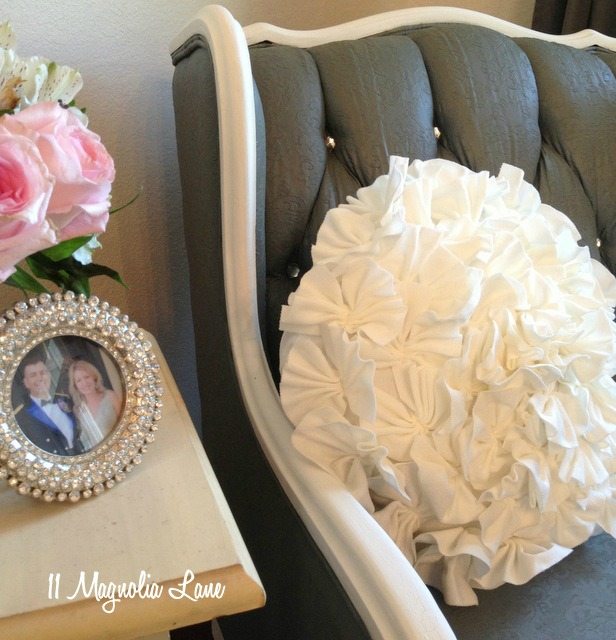
paint fabric chair

I hope that helps–plus, I always like to know how projects hold up over time.  Good luck with your fabric painting project!

Disclosure:  Our posts contain affiliate links.  If you make a purchase after clicking on these links, we will earn a small commission, which helps to keep our content free.  You don’t pay a cent more than you would otherwise, since that would be tacky!

Thanks for stopping by.

icon-facebook-1icon-instagram-1icon-mail-1icon-pinterest-1icon-twitter-1

YOU MIGHT ALSO LIKE THESE POSTS... :

Crushing On: Velvet Couches
Updated Mudroom + Painting Doors for Impact
The Best, Affordable Slipcovered Sofa Options
My New Gray Velvet Chairs from Haynes Furnitu...

Filed Under: DIY/Projects/Tutorials, Furniture, PROJECTS Tagged With: fabric, Furniture, how to, paint

Reader Interactions

Comments

  1. Ilka Charles says

    April 19, 2014 at 8:55 pm

    I really love this idea.

    Reply
  2. Pam says

    April 21, 2014 at 7:23 pm

    I just came across your blog! We’re looking to refresh our faded outdoor patio cushions and trying to find out how to do so. We’re not experienced diy’ers. When you tackle your outdoor furniture, will you use the same kind of fabric medium and paint? Thanks in advance!

    Reply
    • Christy says

      April 25, 2014 at 6:50 pm

      Pam, I will use the same fabric medium but I will probably buy a quart or two of paint at the hardware store instead of using the small craft bottles. I have 11 outdoor cushions to paint–so I will need A LOT of paint for that job! Hope that helps…

      Reply
  3. Beth says

    May 1, 2014 at 11:36 am

    One question that I didn’t see answered …. I keep reading that when using a textile medium that the paint needs to be “heat set” with an iron once dry. Obviously you can’t do that with a chair or other 3D item. Did the brand of medium you used call for heat setting? The one I bought does and I’m trying to decide whether to return it and get another brand or go forth without the heat set.

    Reply
    • Christy says

      May 5, 2014 at 10:06 am

      Beth–good question! It does call for heat setting; however, that’s more to keep it colorfast in the washing machine, which isn’t going to happen with a chair. I’ve had no issues with color bleed or transfer. Hope that helps!

      Reply
  4. Erin Kelley says

    June 24, 2014 at 9:57 am

    Hi Pam, I saw your beautifully painted chair on Pintrest. I followed your method and my 2 chairs (which cost me 2/$20, (proceeds going to charity…bonus!) at the hotel I work for…score. My question is about a protective Scotchguard spray… Have you applied this to your painted chairs? Do you think it’s even necessary? My chairs are definitely sitting room indoor- type chairs, but I live in Hawaii and have an outdoor covered lanai (porch) which I am currently transforming into a second “living room”. If we do get rain here it does not last very long, and usually won’t even reach the area where I have my chairs…My husband and I spend a lot of time on the lanai and sit in the chairs often. Thanks for your amazing and easy to follow tutorial. Your post has been life-changing for me, as I have never really thought of myself as crafty or creative. Your blog is what inspired me to transform all of the used furniture I have been accumulating into beautiful, stylish pieces of art!
    Mahalo, Pam!
    Erin Kelley
    Lahaina, Maui, HI

    Reply
    • Christy says

      June 24, 2014 at 12:52 pm

      Erin–
      I don’t think you need to Scotchguard your chairs; I think the protective barrier that the paint makes is sealant enough. I’ve just wiped water and spills off of my gray chair and they never have a chance to permeate the fabric.

      I’m so glad you’ve been inspired here–thanks for the kind words.

      Reply
  5. Sondra says

    July 3, 2014 at 5:22 pm

    Thank you SO much for this tutorial! I purchased all my supplies today and plan to paint my outdated wicker furniture this weekend. The $50 I’ve spent is so much cheaper than buying a new set or 8 new outdoor cushions!

    Reply
  6. gabrielle says

    July 9, 2014 at 11:31 pm

    Hiya – am just getting ready to paint some upholstery for the 1st time, and wanted to say thanks for the insider’s peek into your process! Very helpful details!

    Also wanted to encourage people with questions about this or that: first experiment on something small, and watch what happens and learn from the experience! Creativity and design aren’t bought in a bottle – they are bold experiments! So get out there and fearlessly experiment, and then go to work on your dream piece with a practiced hand!

    Reply
  7. Allison Cawley says

    July 29, 2014 at 4:31 pm

    Thanks for sharing your instructions and the details! I’m brainstorming some ideas of sewing fabric totes as a few “Thank You” gifts at our upcoming wedding and then painting them to match the wedding theme colors… seems like this process would be really easy to jazz up the boring neutral fabric I’m making the totes out of. I’ll be sure to post it on my new blog, peachfullychic if I do so! Looking forward to reading more great articles from your site!

    xoxo,
    -Allie

    Reply
    • Christy says

      July 31, 2014 at 4:09 pm

      What a good idea, Allie. Best wishes to you on your upcoming wedding!

      Reply
  8. gail says

    September 3, 2014 at 10:15 pm

    Love your chair! I googled to see how fabric chairs hold up, and found yours! 🙂 I have linked to you from my painted chair post because everyone wants to know how it will hold up, and I didn’t know what to tell them. 🙂

    I’ll also be sharing yours on facebook soon.

    thanks!

    gail

    Reply
    • Christy says

      September 4, 2014 at 12:44 pm

      Thanks so much for sharing with your readers, Gail. I hope it helps them. Love how your chair turned out!

      Reply
  9. Donneek says

    January 27, 2015 at 7:40 am

    Hi there!
    Thanks for the great blog it was very helpful.There are many websites with different “recipes” . I have a craigslist couch and four chairs that needed a redo, the couch had a strongly contrasting southwest design and I wasn’t sure if 1:1 would do the job so I went with 2:1 just in case. the chairs were a monochrome, pale, stained beige fabric and the 1:1 worked perfectly. The couch fabric ended up being quite a bit stiffer and I can still see the design with just one coat but I rather like it. The chairs were covered beautifully with one coat I couldn’t be happier with the results.

    Reply
    • Christy says

      January 29, 2015 at 10:02 am

      Thanks for sharing your experience–I think that’s so helpful for others who are wondering what “recipe” they should use for their particular fabric and piece of furniture. I’m so glad you like the results!

      Reply
  10. Susan says

    March 6, 2015 at 10:03 am

    I have three upholstered chairs that have been treated with a stain repellent so water beads up on the fabric. Is there anyway to paint these chairs with any of the paints recommended or will it be stiff. Thanks, Susan

    Reply
    • Christy says

      March 7, 2015 at 12:58 pm

      Susan, I think it will be stiff–the water, paint, and fabric medium won’t be able to sink into the fabric, so it will form a thicker layer on top. It will probably be like my outdoor cushions: https://www.11magnolialane.com/2014/05/20/diy-painted-outdoor-cushions-and-a-paint-sprayer-giveaway/
      Good luck!

      Reply
  11. Sara says

    April 6, 2015 at 7:45 pm

    Hi, thank you for your update! I just bought white linen roman blinds for my girls room and I feel like they are too white. I spent a lot of money on them and they are non-refundable/returnable. Would you use this process on something that like that? They are pulled up and down every day.

    Reply
  12. Kristen says

    May 28, 2015 at 1:51 am

    I have 2 sets of chairs that I want to fabric paint the upholstry. I would love to do white on one set but worried about them getting dirty or discolored. Can you wipe down the fabric after painting or repaint as long as you don’t seal it?

    Reply
  13. Vicki Hudson says

    October 18, 2015 at 8:13 am

    Hi, I redid a bedroom using Dixie Bell chalk paint. I found the perfect chair, but needless to say it needs updated. I want to use the same color for the fabric as my night stands, so using acrylic isn’t an option. Can I mix fabric medium with chalk paint and get similar results?

    Reply
    • Christy says

      October 18, 2015 at 8:52 am

      Hi, Vicki–
      You can, but you can also just use the chalk paint undiluted and it will work fine. My partner Amy used it on a chair and you can read about it here: https://www.11magnolialane.com/2015/08/07/how-to-transform-a-chair-with-chalk-paint/

      Good luck with your chair!
      Christy

      Reply
  14. Annabelledon says

    December 30, 2015 at 8:34 am

    Hi. Has anyone used this process to paint stripes on fabric? Need to add some color contrast to cornice boards upholstered in off-white heavy cotton (I think) using the same mushroom colored late paint that’s on my walls. Am planning to tape off the parts of the fabric I don’t want painted (hence creating the stripes) but am wondering if the paint will soak into the fabric underneath the taped edge. I’d try a test on a scrap piece of fabric but don’t have any left. Also very open to other ideas that might work better!

    Reply
    • Christy says

      December 30, 2015 at 8:40 am

      I’ve painted stripes on drapes before (see this post: https://www.11magnolialane.com/2013/02/06/dining-room-update-painted-curtains/) and I think it will work fine on your cornice boards; just don’t spray the fabric with water first, as that will definitely make the paint bleed. You could even skip the fabric medium, as I did in the drape post, because it’s not like your cornice boards will need to remain flexible.
      Hope that helps!
      Christy

      Reply
  15. Annabelledon says

    January 17, 2016 at 2:04 pm

    Hi again Christy. Following up on our 12/30/15 convo: I’ve decided against stripes, am going to do a solid overall color instead. Am a little concerned about losing the texture of existing fabric so am considering spraying on dye vs. painting. I’ve done a search your site but not finding any dyeing how-tos. Ever tried it and if so, how were results vs. painting? Thank you again for a great blog!

    Reply
  16. Sam says

    March 21, 2016 at 5:24 pm

    This chair is so pretty and upon seein it on Pinterest, i decided to paint my wingback chair. I had the ist coat drying but did not do a lot of covering the dark colored upholstery. Did you used the same ratio on all 3 coats? 1:1:2 parts?Thank you.

    Reply
    • Christy says

      March 22, 2016 at 9:45 am

      Hey, Sam–

      Yes, I used the same ratio on all three coats. I think I included a picture of how my chair looked after the first coat–it definitely didn’t give full coverage! Just hang in there and remember that multiple light coats are better than fewer heavy coats. Good luck!
      Christy

      Reply
  17. Jamie says

    April 26, 2016 at 11:49 am

    Hello, love love love this page!! I was just wondering to date how the outdoor cushions are holding up?

    Reply
    • Christy says

      April 28, 2016 at 10:46 am

      Thanks so much, Jamie. I used the outdoor cushions for almost two years but then finally tossed them and bought replacements. They would have lasted longer, but the white showed dirt/pollen/mold. If I do it again, I’ll use a darker color and just cover them so they don’t fade.

      I hope that helps you out!
      Thanks for writing–
      Christy

      Reply
  18. Lucie La Mer says

    May 8, 2016 at 4:41 pm

    Christie,
    I absolutely loved this tutorial and everything that you’ve done. I have a barrel chair with Channel back that I’m thinking of painting. However all of your projects seem to be smooth material. My chair is a looser woven material, in a kind of basket weave. Do you think your process would work with this? You have really inspired me.

    Reply
    • Christy says

      May 10, 2016 at 2:02 pm

      Lucie, I wish I could tell you for sure, but the answer is that I just don’t know. The velvet chair that I painted might be a better comparison than this project…it was pretty stiff when I finished it because it took so much more paint to cover it. I still sit on it every day, though. You can read more about that project {here}. Hope that helps!

      Reply
  19. Meredith says

    June 2, 2016 at 9:04 am

    How much paint did you use?

    Reply
    • Christy says

      June 2, 2016 at 9:52 am

      Hey, Meredith–those details are in the original post, but it was four 8-oz bottles of fabric medium and ten 2-oz bottles of acrylic paint. Hope that helps!

      Reply
  20. Susan Suits says

    August 30, 2016 at 12:23 pm

    I bought a used glider rocker for my daughter in law to use in the nursery of my first granddaughter. The cushions are in good shape but BLUE and dated. I was looking for helpful hints to make slipcovers but I think I like this idea better. The fabric is in good shape but is already has a stiff chenille feel to it. Needless to say, I’m scared to death to paint it but I figure, if the paint goes wrong I can resort to slipcovers. Thanks for all the details. Keep your fingers crossed!

    Reply
  21. regna Cranmer says

    May 14, 2017 at 7:12 pm

    Have you ever used Snuggles (the laundry product) instead of the medium?

    Reply
    • Christy says

      May 22, 2017 at 10:08 pm

      I haven’t, but I’d love to hear your experience (if you’ve used it)!
      Thanks,
      Christy

      Reply
  22. Katherine Pittman says

    August 1, 2017 at 5:30 pm

    Beautiful… Thank you for the answers to questions in the tutorial. It will be very helpful and I take on a project like this myself!

    Reply
    • Christy says

      August 5, 2017 at 11:52 am

      Thanks so much, Katherine! It’s such an easy way to transform a piece of furniture!
      Christy

      Reply
  23. Kim says

    November 6, 2017 at 6:19 pm

    I love your blog!!! We have 2 chairs that I am about to attempt. Do you still prefer this method over using chalk paint and wax? I’ve read that the fabric is really soft with that method.

    Reply
    • Christy says

      November 18, 2017 at 8:09 am

      Hey, Kim—

      Thanks for your comment. I can’t actually answer that question with authority, because I haven’t used the chalk paint/wax method myself. I figure one painted chair in a home is enough! That being said, I can state that this one is holding up great after about four years of use, and I do sit in it daily.
      Hope that helps! Christy

      Reply
  24. Debra Wright says

    February 7, 2019 at 10:55 am

    Hi Christy,
    I love your chair, it is very Beautiful! We’re looking to redecorate our sanctuary in our church and I’m in charge of this project. Was looking for some diy tips on dyeing the fabric on our church pews, when I stumbled upon your site. The fabric is in great condition and the pews themselves are very sturdy, just looking to change the color. In your opinion, do you think that this would be a “durable” option for us, considering the pews are sat in maybe twice weekly? Thank you for sharing and I look forward to your response.

    Reply
    • Debra Wright says

      February 7, 2019 at 11:31 am

      In addition to my first question: I would also like to know what sheen of paint should I purchase (if you believe that this project would work for us) considering I would not be able to use the little craft bottles of paint, due to the size of the project. Lastly, do you think that having so many painted pews would look tacky. Again, I sincerely thank you for your advice in this matter.

      Reply
  25. Kody says

    March 13, 2019 at 5:53 pm

    Love this transformation and the detailed FAQ here! Got a quick question. I work in a call center where we have a LOT of half-wall type partitions that are fabric. I’m not sure if you know exactly what I’m referring to, but think dividers almost foam/fabric. We are looking to transform the area and since there is such a large area to paint I’m looking at Latex rather than Acrylic. However, I want our executive team to really like it. And I’m concerned the Latex paint will result in a stiffer/potentially flake off situation. Do you think Latex will work well for this type of project? We aren’t sitting on the dividers at least so that should reduce the potential for flaking/chipping off right?
    What thoughts/recommendations would you have?

    Reply
    • Christy says

      March 15, 2019 at 10:18 am

      Hi, Kody–I’ve used latex paint on fabric before and it gives a similar result. While it’s always smart to test a small area first, you shouldn’t have any issues. With such a huge surface area to cover, though, you might want to consider using a paint sprayer instead of a brush. Good luck to you!

      Reply
  26. Marvin Alfred says

    July 22, 2019 at 10:25 am

    Thank you for the great information. My question is: your fabric medium lools like it is in a spray can, so how did you mix it with your paint and water? Have a terrific day.
    Sincerely,
    marvin B. alfred

    Reply
    • Christy says

      July 26, 2019 at 10:51 am

      It’s not in a spray can. It comes with a screw off lid so it’s really easy to pour and mix. Hope that helps!

      Reply

Leave a Reply to Christy Cancel reply

Your email address will not be published. Required fields are marked *

Recipe Rating


This site uses Akismet to reduce spam. Learn how your comment data is processed.

Primary Sidebar

Lowest prices. Straight Teeth,

•Don’t Miss A Thing!!•

•Do You Know Jesus?•

•Featured In•

Holiday Gift Ideas

Footer

  • Email
  • Facebook
  • Instagram
  • Pinterest

Copyright © 2023 · 11 Magnolia Lane· Blog Design by Little Blue Deer
Privacy Policy

11 MAGNOLIA LANE IS A PARTICIPANT IN THE AMAZON SERVICES LLC ASSOCIATES PROGRAM, AN AFFILIATE ADVERTISING PROGRAM DESIGNED TO PROVIDE A MEANS FOR US TO EARN ADVERTISING FEES BY ADVERTISING AND LINKING TO AMAZON.COM AND AFFILIATED SITES. AS AN AMAZON ASSOCIATE, WE EARN FROM QUALIFYING PURCHASES. WE ALSO PARTICIPATE IN SEVERAL OTHER AFFILIATE PROGRAMS; THIS INCOME ALLOWS US TO MAINTAIN THE QUALITY OF YOUR USER EXPERIENCE AND KEEPS OUR CONTENT FREE. WHEN YOU PURCHASE THROUGH ANY OF OUR AFFILIATE LINKS, WE EARN A SMALL COMMISSION AND YOU DON’T PAY A CENT MORE THAN YOU WOULD OTHERWISE; THAT WOULD BE TACKY!   READ OUR FULL PRIVACY AND DISCLOSURE POLICY {HERE}.
  ©11 Magnolia Lane 2019. Unauthorized use and/or duplication of this material without express and written permission from this blog’s authors and/or owners is strictly prohibited. Please email us at admin@11magnolialane.com for more information.

  • MEET CHRISTY & AMY
    • IF YOU’RE NEW HERE…
    • WORK WITH US
    • 11 MAGNOLIA LANE 101
    • DISCLOSURE + PRIVACY (the fine print)
    • BEST OF 11 MAGNOLIA LANE
    • Back
  • TOUR OUR HOMES
    • TOUR OUR HOMES
    • CHRISTY’S MAGNOLIA COTTAGE
    • CHRISTY’S MCC HOUSE
    • AMY’S NEW HOME BUILD
    • HOLIDAY HOME TOUR SERIES
    • SPRING HOME TOUR SERIES
    • Back
  • CELEBRATIONS
    • EVENTS + ENTERTAINING
    • GIFTS
    • HOLIDAYS
    • RECIPES
    • Back
  • HOME
    • CLEANING
    • DECORATING
    • ORGANIZING
    • ROOM BY ROOM
      • BATHROOMS
      • BEDROOMS
      • CLOSETS
      • CRAFT ROOMS + OFFICES
      • DINING ROOMS
      • KIDS’ ROOMS
      • KITCHENS
      • LAUNDRY ROOMS
      • LIVING + GREAT ROOMS
      • OTHER SPACES
      • PANTRIES
      • PLAYROOMS + BONUS ROOMS
      • PORCHES + OUTDOOR SPACES
      • Back
    • TIPS
    • Back
  • SHOP
    • SHOP OUR INSTAGRAM
    • SHOP OUR AMAZON STORE
    • FRIDAY FAVORITE FINDS
    • 11 ML ETSY SHOP
    • 11ML ORGANIZING SHOP
    • Back
  • PROJECTS
    • CRAFTS
    • DIY PROJECTS + TUTORIALS
    • FURNITURE
    • PRINTABLES
    • WINDOWS, DOORS, + WALLS
    • Back
  • LIFE
    • FRIDAY FREE FOR ALL
    • HEALTH
    • SIMPLY ON SUNDAY
    • TRAVEL
    • Back
  • CONTACT
    • Email
    • Facebook
    • Instagram
    • Pinterest
1131 shares
  • 44