This post is sponsored by HomeRight, we are proud to partner with them each month to share one of their fabulous DIY products with you. As always our opinions are our own.

The thought of DIY’ing something can be intimidating, something best saved for someone “experienced” but this project is so easy anyone with a hammer and some nails and a can of paint can do it. Of course, that being said, if you want to make your life easier–it is important to have the right tools for the job (this was always advice from my Dad when we started a project–have the right tools for the job!) in this case a HomeRight Paint Stick and a brad nailer will make it faster and easier to knock this quick trim project out.
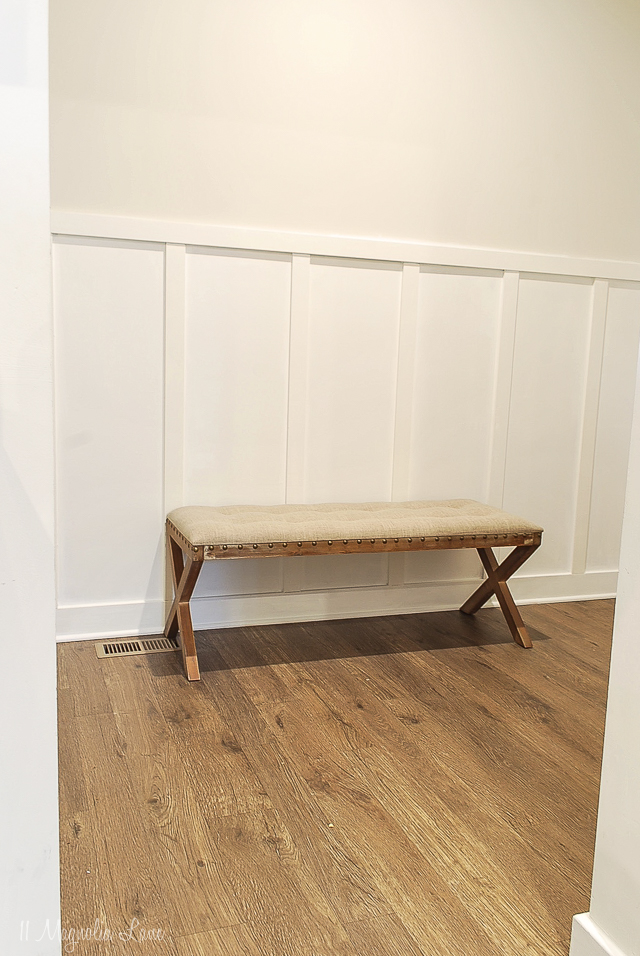
{Affordable Farmhouse Style Bench Available Here}
We’ve done this style trim in other homes, several times, in fact. I’ll link our other projects at the bottom of the post. A “Board & Batten” wall treatment is a super easy way to make a plain wall look finished with minimal time and effort. In fact, the construction part of this project is really easy (especially if you have a nail gun) it’s the painting that can be a little time-consuming.
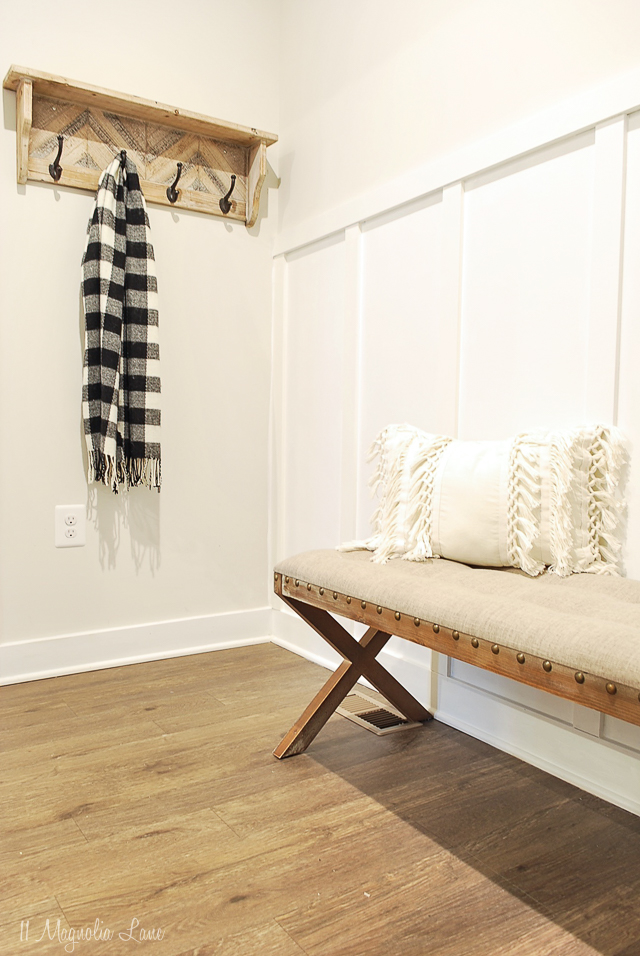
We have a large mudroom off our garage, it was one of the most appealing features of the floorplan we selected when we built our new home last year. In the 6 months we’ve lived here it has served its purpose by collecting coats, bookbags, and shoes, all of which usually wound up in a big pile along the wall. I knew I wanted to add hooks along the long wall, but with such a large expanse of wall space it needed more than just a few random places to hang backpacks. After living here for a few months, I decided to add some easy board and batten to finish the space off.
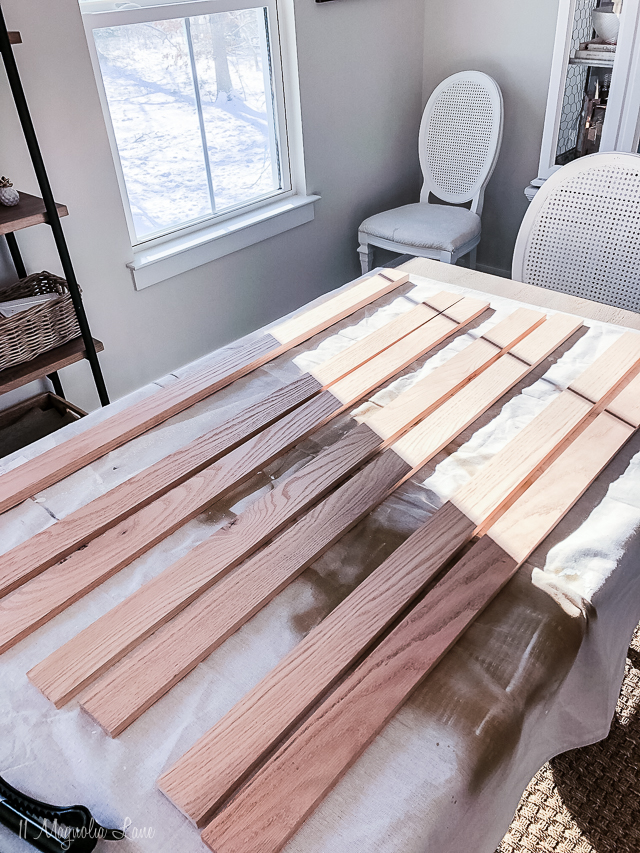
I picked up pre-cut 5′ boards at Home Depot. However, I underestimated the space I’d want between the boards and did wind up grabbing two more pieces (which is why there are two boards on the wall that weren’t painted ahead of time–oops!). This project was pretty easy since I didn’t have to cut down any of the boards, keep in mind that if you don’t have a saw usually the store will make cuts for you at no cost if you have your measurements. I thought the boards were just about the right height so I didn’t have to make any cuts in this case.
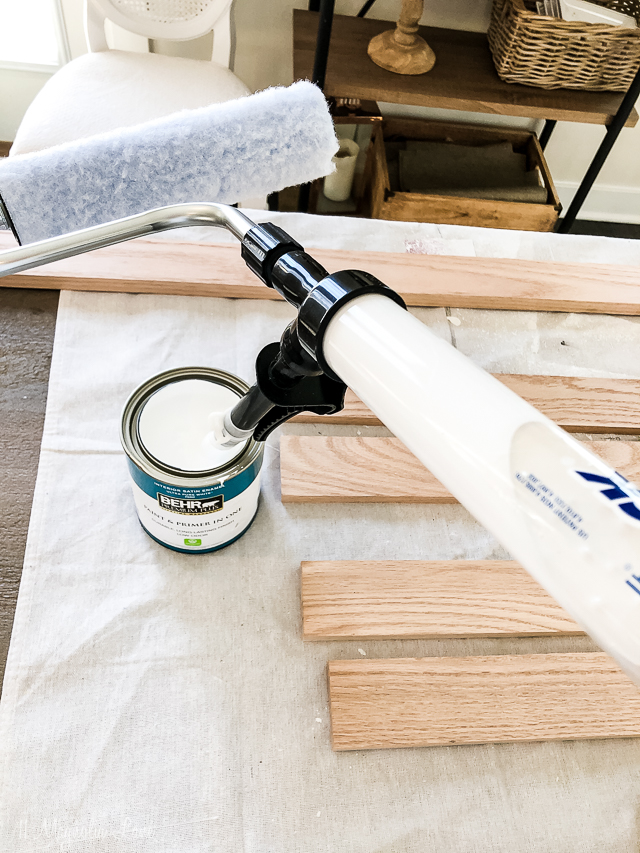
Having done this project before, I knew it would be much easier to paint the trim before putting it on the wall. So the first thing I did was to paint all the trim at once with the HomeRight Mini Paint Stick. This was so easy!
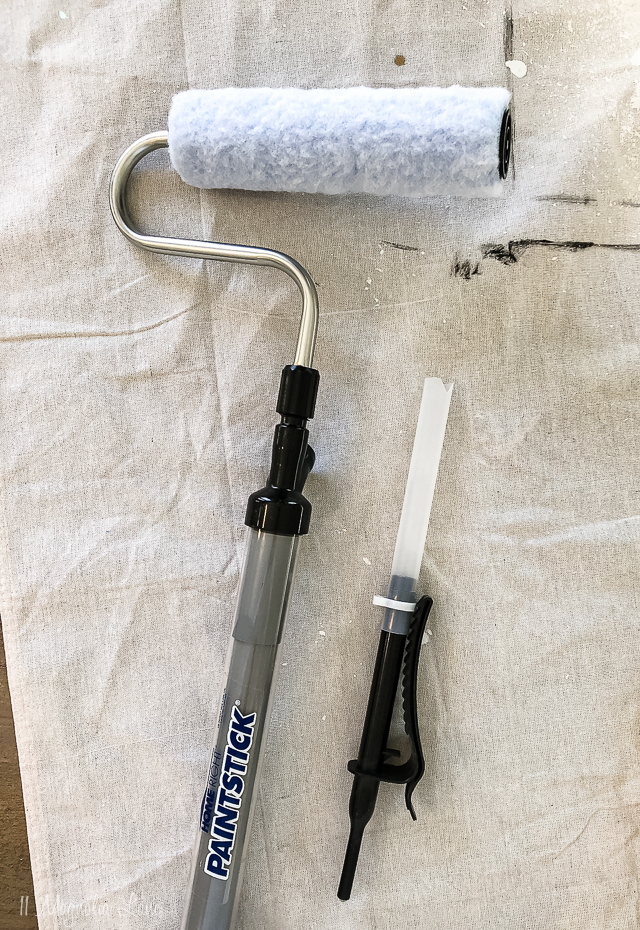
I actually set my timer once I had things set up and ready to go and it took less than TWO minutes to paint all the trim, how easy is that?!? I even screen captured it for you to prove it!

The HomeRight Mini Paint Stick is such a great tool for painting. It holds extra paint in the handle (you suck it up through this cool tube you see below) so you don’t have to stop and get more paint all the time. You also don’t have the mess of rolling pans so it makes painting go so much faster. A Paint Stick is a no brainer when painting a room (you’ll see that I also used it to paint the walls under the trim too) but it also works just as well for small projects as large.
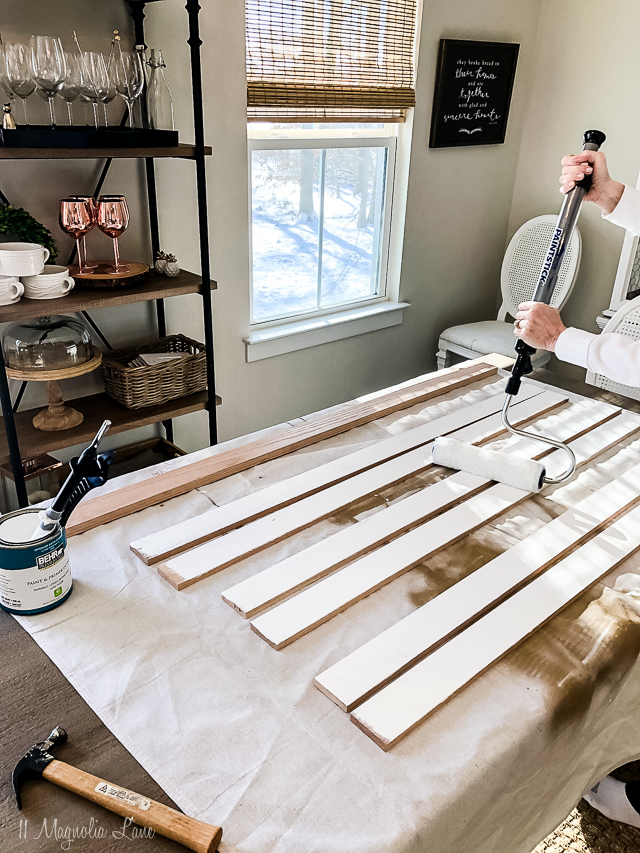
I did lift them up to roll paint on the sides ahead of time as well, so they were covered in paint before I started construction. Once my boards were all painted and ready to go, I measured the walls one more time to be sure, then I laid all the pieces out and attached them temporarily with clear tape so I could see how they looked. I was happy with the spacing so we got to work tacking the boards up.
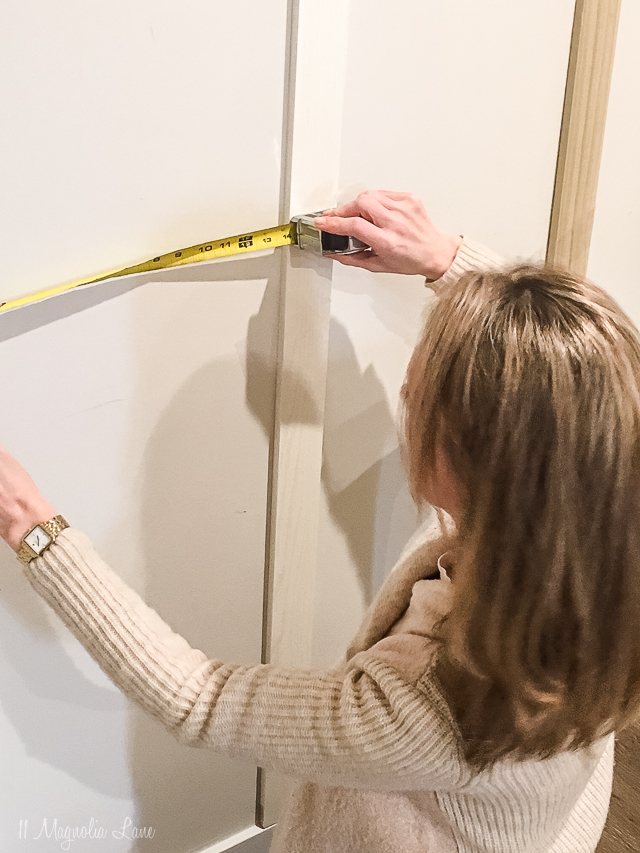
A quick way to figure out your spacing for this kind of project is to total up the total width of all the trim you have (I had 8 boards at 2.5″ each, so 20″), then measure your wall (in my case it was 10 feet). So I subtracted the 20″ of trim from the 120″ of wall space and was left with 100 inches. That I divided that by 7 (the number of gaps you have with 8 boards with one on each end) told me I should have 14 inches between each one. I measured that out and then used a level to be sure each vertical board was straight.
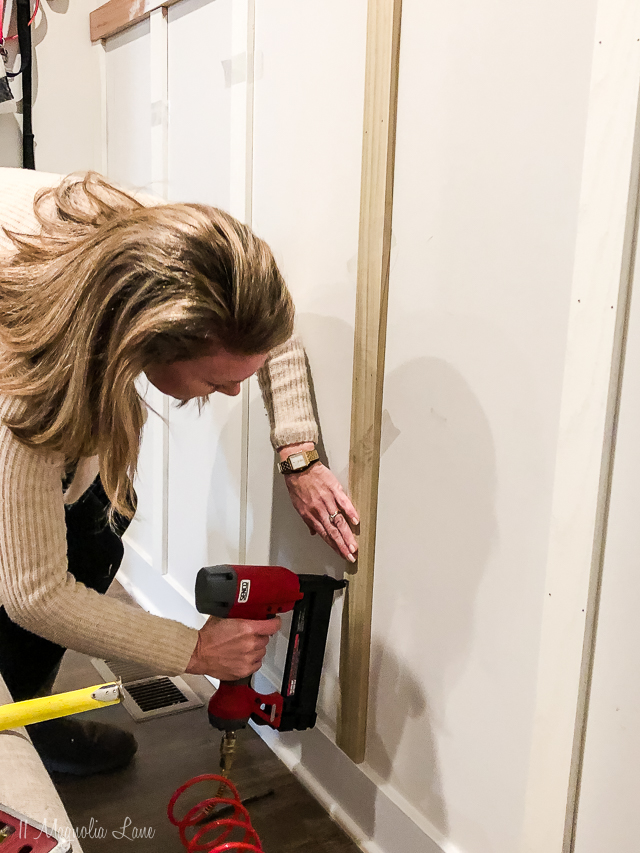
We used a brad nailer to quickly tack everything up, but you can easily do this with a hammer and nails, you’ll just get a bit more of an arm workout 🙂
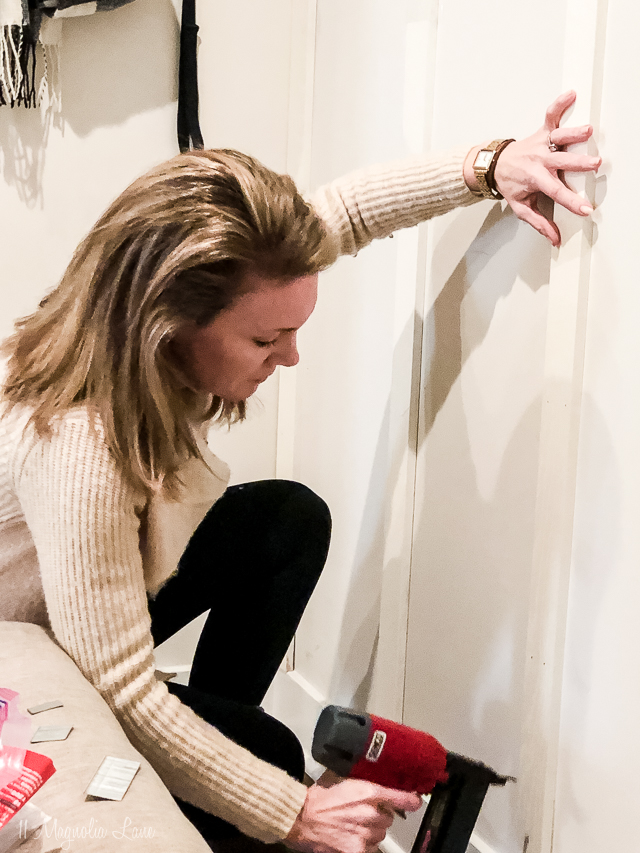
Once everything was up, I set about caulking the seams between the boards and the wall with a regular trim caulk. Once the caulk was dry, I gave the trim and the walls another coat of paint using my paint stick and everything started to look so much better. I do plan to paint the entire room shortly, and the larger HomeRight EZ Twist Paint Stick will come in handy for that part of the project.

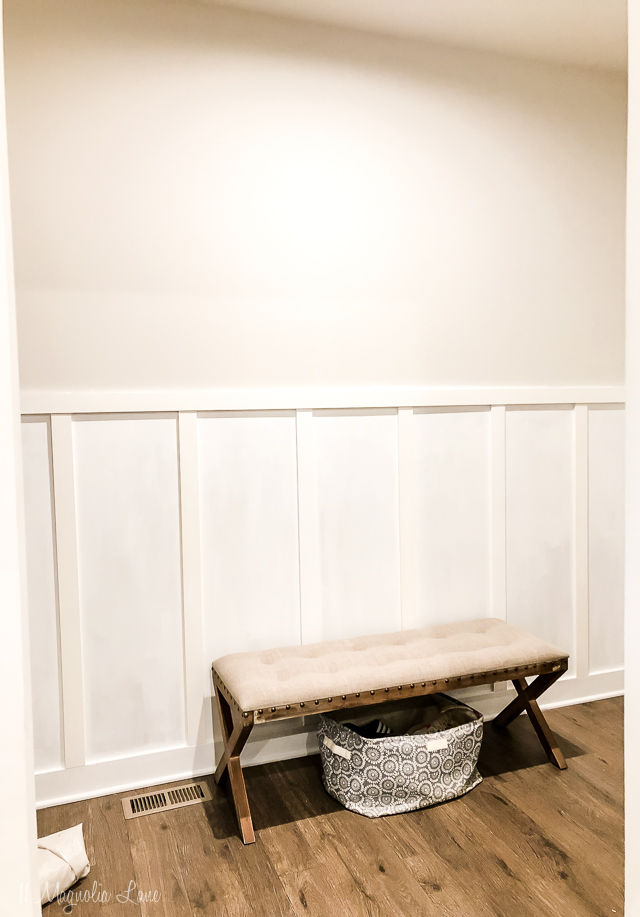
This is all I can show you today. The full room reveal is going to be a surprise down the road, I had an idea while I was working on the space but I had to order something that isn’t here yet, but I can’t wait to show it off to you once it’s done! I think you can get a little more creative in spaces like these that are tucked away from the public areas, so I think it will be fun to do something a little different in here. Stay tuned for that big reveal shortly.
In the meantime, don’t be afraid to tackle a small project like this. It’s perfect for a weekend and adds so much polish to an otherwise empty space. Definitely follow my Dad’s advice and use the right tools for the job! If you don’t already have one you can order a Paint Stick below, they make painting a room take a fraction of the time.

Or you can try your luck to win a HomeRight Paint Stick. It’s perfect for all your painting projects and will save you so much time! To enter to win follow the instructions on the widget below.
Here are our other related posts if you are interested:
Board & Batten in Amy’s Kids Bath
Board & Batten Wall Treatment in Christy’s Kids Bath
XO,

Our posts contain affiliate links. If you make a purchase after clicking on these links, we will earn a small commission, which helps to keep our content free. You don’t pay a cent more than you would otherwise, since that would be tacky! Please see our full disclosure policy here.