I posted on my dining room back in October {read that post HERE}. It’s the first room you see when you walk into my house, and it was my least favorite. I couldn’t allow that to happen! So, I sold the rug and window treatments on Craigslist, painted, hung open shelving, turned two art prints into chalkboards, recovered my piano bench with gray chevron fabric, painted an old metal stool metallic silver, and stuck shelf paper on the door panels of the serving buffet. Phew!
The lady who bought my window treatments through Craigslist was super-nice. She liked the way I had decorated my house, and wound up being my very first decorating client. Hi, Tina!
As a random aside, the stuff I sold on Craigslist more than covered the cost of the paint and supplies I bought to redo the room. This is a very important point, and I’m throwing it in here specifically for the benefit of my dear husband (who reads all of my posts) and who probably wonders why I have to redecorate rooms more than once. See, honey, it didn’t cost a thing! 🙂
Here was what I started with:
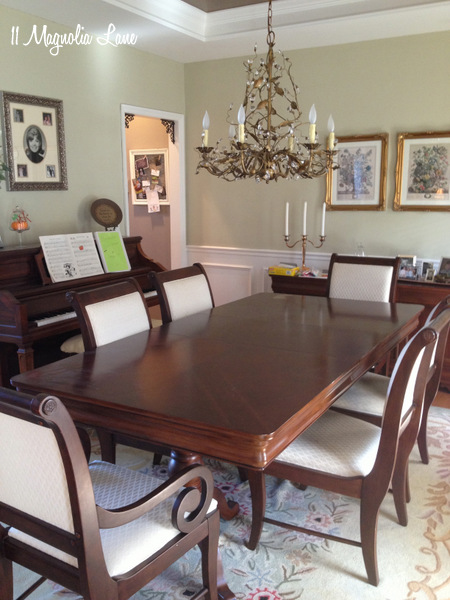
Dining room “before” at 11 Magnolia Lane
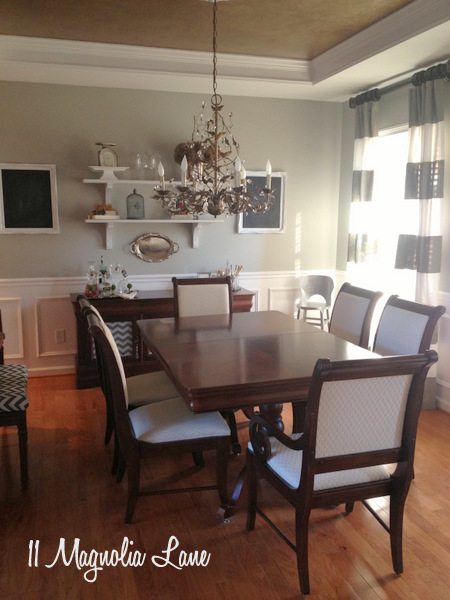
And here is how it looked when I was done with it. Harley is sorry he ripped the antique hooked wool rug.!
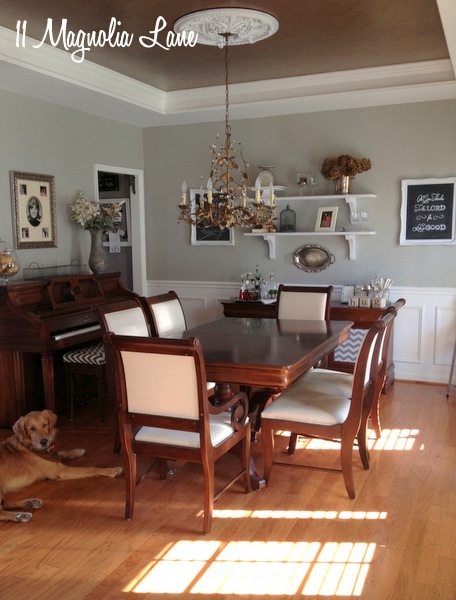
Dining Room “after” at 11 Magnolia Lane
The only thing that was left was window treatments, but as Christmas was coming at me like a speeding bullet train, I had to put them on the back burner for awhile. Here was what we stared at for a couple of months:
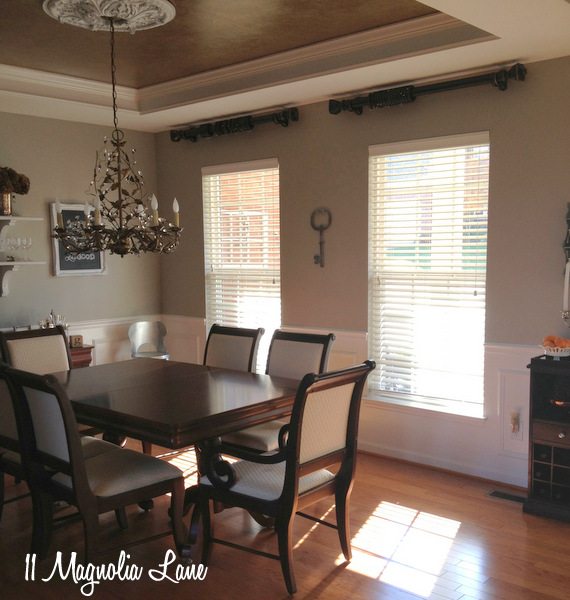
Window area in dining room at 11 Magnolia Lane
Part of my goal for this room was to make it look more casual. Dining rooms are rarely used anymore for very formal dinners–the way we eat and entertain has certainly changed over the last few years, hasn’t it? I decided that the horizontally striped painted curtains that I’ve seen all over Pinterest would be a great, inexpensive way to add visual interest and tie the room together.
I bought the cheapest white panels at Target that I could find ($15 for two panels). In hindsight, I should have spent $30 on the fabric that was a smooth cotton duck because it’s easier to maintain a line that doesn’t bleed, but that’s okay. I was after quick and cheap here, not perfect!
Using painter’s tape and a level, I taped stripes that would be approximately 9″ thick. I wanted a gray stripe at the top and the bottom, to ground the drapes, so I did the math accordingly. I also put a big “X” in the middle of the stripes that I needed to paint so I wouldn’t get mixed up (this has been known to happen on rare occasion). Note that the stripes don’t look even, because the tape goes inside the line on the stripes that stay white and makes those stripes look smaller. Does that make sense?
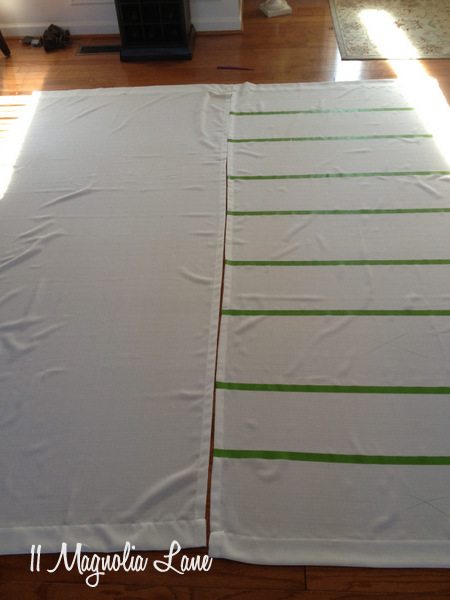
Then my daughter and I painted for awhile (!). I used Fawn Brindle by Sherwin Williams–remember, I used half-strength Fawn Brindle on the dining room walls, so this was slightly darker. A contrasting color stripe would have been cute, too, if I was using an accent color in this room. Yellow, anyone?
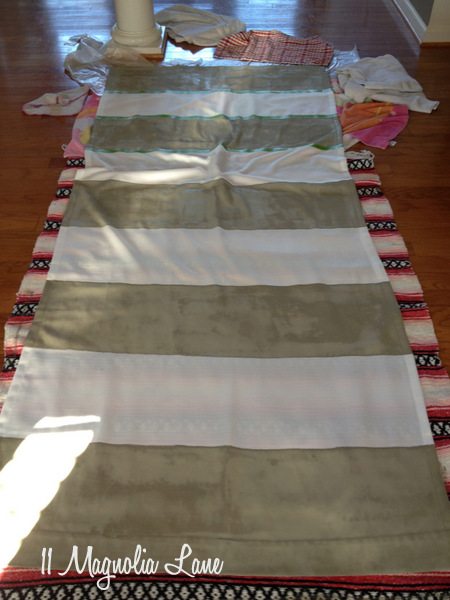
It took those suckers awhile to dry, and when they did the dried paint was stiff! I used the wire drapery hangers (Hobby Lobby, $2) to hang them onto the curtain rings. You’ll see that I kept my heavy black rods and rings when I sold the original drapes on Craigslist–oftentimes the drapery hardware is more expensive than the window treatments themselves!
Even though the stripes aren’t quite perfect and there’s some bleed-through, I love them. A $30 fix was exactly what I was after. Since we’ll be renting this house when we move this summer, I won’t feel bad leaving $30 window treatments behind if the tenants want to keep them.
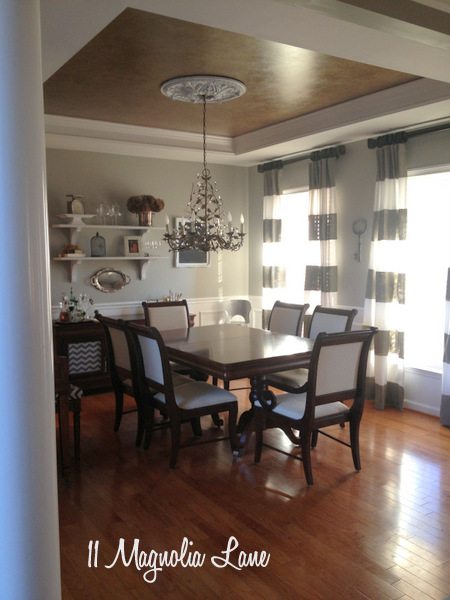
Here are the after shots. I actually really like the way the sun shines through the stripes.

If we were going to be here longer, I’d buy a new rug–maybe jute or seagrass–and paint the table and chairs, but for now I’ll wait until we’re in our next house. The movers always mess up my furniture, anyway, and the dining table might not even survive the next move.
That’s it–what do you think? I’m always amazed and you can really, truly, paint almost anything.
Thanks for stopping by!