This post has our best technique for painting furniture so it has a smooth, glossy finish. You can see how easy it is, with the right tools to get a perfect result from your furniture painting project.
There is nothing like a fresh coat of paint to brighten up a dated piece of furniture. While it looks easy to just slap some paint on, in theory, if you have tried that route you know things don’t always quite go so err–smoothly!
The first problem with using regular furniture paint with a brush is the brush marks. Even with foam rollers you may still see streaks around the edges from the pressure. Nowadays it’s trendy {not to mention easy} to paint with special furniture paint {like chalk paint} which is good for furniture, the only drawback is that those paints can have a dull matte finish.
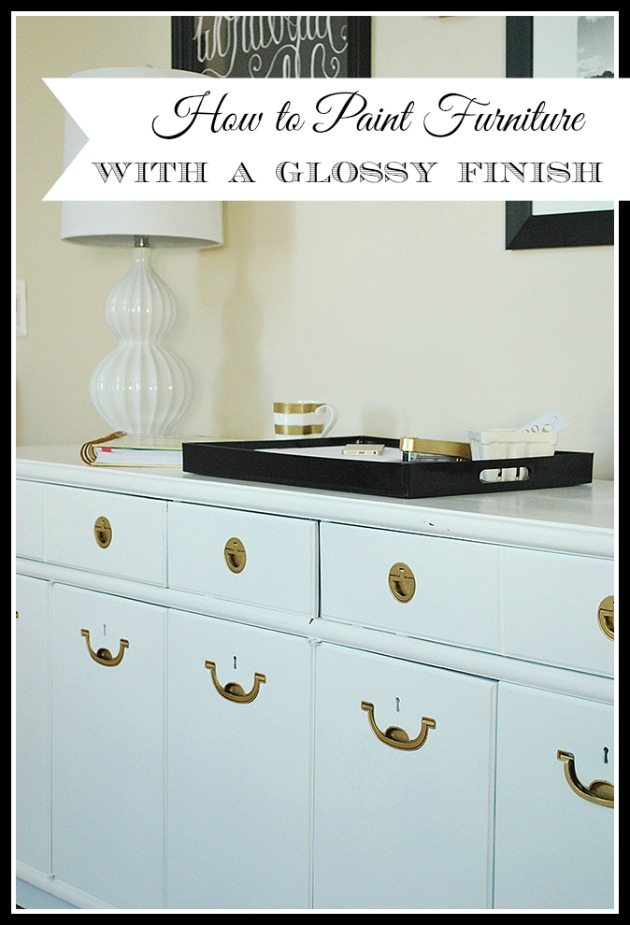
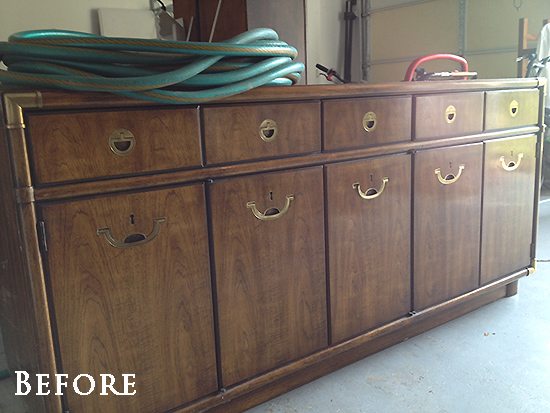
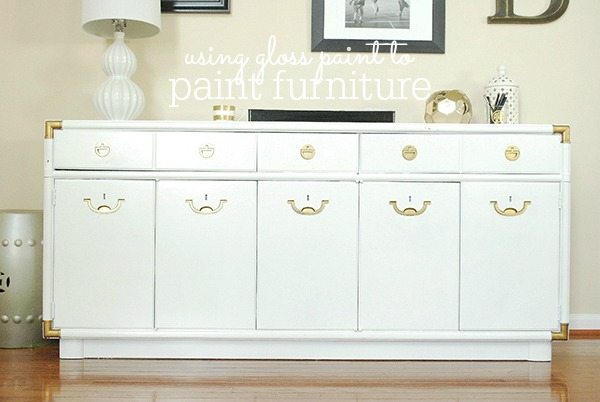
Since I had recently found a gorgeous mid-century Drexel credenza at an estate sale, I knew I wanted high-gloss white paint on it for a high-end look. I also knew the only way I would get a perfect finish with high-gloss paint was to spray it on using a high-quality paint sprayer.
| Don’t want to paint? Buy a similar piece here, here, or here |
This is my HomeRight Finish Max Paint Sprayer, and it’s amazing. I have already used it to paint my daughter’s entire suite of bedroom furniture bright pink, which it did in a flash. So I figured it would be perfect to use to bring my console up-to-date. (Note: the sprayer in the photo below has been replaced with a better, less expensive version, and that’s the one we’ve linked to!)
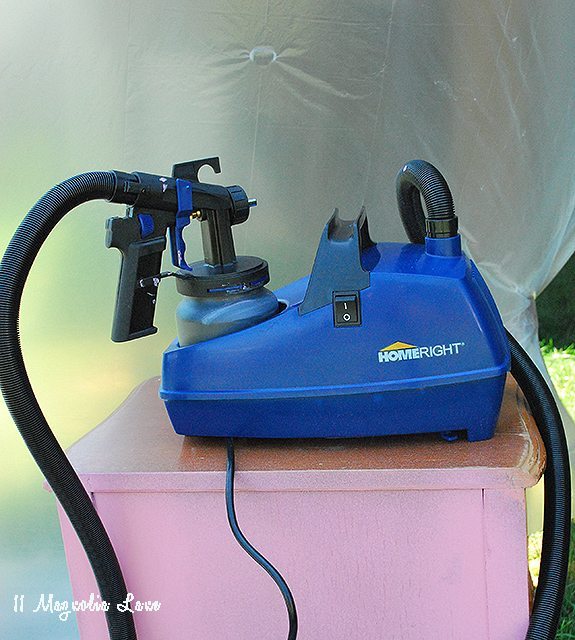
Long before I ever used a paint sprayer, I had actually heard rumors that they are hard to use and meant for professionals. I had visions of the paint spraying out like a fire hose and me trying to hang on–but that is definitely not the case! This sprayer is super easy to use, simple to set up, and within minutes of starting it up, I was painting. Both of these projects have taken much less time than traditional painting, and using a sprayer is just so much easier overall. If you click here you can see the video I made showing how I sprayed my kitchen cabinets.
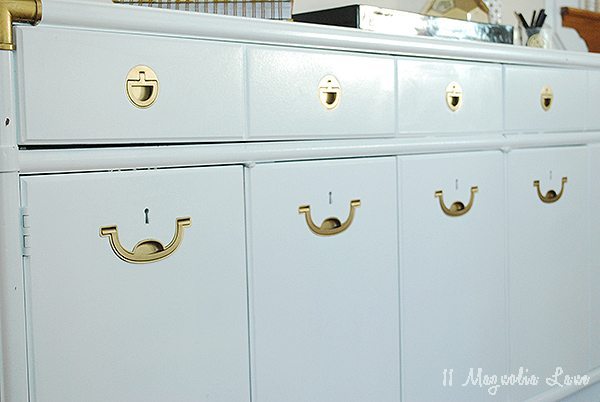
To use the gloss paint the important part is to water it down. The sprayer comes with detailed instructions on the various ratios to do just that. Once the paint was flowing perfectly through the sprayer, I gave the console several light but complete coats. I used Behr pure white {off the shelf} in the paint + primer blend in the gloss finish for this project.
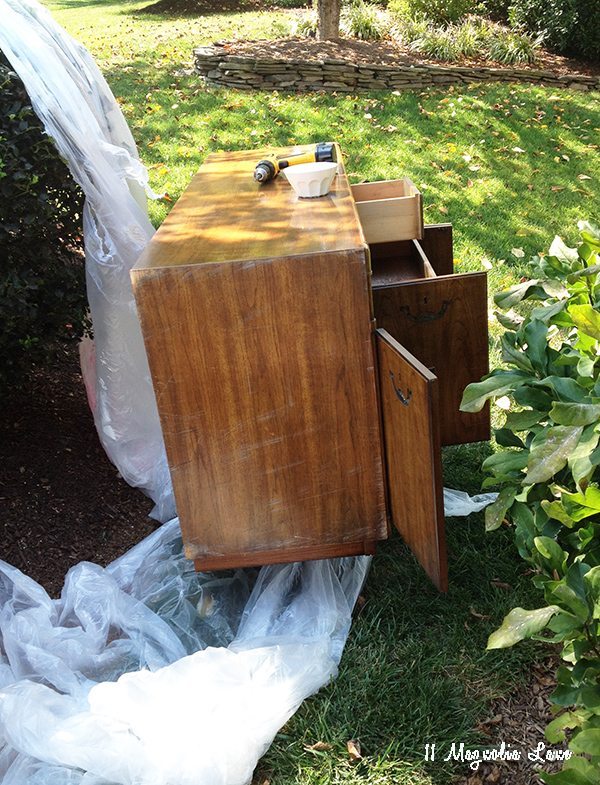
With a piece like this painting inside of it would have been an arm-cramping, headache-inducing experience {and probably wouldn’t have happened!} but the sprayer made it simple to make the inside just as nice as the outside.
As you can tell, I worked outside {you can see I didn’t even bother keeping the plastic sheeting over the shrubs!} but there is very little overspray. The first time we used a sprayer, Christy and I painted her bed in her garage {high-five for us bloggers being determined to not let a little lousy weather stop a good DIY project!} but even being inside the paint was easily contained. It was a little easier this time because I was painting outside, but the paint is aimed directly through the nozzle so I didn’t have to worry about airborne paint particles reaching our house siding or our cars. The Sprayer is specially designed with a high-volume, low-pressure spray technology so there is less paint not reaching its intended target.
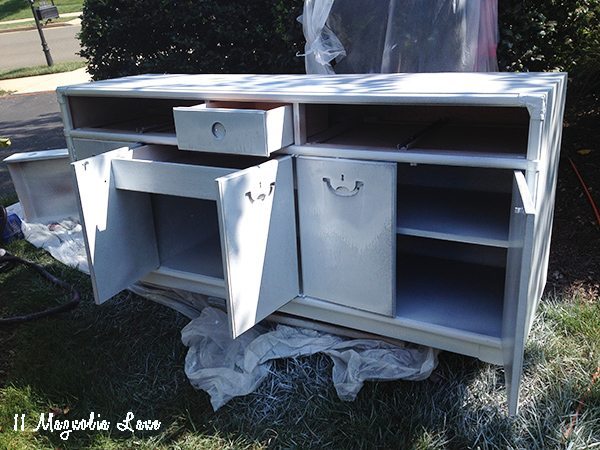
Since you can adjust the nozzle for either horizontal or vertical spraying, as well as the width of the spray pattern, I had complete control over the results. After several coats, and I did occasionally have to use a paint brush to smooth out a few drips from getting a little too much paint in one spot and gravity doing its thing, it was done.
I finished off the piece by spraying the door and cabinet hardware gold {just with regular spray paint}, and refreshing the brass accents with some gold rub-n-buff. I should mention I just used some painter’s tape to cover the corner hardware up while I sprayed it.
Overall this console turned out fabulously. Had I used a paintbrush, not only would it have taken longer, but I’d have been fighting the brush strokes the entire time. This came out with a perfectly smooth and glossy finish. It was the cornerstone of my entire office makeover during the Fall One Room Challenge.
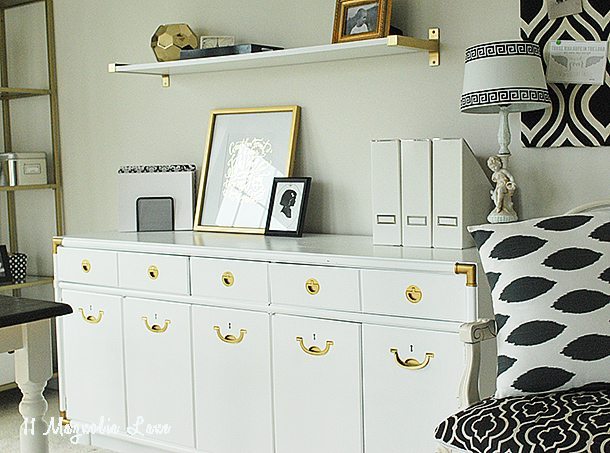

See more about this completed piece in my home office HERE and HERE
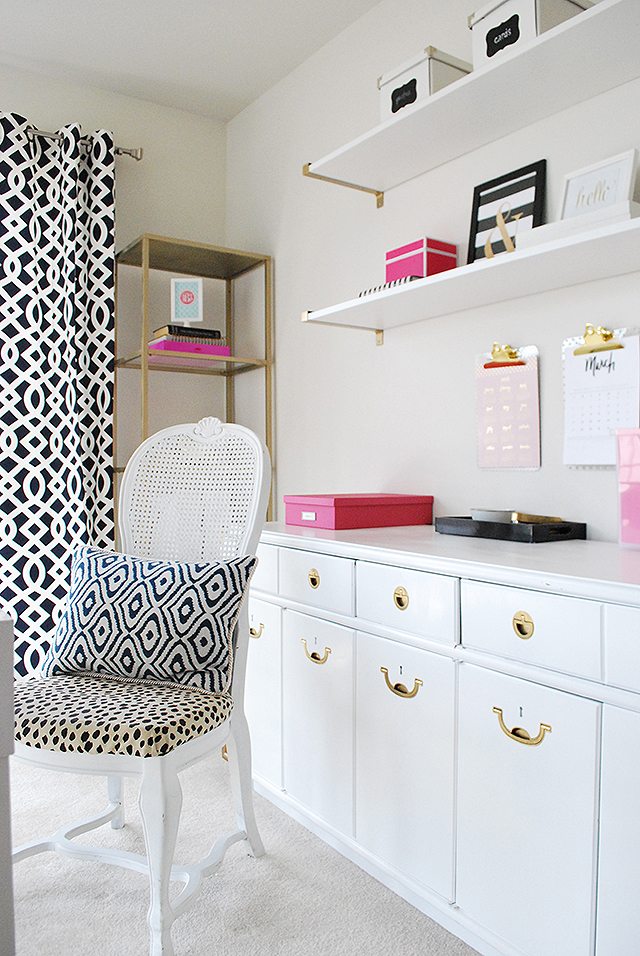
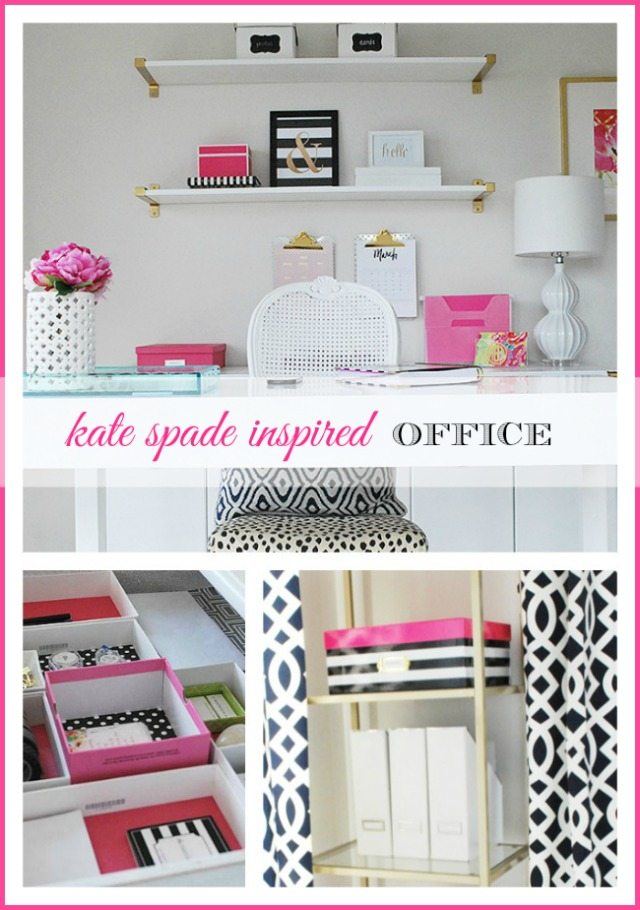
See my “Kate Spade-Inspired Office Makeover” HERE
For more information on painting furniture see these posts below:
Our Best Painted Furniture Projects
How to Paint an Upholstered Chair with Chalk Paint
How to Paint a Chair (with Regular Paint)
Thanks for stopping by!