Last Thursday, I had had ENOUGH of my bare kitchen windows, and I decided to do my usual–figure out something fast, cheap, and easy using what I already had in the house. I had a ton of burlap left over from some party decorations, and twine, but I only had one curtain rod. There are two windows plus a door in my kitchen, so I had to come up with a window treatment that wouldn’t require a rod. Pfft–not even a challenge!
I’m feeling so smug about how these turned out–I love them!
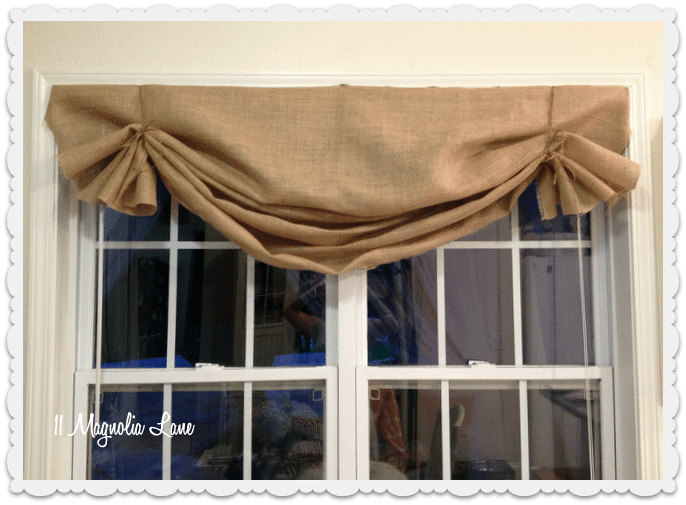
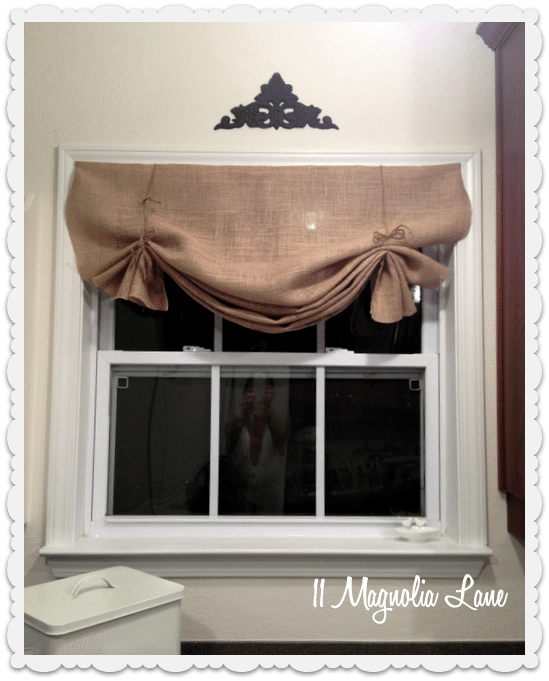
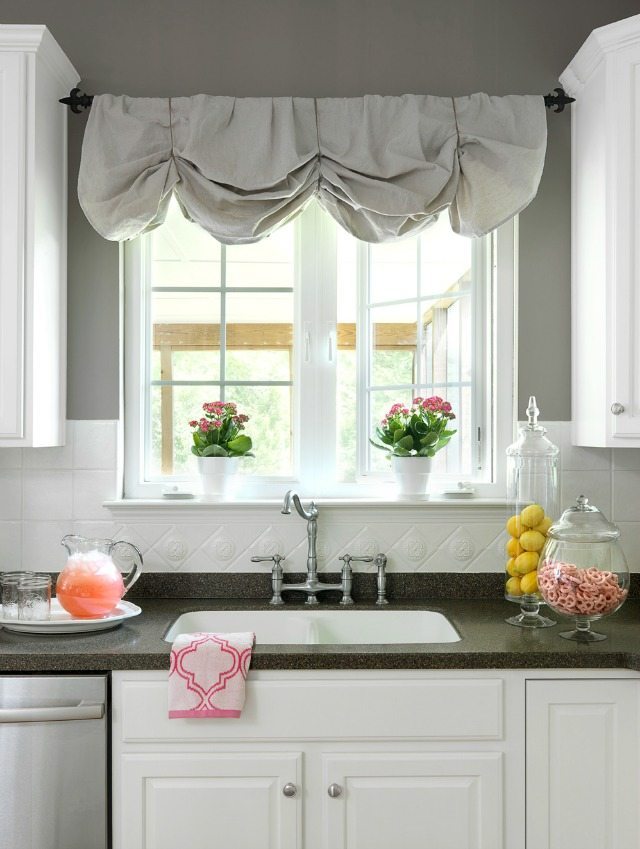
I’m going to tell you exactly how I made these, but first let’s just enjoy the “afters,” okay?

I think I only used about 4 yards of burlap, total.
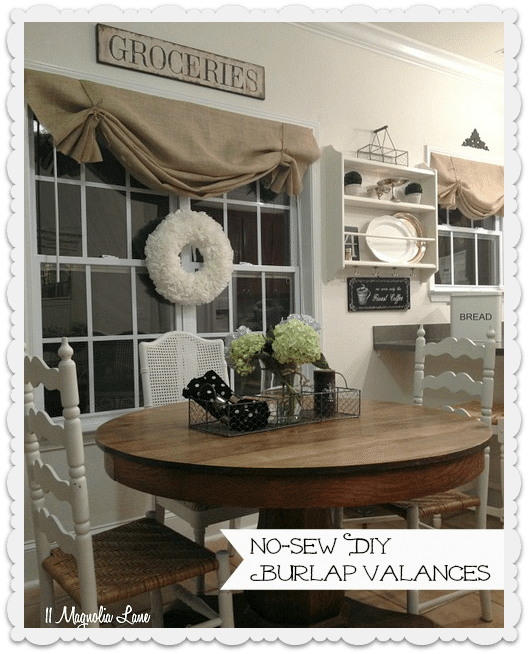
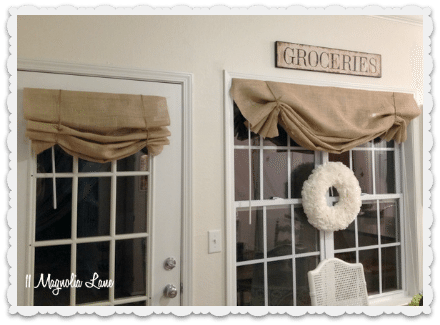
This picture is a little strange, but I wanted you to see the layout of the windows. I have the French door, then the double window, and then the sink window, all in a row. They looked absolutely naked before I covered them.
Here’s a before shot. There are café curtain rings all over the kitchen table because I was playing around with different options–cup hooks and café hooks, canvas dropcloths like I used in my old kitchen, and so on.
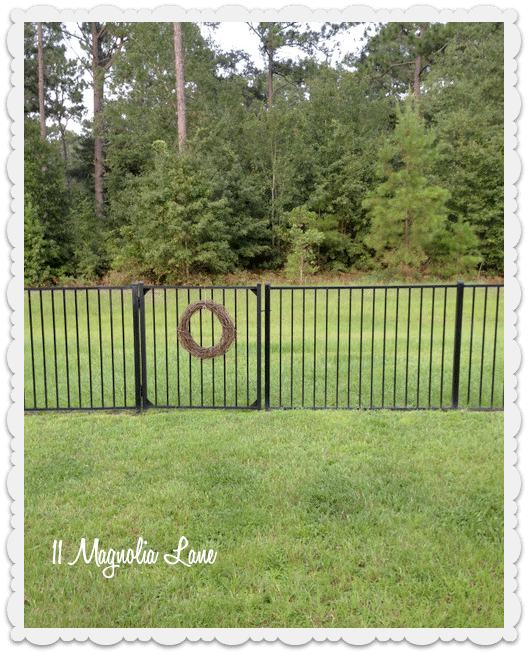
I pulled the thin vinyl blinds up to the top, and I actually removed the ones over the kitchen sink completely (I’ll put them back when we move). Our house backs up to the woods, so privacy was not a concern. Here’s the view out my window:
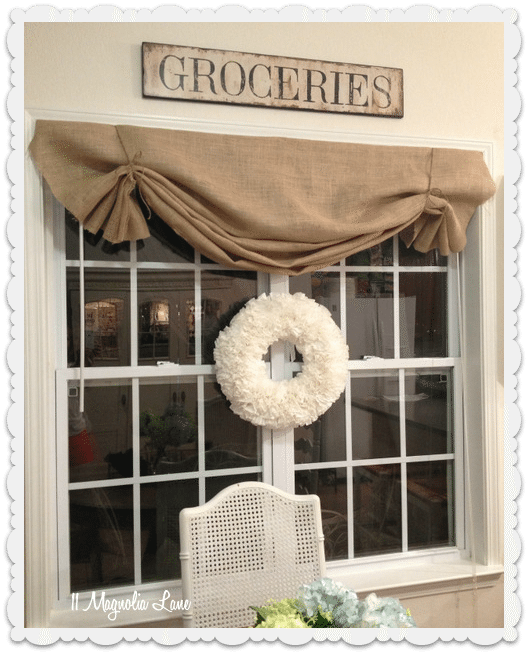
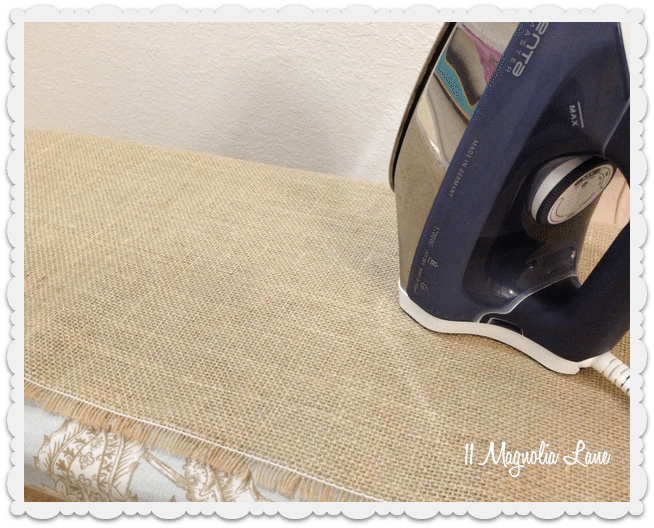
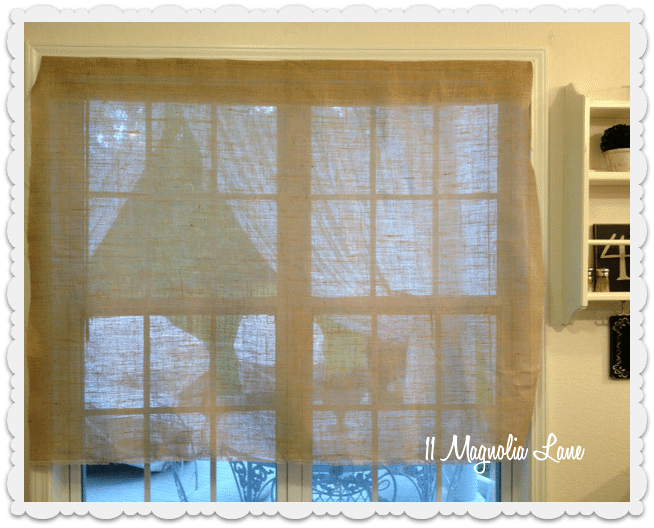
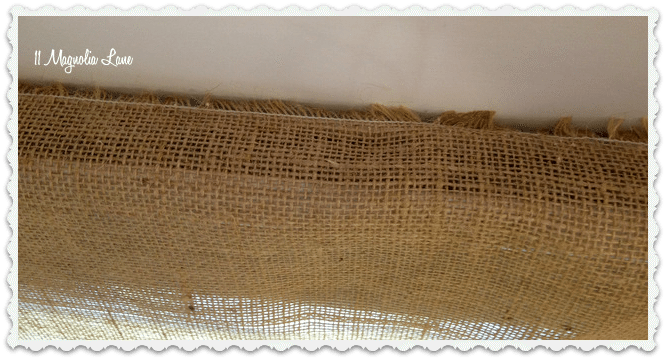
OK, so here’s how I made the valances. First, my burlap was from Hobby Lobby, and it was just the standard 45″ size in the natural color (you can buy it inexpensively online here). I think it was about $2 a yard when I bought it. Since it had been folded up and stuffed in a closet for a month or two, the first thing I did was iron it on high heat, with steam. The seamed and fringed edge is the top and bottom edge of the burlap bolt.
The next thing I did was measure the window (from the insides of the window casing trim) and add about 3″ to the total measurement. It’s easy to cut more away, but impossible to add back what’s already been cut.
The seamed, frayed edges went on the top, along the top of the window casing, and the bottom. I used thumbtacks, spaced about 6″ apart, to pin the burlap to the bottom of the window casing. This picture is taken from up under the burlap:
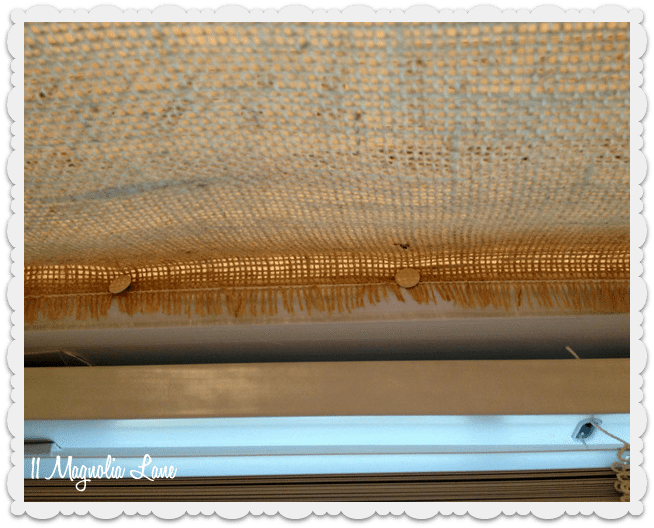
When the 45″ length of burlap hangs down, the top should fold over those thumbtacks and hide them, like this:

Up close
Far away
I added more thumbtacks as needed at the top so the burlap sat in a neat line. Then, I folded in the inch or so of fabric at the sides (like wrapping a present) and used another thumbtack or two to secure it from the underside. The picture I snapped was too blurry to post, so just go with me on this step!
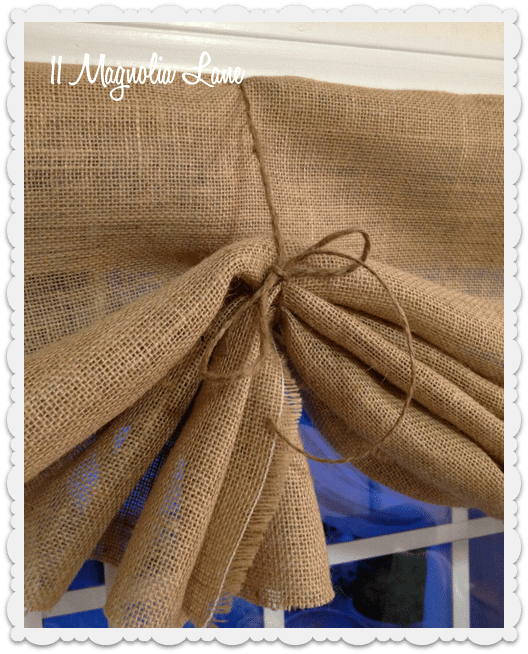
I trimmed any loose fibers from the sides, and then started folding the burlap from the bottom like a fan or accordion. I tied jute twine around on each side, and in the middle:
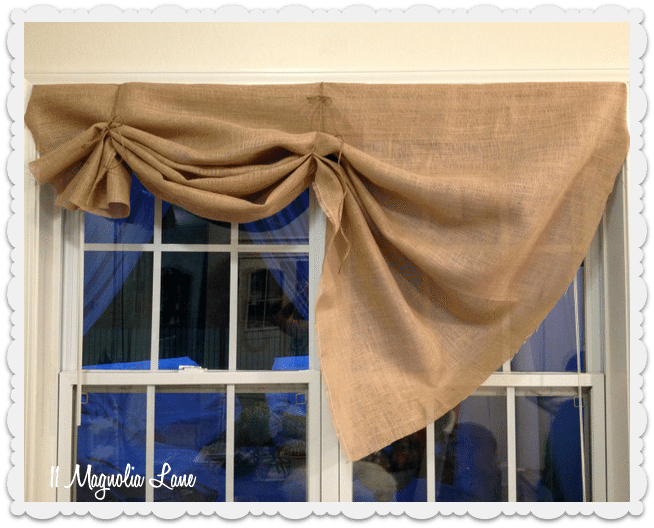
I left the three ties in place and fiddled around with the folds to see how I liked it.
And then I fiddled a little more. This part took me awhile, until I got it just so. Oh, and the burlap will shed all over your floor, so be prepared to vacuum when you’re done!
The tiny little difference from the previous picture to this one is that I let the center tie out a bit. By the way, this is the sort of thing that makes my husband crazy–move it an inch, step back and assess, move it back an inch, step back and assess, ad infinitum…
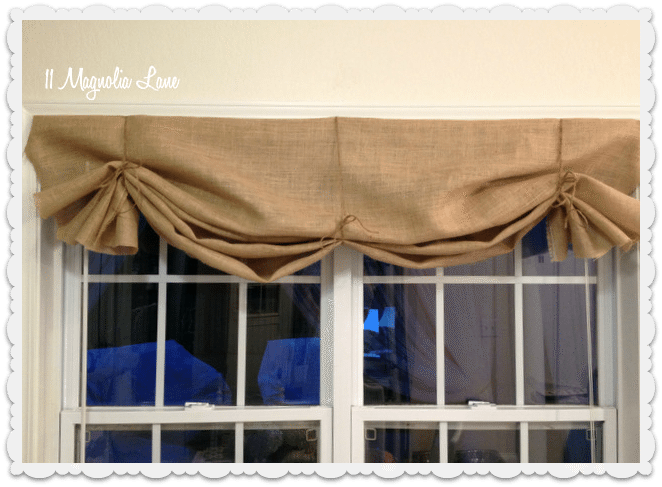
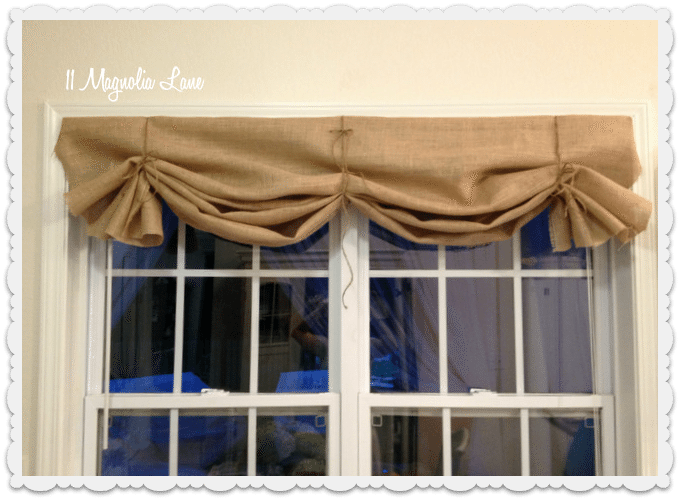
Finally, I took that center tie away and this is the way I kept it, although I continued to fiddle with the pleats. That’s what I do.
Here’s a close up of the jute twine and how I tied the sides up.
I repeated the process for the small window over the sink.
I did almost the same thing on the French door. Since there wasn’t any window trim to stick thumbtacks in, though, I glue gunned the burlap to the top of the window blinds:
Please don’t let that sentence horrify you. If you warm the glue a bit with a hair dryer, it peels right off. It won’t leave any marks when the time comes to take it down, and the teen, tiny thumbtack holes will fill with spackle so you’ll never even know they were there!
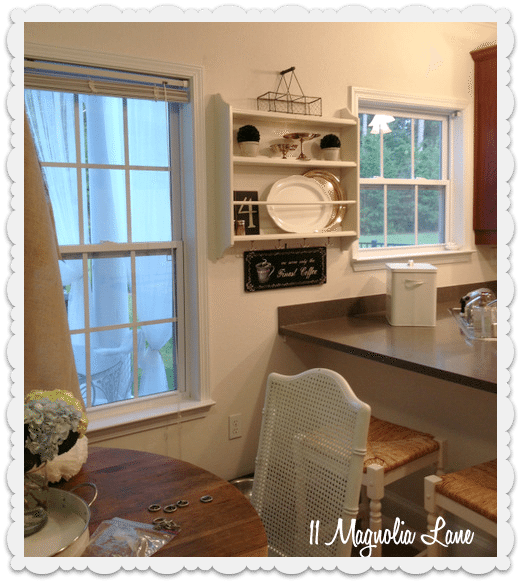
I had some fun styling my Ikea plate rack that sits between the windows. It’s the Stenstorp, by the way.
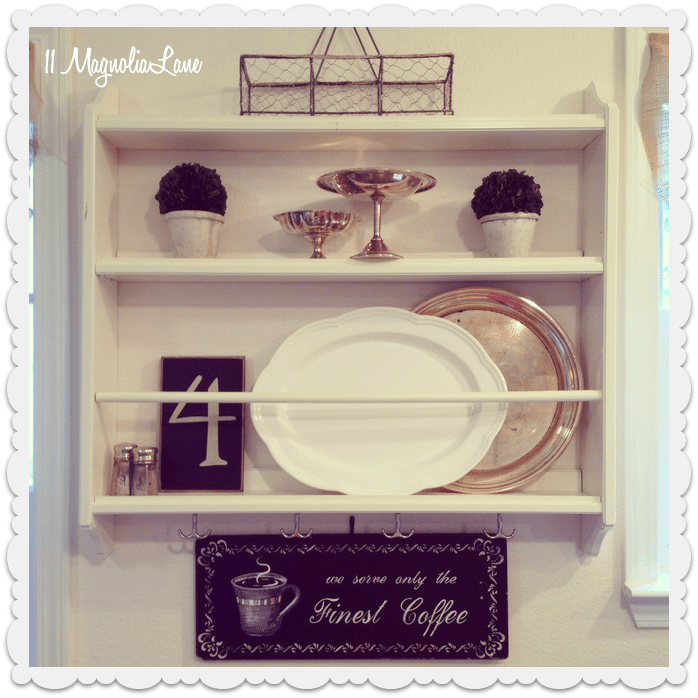
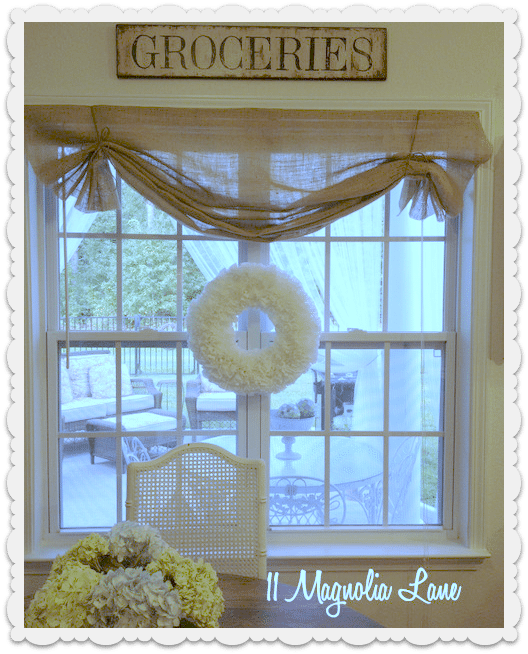
The Groceries sign is from Hobby Lobby, several years ago. It looks vintage, but it’s not. The white wreath is made from coffee filters. I made it several years ago, and I followed {this} tutorial from The Little Brown House.
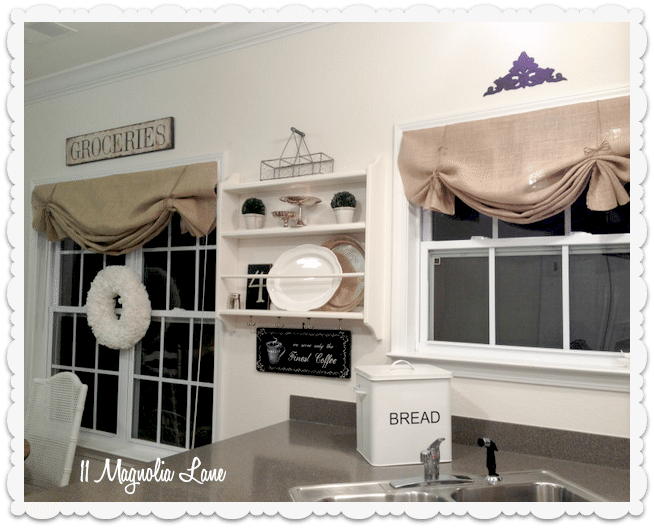
All three windows look out onto my back porch and the great outdoors.
I’m so pleased with how they turned out, and the price was right, too!

Here are all the supplies I used:
And if you’d like to see how I’ve used canvas painter’s dropcloths to create a valance that looks like this, just visit this post.
Our posts contain affiliate links. If you make a purchase after clicking on these links, we will earn a small commission. You don’t pay a cent more than you would otherwise, since that would be tacky!
Thanks for stopping by~