Because I have my entire powder room ripped apart right now and it’s nowhere near ready to show you yet, today I’m sharing a project done by good friends who we met when we lived in Virginia Beach–Steve and Robyn. Despite several moves (all on our side 🙂 ) our families have remained close, and most recently Robyn visited us so that we could run the Country Music Half Marathon together. Or, more accurately, we both were running the same course on the same morning, but she managed to finish it in record time and I just managed to finish!
Here we are post-race, with the gorgeous Nashville skyline behind us:

And because she’ll probably be annoyed that I shared a photo of her looking less than her usual glamorous best, here we are the same night (after blissful showers and a big nap!) enjoying a post-run margarita:
 But I digress, because we’re talking about stairs here, and not margaritas, right? That’s a shame…
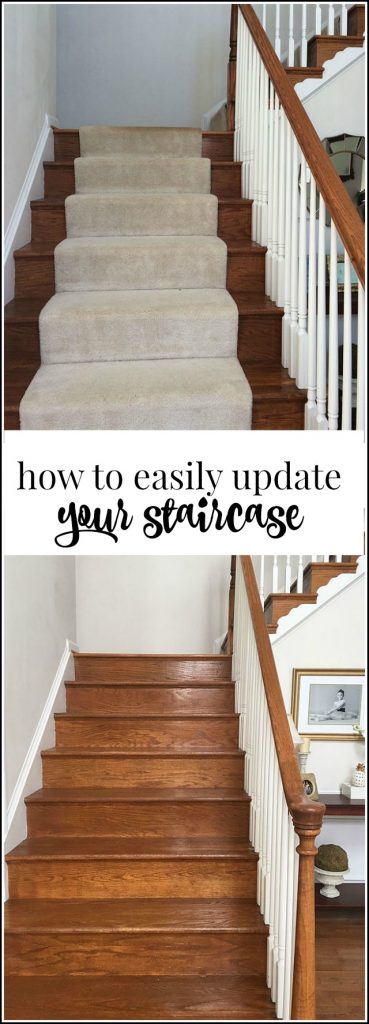
Steve and Robyn decided to get new carpet in their house, and as so often happens, one change led to several must-do projects. As they ripped the old carpet off their stairs (they were completely covered in carpet although I don’t have a before picture), they realized that they wanted to go with a different look. I had sent Robyn a blog post written by Miriam at Prudent Projects (read it HERE), and it gave them some inspiration to get to work on their stairs! They wound up with a dark espresso brown banister and treads, and crisp white spindles and beadboard risers–gorgeous! Here’s what they did to get these fabulous results:
 1. Yanked up the old carpet (underneath they found MDF stair treads, but they did have a nice bullnose, or round, edge on the front).
2. Hung sheets to protect the doors to as many rooms as possible from sanding dust (this was a smart step and one that I usually skip, I’ll admit).
3. Sanded, sanded, and sanded the treads, banister, and spindles.
4. Caulked the edges, where the stair treads meet the wall and the banister.
5. Primed the stair treads with gripper gray primer and also primed the banister and spindles with regular primer.

6. Painted the banister with this lovely dark brown paint from Home Depot:
 And below is the color match formula if you’re interested:
 Here’s the banister before (hi, Steve):
 And after:

7. The spindles got a couple of coats of white (just regular white latex off the shelves). Robyn said that everything got one coat of primer and two coats of paint (either dark brown or white). She also said there was a lot of painting and repainting around spindles to make sure that white areas were only white (with no brown smears) and vice versa. I don’t doubt it!
8. Next, the stair treads got two coats of espresso brown. Robyn reports that they sent the kids to sleep over at her mom and dad’s house that night, and she and Steve ate sushi and watched a movie downstairs while the treads were drying in between coats. You could also paint every other stair so that you could still climb the steps two at a time during a project like this, although that doesn’t sound quite as much fun as dinner and a movie!

9. After the treads were painted, they added the beadboard to the risers. They bought one of the big sheets (I think they’re 4′ x 8′) and Steve cut them to fit on his table saw. They adhered them with glue, and while they did caulk around the edges, they didn’t paint the beadboard–it was already white and Robyn said they didn’t need to.
It took the two of them three full days to complete this project, due to the multiple coats of primer and paint and the detailed painting work required. However, they’re so pleased with the results. They did add a carpet runner to protect their hard work–plus, with two kids and a dog, the stairs are in heavy use all day long. Let me know if you have any questions for Robyn and I’ll have her answer them.
Here are a few more “after” shots–I love the way she styled her steps!


Great job, guys! I’m almost inspired to rip up the carpeting on my stairs and see what I find! Thanks for sharing your project with us, Robyn and Steve, and thanks for stopping by!
Here is another stair makeover post you might find helpful!
Our posts contain affiliate links. If you make a purchase after clicking on these links, we will earn a small commission, which helps to keep our content free. You don’t pay a cent more than you would otherwise, since that would be tacky!