I’ve been hard at work on our master bath/bedroom/sitting area, but I’ve kind of stalled out on it. The painting is all done, and I love it–Benjamin Moore’s Pebble Beach–but until I get all the furniture arranged just the way I like it, and the bedding figured out, I can’t show you the final reveal. In the meantime, though, I wanted to share the board and batten treatment that I did in my kids’ bathroom. It was a very easy project, and I love that it added six hooks to my kids’ bathroom wall–they don’t use towel bars, after all!!
Here’s a quick before picture. Sorry that I already took off the switch plate on the light switch. It was just a boring wall, with one towel bar on it. What a waste of space!
 There are so many board and batten tutorials out there in blogland that I won’t recreate the wheel here. I did use Centsational Girl’s post more than the other ones; you can check it out here.
**By the way, if you have tile in your room like I do, try to determine whether or not the baseboard was installed before or after the tile. My baseboards were put in before my tile, so when I removed the baseboards it was a NIGHTMARE. If I had known that, I would have left the baseboards in place and just dealt with it.**
I have a miter saw but not a table saw, so I took all my measurements to Home Depot, and had them cut everything for me. All of this was done before I had my nailgun birthday gift, and while it would have been way easier with the nail gun, this still wasn’t too bad.
Here’s a during picture, with the battens put up but not painted:

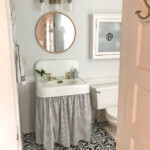
And here are some shots after I primed, painted two coats of semi-gloss latex, and added the hooks (and towels).

 While I was at it, I decided to trim the HUGE mirror the builder glued above the double vanities (the one in my bathroom still has to come down, and hopefully I won’t cut myself to shreds doing it). Here’s the before of the mirror (sorry for the mess!):
 I really liked how this turned out, and it was easy with my miter saw, some finish nails, and a little Gorilla glue!

I have a boy and a girl, and they share the bathroom, so we have to go with a color scheme that works for both genders. We chose “colorful” for our palette. Bright washcloths in a galvanized pail and flossers in a small apothecary jar mark the line between brother’s and sister’s sinks!


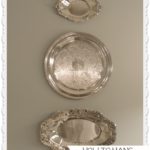
I changed out the cabinet knobs and drawer pulls with this cheerful polka dot ones from Hobby Lobby; but I kept the old silver ones in case I need to change things back for resale one day.

And, yes, there’s still one thing to do…I have to patch the drywall on my daughter’s side of the sink, where I pulled out the medicine cabinet. There wasn’t enough room to trim the mirror and keep the medicine cabinet, so now there’s a hole!
Always happy to show you my dirty laundry (as it were) here on Magnolia Lane!
 I hope you’re coming along with your 2012 to-do list, too! You’ve got plenty of time. 🙂
Thanks for stopping by.